This is a very exciting post to share with you. Believe it or not, I’ve actually been having multiple conversations with various people lately on the topic of depth of field as it pertains to photography. Basically, the conversations go something like this:
THEM: I would love to solve the issue of not being able to take sharp photographs, from front to back.
ME: What do you mean? Can’t you just reduce your aperture size so your depth of field is very deep?
THEM: Well, that would work in theory, but sometimes I’m too close to something and the depth of field becomes shallow because of that. Also, I like large apertures because of all the light and clarity I’m able to capture. I feel like I’m being hamstrung because of some sort of limitation.
ME: You are. There’s only so much you can accomplish with your camera. There’s always going to be a trade-off. That’s what post-processing it for. Don’t worry, I’ll soon write a post that will solve all your problems.
You see? It’s that easy. Basically, because of the limitations of how cameras and lenses work, it’s not always possible to take crisp, clear photos that are sharp from front to back. Actually, it’s nearly impossible, unless you’re a decent distance away and are focusing on infinity. But really, a lot of the time, people want to take photos of things that are up-close and would like the entire image to be sharp. Unfortunately, that’s just not possible, even if you set your aperture to a very small size, such as f/18 or even smaller. So what to do?
In today’s post, I’m going to share a technique that top photographers use when they’re in situations like the one I described above. Since these photographers understand the capabilities of their cameras as well as how their cameras actually work, they prepare ahead of time. They bring the necessary gear to the location of their shoot and they capture photographs that they’ll use later on to create the perfect image. The best part is, the technique I’ll show you today is so easy, pretty much anyone can do it, granted they have the necessary software. You’re going to love it.
Down below, I’ll talk about taking multiple photos of the same scene while focusing on different planes of the scene, so you capture each plane in focus. After that, I’ll explain how to modify those images in Adobe Camera Raw and then how to import them into Photoshop as layers. Finally, I’ll show you how to use the Auto-Blend Layers command in Photoshop to “stack” the photos so only the sharp sections of each shows in the final image. Again, you’re going to love this technique because it’ll allow you much more flexibility in your photography. Imagine not having to worry so much about the exact perfect shot every single time you press your shutter button because you know you’ll be able to merge a few different ones later on. It’s liberating, to say the least.
Capturing The Images
Okay, what I’m going to discuss today will be about taking photographs of objects that aren’t moving. Think flower photos or macro photography. A shoot you’ll need a tripod for because trust me, you aren’t going to be able to pull this technique off holding the camera in your hands. You need your camera to be absolutely still and if you have a remote shutter, you might want to use it. Your subject needs to be stationary as well. For my example, I took some pictures of a few bottles of hard cider I recently purchased for a recipe I was preparing. I had to think of something I could scatter on a table and these bottles came to mind. They worked out well enough.
To take the photos, I set my camera to Aperture Priority mode. Then, I set the aperture to f/4.5 because that’s as wide as my lens allows. I set the camera on a tripod and then made a few adjustments so the scene looked good. Overall, I took five photos. I began by focusing on the front bottle and then for every one after that, I focused on the second bottle back, the third bottle back and so on. Here are the five images. Please note the focal points of each.
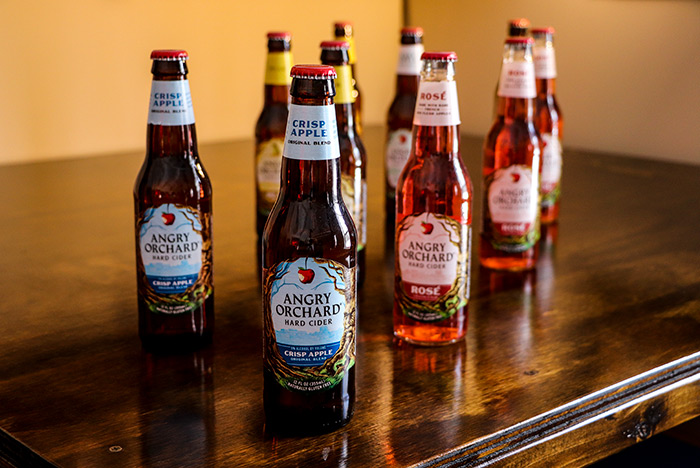
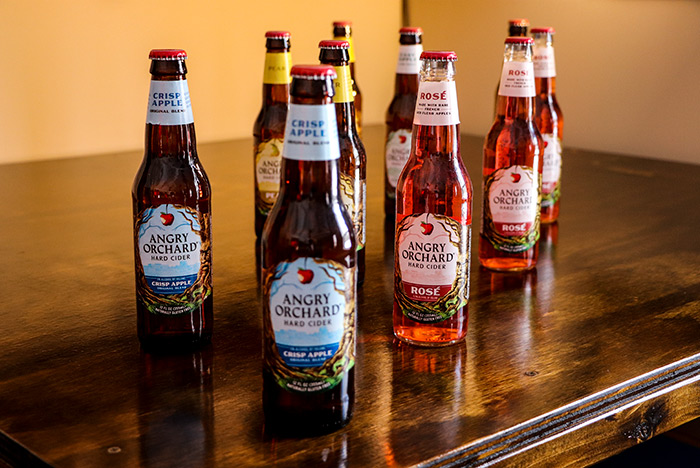
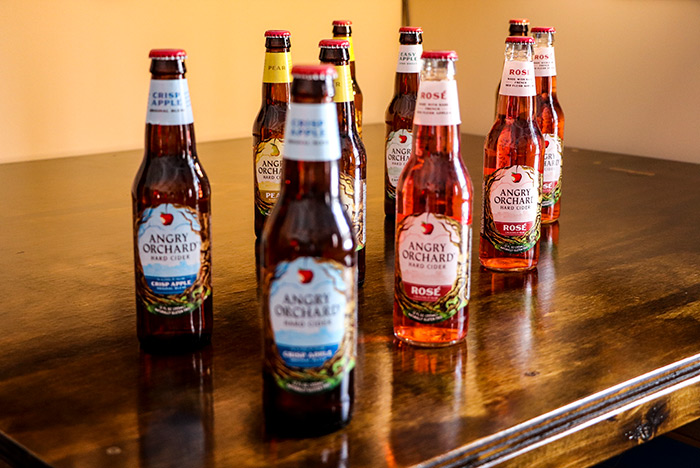

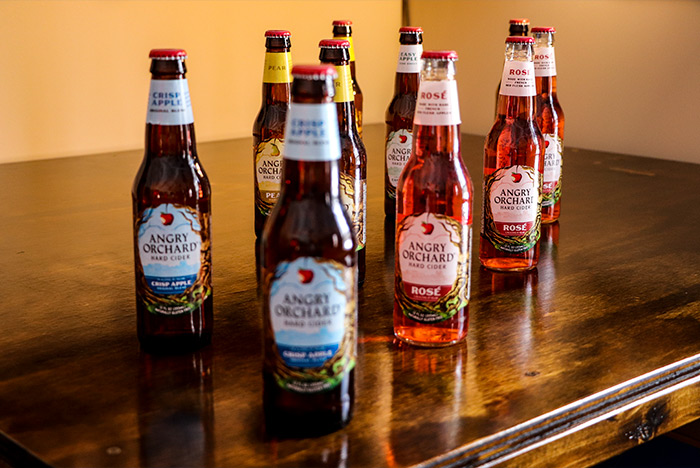
To alter the focus, I used the magnify feature on my camera and then focused that way. I also use back button auto focus, so that was helpful as well. My goal was to capture multiple images that were taken with different focal distances that will ultimately give me a resulting image that displays a far greater depth of field than any one image in particular.
Enhancing the Images in Adobe Camera Raw
This is just a bonus section, as it has nothing to do with the process of focus stacking. But, since we all want our photos to look as good as possible, I figured I’d add it in. Basically, I selected all five photos inside of Adobe Bridge and then opened them up in Camera Raw. Once there, I edited the first one and then copied those edits to the others. When I was finished and when I thought the photos looked appealing, I pressed the Done button in Camera Raw to return to Bridge.
Loading the Photos as Layers into Photoshop
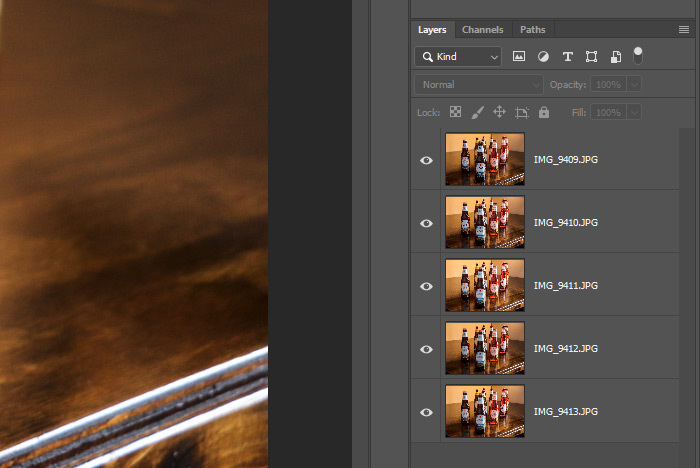
So far, I’ve taken the photos with different focal distances and I’ve cleaned them up in Camera Raw. The next step is to move them into Photoshop. The thing is, I would like each of the five files I’ve got to load into the same file in Photoshop as individual layers. There are multiple methods for accomplishing something like this, but I’ll show you the easiest. To move these photos from Adobe Bridge into Photoshop as layers, I’ll select all five image thumbnails in Bridge. Then, I’ll head up to the Tools > Photoshop > Load Files into Photoshop Layers and click. After a bit of working, Photoshop will open up and each of the photographs will be in their own layer.
Here’s a screenshot of the Layers panel in Photoshop with the images as layers.
Auto-Blending the Layers
The next step is to blend the photos together, so a spectacular overall image is formed. I’ll go ahead and select all five layers in the Layers panel and then head over to the Edit > Auto-Blend Layers menu item and click.
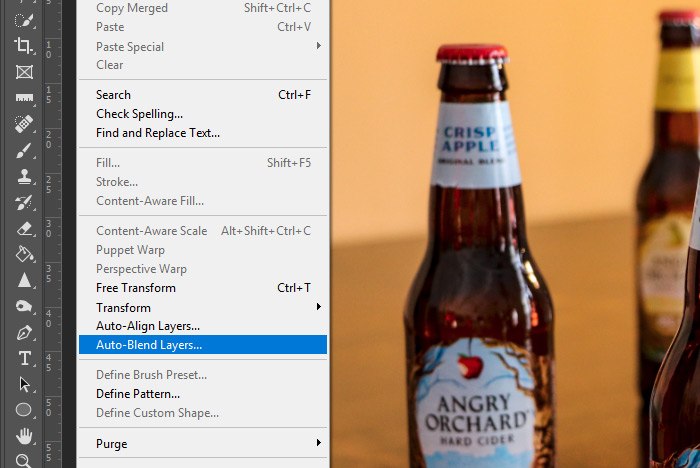
When I do that, the Auto-Blend Layers dialog box will appear. In that dialog, I’ll choose the Stack Images option as well as the Seamless Tones and Colors and Content Aware Fill Transparent Areas options.
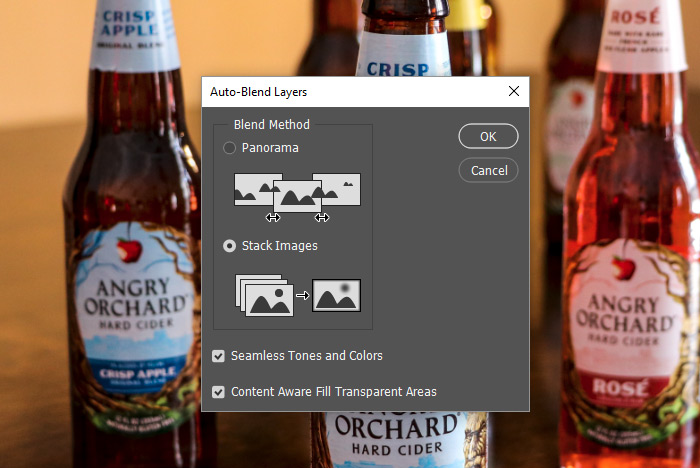
Stacking the images is the primary operation I’ll be performing. I’ll choose the seamless tones and colors option because I used Aperture Priority mode when shooting, and due to that, my camera changed some of the other settings as I focused differently on the various areas of the scene. They’re slightly varied in their brightness levels. Also, Photoshop will auto-align the images during this process because, again, I wasn’t in full Manual mode when I shot the scene. And finally, because there may be some shifting of the layers due to the alignments that may be necessary, Photoshop will fill any gaps with content.
When I’m ready to go, I’ll click on the OK button.
The Final Result
After pressing the button, a few seconds will pass and then the process will be complete. Let’s take a look at the Layers panel now.
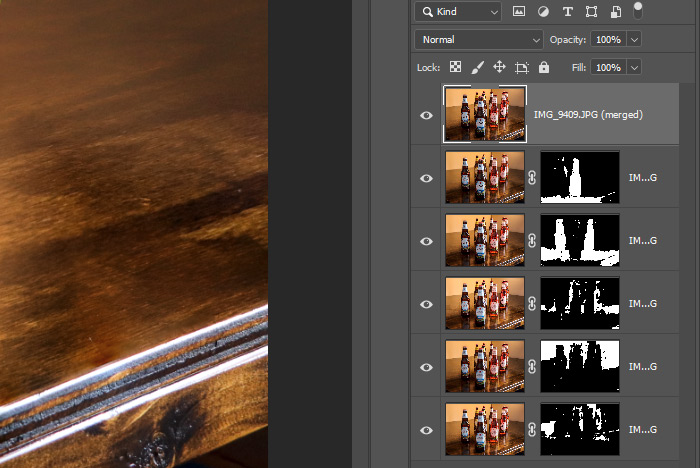
Do you see what I see? Masks. Essentially, Photoshop has analyzed each layer and masked out any areas that aren’t sharp. It kept the areas that are sharp and combined them to form one complete image. Let’s take a look at each individual layer to see what went on. I’ll start with the bottom layer (the one where I focused on the bottle all the way in the back) and then I’ll work my way forward.
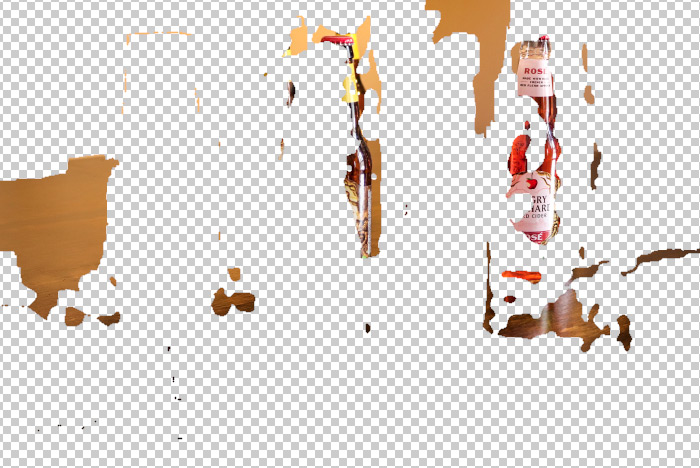
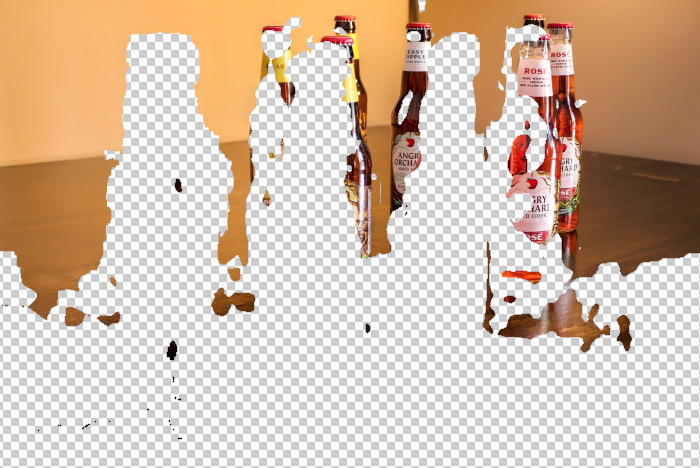
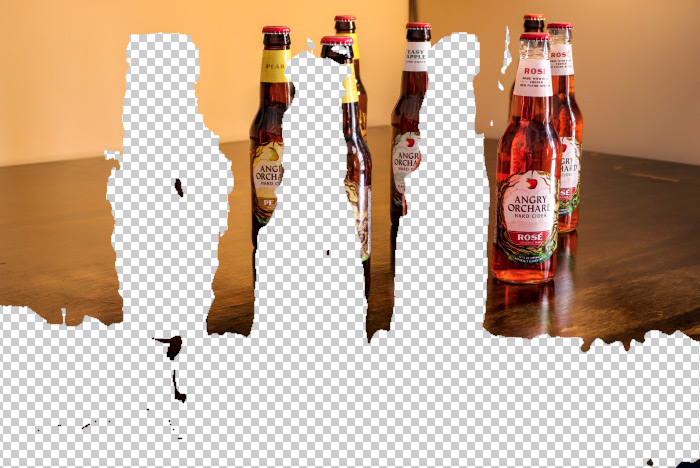
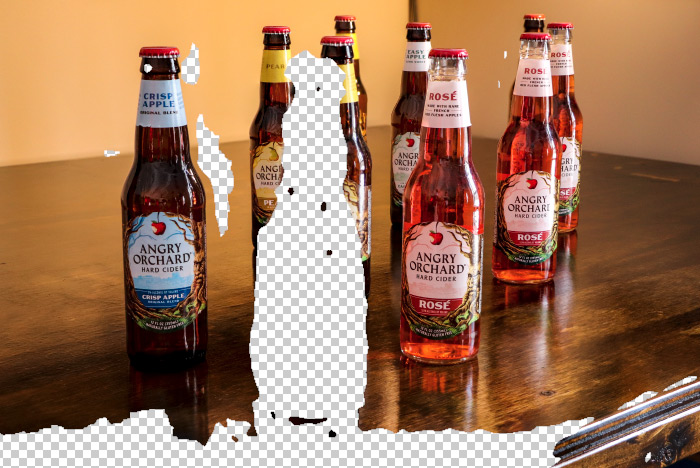
And here’s the final image composite.
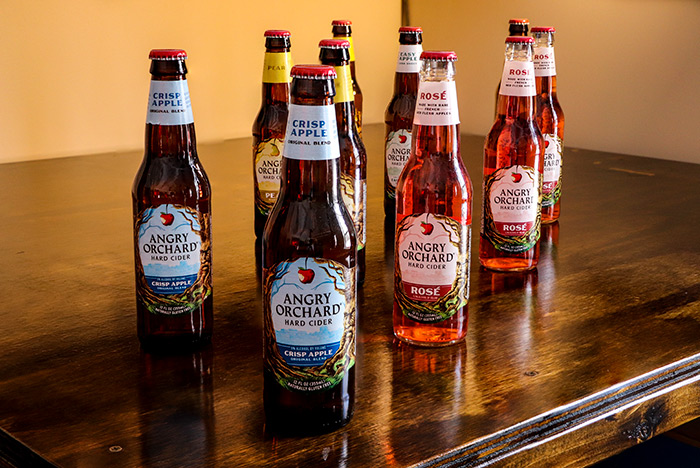
Pretty crazy, right? Do you see how the bottles are sharp from front to back now? And the best part is, the process is very simple. All you need to do is take the photos with varied focal points and then merge them together in Photoshop. Photoshop does all the work, so it’s rather painless.
I hope I clearly explained how to capture multiple photographs with different focus points and then how to blend the images together in Photoshop for a sharp image overall. If you have any questions regarding this post or topic, please ask down below in the comment section. Thanks for reading!
What is Focus Stacking?
A quick summary of above. I thought of a better and faster way of explaining things.
If you’re a macro photographer, you need to know what focus stacking is. You don’t even need to be a very experienced macro photographer or one who wants to learn every last detail there is to know about this type of photography. The reason you can be a newbie is because what I’m about to explain is a simple concept to understand and to execute. As long as you have a copy of Adobe Photoshop installed on your computer and a camera in hand, you’ll be fine.
Okay, here’s what focus stacking is. It consists of taking a few different photos of the same object from the same position, but with a focus on different elements of that object. So for instance, let’s say you took three photos of a flower. You’d first focus on the front petals and then, after that, you’d focus on the center of the flower and then finally, you’d focus on the rear petals. If you’ve ever photographed flowers before, you know that the depth of field can sometimes be shallow with these close up types of images. The three different shots of the same flower with a focus on varying parts of that is part of an effort to get around that obstacle. For a very thorough description of focus stacking, please read my post on the topic above.
After you take the three images with different focal distances, you can process those pictures in a photo editing application such as Adobe Photoshop to actually “stack” them. Photoshop will analyze each image and will find the sharpest area of the photos. Then, it will combine the first sharp area with the second and third sharp areas and will create an entirely new image that’s sharp from front to back. This technique is extraordinarily helpful when it comes to, like I said, macro and up close photography because those types are famous for having very shallow depths of field because of their proximity to their subjects. Even if you use a very small aperture, you’ll still end up with a shallow depth of field in these cases.
To accomplish something like this in Photoshop, you’ll first need to import your images as layers in the same file. This is called loading files into a stack. Once you have the images in a file as layers, you’ll need to go ahead and select all of them in the Layers panel. After that, you’ll go to the Edit > Auto-Blend Layers menu item and click. This will open up the Auto-Blend Layers dialog. Go ahead and select the Stack Images option and then be sure to check the boxes for the next two options below that one. Click OK and you’re done. Photoshop will process the images and will give you a final photo with a much deeper depth of field than you’d ever be able to capture with just your camera and lens alone. That’s really all there is to it.
A summary even more brief than the above.
After reading through what I just wrote, I think I’ll sum things up by saying that “focus stacking” is the process of stacking your images on top of one another. It’s then the process of keeping the areas of each image that are sharp and discarding the areas that are blurry. You need to capture the appropriate images and Photoshop will do all the processing after that.
Do you have any further advice for when it comes to focus stacking? Do you have any questions about this process? If so, please share below. Thanks!
Leave a Reply