I can remember back to the early days of Photoshop, where there once was a “Browse” window that would show, in thumbnail view, all images in a folder. From that window, you could look through and open any image you were interested in working on. I think these were the days before the “CS” was added to Photoshop’s name (such as Photoshop CS3). Have I been doing this that long? Perhaps I’m mistaken, but I think this may have been around 2002. I remember that having this browse window was a pretty big deal back then. It was an effort to integrate more of a structured “workflow” to the use of Photoshop, as opposed to simply a standalone program.
These days, things have changed quite a bit. Today, we’ve got all sorts of workflow, including Camera Raw, Lightroom, Photoshop and something called Adobe “Bridge.” Bridge has been around for a while and if I had to put money on it, I’d say that it replaced the “Browse” feature that was once incorporated into Photoshop. Bridge is pretty cool. It certainly is a handy tool to have in your arsenal. If you’re a once a month Photoshop editor, perhaps you won’t find much value in using Bridge and it may be more trouble than it’s worth, but if you’re a budding or professional photographer or graphic artist who relies on efficiency and, as I mentioned above, workflow, then you really need to dig into Bridge and use it as part of your daily routine. It’s a piece of the puzzle, if you will.
In this post, I’m going to begin talking about what Adobe Bridge is and how it can integrate with Photoshop. I’ll discuss how we can browse through Bridge to find the images we’re interested in. We’ll take a look at what the program’s interface looks like and check out the different methods of viewing thumbnails and photos. This post is the first of a short series on Adobe Bridge, so if you’re curious about what else this particular application can offer, be sure to take a look the “Bridge” section of this website.
Adobe Bridge in a Nutshell
The largest group, basically everyone, knows what Photoshop is. It’s become a household word. A smaller group, primarily photographers, knows what Lightroom is. It’s an industry specific piece of software. The smallest group, hardly anyone, knows what Bridge is. I’m not sure why this is the case. Perhaps it’s because you can accomplish what you’ve set out to do without using Bridge. As I mentioned above though, if you’re a power user, your life can get a whole lot easier if you decide to take advantage of this application.
Think of it this way – if Photoshop is the band, Bridge is the band manager. We have the creative side and the managerial side. One uses free flowing thought to create pieces no one has ever seen before and the other – well, if just gets things done.
In more formal terms, Bridge is a “media asset manager.” It offers integration between other Adobe creative applications and allows for a simple and intuitive method for browsing through files and folders that reside on your local computer hard drive, your external hard drive or on various accessories, such as your camera. Throughout this post and my later ones on this topic, you’ll become very familiar with what you can accomplish with Bridge. But to get things started right now, lets look at a few screen shots and descriptions.
I think it would be helpful to simply take a peek at what the Bridge interface looks like. Below that, we’ll get into more details.
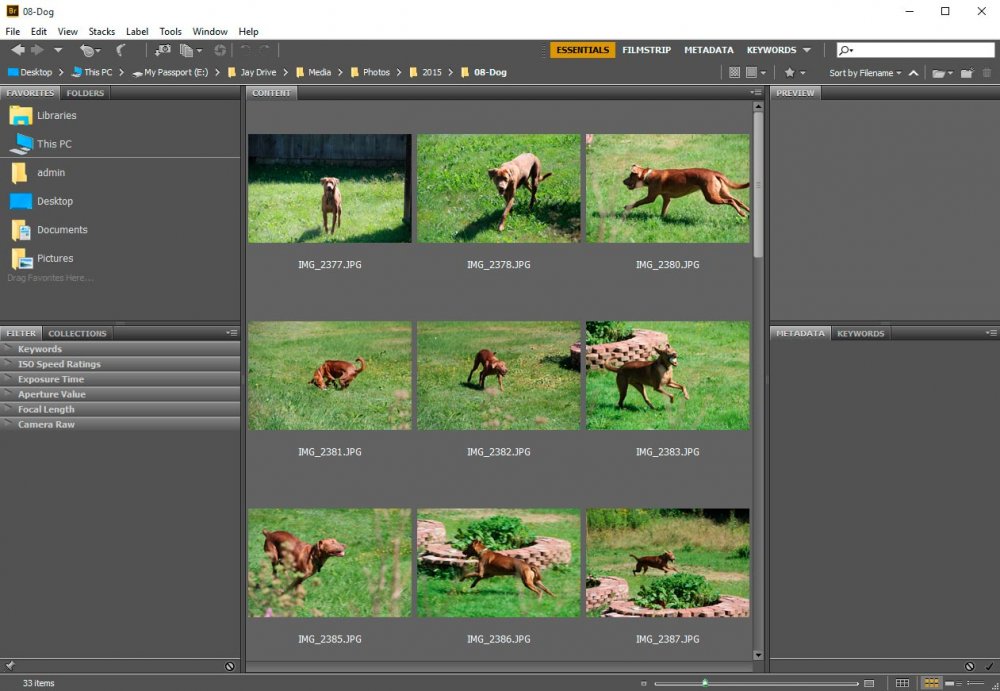
Launching Adobe Bridge
There are a few ways to initially launch Adobe Bridge. One is to simply go to your start menu and open it as you would any other program. That’s fairly straightforward. The other is to launch Bridge from right inside Photoshop. If you take a look at this next screenshot, you’ll notice that if you navigate up to the top menu and click “File,” you’ll see a selection called “Browse in Bridge.”
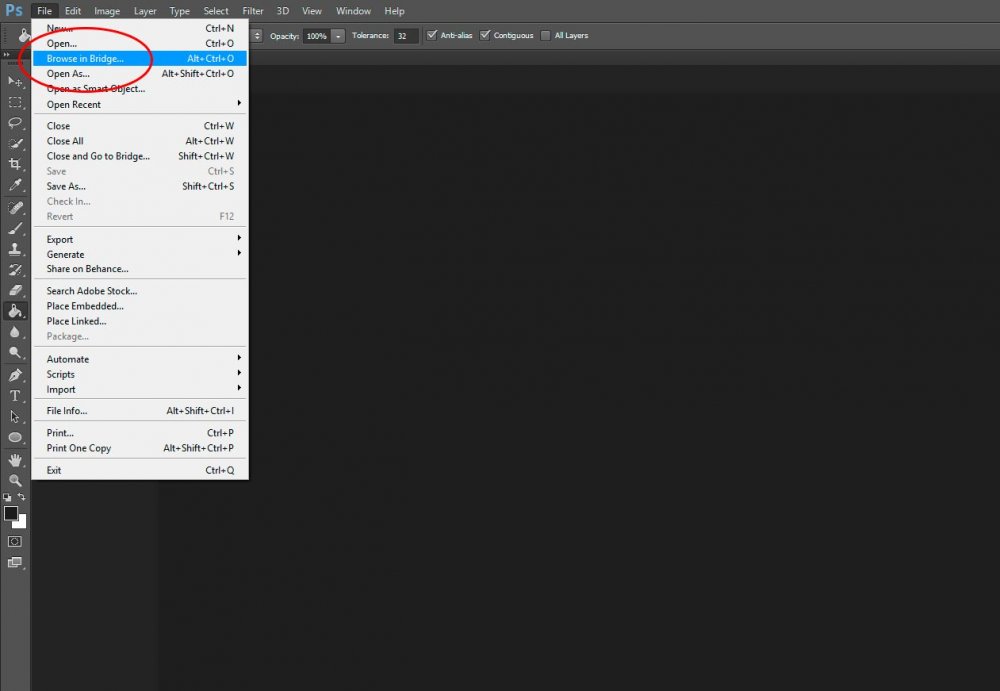
If you click that selection, you’ll find that you just launched Bridge right on top of Photoshop. You didn’t launch is inside of Photoshop, but as a separate application right beside Photoshop. From there, you can perform many different operations.
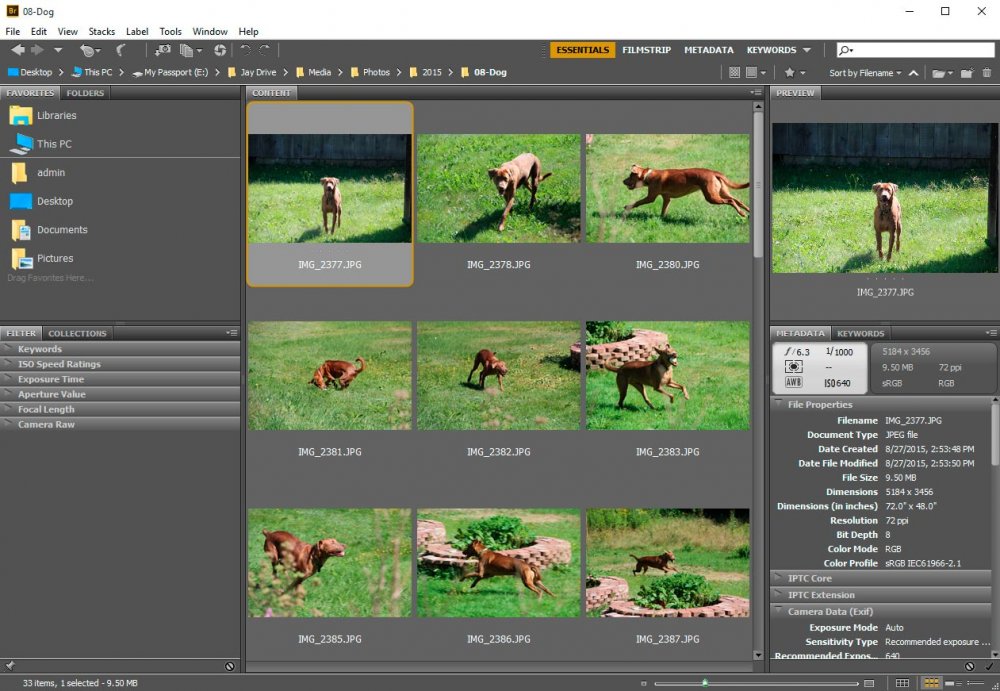
Exploring Adobe Bridge
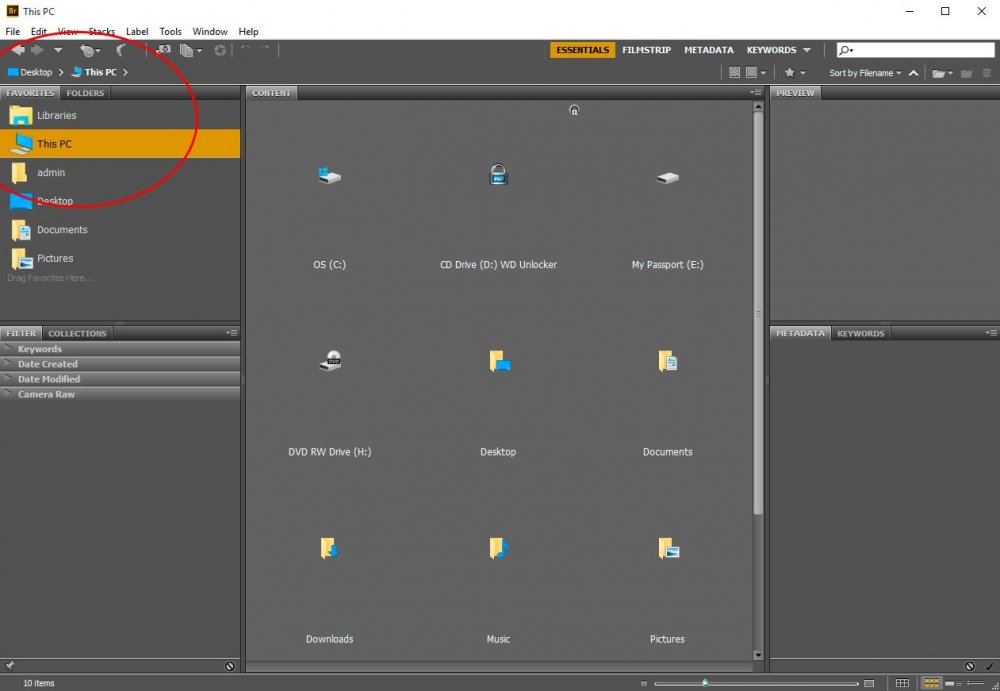
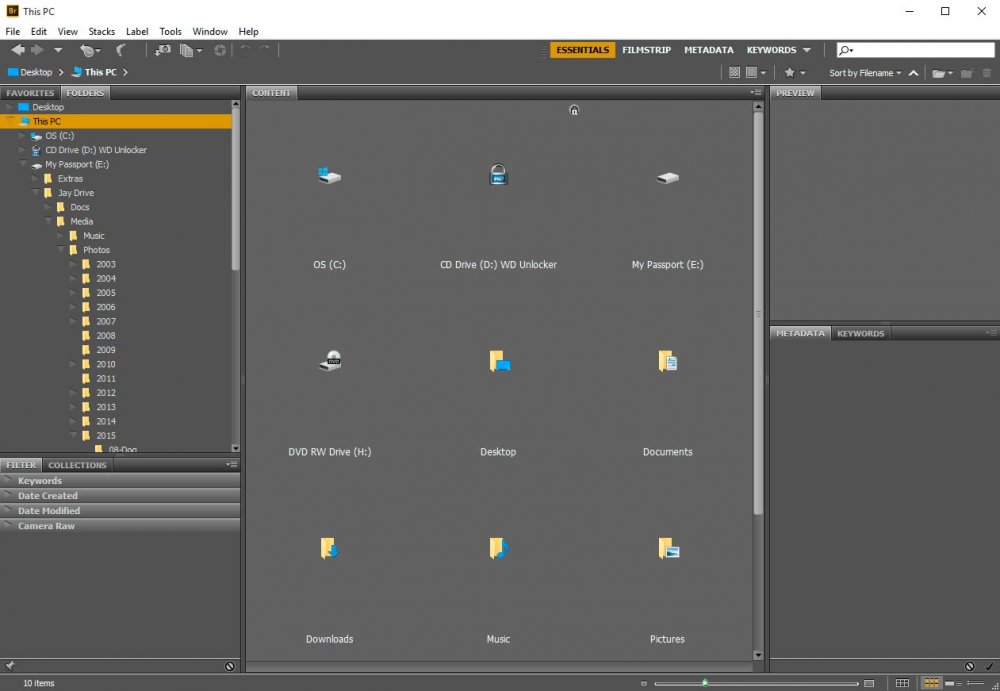
Now that Bridge is open and ready, let’s take a moment to explore a bit. The first few areas I’d like to show you are the “Favorites” panel and the navigation tree. Take a look inside the red circle. If you click around your folders, you’ll see the navigation tree right above the Favorites panel change location. That’s a great way to keep tabs on your current location within your file structure. Currently, it says that I’m at the “Desktop > This PC” location.
My preferred method of navigating to my files through Bridge is to click into the “Folders” panel and browse through that. It operates the same way the Favorites panel does, but it works better with my brain. Take a look.
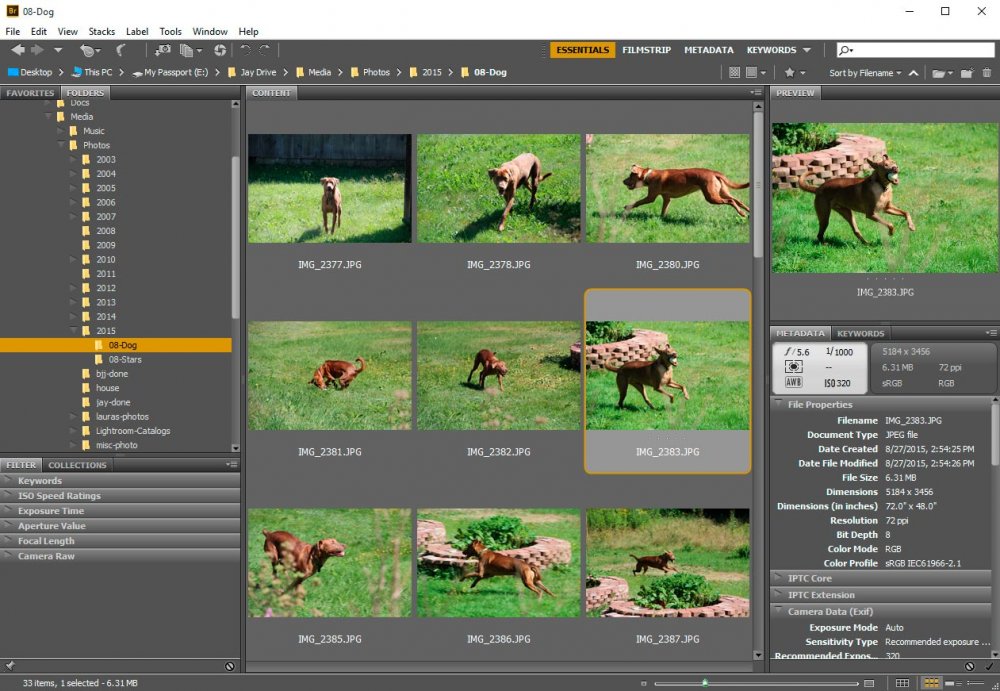
If I navigate to the folder I’m interested in working in from the Folders panel in the left column, I can see all the enclosed images being previewed in the center “Content” column. And if I click on one of the images, I can see a larger individual view in the right “Preview” panel. This is accompanied by all sorts of goodies, such as meta data, keywords, file properties and more, right below the Preview panel in the right column. Also, take note of how the navigation tree has been updated to show the folder’s current location.
Moving Into Photoshop
Opening Bridge and finding images is pretty useless unless we can work on them in Photoshop. So, we need to go over how to open a photo from Bridge, in Photoshop. Luckily, this is super simple. All you need to do, once you’ve found the images you’d like to work on, is to double click one of them inside the Content panel in Bridge. Once you do that, you should see the image immediately open inside of Photoshop.
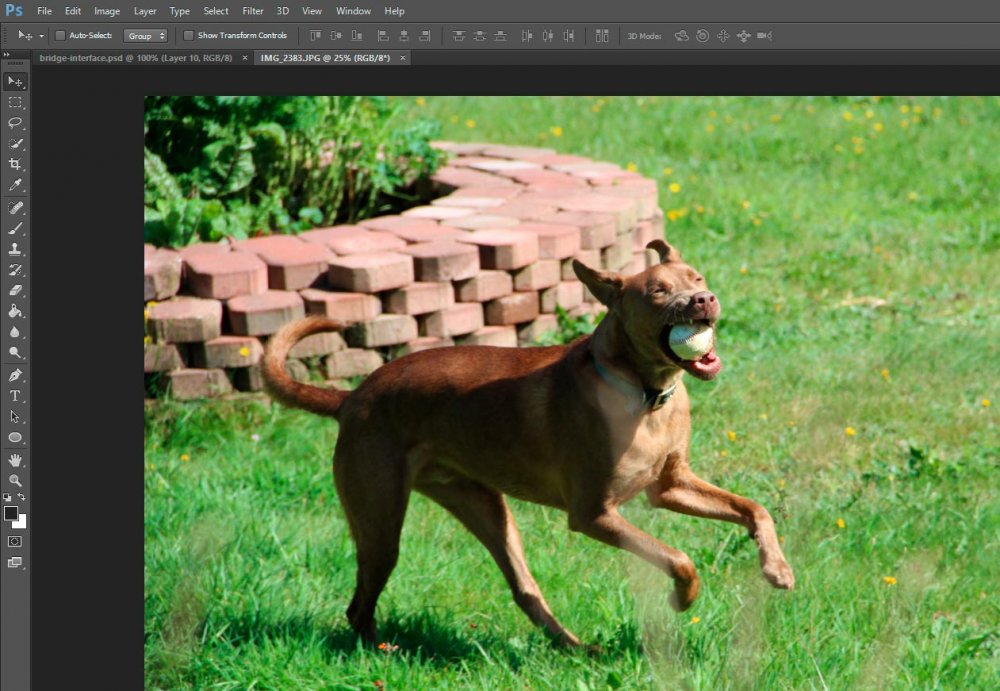
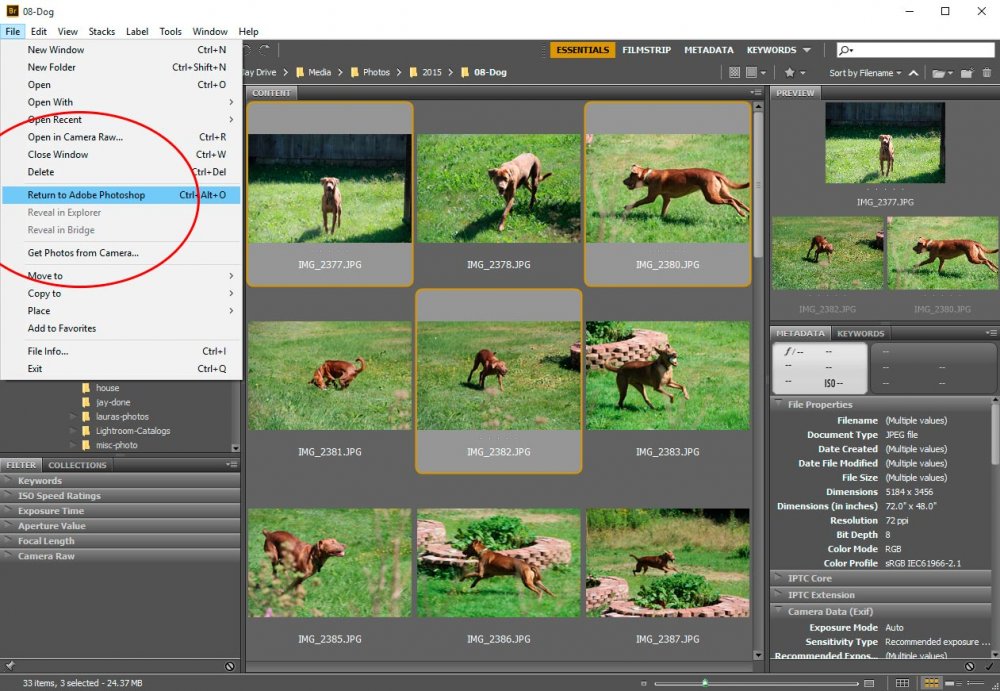
Now, what’s really cool is that we don’t have to choose a photo to open from Bridge, if we just want to get back into Photoshop. If we would like to simply move over, all we need to do is to click the boomerang icon that’s up in the top bar.
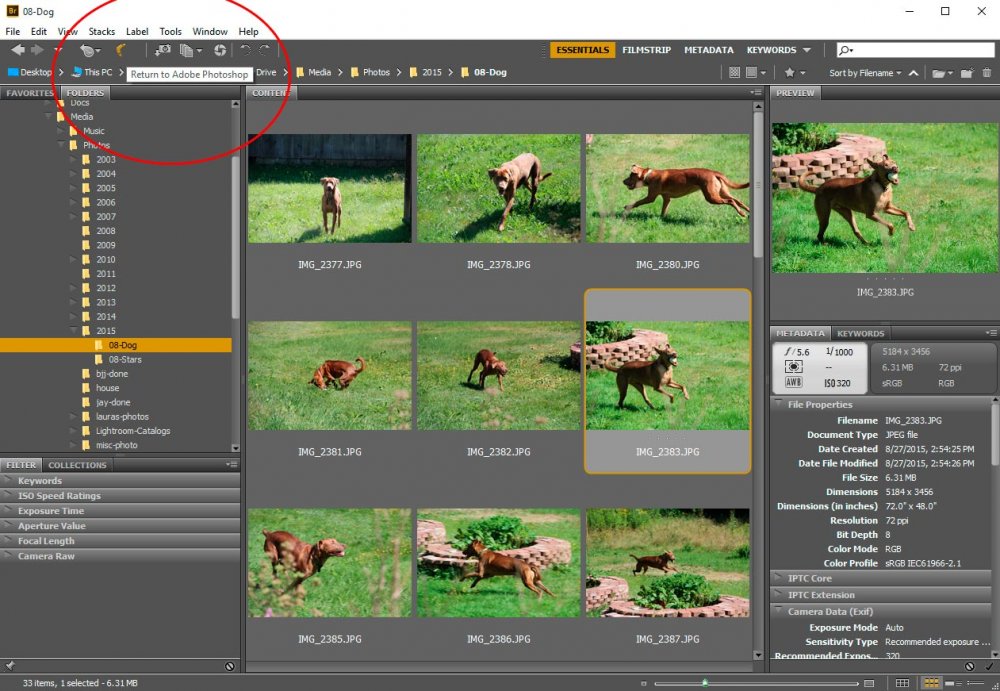
We could either click on the boomerang icon to move back to Photoshop or we could click File from the top menu and then click “Return To Adobe Photoshop.” This will have the same effect.
Selecting & Moving Files
This is pretty neat. Let’s say that we want to select more than one image to either open in Photoshop or to simply relocate later on. To accomplish this, you either click on an image, then hold the Ctrl key down (if the images are random) and go ahead and select the rest of the images you’re interested in, or, click an image, then hold down the Shift key (if all images are contiguous) and select the last image in the group. Once you do this, you can see that the Preview panel in the right column shows all the selected photos.
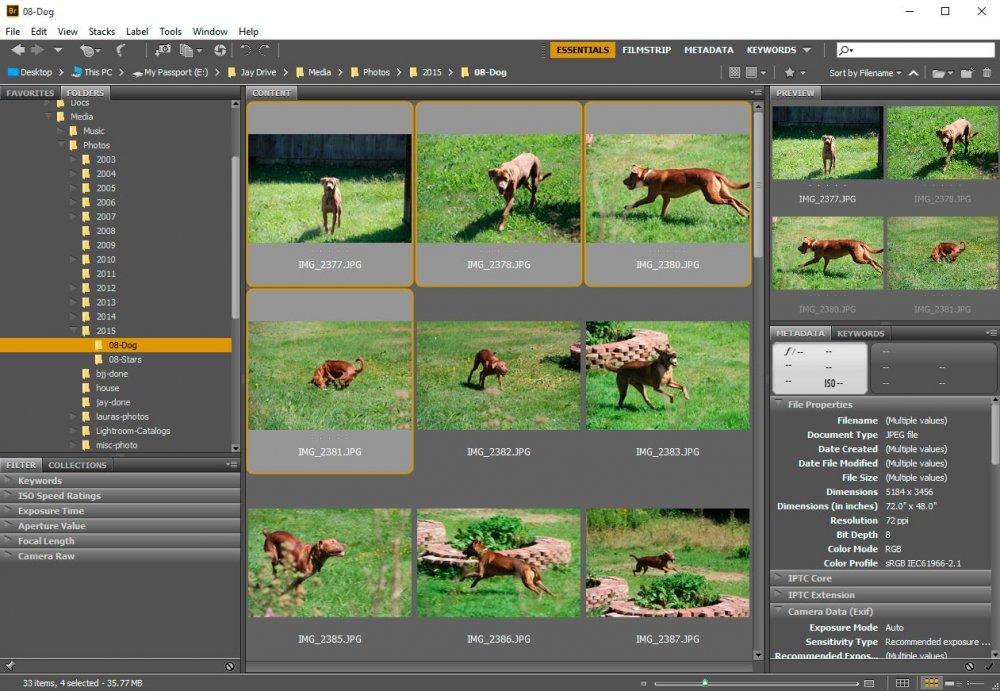
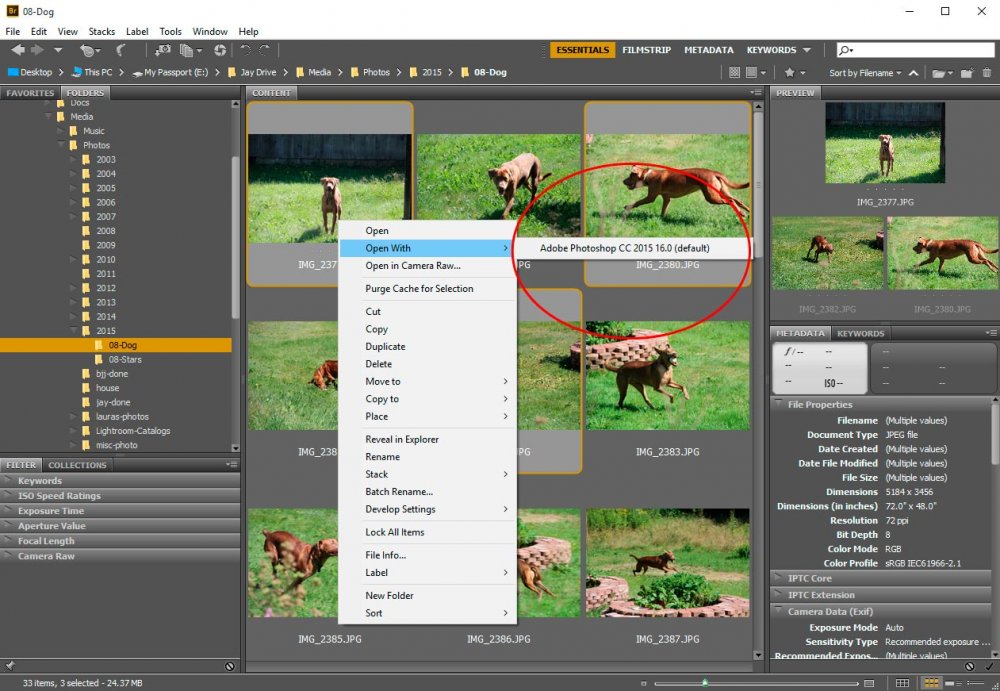
Once these images are selected, we can do a few things with them. If we wanted to open them in Photoshop, we can double click on any one of the photographs we’ve selected and each one will open as an individual file inside of Photoshop. We can edit from there. If you’re not into double clicking, you can right click on any of the selected photographs and then roll over the “Open With” menu selection and click on “Open in Photoshop.”
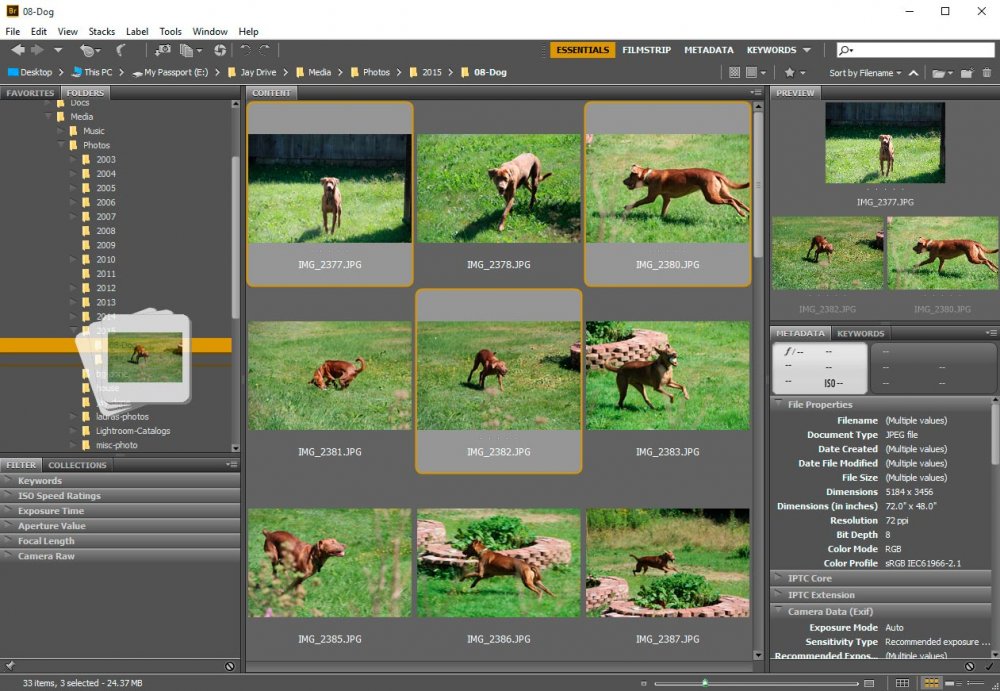
All this is well and good, but what if we selected multiple images, not to open and edit in Photoshop, but to move to a different folder on our hard drive? Well, to relocate a file or group of files, it’s just as easy as what we did above. To move an image or images, select them and drag them over to the folder you’d like to place them in, inside the Folders panel in the left column. Once your chosen folder is highlighted, let go of your mouse and the images will have been moved.
As I mentioned at the beginning of this post, what I’ve covered here is just the beginning of what Bridge can do. If you’re interested in more, all you need to do is follow the “Adobe Bridge” link in the menu at the top of this page. If you’ve enjoyed today’s post and found it helpful, please share it with a friend. Thanks!
Leave a Reply