If Photoshop’s workspace management had a twin, it would be Bridge’s. Both applications have panels, tabs and Adobe provided “themed” work areas. Both applications also offer the ability to create a custom workspace. The management and customization (creating, saving, deleting) is what I’m going to cover in this post.
Oh yeah – if you’re a Lightroom user, don’t worry. Lightroom’s workspace setup and customization is similar to Photoshop’s and Bridge’s. So if you learn one, you sort of learn them all.
Preset Workspaces
Like Adobe Photoshop, Adobe Bridge comes with preset workspaces. Each one is geared toward a specific type of user or a specific type of task. It isn’t uncommon for someone to flip between workspace styles while managing photos and files inside of Bridge. To kick off this post, I thought some screenshots of these workspaces was in order. But before I do that, let me show you how to go about switching between each of them.
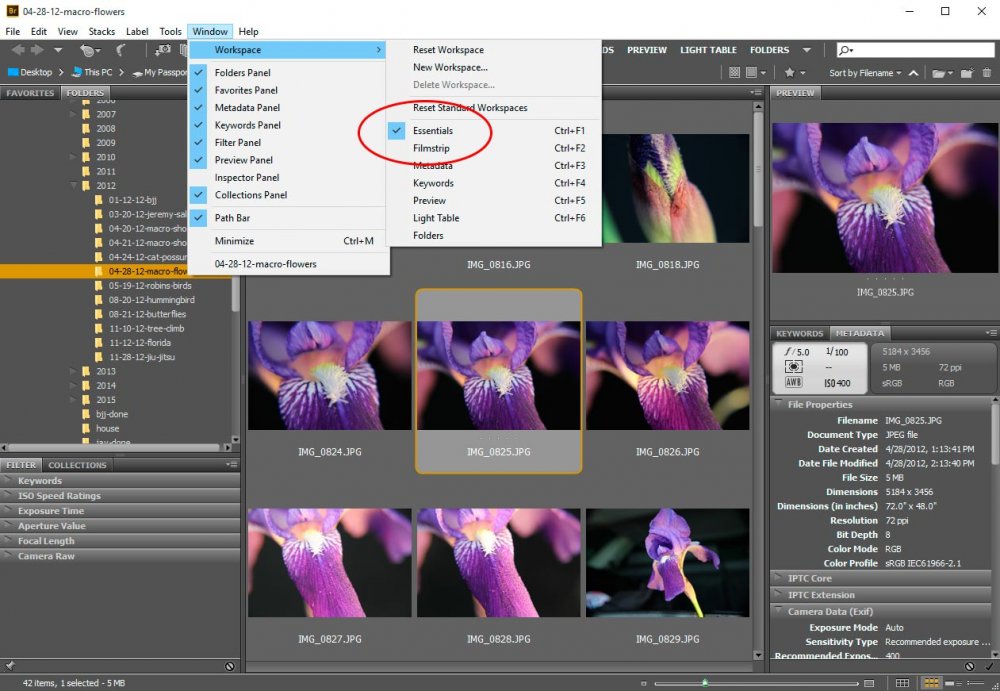
If you’re interested in altering the layout of your tabs and panels within Bridge, you can simply navigate to the top “Window” menu, roll over “Workspace” and choose from one of the available selections.
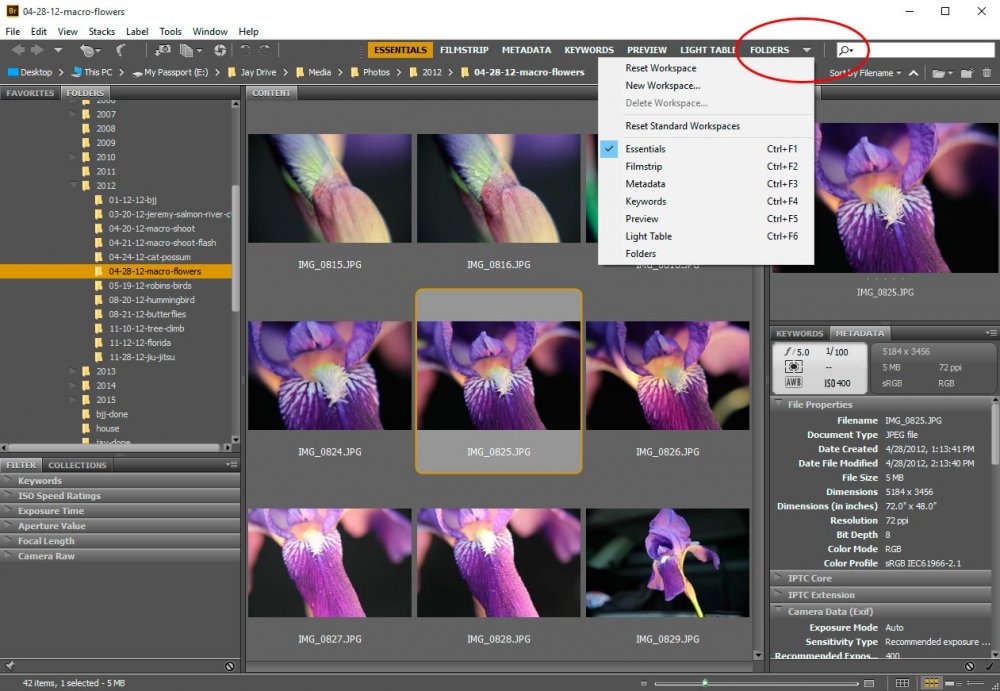
If you’d like to accomplish the same exact task by using an alternative method, you can choose between one of the listed workspaces below the main menu. By default, only a few of these will be displayed. If you drag the small vertical bar that’s to the left of the list (to the left), more workspace choices will become available. Alternatively, you can click the down arrow and make your selection from there.
Below, I’ll give you a screenshot for each preset workspace that’s shipped with Adobe Bridge.
Essentials
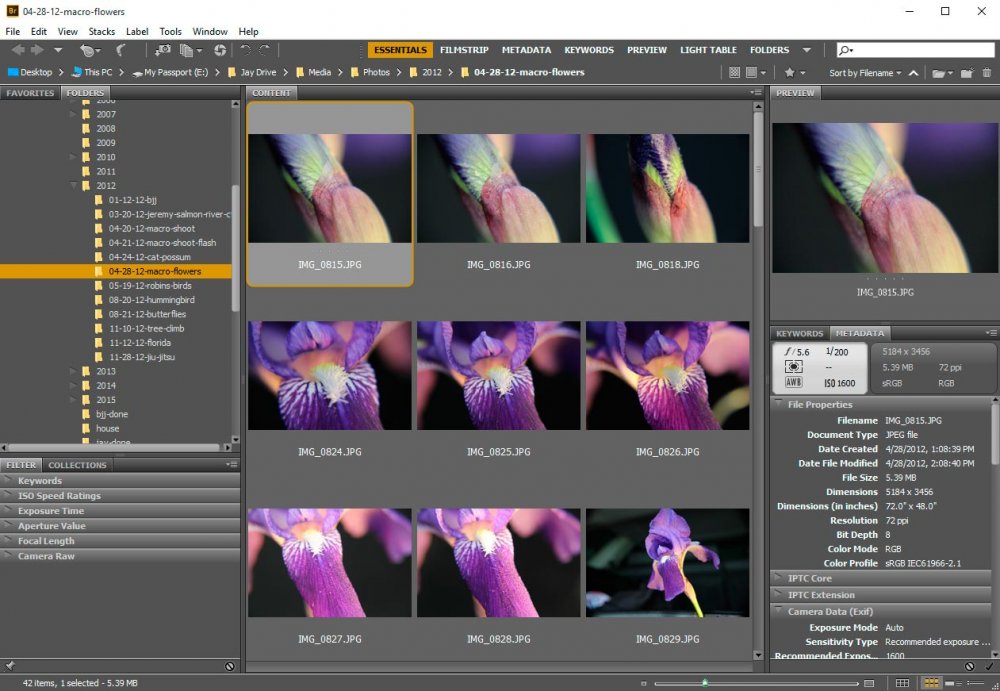
Essentials is the default workspace that Bridge is set to upon opening for the very first time. It give you adjustable thumbnails in the center column with a preview to the right and metadata and keyword options below that. To the left, you’ve got your folder selections along with filters, collections and more.
Filmstrip
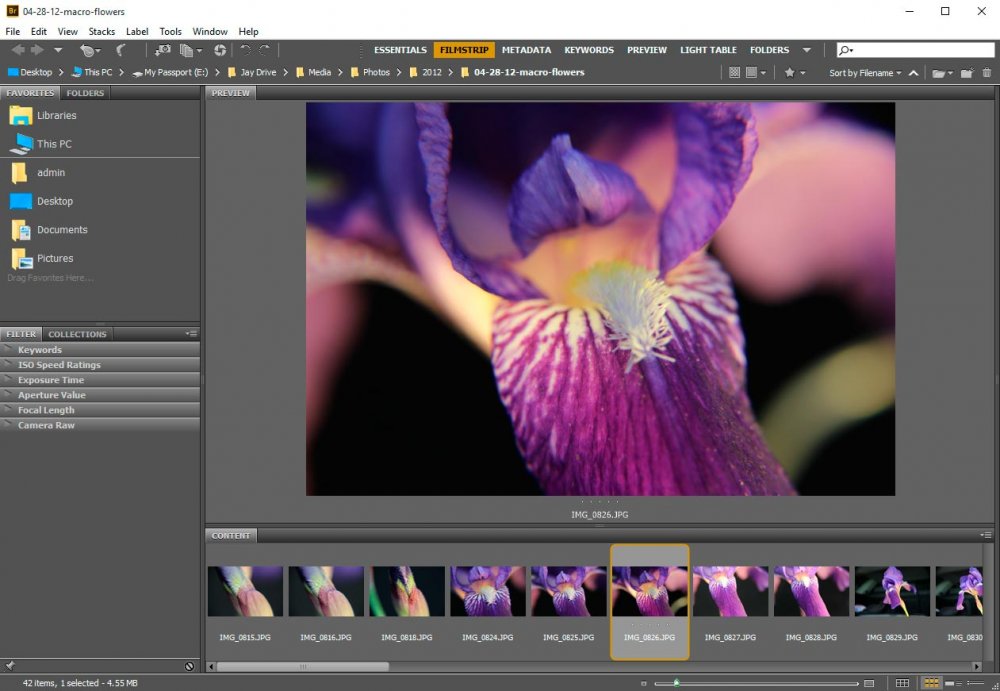
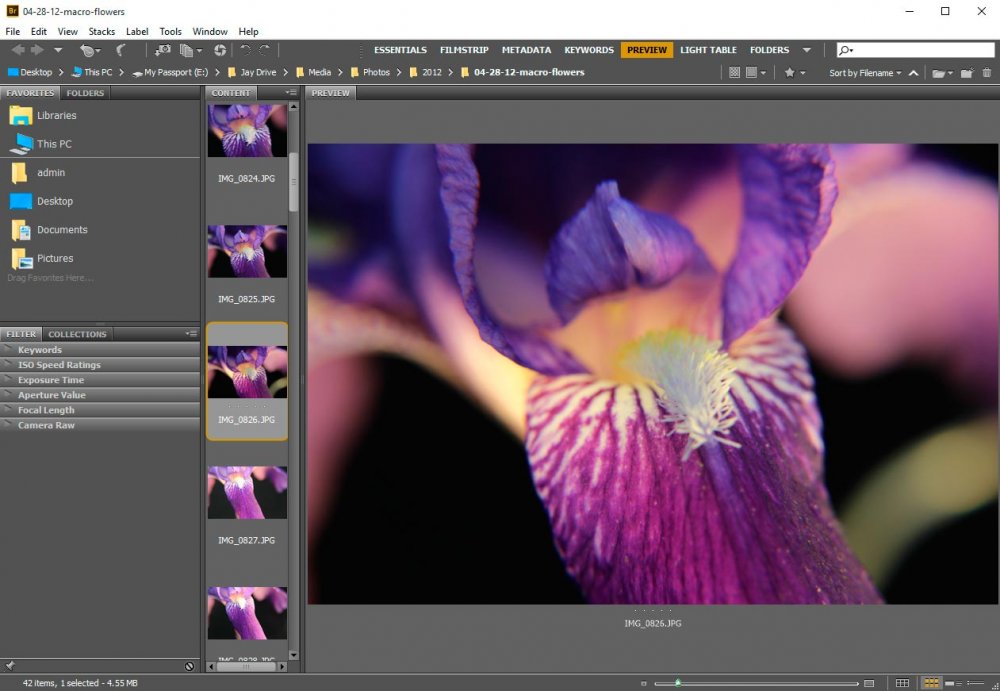
Many of the preset workspaces are geared toward previewing photos with a larger view than what Essentials offers. Filmstrip is one of them. Notice how you’ve got the scrolling thumbnails below the larger image. Also, the metadata and keywords panels have been removed. Lastly, if you’d like to adjust the size of the thumbnails in the filmstrip portion of the workspace, simply move the slider that’s located below the thumbnails to the left and right.
Preview
I decided to go out of order here because the Preview workspace is so similar to the Filmstrip one. Essentially, it’s almost identical, except for the fact that the thumbnails are shown vertically as opposed to horizontally.
Light Table
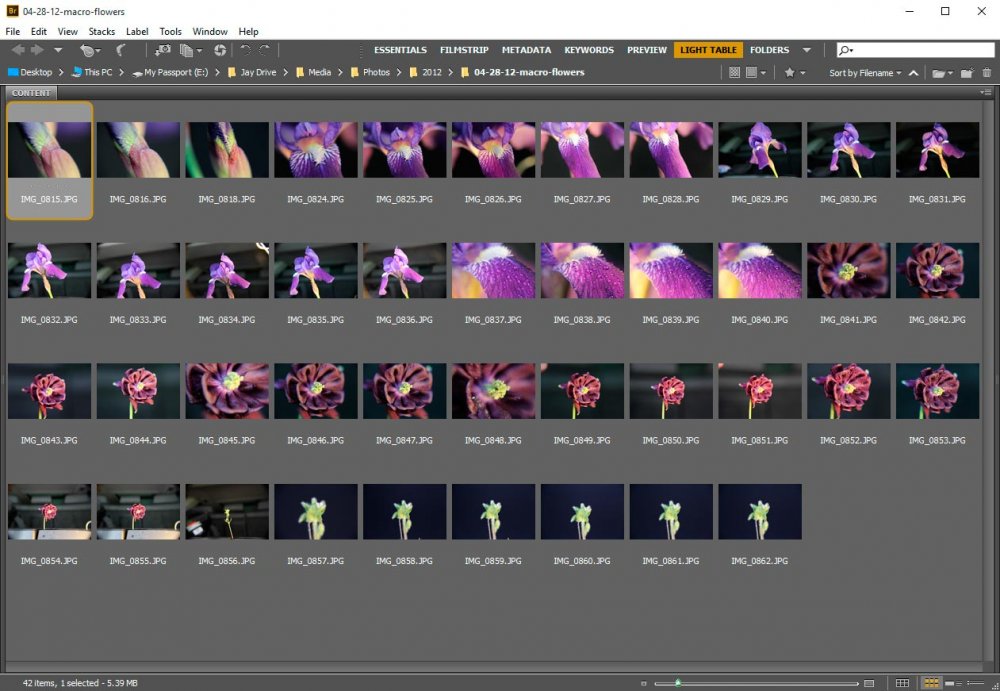
A popular workspace for previewing your images by themselves is Light Table. This workspace simply displays your photos while leaving all panels out of view. Remember, below the thumbnails is the size adjustment slider to enlarge and shrink your thumbnails.
Metadata & Keywords
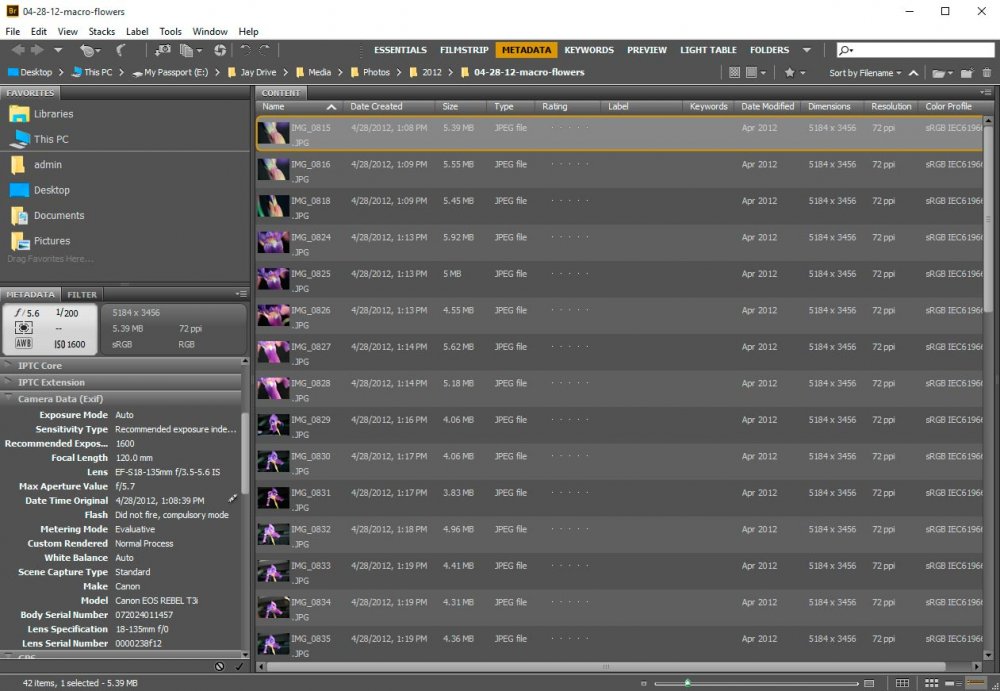
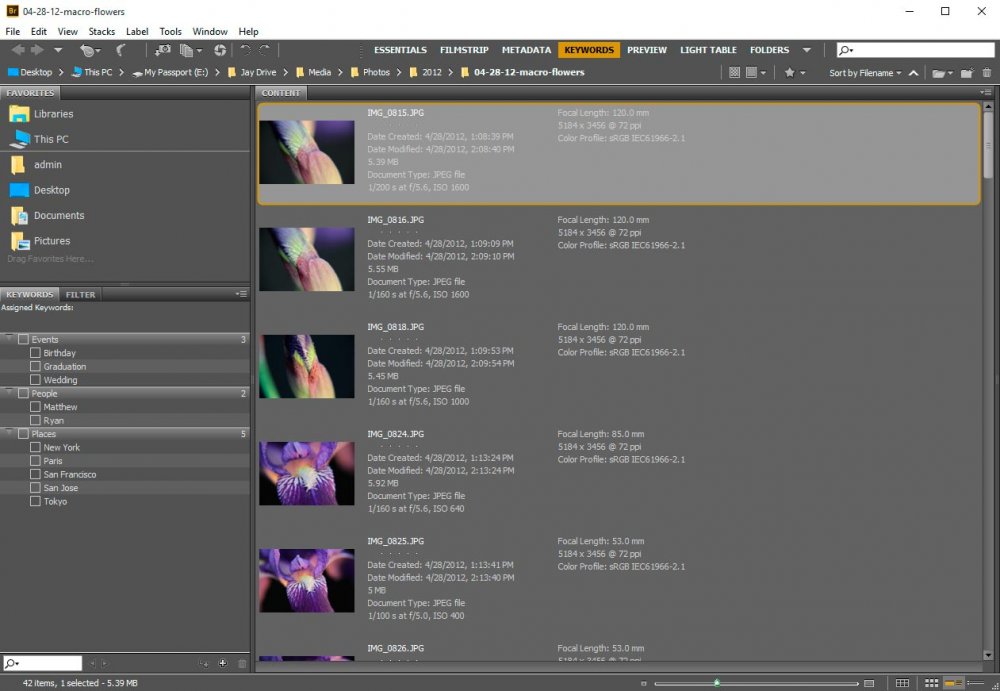
I’m combining these two workspaces because they both focus primarily on what’s behind each photo, as opposed to previewing the photo itself. Again, for each of these workspaces, you can view adjustable thumbnails of your images, but with these layouts, you can also view some of the particulars for each shot. Also notice how the Metadata and Keywords panels are in view for each workspace, respectably.
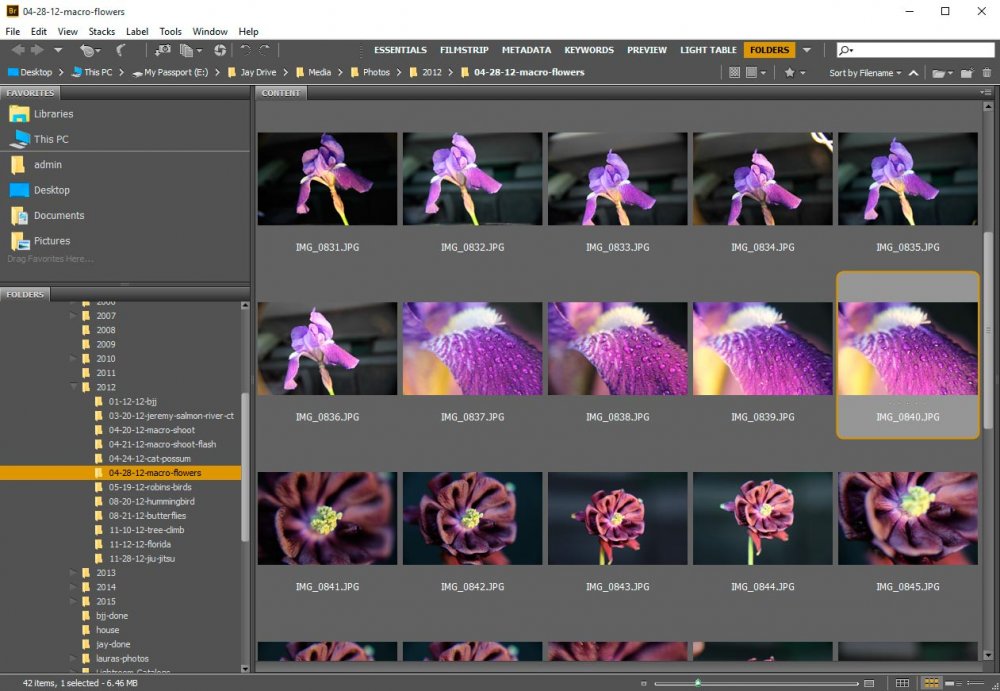
Folders
This is probably one of my favorite workspaces. It’s simple and it lets me quickly navigate through my folder hierarchy to find the image collection I’m interested in working with. Also, since I can adjust the size of my thumbnails, I can get a quick view of my photos.
Previewing More Than One Image
Oftentimes, previewing one image at a time becomes cumbersome. For those of us who like to work fast, it’s helpful to browse through what just came off our cameras at light speed. To see what we’ve got, multiples at a time, and to compare shots quickly, we need to view our thumbnails with more flexibility. This is where multiple previews comes into play.
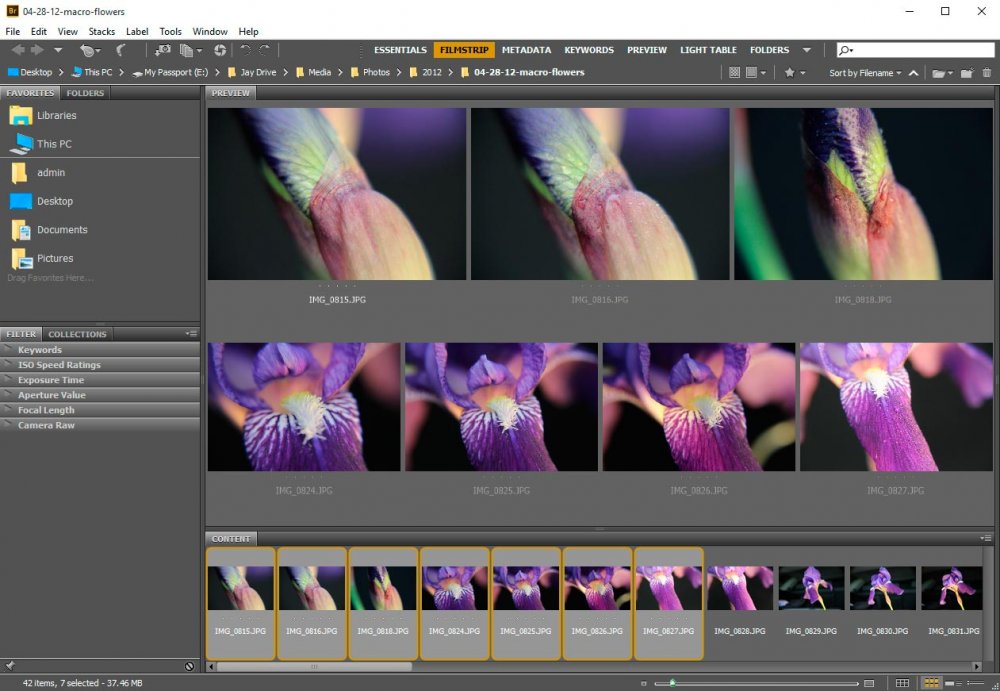
I’m going to give you can example of how to do this by using the Filmstrip workspace because it offers a nice, large preview area.
If you’d like to view more than one preview at a time, click on the first image thumbnail you’d like to see and then hold down your Ctrl key. After that, click on your next thumbnail. You should see your second photo appear inside the preview box. By using the Ctrl key, you have the ability to sporadically click thumbnails. If you have multiple photos that are listed one right after the other, you can click the first thumbnail and then hold down your Shift key. After that, click the last thumbnail in the series. They should all appear in the preview box. Just one note though – the preview area only displays nine previews at a time, even if you select more than nine thumbnails. The amount selected will be shown as text at the center of the preview area.
Changing Panel Size
Adobe was brilliant in giving us such helpful preset workspaces, but sometimes, while otherwise thankful, we’d like to make small alterations to the look and feel of a few of those workspaces. Adjusting the size of our panels is one way to make those changes.
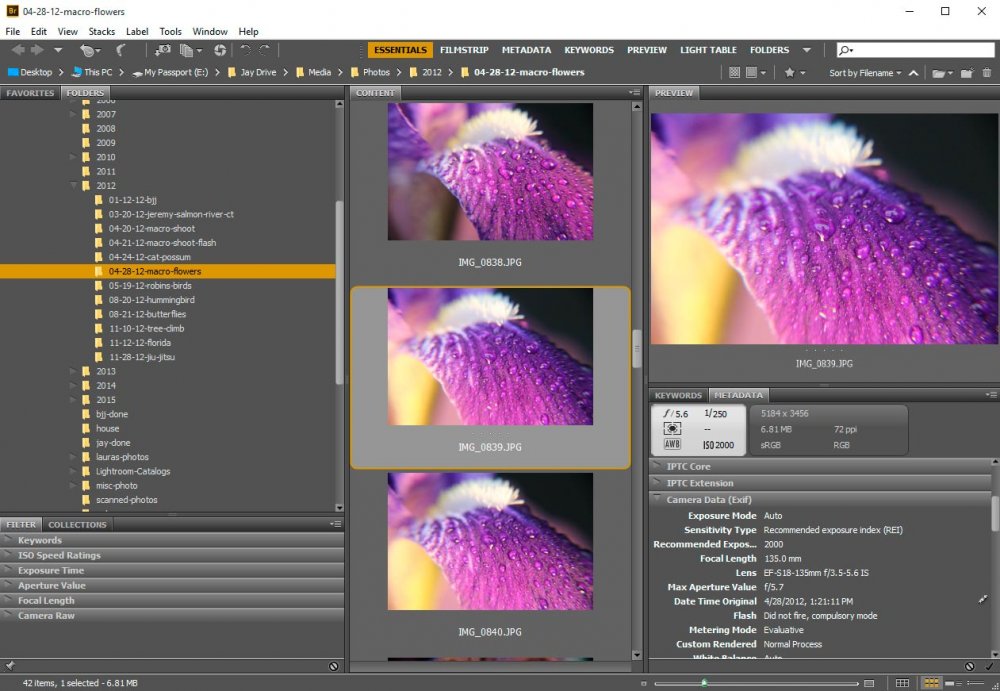
To adjust the size of the panels in Bridge, all you need to do is hover your mouse over the divider between any of the panels you’d like to resize. Once you see your mouse change from a pointer to a double arrow, you can click your left mouse key and drag to the left, right, up or down. That’s it! It’s as simple as that. Check out what I’ve done to the Essentials workspace.
Resetting a Workspace
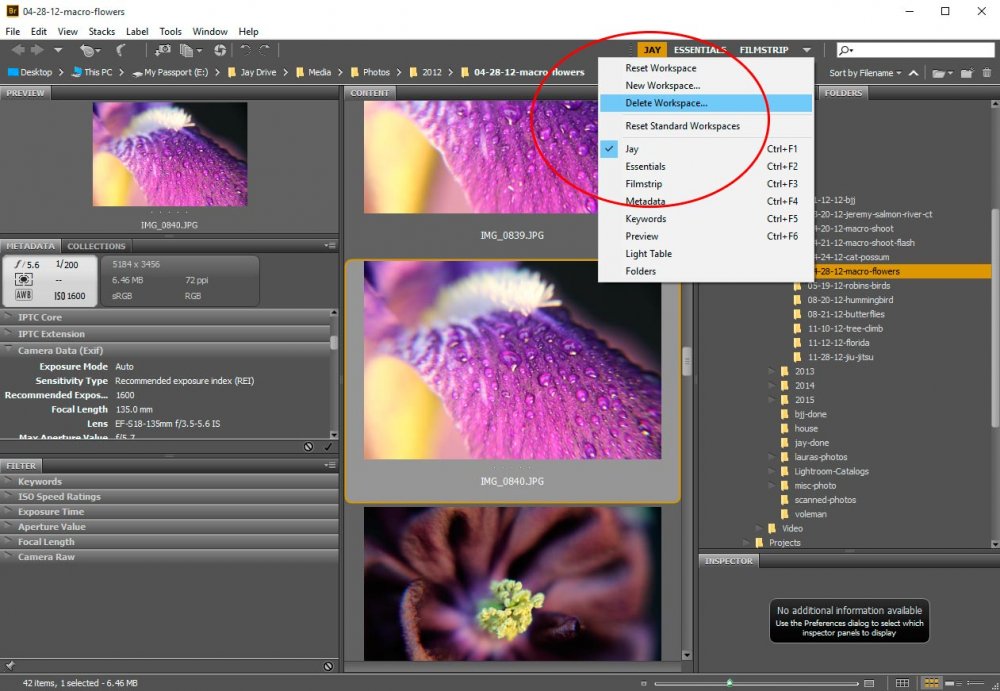
Here’s a thought – say that we go a little crazy (like I just did above) and move around all sorts of panels and resize them to a point where they don’t make any sense. What if we just want to erase the changes we made and start over? Well, there’s an easy correction for our madness. While in the workspace that you’d like to reset, head up to the “Window > Workspace” menu or to the drop-down arrow that’s to the right of the preset workspace options I discussed before and choose “Reset Workspace.” Whichever workspace you’re currently in will be reset to its original fashion. All changes you made will be gone.
Moving Individual Panels
What if your workflow called for the heavy use of, say, two panels that are currently positioned on opposite sides of the workspace? Wouldn’t it be easier to reposition those two panels so they’re right next to each other, instead of moving your mouse back and forth, back and forth?
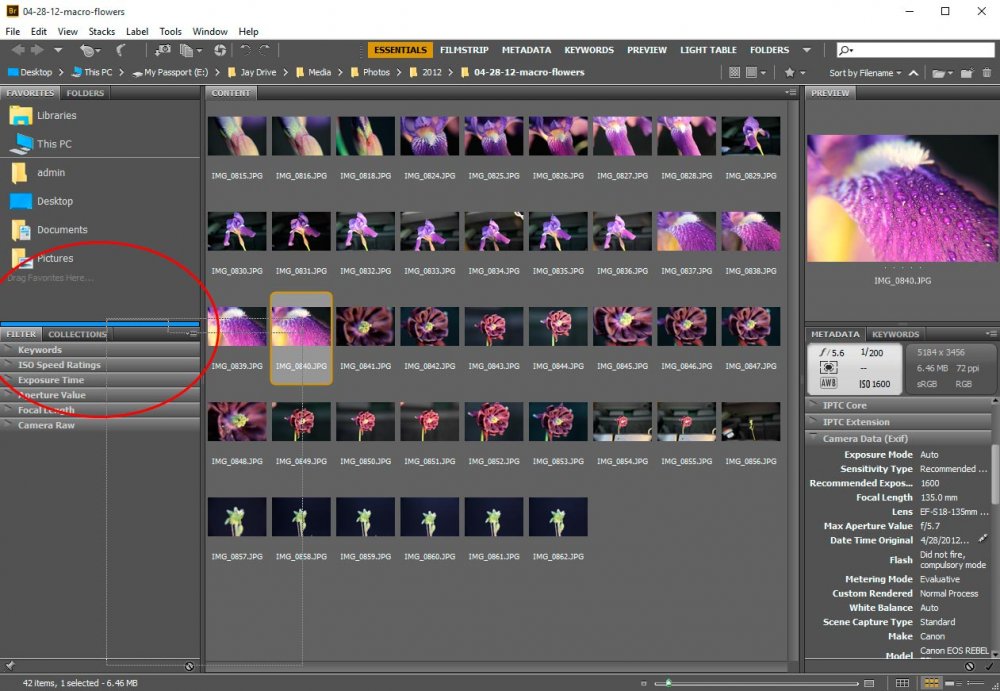
To move a panel, simply click on the name (tab) of the panel and drag it inside of the panel you’d like to position it next to. As you’re dragging, you should see your target panel outline itself in blue. Once it does that, let go of your mouse button and drop the panel you’re dragging. You should see it now repositioned.
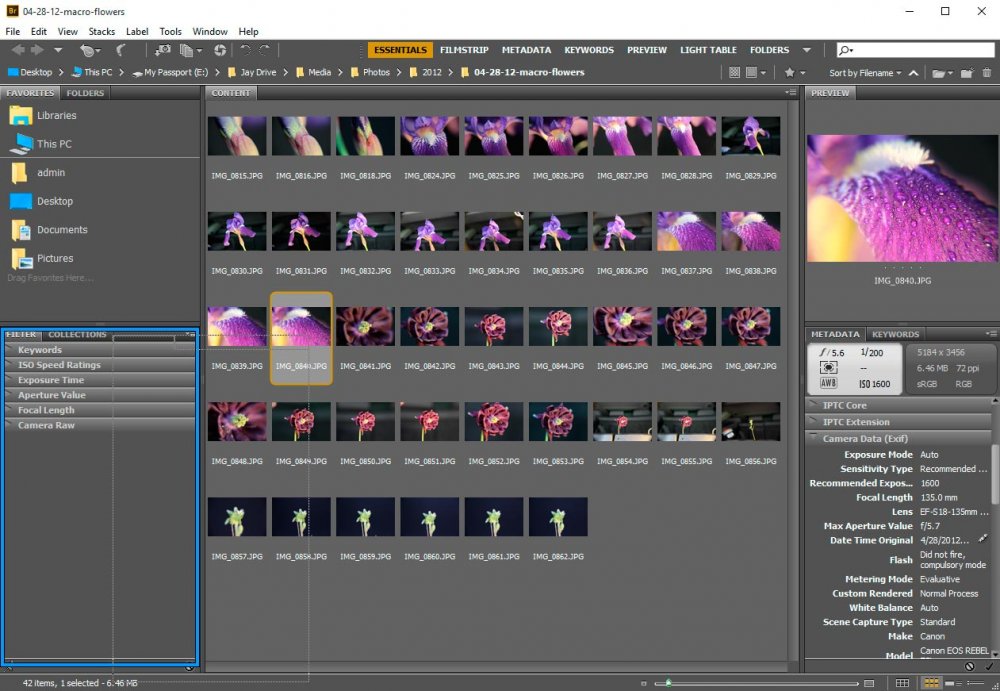
Again, if you’d like to quickly undo what you just did, you can easily reset your current workspace by following the instructions I gave you above.
Stacking Panels
This section is very similar to the last. If you’d like to stack a panel in its own area of your workspace as opposed to nesting it inside of another panel, you can drag it just like above, but instead of repositioning it inside of the other panel, just drag it in between the panels you’d like it to be positioned. You’ll know you’re in the right area when you see a horizontal blue line between two panels.
Adding & Removing Panels
Now that we know how to reposition panels in our workspaces, let’s go over how to add one that’s not currently available to us.
To add a panel to our current workspace, head up to the “Window” menu. From there, you should see all the active panels checked off in blue. If you’d like to add a panel that isn’t currently active, go ahead and click the panel name. You should see it appear in your workspace.
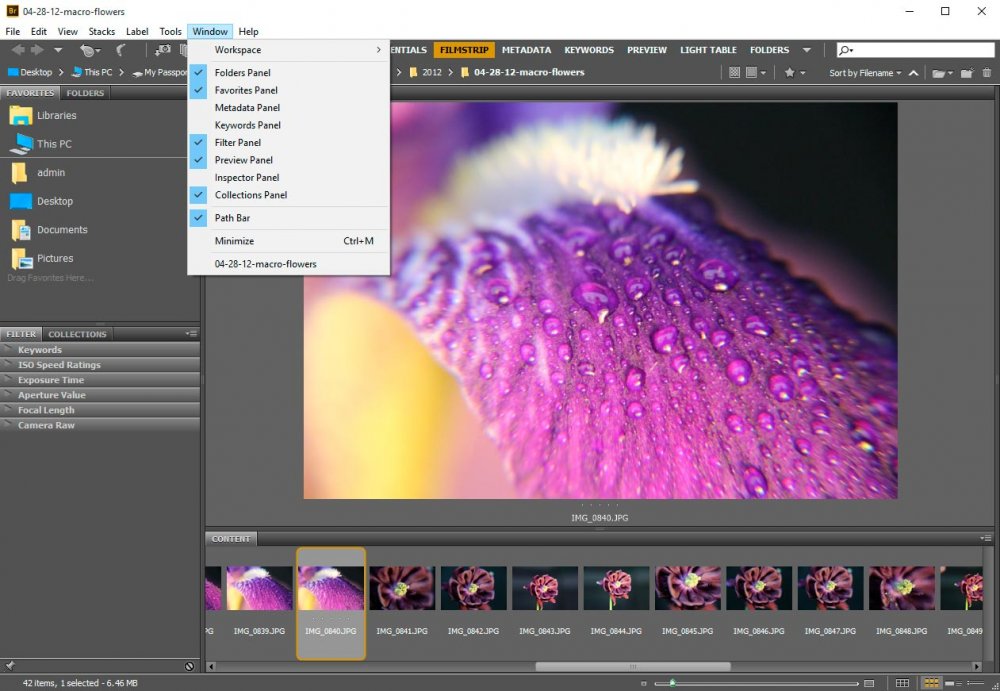
Once you see the new panel in your workspace, you can reposition it just like we went over above.
Now, if there are panels in your workspace that you don’t need, you can just as easily remove them. To do this, navigate back up to the “Window” menu and uncheck an active panel. Once you do this, you should see that panel disappear from your workspace.
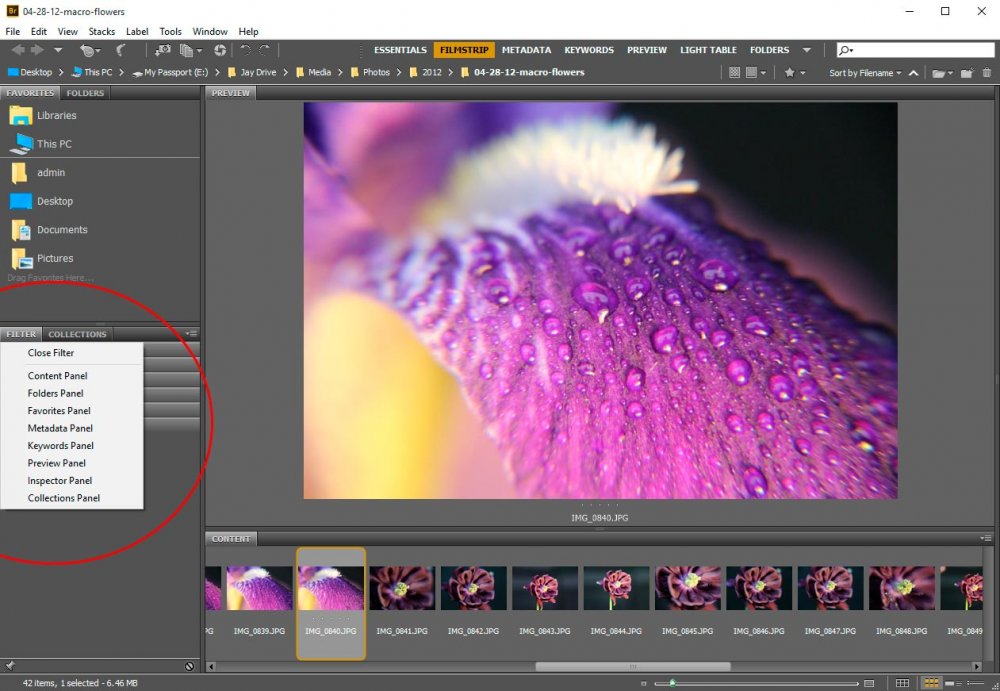
Alternatively, you can also right-click on the panel name itself inside your workspace to add or remove panels. Once you right click, you’ll see a menu appear that gives you the option of removing the panel you clicked on or adding a panel to the current panel you’re inside of.
Creating & Deleting Custom Workspaces
Let’s pretend that none of Adobe’s preset workspaces are able to suit my needs. I have a huge monitor and I’d like to have access to all panels simultaneously. Also, I’d like to nest panels differently than what’s currently offered and reposition a few others. The thing is, I’d like to save this arrangement as a new workspace, as opposed to altering an existing one. Good thing we can do just this.
For this example, I’m going to start off using the Essentials workspace. I’ll add all available panels to it and then move them around the way I see fit. After that, I’ll adjust the size of each panel in the workspace.
Now that I’ve created my new workspace, I’d like to save it as a custom one. To do this, I need to head to the “Window > Workspace” menu once more or go to the drop-down arrow to the right of the preset workspace titles and choose “New Workspace…” Once that’s done, I should see a dialog box appear that gives me the ability to name my new workspace. In this case, I’ll call it my name, which is “Jay.”
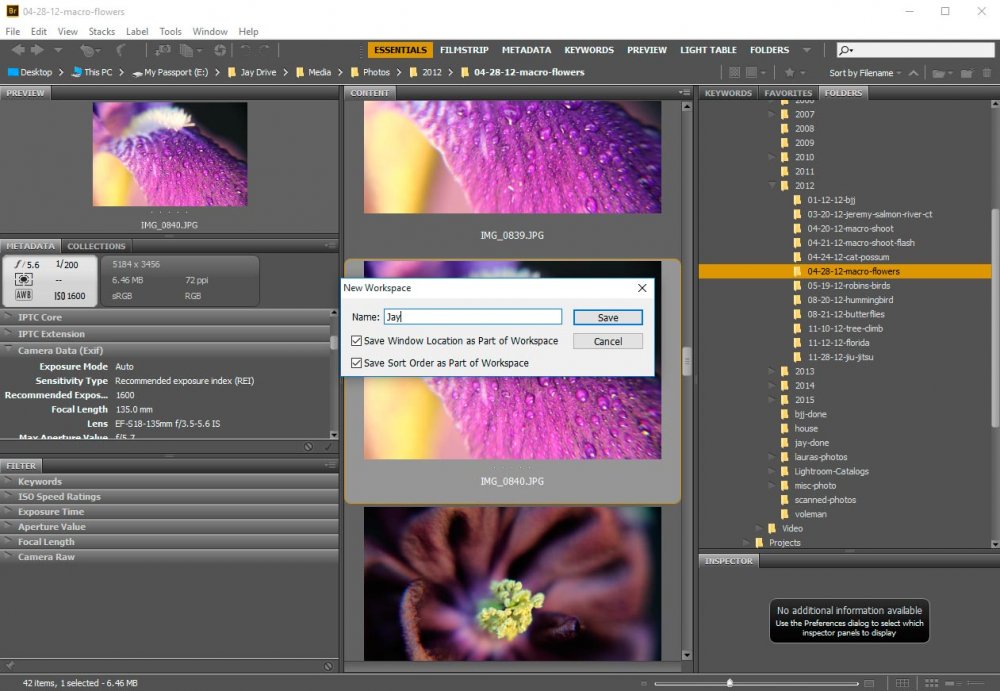
Once I click “Save,” I should see my new workspace name appear in both the “Window > Workspace” menu as well as the workspace bar under the primary menu. It’s highlighted to indicate that it’s active.
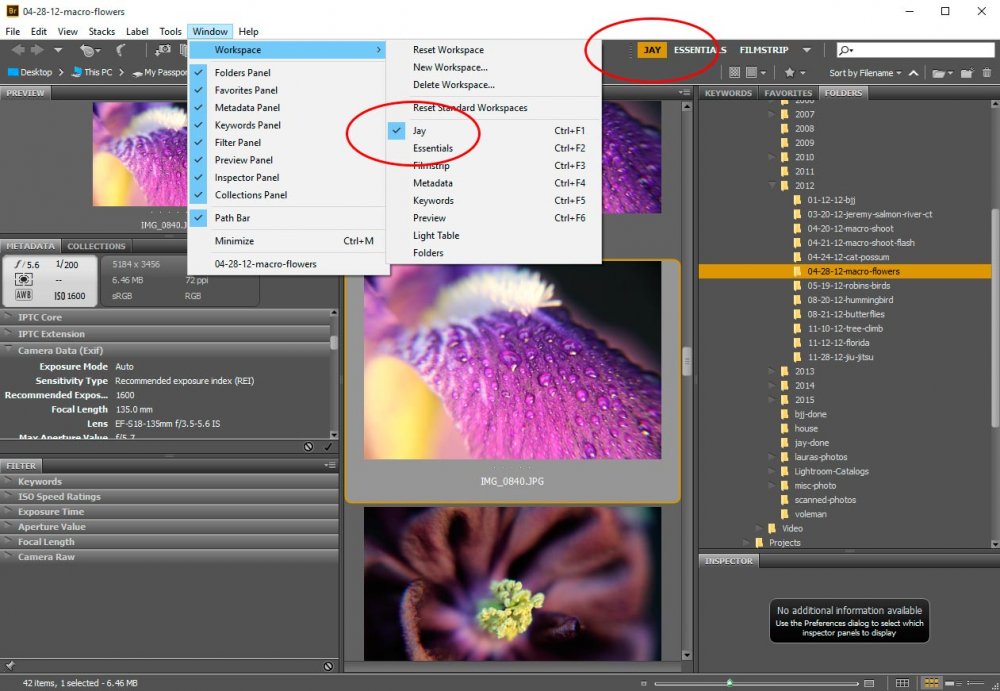
Here’s the thing – I only created this workspace for this example. I don’t really want it, so I’d like it deleted. To do this, while active in the workspace, I’d need to head back up to one of the Workspace menus and choose “Delete Workspace…” After I do this, I should see a confirmation box. Click “Delete” and that custom workspace will disappear. The only issue is that while the custom workspace is no longer available as a choice, I still see its settings inside Bridge. To change to something else, I need to choose a new workspace. If I choose Essentials again, all those panels I activated and moved around are still live. It isn’t until I reset Essentials that it goes back to its original state.
Leave a Reply