Many people don’t know an application called Camera Raw even exists. And many who do think its use is limited to those of us who shoot RAW photos exclusively. The name is actually somewhat misleading because Camera Raw is an excellent image editor for many types of photographs, JPEGS included. And one of the best things about Camera Raw is its ease of use. Adobe has made this program so simple to navigate through the years that almost anyone can become proficient in the shortest amount of time.
The last time I checked, Camera Raw shipped with Photoshop, which comes included with Adobe’s Creative Cloud Photography plan. Camera Raw is a plugin that’s included with both Photoshop and After Effects. So once you install either program on your computer, you’ll need to install Camera Raw as well. Don’t worry, it’s worth it and it only takes a second.
In today’s post, I’d like to take a moment to offer a brief tutorial on one of the most basic corrections a photographer might want to make. It has to do with how to brighten up a photo that’s too dark. Photos that come out too dark are referred to as underexposed. An underexposed image is different than one that may be properly exposed, but that has dark shadows. In cases like that, you’d want to keep the majority of the image as is, but lighten just those shadows. Today, I’ll limit my discussion to only exposure as a whole. In later posts, I’ll write about brightening shadows exclusively. Well actually, today, I’ll most likely include a few different areas of Camera Raw that deal with exposure and shadows will likely play a part in making the correction.
Open Photograph in Camera Raw
To start off, go ahead and open Adobe Bridge. Then, select your image and launch it into Camera Raw. For this demonstration, I’ll be working on a random photograph I took yesterday of my kitchen window. As you can see, it’s way too dark. You can hardly make out any details of my wonderful post and beam.
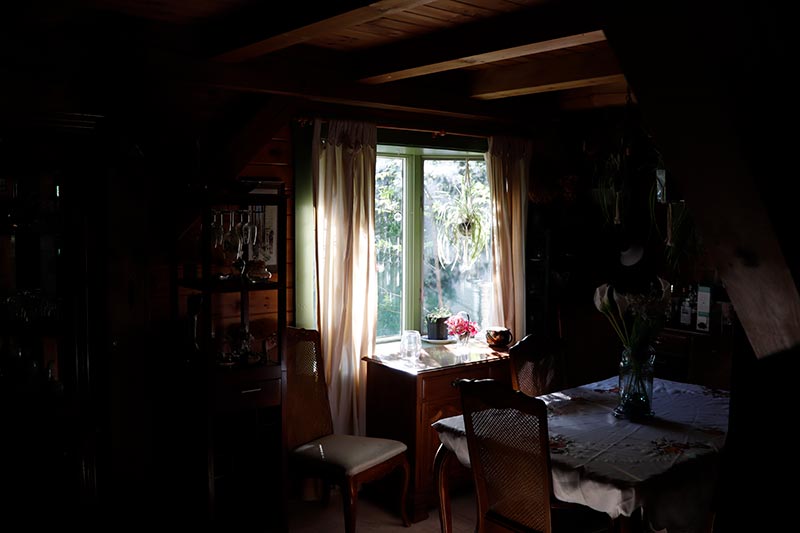
This photo wouldn’t actually be terrible if my goal was to capture only what was outside the kitchen window. Unfortunately, I wanted to see outside, but inside as well. To deal with this, I’ll be working in the Basic panel of Camera Raw. Take a look at it below. Notice how I got there too. It’s on the right side of Camera Raw and it’s accessed by clicking a down arrow. Also notice how all of the sliders are in their default center positions.
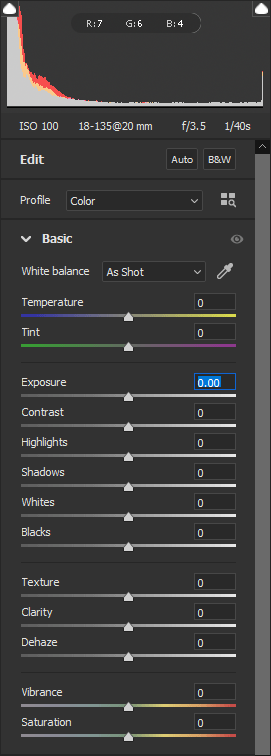
I’ve also included the histogram for this photo because I think it offers a lot of information. It shows just how underexposed this image is. The lighter part of the histogram is the image data. It’s pushed all the way to the left, meaning the picture is far too dark. That data should really be centered a heck of a lot more.
Increasing Exposure – Pushing the Basic Sliders
To increase the exposure of a photo, all you really need to do is push a few of the sliders. The trick is knowing which ones to push. To start off, I’ll go with the obvious choice – the Exposure slider. I’ll push that to the right until I see the dark areas the way they should be. Much brighter. I’ll go all the way to +4 with this slider. Let’s see how that looks.
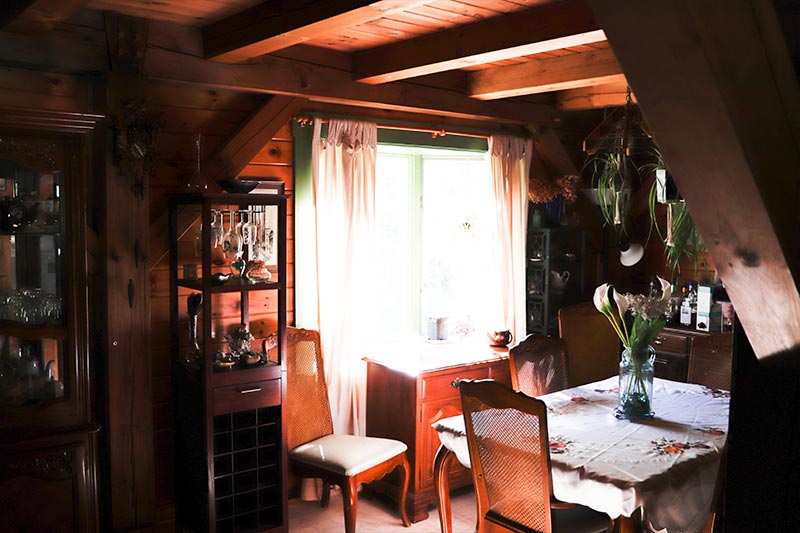
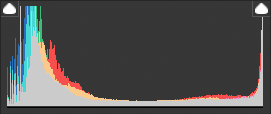
Well, I’d say that looks somewhat better, but now the light from the window is all blown out. I don’t know which is worse, the dark or the bright. I’ll need to correct this now. On the plus side, the histogram is looking pretty good. At least it’s moved all the left wall.
Reducing the Blown Out Highlights
Camera Raw offers an extraordinarily simple solution for dealing with highlights that are far too bright. It’s called the Highlights slider and in this case, it needs to be pushed all the way to the left. To reduce these highlights, I’ll set this slider to -100. Let’s see what that did to this image. Hopefully it’ll remove some of that unsightly glare.
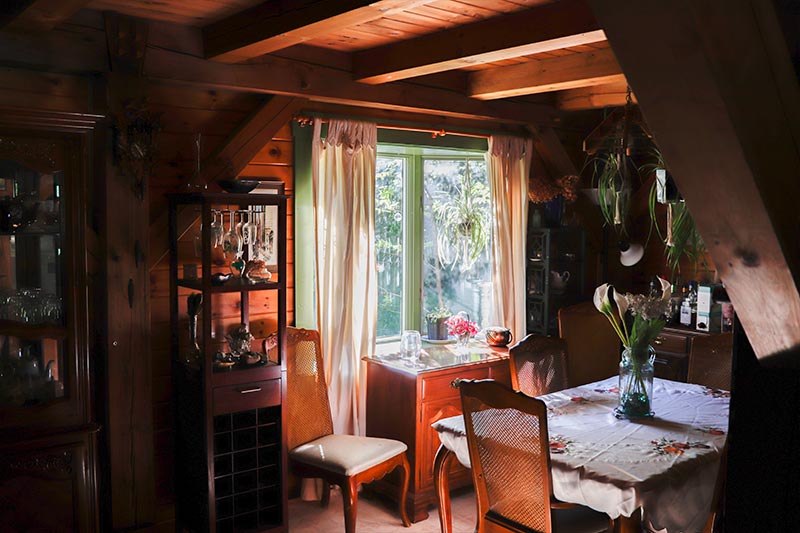
Wow. I’d certainly say that worked well. The picture almost looks perfect. There’s more to do though, but luckily the exposure part is done. Because the changes I made to this photo were so extreme, I’ll need to add some definition back in. As you can see, some of the posts and beams look a bit too neutral. They’re flat and bland. By pushing a few more sliders, I think I can correct that.
Refining the Image – Adding Detail
To add some definition to this image, I’ll make the following changes:
Contrast: +50
Shadows: +15
Texture: +50
Clarity: +25
Dehaze: +5
This is the final image. Let’s take a look.
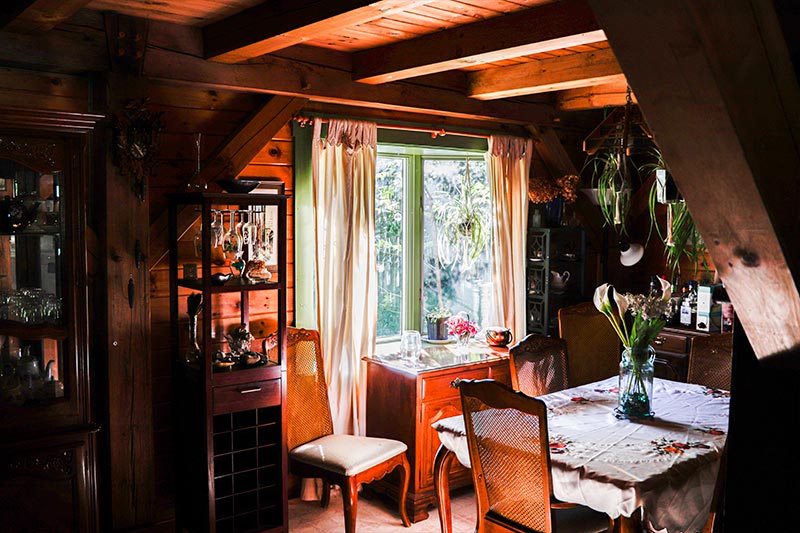
It doesn’t look terribly different than the photo directly above, but if you look at the woodwork in the house, you’ll much more detail in this version. So here’s the final Basic panel, with histogram included.
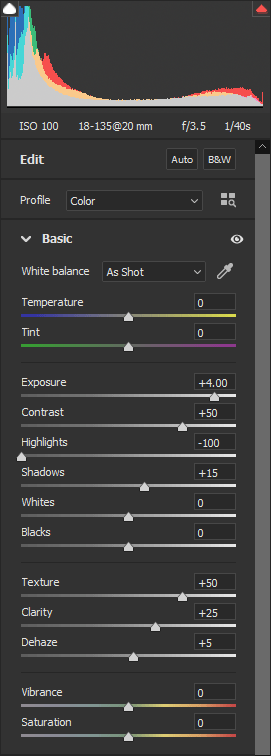
And that’s about it. I’d say the final photo looks great. If you’ve got any question or suggestions, please leave them below. I hope this Camera Raw exposure correction tutorial has helped you in some way. Thanks!
Leave a Reply