Oftentimes, photographers and graphic designers find it necessary to add certain bits of information to their photos or graphics in the way of metadata. Examples of metadata might include a copyright, address, email address, phone number, etc… There are many pieces of data someone can attach to an image, given they’re using a piece of software that allows them this functionality. It just so happens that Adobe Bridge is one of those pieces of software.
In this post, I’m going to discuss how anyone using Adobe Bridge can easily add metadata to their images. I’ll go over exactly how they can accomplish this task by editing one image at a time as well as how they can edit multiple images at once. Also, I’ll talk about how to create a template that will allow for a speedy edit or addition of metadata that can be used over and over again.
Introducing the Metadata Panel
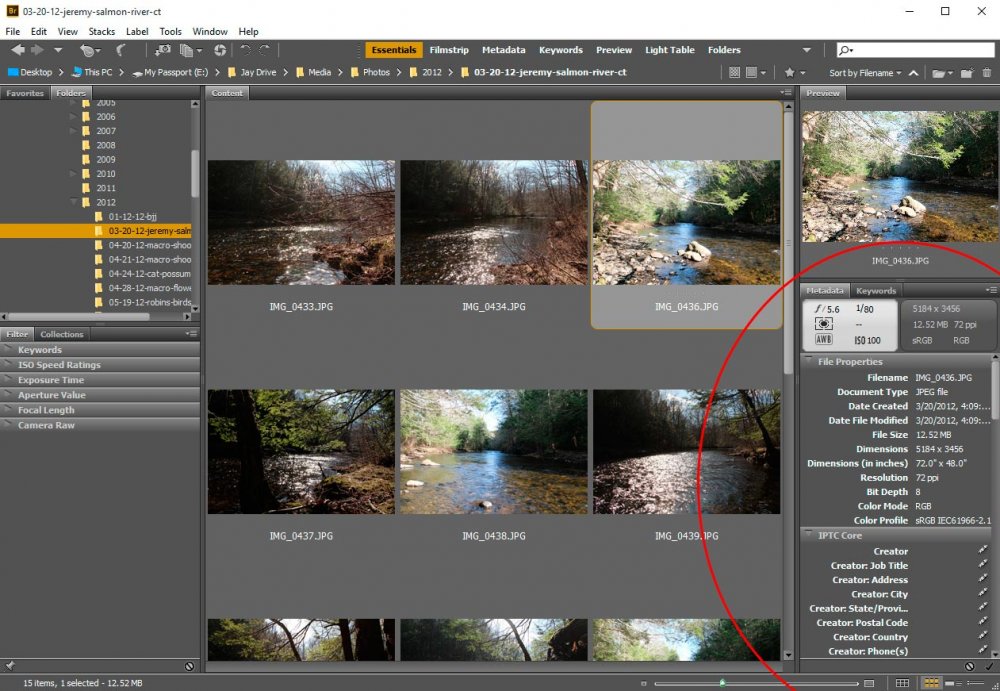
Since this post is about metadata, I think it might be helpful to show you exactly where the metadata panel in Bridge is located. If you take a look at the screenshot below, you’ll notice that I’ve got an area circled in red. The tab of the panel inside this circle is labeled “Metadata.” This is the area you’ll find all the “behind the scenes” information that’s attached to your images. In the case of my example photo gallery, my camera has already attached some information, such as the document type, the date the photo was taken, some specifics on how I was using the camera when I took the shot that’s currently selected in Bridge. If you open your own photo in Bridge, you’ll see some interesting information in the metadata panel.
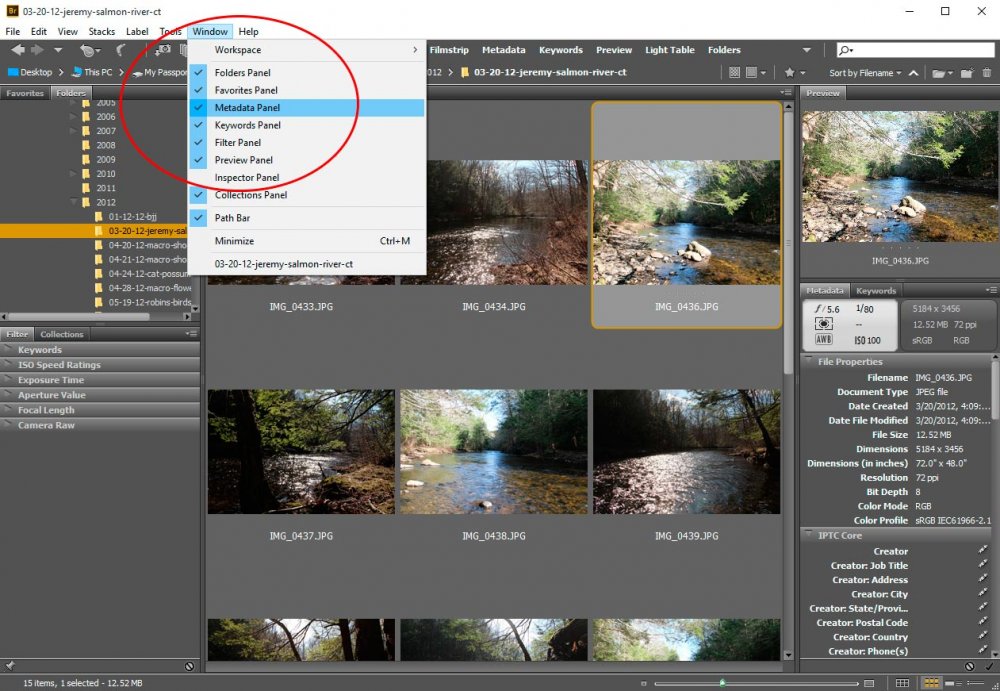
If you don’t see the metadata panel anywhere in your install of Bridge, you may have to enable viewing of it by heading up to the “Window” menu and then selecting “Metadata Panel.” This will ensure the panel appears for you.
Adding Metadata to a Single Image
If you click through the headings inside the metadata panel, you’ll quickly find that you can add oodles of information that describes each of your images. In my opinion, you’d be crazy to fill in each one of these fields. What isn’t crazy is to pick and choose through the areas that are most important to you. In this post, I’m going to focus primarily on the “IPTC Core” section because many of the fields contained in this area are relevant to the information I care about, such as my name (creator), email address, copyright and a few others.
To add information to a single image, all I’m going to do is click on the image I’m interested in. After that, I’m going to click to the right of the field title that I’d like to describe. In my example below, I’m going to add my name as a value in the “Creator” field.
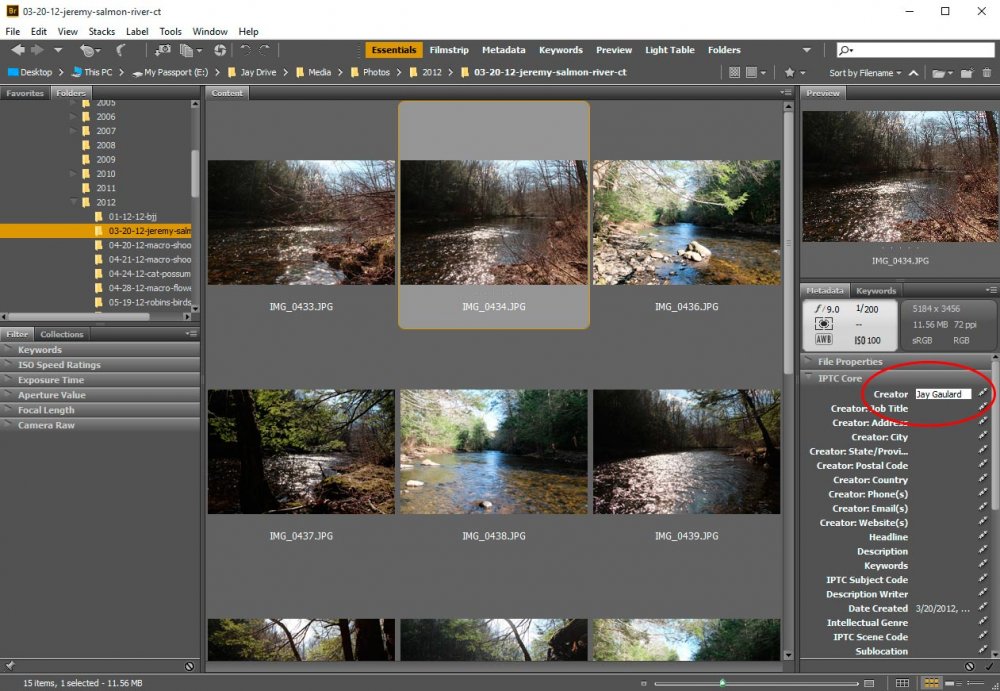
As you can see in the screenshot above, the area to the right of the “Creator” title has turned white. That changes the minute I click in that area. The white indicates that it’s an editable field. After it turned white, I simply typed in my name. If I wanted to go ahead and add more information describing me or the photo, I would continue clicking in each field and then added what I saw fit.
Adding Metadata to Multiple Images
To add metadata to multiple images simultaneously, all I would need to do is to follow the instructions I just offered above, but to select multiple images and then go about filling in my desired fields. To select multiple images, I click on the first image and then hold down the “Shift” key on my keyboard. After that (while holding down shift), I select the last image in my row of images. If I have staggered or random images I’d like to select, I would just click the first one and then hold down “Ctrl.” After that, I would go ahead and select all the images I’m interested in adding metadata information to.
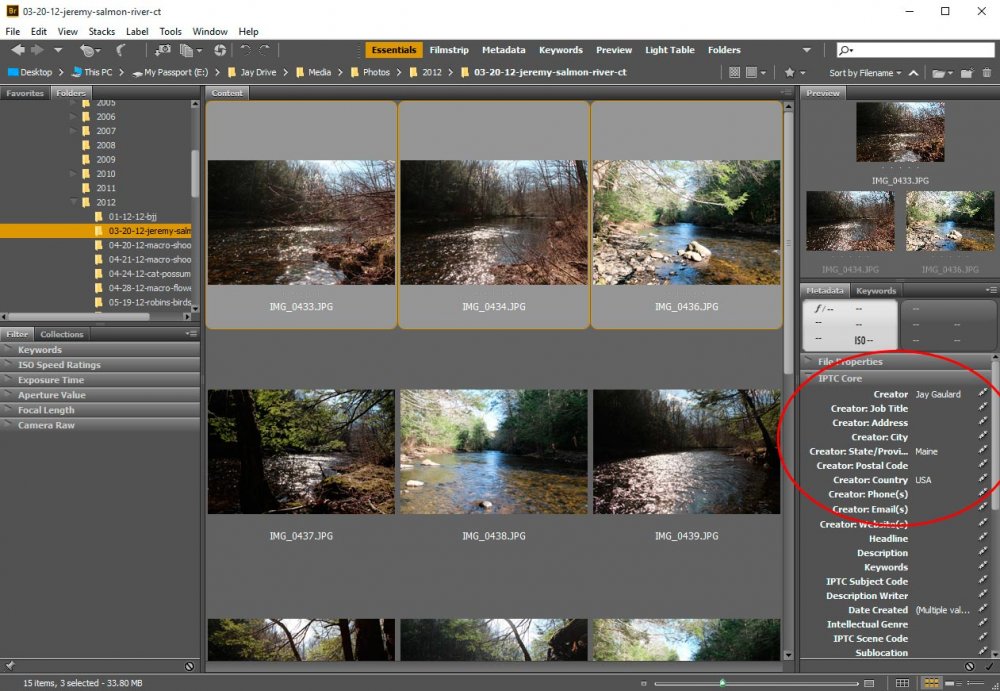
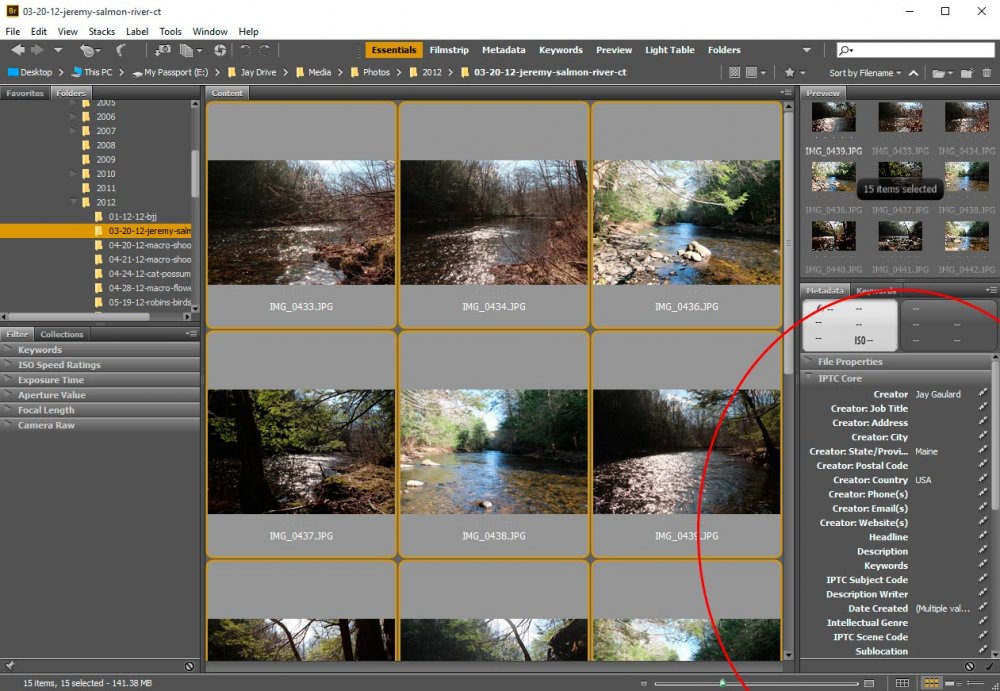
In the screenshot above, you can see that I filled in the “Creator,” “State” and “Country” fields.
Creating a Metadata Template
As you might imagine, for many of your images, you’ve probably got the same exact information you’d like to add for almost every shoot you take. For instance, your name most likely won’t change anytime soon. Neither will your website address or email address. Or your copyright. So, if you’re going to be adding each of these bits of information as metadata to all your photos every time you open Bridge, it would certainly be a time (and headache) saver to create a template with all this information already filled in. With a template, you can apply the repetitive data with just a few clicks.
To create a metadata template, head up to the “Tools” menu and click on “Create Metadata Template.”
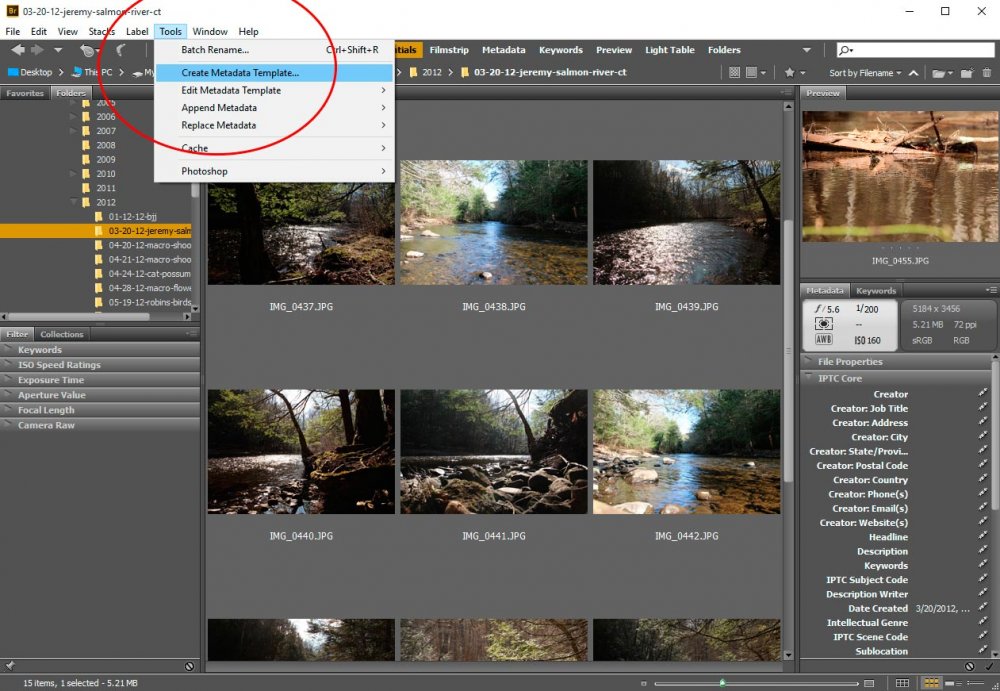
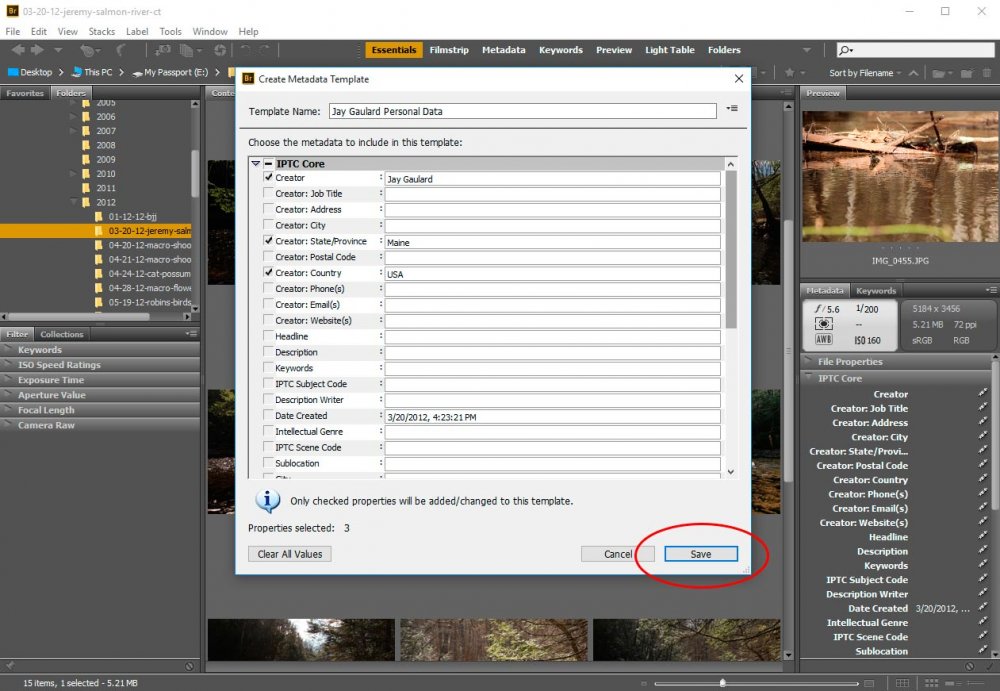
Once you do that, you’ll see the “Create Metadata Template” dialog box appear.
I know this is fairly self-explanatory, but I think it’s wise to go over it. The first thing you need to do inside this box is to name your template. This will be the name you choose from in the next section of this post, when you would like to apply the data contained in the template to your images. After you give your template a name, you’d go ahead and fill in all the information the same way you would as if you were adding it to one image at a time, like we did above. Once you’re finished with that, go ahead and click “Save” to save your template inside Bridge for later use.
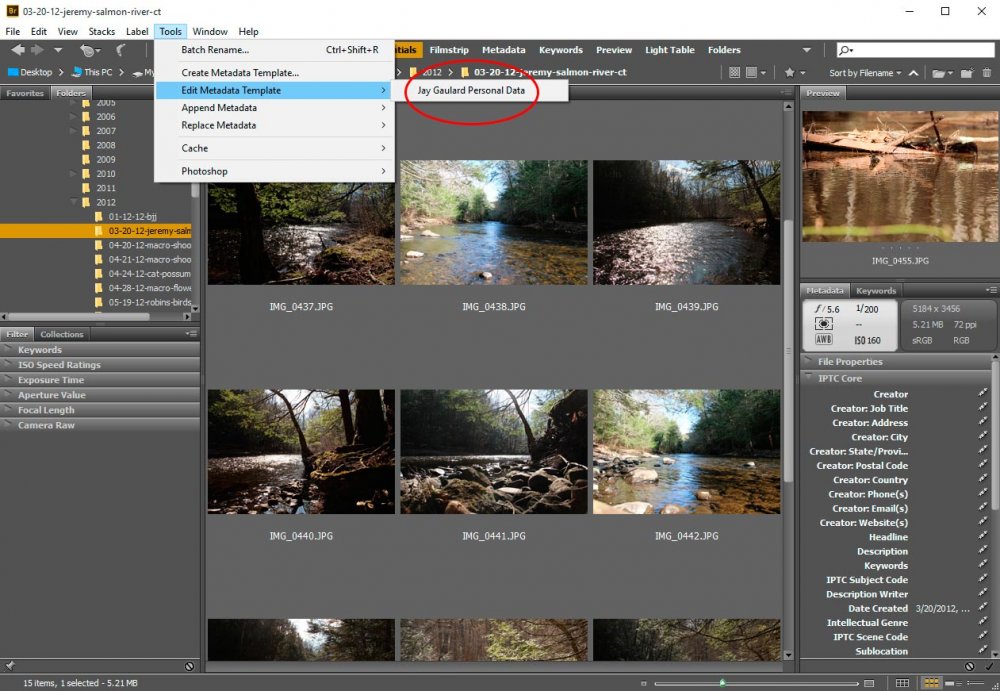
Now that I’ve created a template as an example, I can go back up to the “Tools” menu and roll over “Edit Metadata Template.” When I do this, I see the “Jay Gaulard Data” template that I just created. Now it’s time to apply this template full of data to my desired images.
Applying a Metadata Template to Images
With our new template created, we can apply the information contained in it to as many images as we wish. If we want to apply it to only one image, we would simply select that one image. If we wanted to apply it to some or all images, we can select those images the same way I described earlier in this post. I’ll give you a quick keyboard shortcut for selecting all images though – press “Ctrl+A” and all your images will be selected, which might help out if you’ve got tons of them. You can also select all your images by going up to the “Edit” menu and clicking on “Select All.”
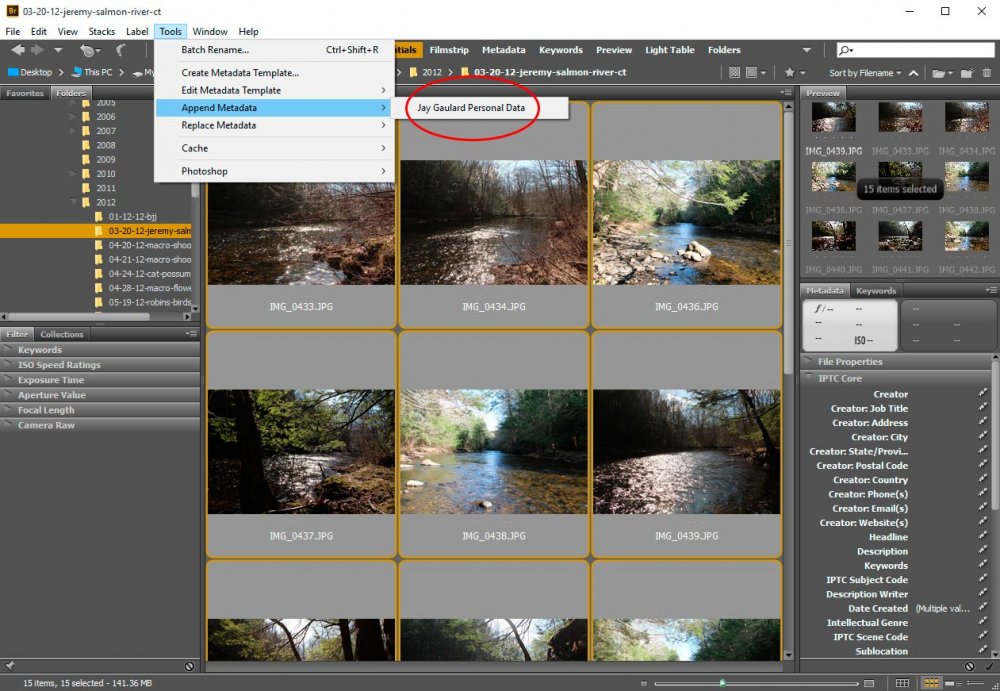
Once we’ve got our images selected, we can apply our metadata to them in two different ways. They both have identical results, so the method is really up to you. The first method is to head up to the “Tools” menu and roll over either “Append Metadata” or “Replace Metadata.” From there, you’ll see the template name. Just click on it to apply the data.
The next method of adding metadata to our images is to use the fly-out that’s located at the right of the metadata panel. If we click this area, we’ll see the same options with the same available template(s).
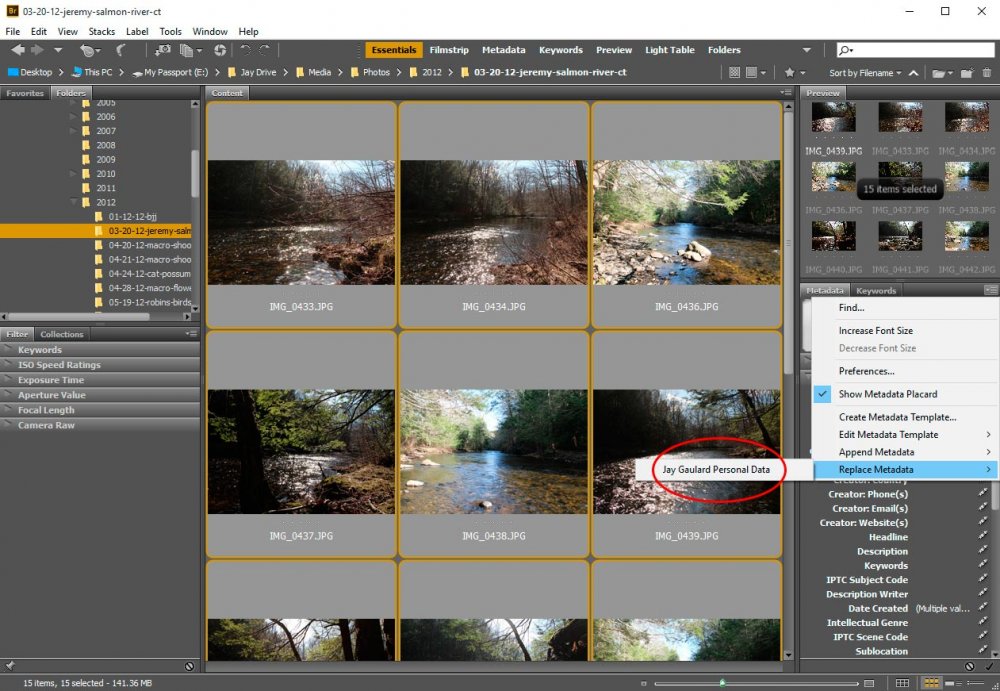
As you may have noticed, we’ve got two options for adding data in both of these locations. The “Append Metadata” option merely adds the data to empty fields. The “Replace Metadata” actually replaces data if those fields are already occupied.
In my example, once I click the name of my template from either of these locations, I’ll experience a small delay that’s based on the number of photos that are being edited and then I’ll see the data being applied. I can look at the fields in the metadata panel to confirm this.
Leave a Reply