Brightening shadows in a photograph during post-processing has got to be one of the most rewarding tasks because the change can be so dramatic. Depending on the image, dark shadows that look completely like silhouettes can be transformed into objects with detail and clarity. It’s amazing, really.
In today’s post, I’ll be sharing the simple steps necessary to take a dark and dreary photo that’s got shadows that are dismal to the eye to a place where even the most discerning of photographers can show some appreciation. I’ll be using Adobe Camera Raw to complete this task. Luckily, there are only a few easy steps.
Open Photo in Camera Raw
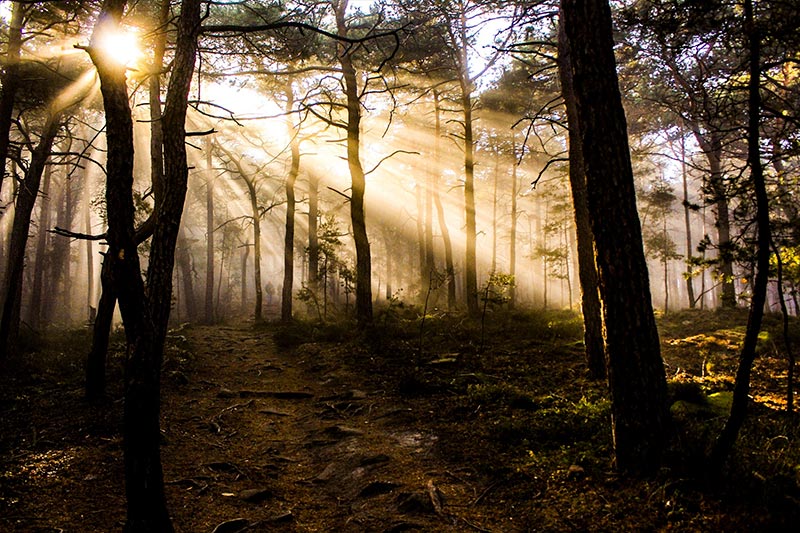
To start off, I’ll open my sample photo into Camera Raw. I downloaded this image from Pexels, a free stock photography website. It took a few tries to locate a suitable image to work with because, while many of the images had shadows I liked, they (the images) were already very compressed. They didn’t have the stored data I needed to show you a stunning transformation. The photo I ultimately decided on is great though. You’ll see a big change.
Also, just to let you know, if you take photos and find that you need to brighten some shadows, it’s much easier to do this to the photo before you compress and save it in any way. The goal is to have as much of the original data to work with as possible. Shooting in RAW format would be excellent for something like this. RAW files have tons of data in them. They’re huge though; that’s the only downside.
Okay, let me show you the original image. This is what I downloaded from Pexels.

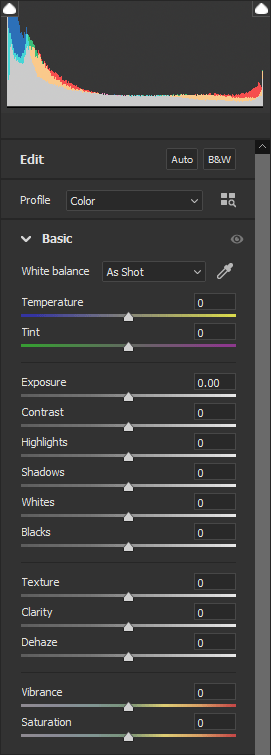
I’ve launched this photo into Adobe Camera Raw. Let’s take a look at the Basic panel, the place I’ll be making the changes.

For this tutorial, I’ll only be focusing on two things. First, the Shadows slider, which is now sitting in its default center position, and second, the histogram up top, above the Basic panel. As you can see, all the data is pushed to one side. My goal is to smooth that data out across the spectrum as much as possible.
Brightening the Shadows
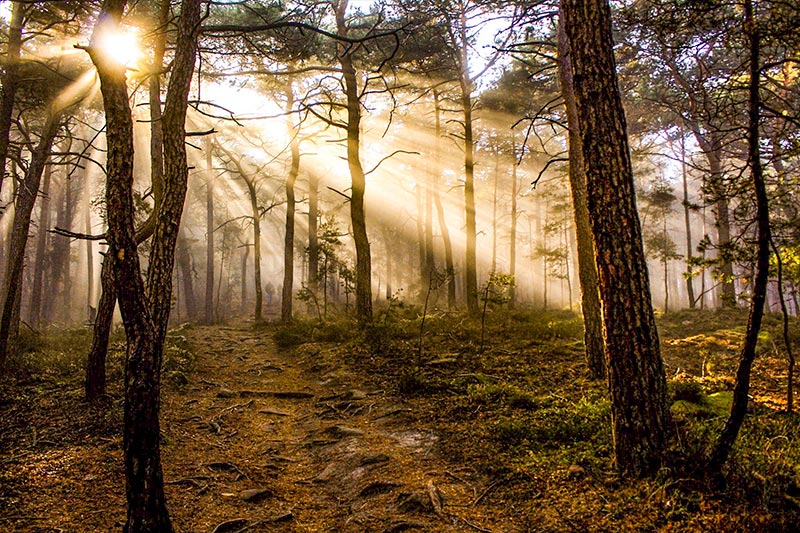
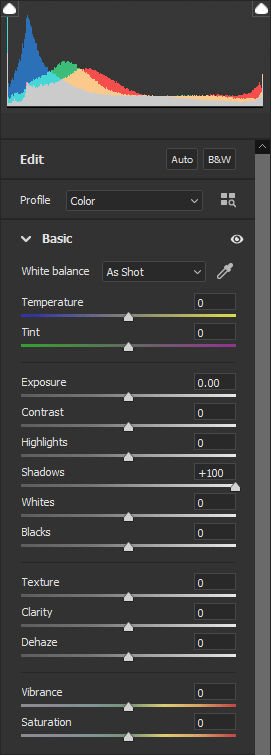
In this demonstration, I’ll limit my actions to only one step. I’m going to push the Shadows slider all the way to the right so the value is +100. I think doing this will prove my point. The photo will look so much better and the data in the histogram will be smoothed across the spectrum. Here’s the corrected image.

Compare the backsides of the trees in the two photos. Big difference.
Now take a look at the Basic panel. Notice the Shadows slider and the histogram.

I could easily add some more detail and definition to the rest of the image if I wanted to, but I’ll leave this one here. I don’t need to do anything else. My point was made. The Shadows slider in Adobe Camera Raw is extremely powerful, so the next time you’ve got some dark areas to lighten up, follow these instructions and get to work.
If you have any questions, suggestions, or tips to add, please contribute down below. Thanks!
Leave a Reply