• Skip to primary navigation
  • Skip to main content
  • Skip to primary sidebar
  • Skip to footer
  • Skip to footer navigation
  • Home
  • Facebook
  • Instagram
  • YouTube
Gaulard.com Logo

Gaulard.com

For Photographers, Designers, & Developers

  • About
  • Blog
    • Digital
      • Bridge
      • Camera Raw
      • Lightroom
      • Photography
      • Photoshop
      • Video
    • Business
    • Web
      • Blogging
      • Coding
      • Hosting
      • SEO
      • XenForo
      • Windows
      • WordPress
  • Forum
  • Contact
Home » Blog » Web » How To Enable God Mode in Windows 10

How To Enable God Mode in Windows 10

January 5, 2023By Jay GaulardLeave a Comment|Posted Under: Web Tagged With: Windows

Do you know where to go in Windows 10 if you wanted to defragment and optimize you hard drives? What about if you wanted to view some event logs? Okay, how about changing your time zone or viewing your devices and printers? If you do, that means you are very familiar with Windows. The funny thing is, I just listed a mere fraction of the areas in Windows that you can access via one place. And that place is a folder with “God” like capabilities. In all, this folder is an all-in-one location for accessing and manipulating 226 controls on any computer running Windows 10. And many previous versions of Windows, for that matter.

Would you like to follow me on social media? Facebook • Instagram • Twitter

In today’s post, I’m going to explain exactly how you can enable what’s commonly referred to as God Mode on a Windows 10 machine. This is probably going to be the shortest post I’ve ever written because the entire process only consists of a few steps.

Finding the God Mode Code​

If you do a quick internet search for something like “Windows 10 God Mode,” you’ll come across an endless number of web pages explaining how to accomplish the same thing I’m explaining right now. On all those pages, you’ll only need one small chunk of information. It’s a code and it looks just like this:

GodMode.{ED7BA470-8E54-465E-825C-99712043E01C}

Remember where that code is. You’ll need to copy and paste it in just a moment.

After finding this code (which you just did), you can continue on with the instructions below.

Create a Folder On Your Desktop​

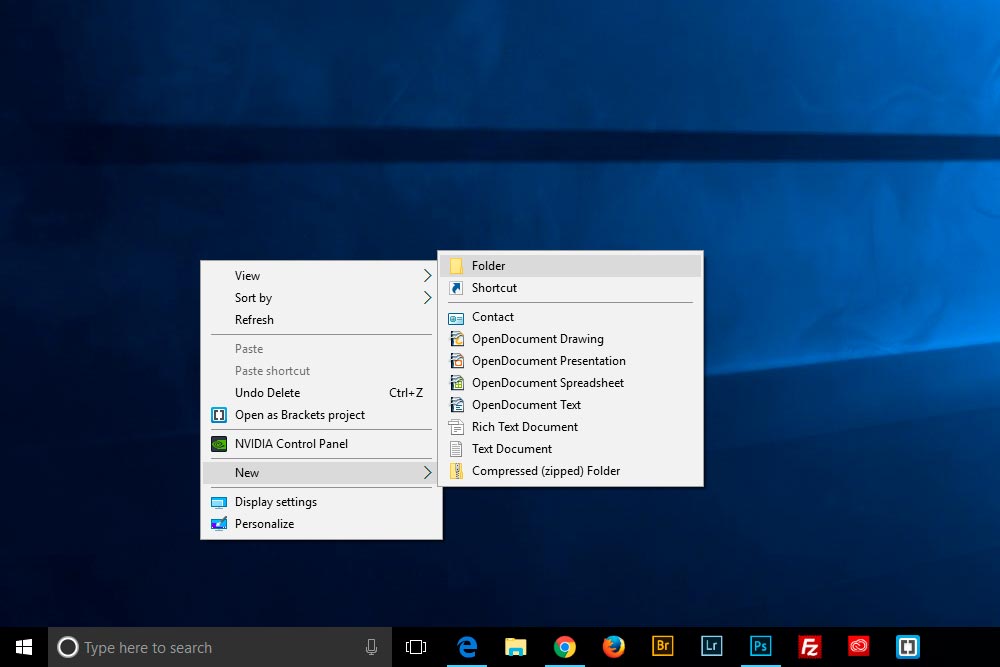
Copy the code above by highlighting it and pressing Ctrl+C on your keyboard. Then, head on over to your Desktop and right click anywhere in an empty space. When the menu appears, click the New > Folder menu item.
See also  XenForo: How to Remove Member & Attachment Links
Create New Folder in Windows

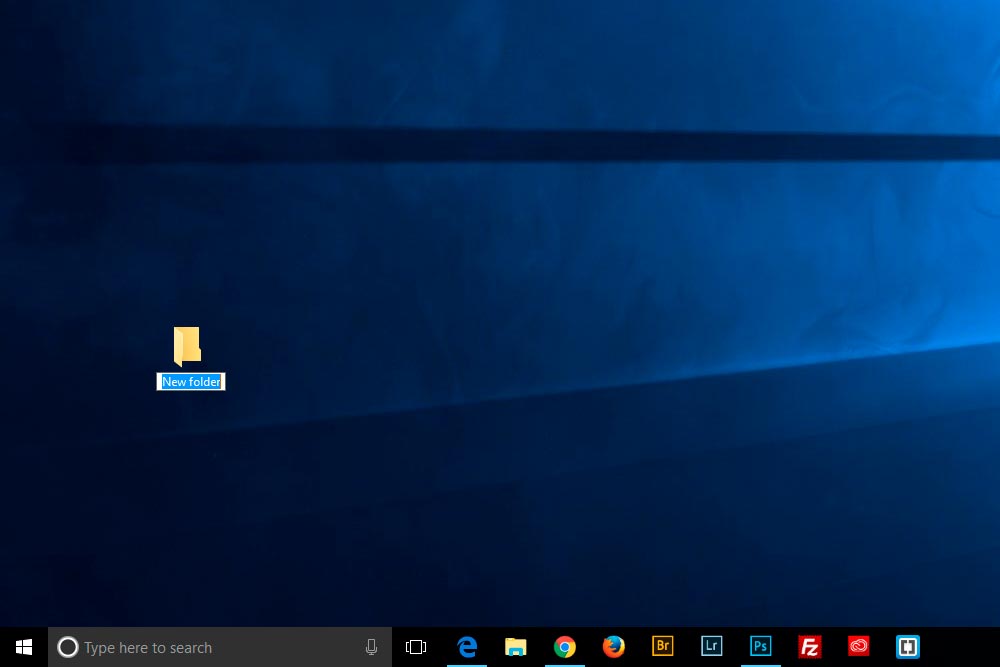
When the folder appears, you’ll notice that the name is highlighted in blue and is waiting for you to rename it to something that makes more sense than New Folder.
Created Folder
Created Folder

Rename the Folder​

Since you already copied the God Mode code, you can immediately use the keyboard shortcut of Ctrl+V to paste that code in as the new name of the folder you just made. When it’s pasted, press Enter on your keyboard to execute the new name. When you do that, the folder should change appearance and look like the icon below.
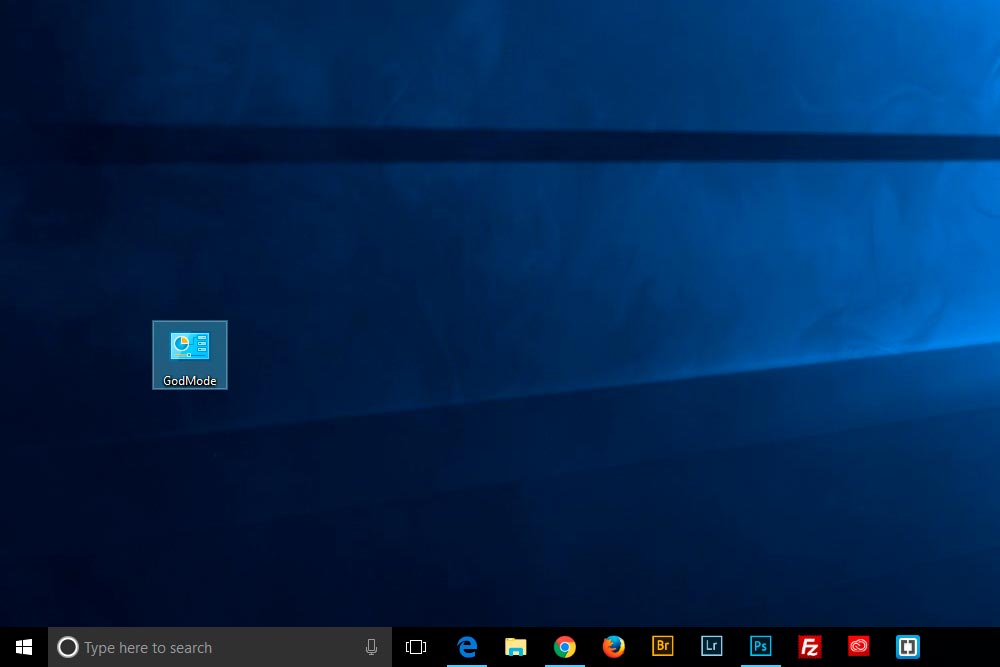
Windows God Mode Icon on Desktop

That’s it. You just made a shortcut to an area that controls tons of things. Let’s take a look at some of them.

What’s Inside the God Mode Folder?​

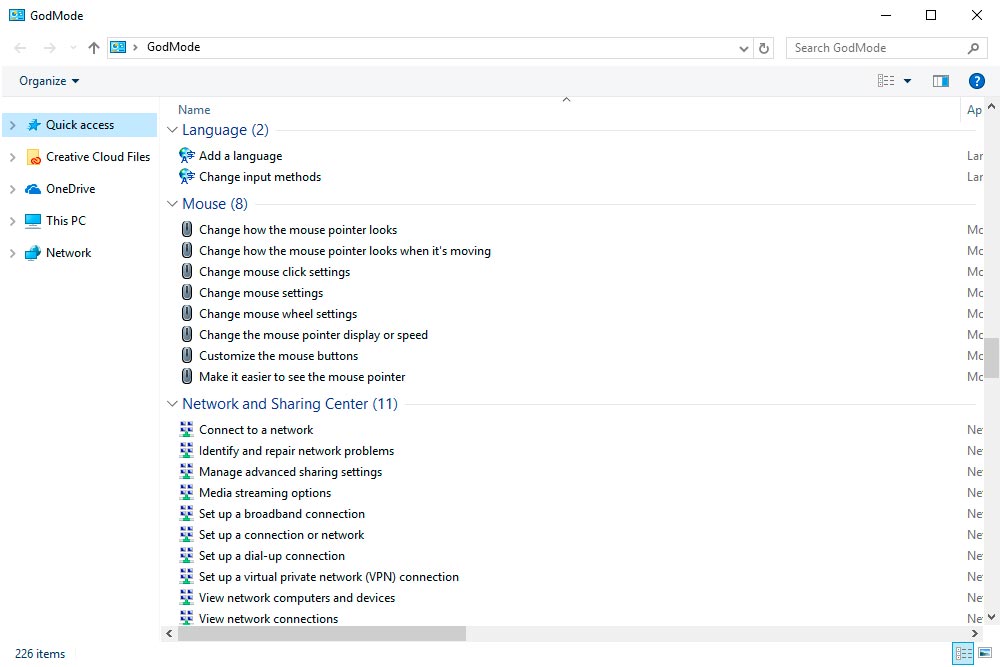
Double-click the new icon to see what’s inside. I’ll give you a few screenshots and let you read what’s in the folder yourself if you don’t want to do that. Remember, you can access 226 areas from one central location now, so this is pretty huge.
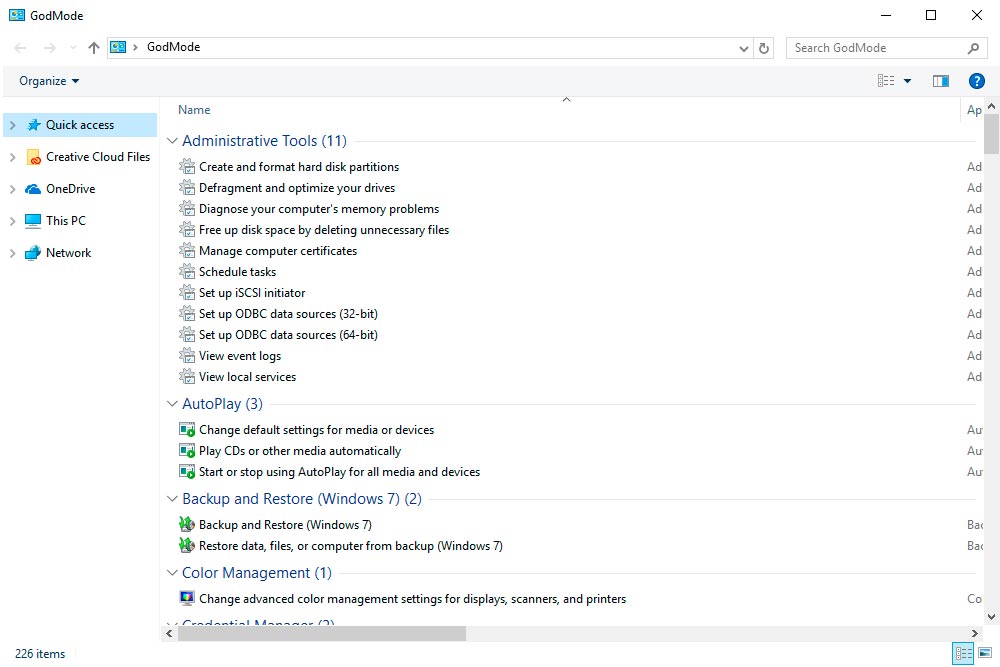
Admin Tools
Admin Tools
Display
Display
Language
Language

There are three screenshots. I had to stop because I could go on all night. Give creating this folder and try and look around for yourself. You may have just found a real time saver.

I hope I clearly explained how to create and access the God Mode folder in Windows 10. If you have any questions or concerns regarding this post, please leave them below. Thanks for reading!

Related posts:

  1. How to Adjust the Mouse Click & Scroll Settings in Windows 10
  2. How to Change XenForo Heading Colors​
  3. How to Use Manual Mode for Video in Changing Light
  4. Using Sublime Text
See also  HTML5 Semantics

Reader Interactions

Leave a Reply Cancel reply

Your email address will not be published. Required fields are marked *

Primary Sidebar

Connect With Me

  • Email
  • Facebook
  • Instagram
  • Twitter
  • YouTube

Blog Categories

  • Business (1)
  • Digital (42)
  • Web (32)

Tags

Blogging Bridge Camera Raw Coding Hosting Lightroom Photography Photoshop SEO Video Windows WordPress XenForo

Recent Blog Posts

  • Photoshop Tools Panel & Options Bar Features
  • How to Expand & Collapse Panels in Photoshop
  • How to Group, Dock, Undock, & Hide Panels in Photoshop
  • How To Adjust a Camera Diopter
  • How Can I Set Up Lighting For Great Studio Portrait Photographs?

Most Popular Blog Posts

Recent Comments

  • Jody on How To Adjust a Camera Diopter
  • Jay Gaulard on How to Set Electronic Level on Canon T6i (or Any Rebel Camera)
  • Wendy on How to Set Electronic Level on Canon T6i (or Any Rebel Camera)
  • Kody on Technical SEO Case Study: Why Do Website Rankings Keep Dropping?
  • Jay Gaulard on How to Adjust the Mouse Click & Scroll Settings in Windows 10

Footer

About Me

I'm a guy who likes to build things. I'm not a professional and I'm not an agency. I don't charge people thousands of dollars a month to do something they can do themselves. My primary goal is to help people build things too. And beleive me, I've got a long history of helping people.
Read More

Contact Me

Have you finished exploring my website? Would you like to get in touch? Please do! I love meeting new people. You can also follow me on: Facebook Instagram YouTube

Posts by Email

Would you like to receive my most recent blog posts delivered right to your email box? If so, simply type your email address below and click the button.

Copyright © 2023

  • Home
  • About
  • Blog
  • Privacy & Terms
  • Sitemap
  • XML Sitemap
  • HTML Sitemap
  • Write for Us