There are a few different methods for enlarging and shrinking the view of an image in Adobe Photoshop. Each one is super simple to use. In today’s post, I’ll walk you through all of the different options that I know of. If you’re aware of more, then please share them down below. I, and everyone else, would appreciate it.
Type in Percentage
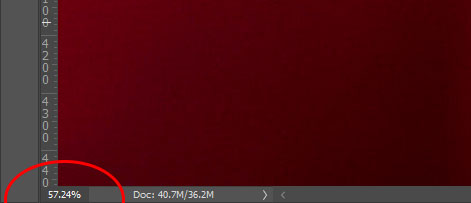
First, the easiest. If you open a picture in Photoshop, take a look down in the lower left corner of the application for a number before the percent symbol. In my case, the document I have opened is being viewed at 57.24% of it’s entire size.

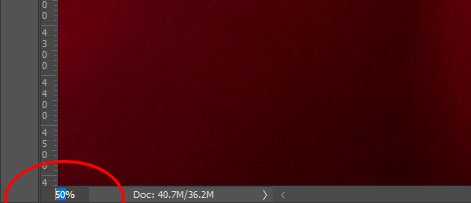
If I were to click right on that percentage number, I can edit it. Click to activate, overwrite what’s there, and then press the Enter button on your keyboard. You should see the image resize itself in the workspace. I just did this and resized the image I’ve got open to 50%.

Menu Item & Keyboard Shortcuts
Another method for zooming in and out of a document is to use the menu items at the top of Photoshop. If you click View > Zoom In or View > Zoom Out, you’ll be able to enlarge or reduce the visible area of your file. Also, you can just as easily use the keyboard shortcuts for this. These shortcuts are seen to the right of the menu items I just described. For Windows, use Ctrl++ and Ctrl+- to grow and reduce the view. For Mac, use Command++ and Command+-.

Navigator Panel
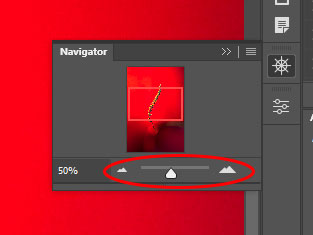
In general, people don’t really use this option because it’s so slow and cumbersome, but it’s there, so I thought I’d show it to you. If you open up the Navigator panel (Window > Navigator), you’ll see your image inside of it. It’s a micro sized image, but image nonetheless.
To grow and shrink the view of your file, simply click and drag the small slider to the right and the left.

You may also click on either of those triangles on the left and right to accomplish the same thing. And beyond that, you can type in the percentage that you’d like to see, just as you did in the option above. So basically, this panel is very powerful.
One final word about the Navigator panel: at any time, you can click and drag the small image thumbnail that’s inside the panel to navigate around your image. This is especially helpful if you’ve got a very large image that’s zoom in quite a bit. It’s easy to get lost in such things, so that panel can help a lot.
Zoom Tool & Scrubby Zoom
Finally, if you look over at your toolbar on the left (or wherever you have it), you’ll see a small magnifying glass. That’s the Zoom Tool.

If you click that tool and then click on your image directly, you’ll see it enlarge. If you then hold down the Alt key and click, you’ll see it shrink. Notice what’s inside the magnifying glass to see which way it’ll go. When not holding the Alt key, you should see a +. When holding that key, you should see a -.
While the Zoom Tool is active, you’ll see an option up in the options bar that says Scrubby Zoom.

When that’s checked, you’ll be able to click and drag to the left and the right, directly on your image, to shrink it and grow it.
To the right of the Scrubby Zoom option, you’ll see three buttons. They are 100%, Fit Screen, and Fill Screen. Click these to see what they do. They’re fairly obvious.
If you uncheck the Scrubby Zoom option, you have the ability to click and drag a square or a rectangle right on the area of the image you’d like to enlarge. Wherever you drag, that’ll be how large the image grows. It’s a very cool option to use. While you’re doing all of this, you can always check the percentage of zoom you’ve got by looking at the figure down in the lower left corner. The most you can zoom in is 12,800%. That’s pretty big.
Leave a Reply