I remember back when I first began using Adobe Photoshop. One of the very first things I noticed in the workspace was the Color Picker. I didn’t know it was called that back then, but I do now. The job of the Color Picker is to dictate which color is used in an image in any way the editor (you) wants to use it. The Color Picker can contain two colors at a time, the foreground color and the background color. When you open your application initially, these two “chips” will be set to black and white. As you use Photoshop and change these colors, they’ll stay to what you changed them to last. Let me show you the tool I’m referring to. It’s located at the bottom of the toolbar.

If you look at those two chips, you’ll notice a small 90° arrow to the upper right of them. If you click those arrows, the chips will reverse.
In today’s post, I’d like to discuss how you can sample a color to load it into the Color Picker. There are many reasons you may want to do this. Perhaps you’d like to match a color that’s already contained in an image or graphic, perhaps you’d like to choose a color for a font or a shape from an existing image, perhaps you’d like to see the RGB or CMYK values of a color in your image to use elsewhere. There’s no shortage of reasons and as you use Photoshop more and more, you’ll find yourself taking advantage of the Color Picker quite frequently.
Off the top of my head, there are two methods for sampling a color in Photoshop. First is to click right on the foreground color chip in the Color Picker. When you do this, you’ll see the Color Picker palette open up.
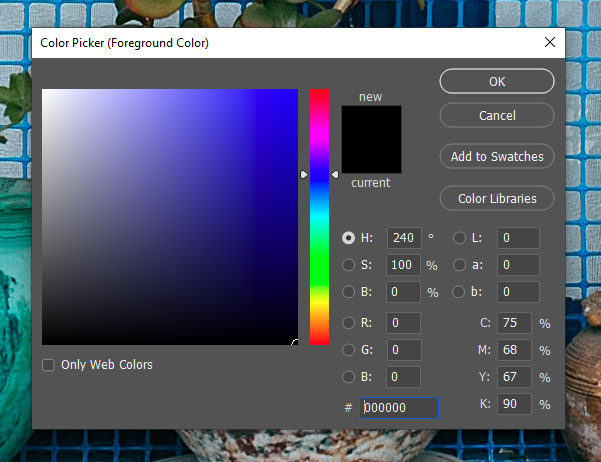
You’ll also notice that your mouse pointer turns into an eyedropper. If you click on anything in your image with that eyedropper, you’ll see that color sampled. The data that’s contained inside of the Color Picker will change. For instance, you’ll see new values for HSB, RGB, LAB, HEX, and CMYK. These values are extremely valuable when outputting images and photos for both web and print. Just remember, you’ll need your layer to be visible to sample a color from it, so be sure to click on the eye icon in the Layers panel to make it so.
Also, be aware that you can type in your own RGB and so forth values to set a particular color you’d like to work with. I used to own Pantone color chips that had conversions typed onto them, which was a great help when working with print. Computer monitors can be deceiving when it comes to accurate colors, so having actual physical colors was helpful. Here, take a look at some color conversion chips.
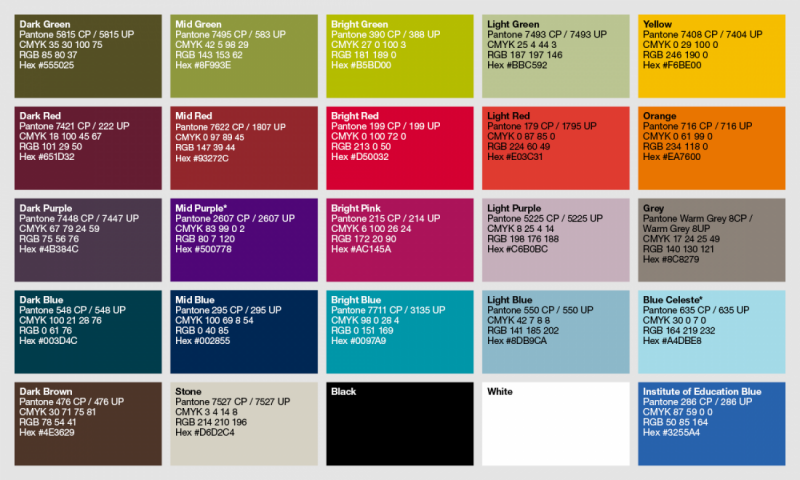
Thank you UCL.
I know this isn’t a post about the Color Picker, per se, but I do want to mention that you can switch over to web only colors if you click the Only Web Colors check box below the big color box. I’ll do that now to show you what happens. Web only colors are much more limited to their full spectrum counterparts.
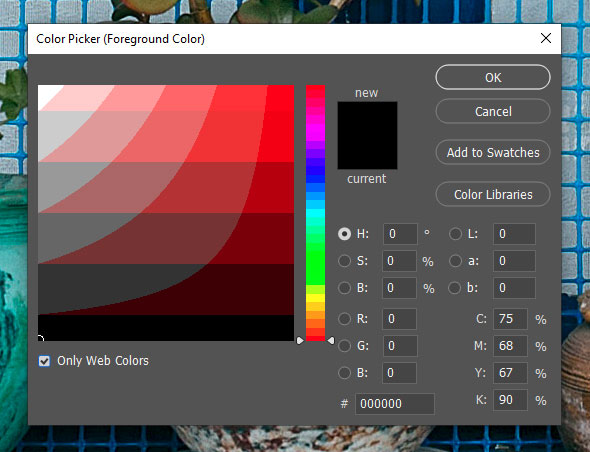
Okay, I’ll uncheck that to go back to the earlier view.
To demonstrate how the Color Picker works, I’ll open it and then click my mouse pointer on the aqua planter that’s to the left of it. Take a look at what happens.
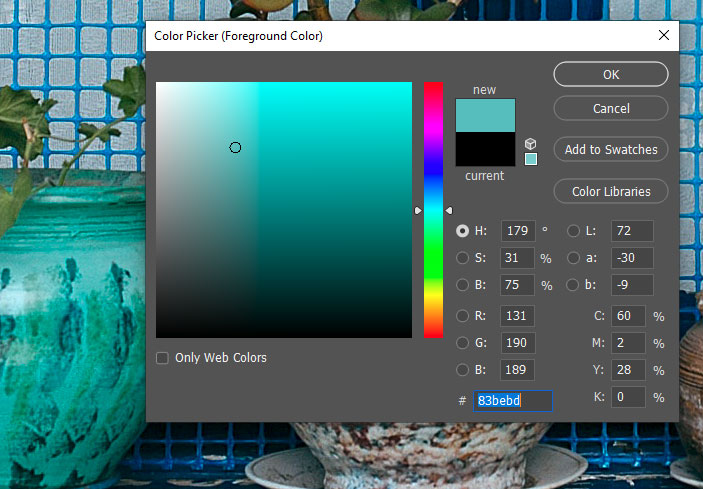
The color in the image that I clicked on became visible in the Color Picker. To accept this color and close out of this tool, I’ll simply click the OK button in the picker.
Another option for sampling a color is to use the Eyedropper Tool. This is contained in the toolbar on the left.

This tool works much like the Color Picker tool but it doesn’t open the Color Picker palette up. It just samples the color and then sets it as the foreground color.
Now, here’s the issue when finding and selecting tools from the left toolbar. Sometimes they’re hidden and can’t be found very easily. If you click the Eyedropper Tool and drag to the right, you’ll see other tools nested beneath it. These other tools include the Ruler Tool, Note Tool, and others. Here, take a look.
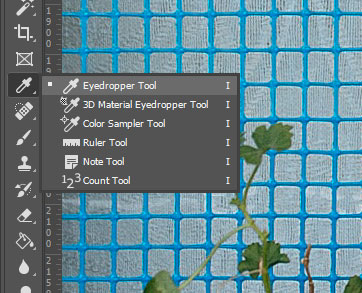
If I were to use the Ruler Tool, the Eyedropper Tool would become buried and hidden. Since I’m a forgetful person, I’d spend far too much time trying to find it again. A great tip for getting around this and locating tools that are nested under others is to click on the magnifying glass (Search) icon that’s located in the upper right corner of Photoshop. I’ll do this now and then type “Eyedropper” in the search box. Let’s see what comes up as a result.
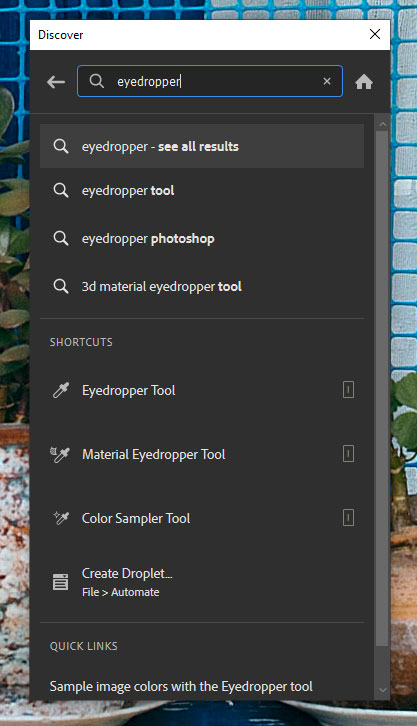
Inside the Discover palette are a bunch of results. Inside the Shortcuts section, the Eyedropper Tool can be found. If I were to click on that, that tool would be selected in the toolbar. Pretty cool.
Do you have another methods for sampling colors in Adobe Photoshop? If so, please let me know below. Thanks!
Leave a Reply