EmeraldHike
Member
- Joined
- May 10, 2021
- Messages
- 133
- Reaction Score
- 0
- Points
- 21
- #1
I see this question asked a lot and I'll do my best at answering it. The problem with it is that there are many answers that can be given. When it comes to editing photos and graphics in Adobe Photoshop, there are any number of empty spaces that may need to be filled. In this post, I'll tell you how to work through a few different alternatives. If you've got specific questions, please ask them down below and I'll try to answer them for you. I've got years of experience in Photoshop, so I may be able to help.
Okay, let's get going. I'm going to open an image inside of Photoshop by going to File > Open, selecting my file and then opening it. For today's tutorial, the photo will be of a loaf of bread.
Just to let you know, the quickest method for filling an empty space with this application is to use the Paint Bucket Tool. I can choose the color with which I'd like to fill and then use the tool to pour that color into the layer I'm working on.
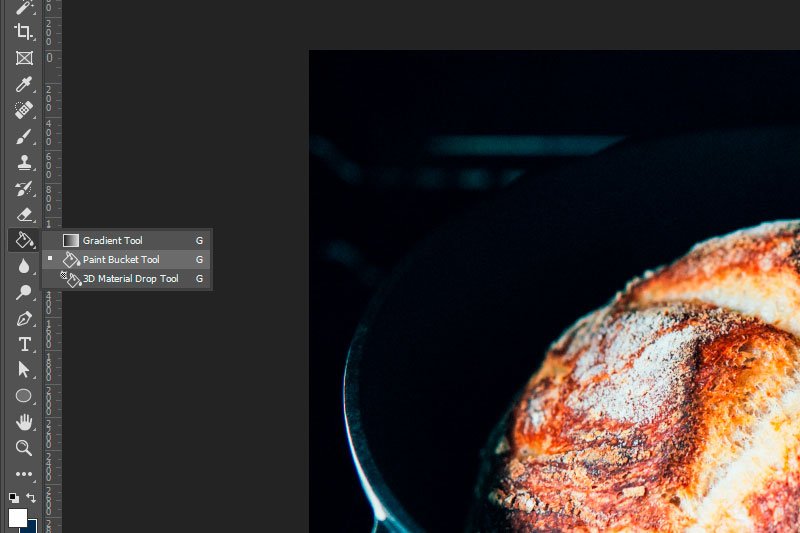
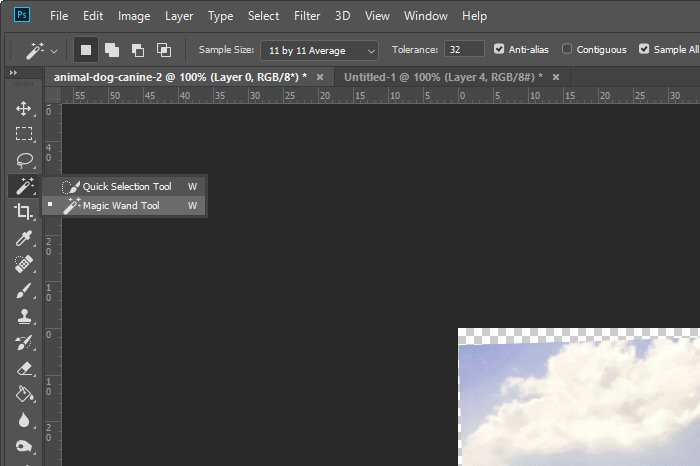
That's not very difficult. It's also not very realistic. Let's get to something more realistic. For that, I'll use the Magic Wand Tool. I'll select that tool from the left toolbar and then select something in the image I'd like to fill.
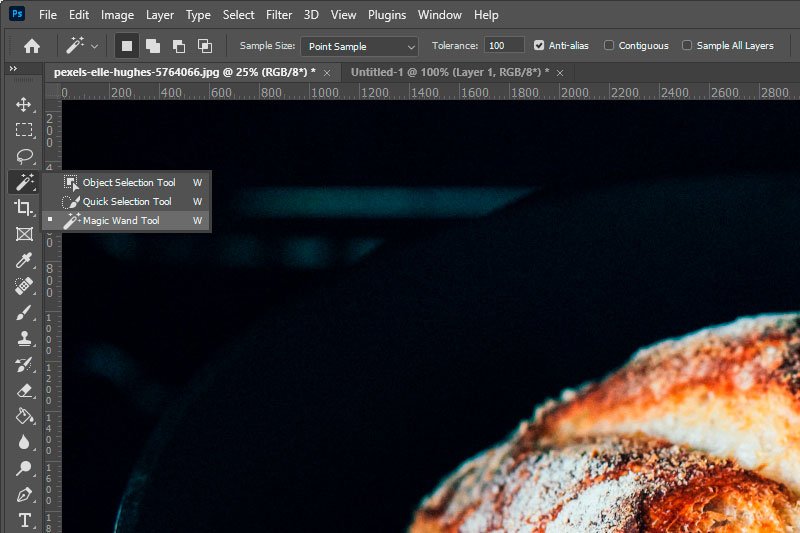
In this case, I want to make everything that's white in the picture, lime green. So first, I'll select the white parts by clicking on one of them just once with the Magic Wand Tool.
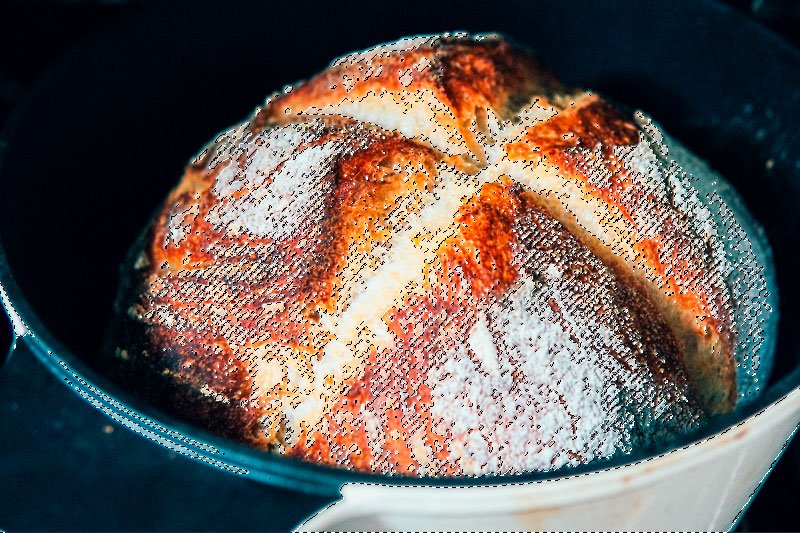
If you look closely at the above image, you'll see the marching ants. They march around the areas that are selected.
Now that I've got a selection, I can fill it with a color. By the way, if you've got an empty space, you can select that just as easily. I'll do that in the next example.
To fill the selection, I'll go to Edit > Fill.
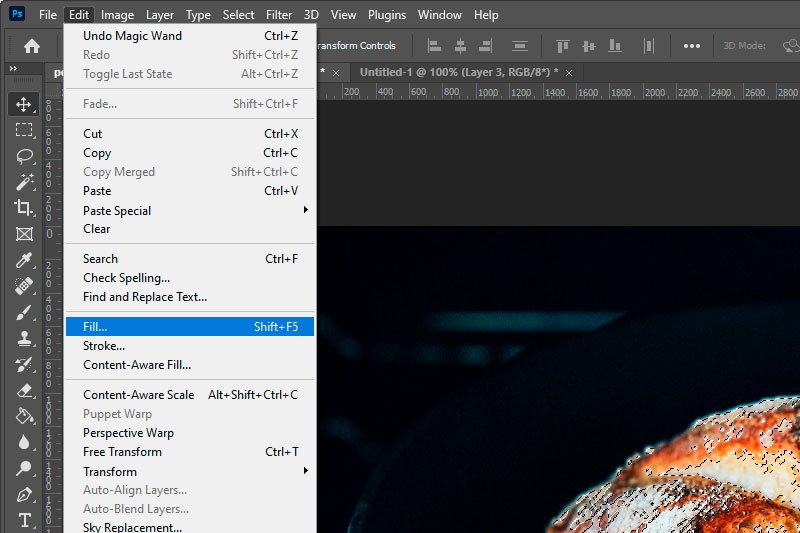
And then I'll choose Foreground Color from the top drop-down box that appears. I've already gone ahead and chosen the lime green color from the color picker.
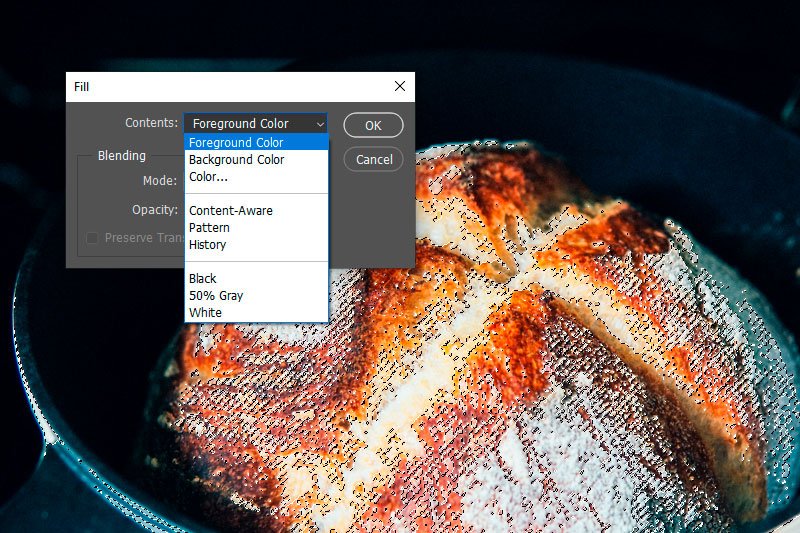
I'll click OK and anyplace there was a selection will be filled with green. Here's the result of that.
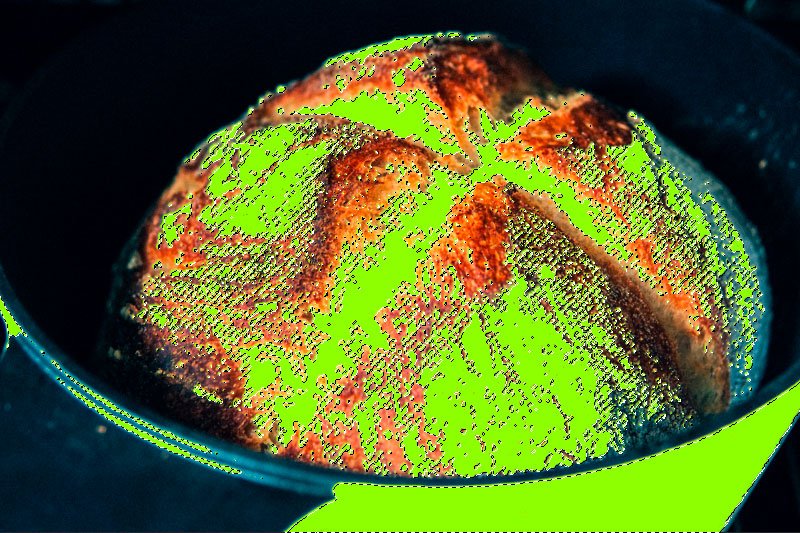
Again, this selection could have been just as easily an empty space. And mind you, when making selections in Photoshop, there are many different adjustments you can make to get the exact selection you'd like. That's an entirely different series of tutorials though. Making selections is an enormous topic.
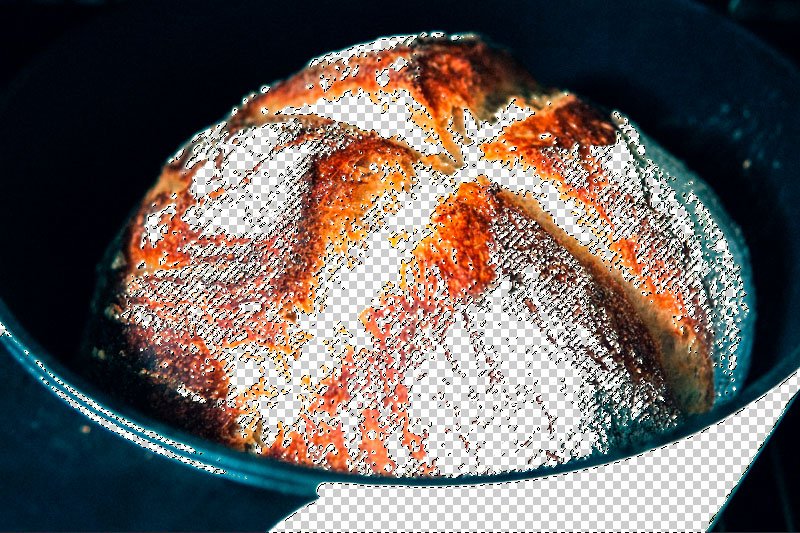
Let's get to something a little more exciting now. Before we do that though, I'd like to mention one creative method I've seen people use when wanting to fill an area. They go ahead and make a selection in a layer they're working on. Then, once the selection has been made, they press the Delete button on their keyboard. In order to do this, you may need to create a new layer, unlock the image layer you're working on (by clicking on the lock in the layer in the Layers panel), and then move that new layer beneath the image layer. You'll then have two layers and the one with the photo in it will be editable. Anyway, once that's done, press the Delete button and anything that's been selected will be deleted.
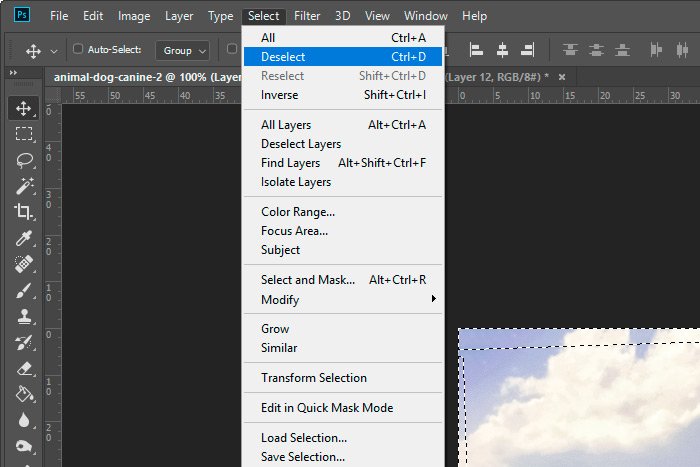
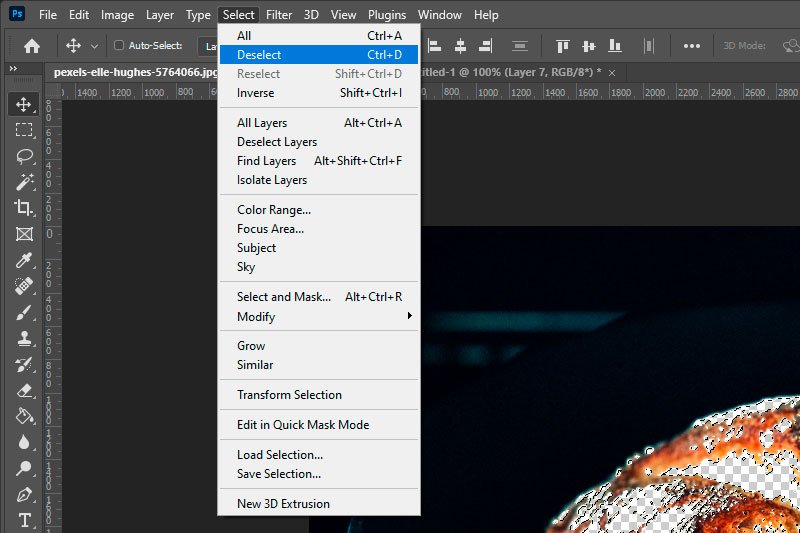
To deselect an area, go to the Select > Deselect option in the top menu.
Once you've got the selected area deleted, you can add a new layer beneath it that consists of anything you want. It can be another picture or a solid color or a gradient. Pretty much anything. The good part is that the empty area that the deleted selection left behind will be filled. In my example, I added a bottom layer that consists of a blue to black gradient. It's ugly, but it serves its purpose.
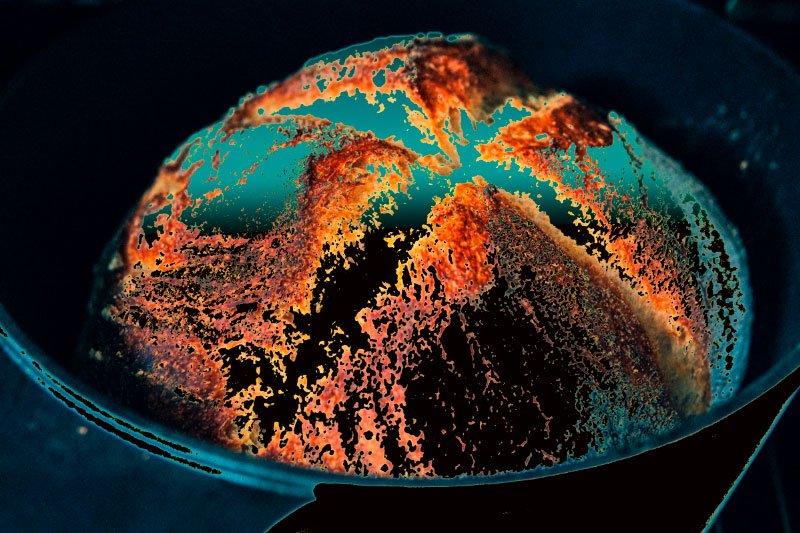
Just to let you know, I've only got two layers in the Layers panel. The top one is the original image layer and the bottom one is the gradient.
For my final example, I'm going to pretend that I pasted this image a bit crooked into an existing file that consisted of a layer with a white background. Here's what that looks like. This is actually what most of you will be working on...something like this.

Do you see how the upper left and right corners are slanted? I'd like to fill these empty areas, but I want to do it so the filled areas match the rest of the photo. For this, I'll need to take advantage of Photoshop's Content Aware technology.
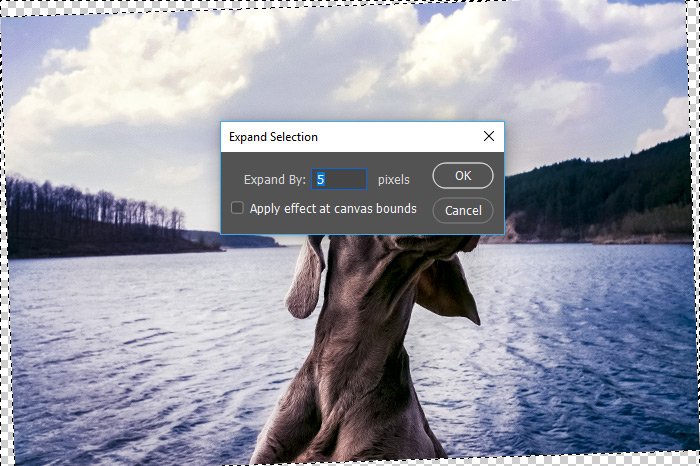
I'll make sure the top image layer is active in the Layers panel by clicking on that layer there. Then, I'll grab my Magic Wand Tool again and click in one of the empty corners. Doing this should select all of the corners.

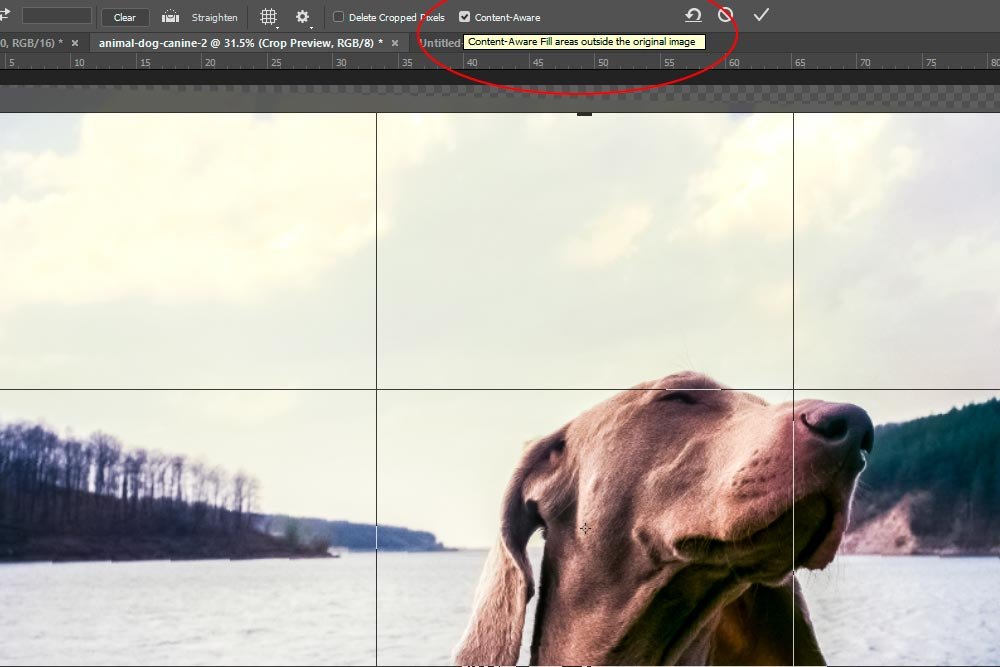
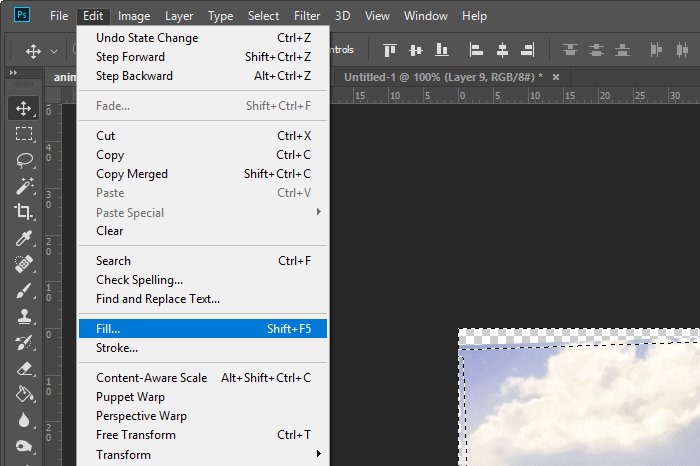
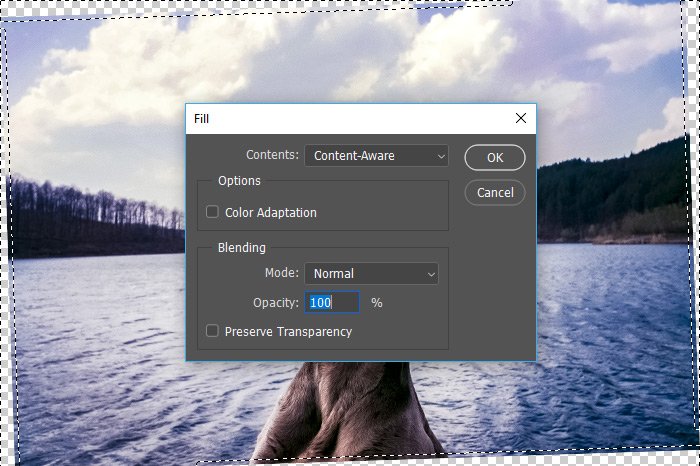
Once that's done, I'll go to the Edit > Fill menu option again, but this time, I'll choose Content-Aware from the drop-down.
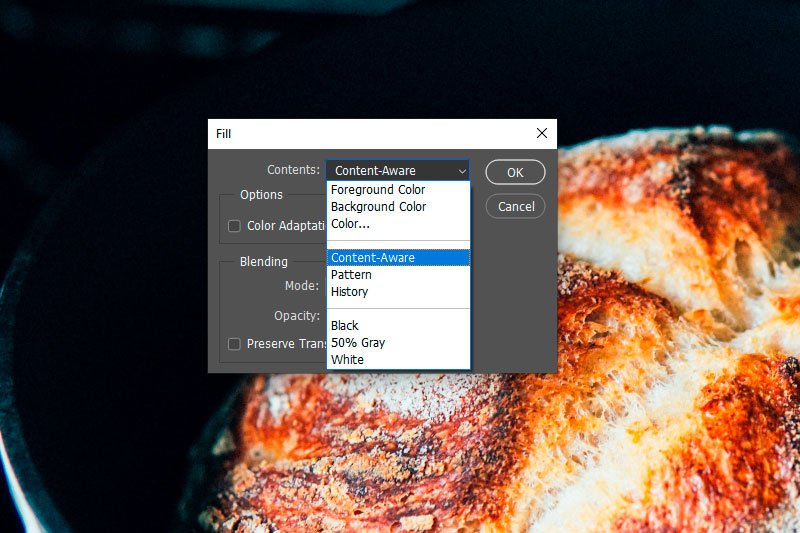
I'll click the OK button and watch as Photoshop fills those empty white areas so they match the surrounding areas. It's pretty cool.
I'll show you the bottom left corner, just so you can see how good of a job it does.

Do you see how Photoshop "predicts" what you'd like in those areas? It's so very cool.
Those are the basic methods for filling empty areas. I will tell you that there were a few different in between steps that I took to get the best results, so if you're having issues with any of these, please let me know and I'll walk you through the process in a more nuanced fashion. Thanks!
Okay, let's get going. I'm going to open an image inside of Photoshop by going to File > Open, selecting my file and then opening it. For today's tutorial, the photo will be of a loaf of bread.
Just to let you know, the quickest method for filling an empty space with this application is to use the Paint Bucket Tool. I can choose the color with which I'd like to fill and then use the tool to pour that color into the layer I'm working on.

That's not very difficult. It's also not very realistic. Let's get to something more realistic. For that, I'll use the Magic Wand Tool. I'll select that tool from the left toolbar and then select something in the image I'd like to fill.

In this case, I want to make everything that's white in the picture, lime green. So first, I'll select the white parts by clicking on one of them just once with the Magic Wand Tool.

If you look closely at the above image, you'll see the marching ants. They march around the areas that are selected.
Now that I've got a selection, I can fill it with a color. By the way, if you've got an empty space, you can select that just as easily. I'll do that in the next example.
To fill the selection, I'll go to Edit > Fill.

And then I'll choose Foreground Color from the top drop-down box that appears. I've already gone ahead and chosen the lime green color from the color picker.

I'll click OK and anyplace there was a selection will be filled with green. Here's the result of that.

Again, this selection could have been just as easily an empty space. And mind you, when making selections in Photoshop, there are many different adjustments you can make to get the exact selection you'd like. That's an entirely different series of tutorials though. Making selections is an enormous topic.
Let's get to something a little more exciting now. Before we do that though, I'd like to mention one creative method I've seen people use when wanting to fill an area. They go ahead and make a selection in a layer they're working on. Then, once the selection has been made, they press the Delete button on their keyboard. In order to do this, you may need to create a new layer, unlock the image layer you're working on (by clicking on the lock in the layer in the Layers panel), and then move that new layer beneath the image layer. You'll then have two layers and the one with the photo in it will be editable. Anyway, once that's done, press the Delete button and anything that's been selected will be deleted.

To deselect an area, go to the Select > Deselect option in the top menu.

Once you've got the selected area deleted, you can add a new layer beneath it that consists of anything you want. It can be another picture or a solid color or a gradient. Pretty much anything. The good part is that the empty area that the deleted selection left behind will be filled. In my example, I added a bottom layer that consists of a blue to black gradient. It's ugly, but it serves its purpose.

Just to let you know, I've only got two layers in the Layers panel. The top one is the original image layer and the bottom one is the gradient.
For my final example, I'm going to pretend that I pasted this image a bit crooked into an existing file that consisted of a layer with a white background. Here's what that looks like. This is actually what most of you will be working on...something like this.

Do you see how the upper left and right corners are slanted? I'd like to fill these empty areas, but I want to do it so the filled areas match the rest of the photo. For this, I'll need to take advantage of Photoshop's Content Aware technology.
I'll make sure the top image layer is active in the Layers panel by clicking on that layer there. Then, I'll grab my Magic Wand Tool again and click in one of the empty corners. Doing this should select all of the corners.

Once that's done, I'll go to the Edit > Fill menu option again, but this time, I'll choose Content-Aware from the drop-down.

I'll click the OK button and watch as Photoshop fills those empty white areas so they match the surrounding areas. It's pretty cool.
I'll show you the bottom left corner, just so you can see how good of a job it does.

Do you see how Photoshop "predicts" what you'd like in those areas? It's so very cool.
Those are the basic methods for filling empty areas. I will tell you that there were a few different in between steps that I took to get the best results, so if you're having issues with any of these, please let me know and I'll walk you through the process in a more nuanced fashion. Thanks!


