Search

How Do I Set the Timer On My Canon Rebel Camera?

  • Thread starter EmeraldHike
  • Start date
EmeraldHike

EmeraldHike

Member
Joined
May 10, 2021
Messages
133
Reaction Score
0
Points
21
  • #1

Using the Self Timer on the Canon T3i Digital Camera​

I was browsing through a few woodworking posts last night when I stumbled across one with really great "action" shots. You know the type - up-close pictures of someone working in a wood shop, hands holding whatever they're working on, tools running. This particular post had three or four photos with really great detail. It was obvious that whoever took the photos used a tripod and a self timer.

As I read through the post, I discovered that my theory was correct. The post was actually about the photos this individual posts on their blog. Others have asked how she takes such great pictures and the author responded that she sets her camera and tripod up, gathers whatever it is she wants to take action pictures of, turns on the power tools and then sets the self timer and hits the shutter button. A few seconds later - boom. Picture taken.

I wanted to try this myself with my own camera, but since I hadn't ever used the self timer, I was at a loss for how to set things up. I did a quick online search and discovered that the setup for a Canon T3i is very simple. I'm guessing that the sequence of events is the same for our other camera too (Canon T2i), so it'll be easy to interchange cameras if I ever need to do that.

I thought I'd write a tutorial on how to go about using the self timer on my T3i because it's this blog I refer back to for things of this nature. My post may also help others who are in a similar situation.

How To Use the Self Timer on a Canon T3i​

Very simple - first, turn on your camera.
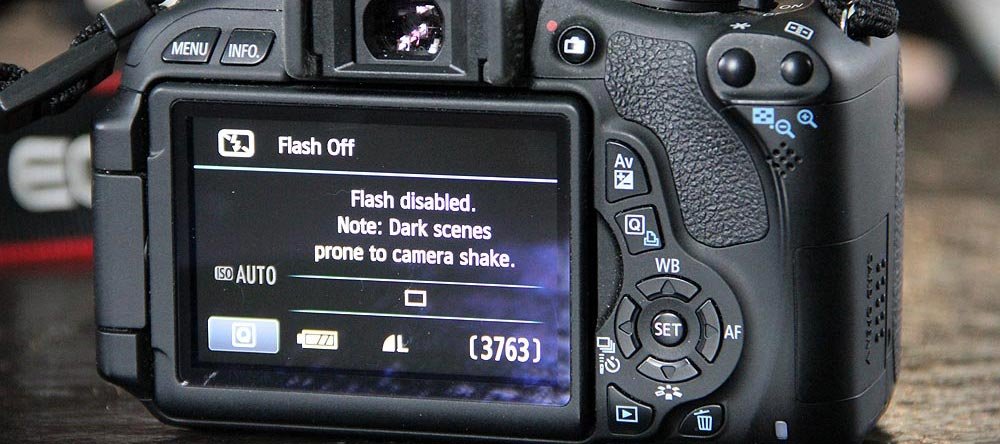
IMG_0063.jpg

You should see your LCD screen look just like this. In the above picture, I haven't touched anything besides the on/off switch. If you'll notice the small rectangle box on the viewfinder, you'll see that the camera is set to regular shooting mode.

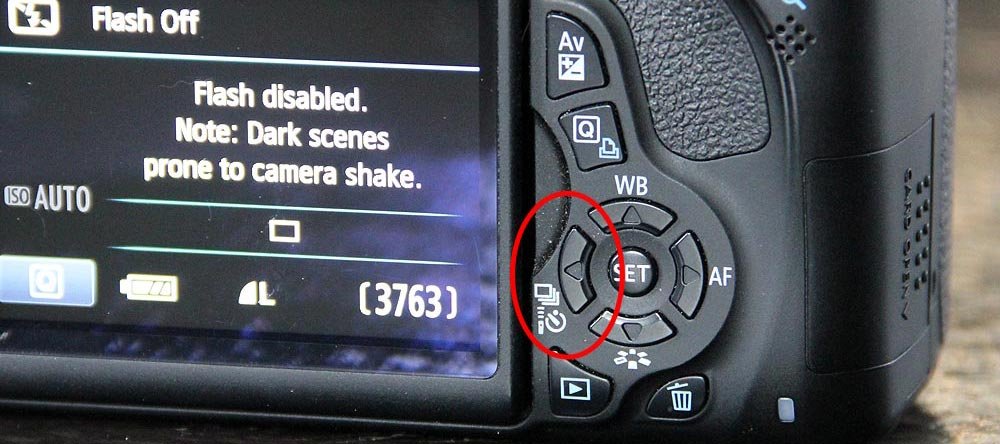
Next, press the "Self Timer/Continuous Shooting" button. This is the left arrow in the circle of arrows with the "Set" button in the middle.
IMG_0064.jpg

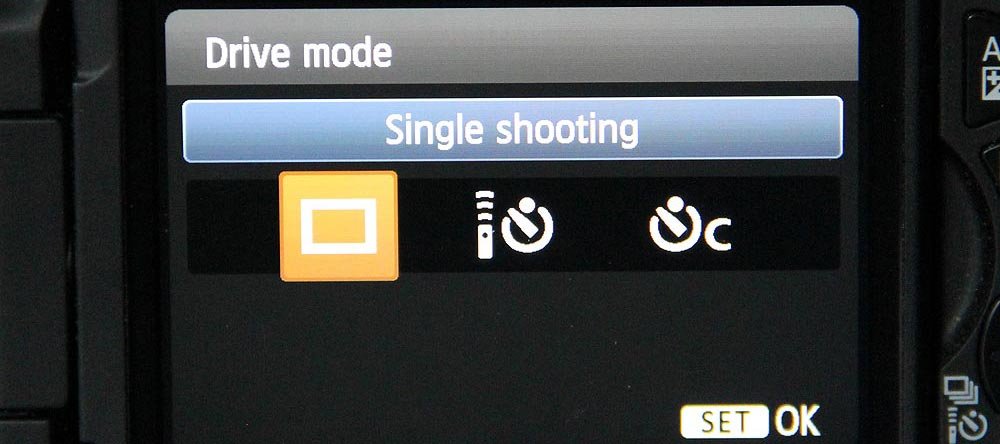
Once you press that button, you should see a few options. The first is normal shooting mode, the second is the option to use the self timer at 10 seconds and the third is the option to use the self timer at 10 seconds with continuous shooting. You can choose how many pictures you'd like to take continuously as well by hitting the up/down arrows. To choose which option you'd like to use, simply press the left/right arrows. Once you've decided what you'd like to do, press the "Set" button.
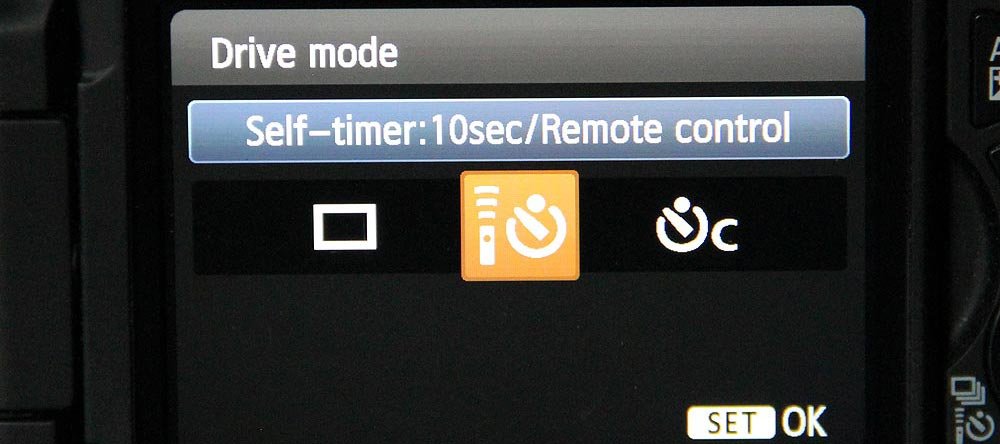
IMG_0065.jpg

IMG_0066.jpg

IMG_0067.jpg

After you press the "Set" button, you'll see your LCD viewfinder screen look like this:
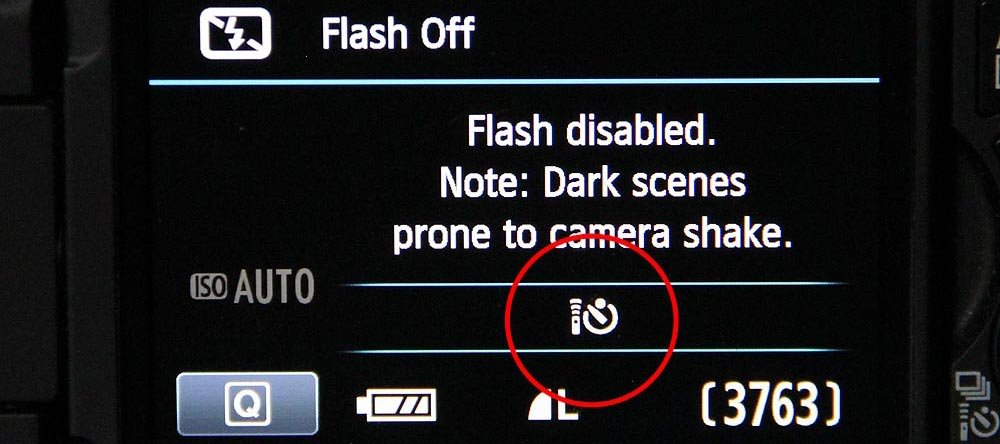
IMG_0068.jpg

Now, you may either use the traditional viewfinder or switch your camera to use the LCD viewfinder and start taking your pictures.

I do want to mention something that was tripping me up before I actually looked online for the way to set up the self timer. When I take pictures, I like to immediately set my camera to use the large LCD screen in the back as my view finder. When I was fiddling with the self timer button in this mode, all that happened was the box in the middle of the screen moved to the left. Once I realized that I needed to turn that mode off, the self timer choices popped right up.

I found the page (page 89) that covers this topic in the Canon T3i user's manual and took a screen shot of it to post here. It gives more detailed instructions on how to use this feature, along with a few more options, if you'd like.
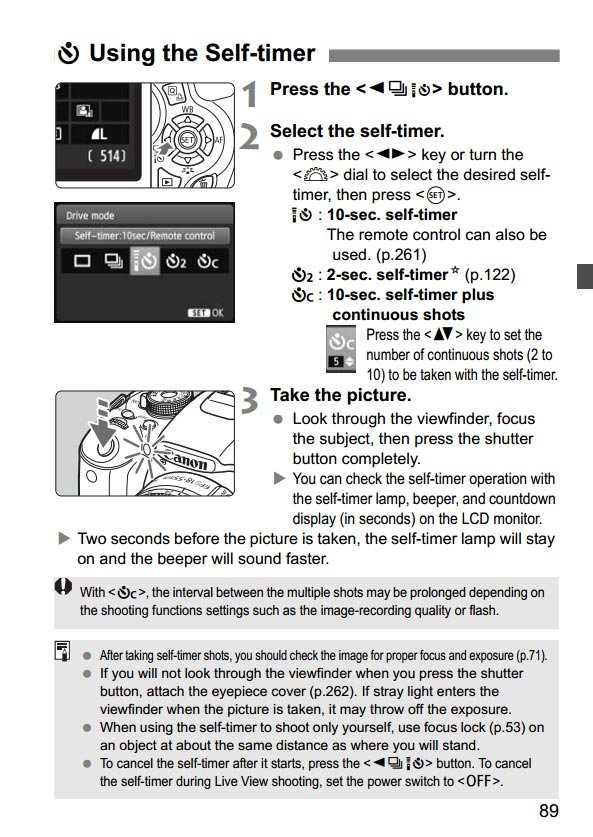
canon-t3i-self-timer.jpg

As I was hunting around last night, I found some really great websites that cover a plethora of photography tips, tricks and tutorials. I was amazed at how far the hobby has come in recent years and very pleased at its progress. I also thought it was pretty neat how people devote a good portion of their days to photography. Writing, taking pictures – all that.

I will share some of the better blogs I found below. Feel free to click around to get some assistance upping your own photography game.

Kevin & Amanda Photography Tutorials – The photography section of Kevin and Amanda’s website caught my eye because of its thoroughness and creativity. They cover the most critical of topics, including choosing the right lens, how to pick the correct settings on your camera and which type of lighting will get you the best pictures. Good stuff.

Clickin Moms – This blog offers tips and advice for aspiring photographers. I believe it’s geared towards women, but that didn’t stop me from getting my fill on how to nail down some good focus, how to capture personality on camera and creating and maintaining connection between subjects. Check it out.

121 Clicks – This blog was simply a great read. While I didn’t discover many hard and fast photography tutorials, I did find some esoteric posts, such as aspiring fine art photography, travel and people photography and some inspiring stories in the photography world. This site is well written and you quickly learn that the folks who contribute to it don’t mess around. They are serious about what they do.
 
KristinaW

KristinaW

Member
Joined
May 7, 2021
Messages
127
Reaction Score
0
Points
18
  • #2
I have the Canon Rebel T3i and did a shoot with action but cannot find my photos on my SD card or on the internal memory. Where can I find them? Btw, photos were taken in continuous mode…
 
EmeraldHike

EmeraldHike

Member
Joined
May 10, 2021
Messages
133
Reaction Score
0
Points
21
  • #3
What number photo are you up to? If you look at the live view LCD screen on the back of your camera, you should see it. I’m wondering if you went over 9999. If you did, the camera will begin placing the photos into a new folder. My suggestion is that you connect your camera to your computer like you normally do, but click into some other folders. If you did manage to take more than 9999 photos, they should be in a sister folder to the one you’re used to looking in.

Let me know what happens.
 
Phoenix1

Phoenix1

Member
Joined
May 7, 2021
Messages
135
Reaction Score
0
Points
23
  • #4
Anyone know how to set the timer on my Canon Rebel T7i? I looked through the menus and I can’t find that setting anywhere. Thanks.
 
EmeraldHike

EmeraldHike

Member
Joined
May 10, 2021
Messages
133
Reaction Score
0
Points
21
  • #5
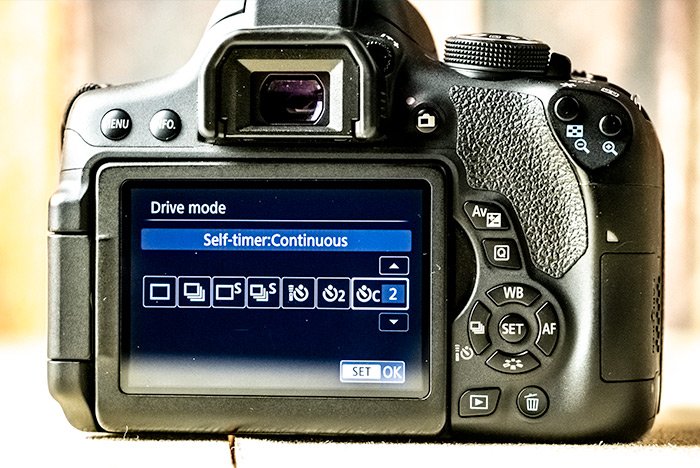
To set the self timer, push the left arrow button on the back of your camera. Make sure you’re not in Live View mode, because if you are, pushing that arrow button will simply nudge the white box on the LCD screen around. In regular shooting mode, push the left arrow button, which will bring you to the Drive Mode menu area. In that menu area, you’ll see three different options all the way to the right. The first option is for a ten second timer, the second option is for a two second timer and the last option all the way to the right is for a ten second timer again, but for continuous shooting as well. You can use the up and down arrows to set the number of photos you’d like the camera to take continuously. Use the up/down arrow buttons to change the number of photos you’d like taken. Use either the left/right arrow buttons on the back of the camera or the dial at the top of the camera to make your timer selection. Once you do, press the SET button to confirm the setting change. Then, begin shooting.

These instructions are good for the Canon Rebel T2i, T3i, T4i, T5i, T6i and T7i.
 
LukeLewis

LukeLewis

Member
Joined
May 7, 2021
Messages
134
Reaction Score
0
Points
21
  • #6

How to Set the Self Timer On Your Canon Rebel DSLR Camera​

Camera self timers are great. I was recently part of a group photo where someone was trying to set up her smart phone to take a picture of all of us. It was hilarious watching her attempt to balance the phone on a chair so it was accurately aimed at the group and then run to us quickly so she could be in the shot. Luckily, everything worked out for the best and we were all smiling as we should have been.

I’m not sure of the features my friend’s phone had installed on it, but I can tell you that when it comes to Canon Rebel DSLR cameras, you’ve got pretty much all you’ll ever need. There’s a 10 second timer, a two second timer and a continuous timer where the camera sets the timer at 10 seconds and allows you to determine how many continuous photos you’d like it to take. This feature is designed to compensate for group shots where a single person or multiple people may be blinking or sneezing or any other action that you don’t necessarily want in the photo. If you set the number of shots to, say, five, there’s a chance that at least one of those photos will be the winner.

In today’s post, I’d like to demonstrate exactly how to set the self timer for the Canon Rebel DSLR line of cameras. While the controls may be slightly different for each iteration of the Rebel line, these instructions apply to the T2i, T3i, T4i, T5i, T6i and the T7i.

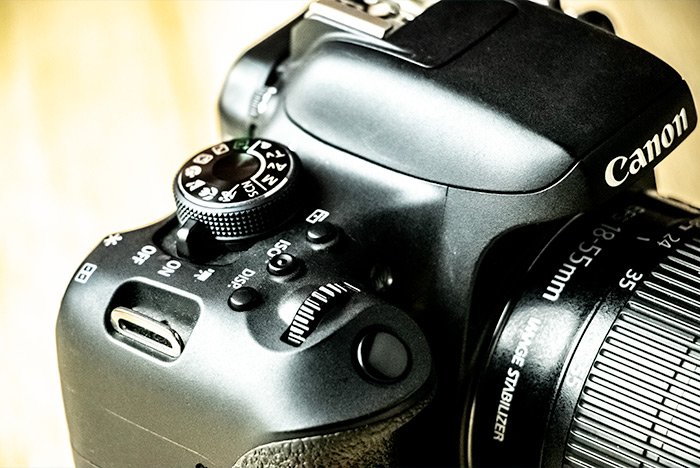
canon-rebel-t6i.jpg

Setting the Timer​

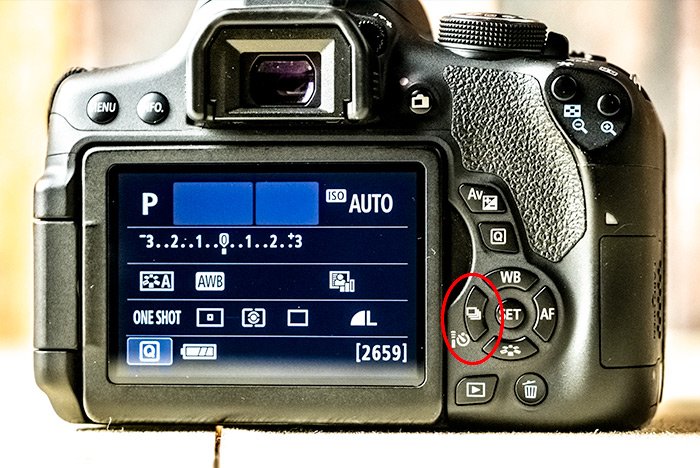
To access the timer controls, I’ll push the left arrow button on the back of my camera.

timer-button.jpg

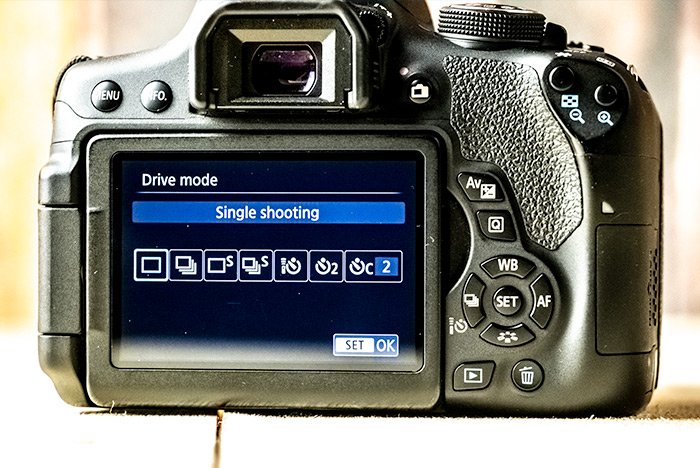
Once I do that, the Drive Mode menu will appear and the timer options will show in the list of total options.

drive-mode-menu.jpg

From here, if I have touch screen, I can simply touch the timer option I’m interested in and then press the SET button on the back of the camera to accept those changes. If I don’t have touch screen, I can navigate back and forth by pushing the left and right arrow buttons.

Whichever method I employ, I’ll need to push the SET button to activate my setting and to return to regular shooting mode.

With these cameras, there are three different self timer modes. I’ll describe them down below.

Self Timer: 10 Second: Great for setting up a camera and then joining the group to participate in the photograph.

Self Timer: 2 Second: This option is perfect when using a tripod. Set the timer to two seconds to avoid any excess camera shake that may occur from touching the shutter button.

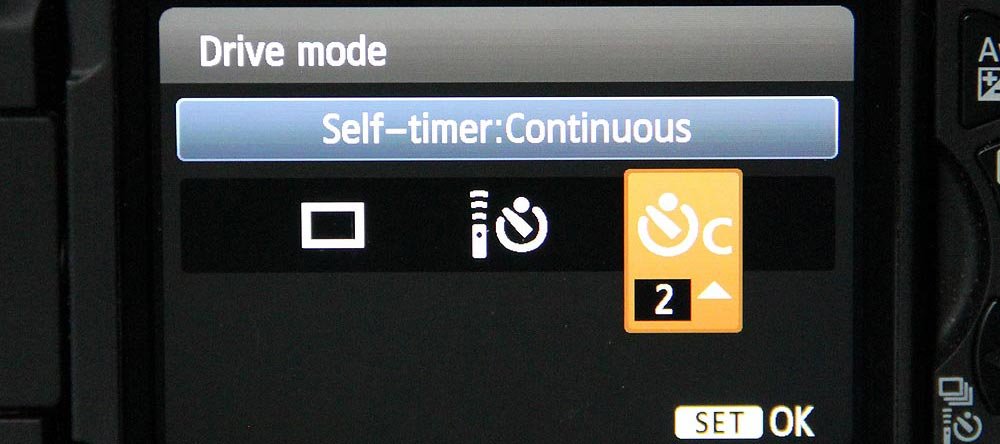
Self Timer: Continuous: As I stated above, if you’re trying to avoid someone having their eyes closed while the photo is being taken, you can set the timer to continuous. This setting will activate a 10 second timer and will take the number of shots you dictate. To tell the camera how many photos to take, use the up and down arrows to change that specific number, while in the Drive Mode menu area.

self-timer-continuous.jpg

Once you change the timer setting and press the shutter button to take a photo, a light will blink on the front of the camera to tell you that it’s progressing through the time sequence. The audible beeps will hasten towards the end of the timer duration until the photograph is captured. Also, I want to mention that in order to access this menu the way I discussed above, you’ll need to be in viewfinder mode. If you’re looking at the scene through the rear LCD screen and you push the self timer button, all you’ll do is move the white box that’s in that screen to the left.
 
Top