Search

Camera Lens Tutorials

  • Thread starter KristinaW
  • Start date
KristinaW

KristinaW

Member
Joined
May 7, 2021
Messages
127
Reaction Score
0
Points
18
  • #1
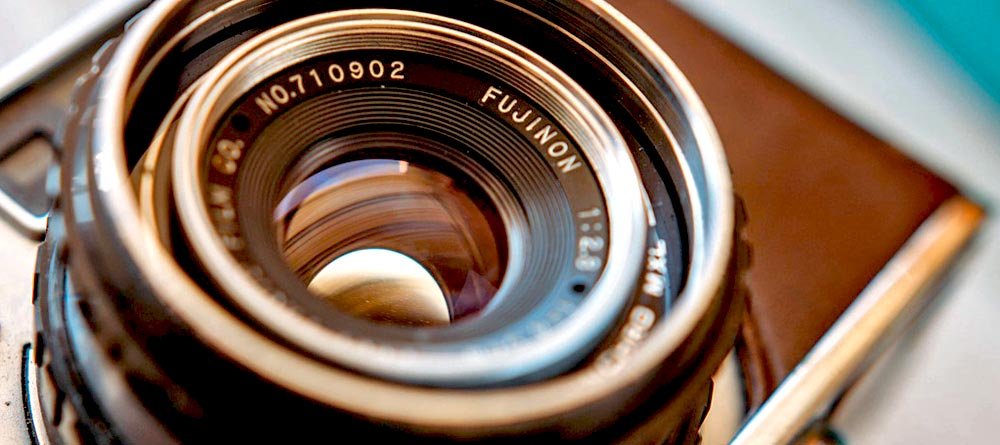
camera-lens.jpg

In photography, really cool lenses are those mysterious pieces of gear that everyone loves to talk about, but few have enough money to afford. We read about them on our favorite photography websites and drool over the pictures they take. And as we browse the sites of the photographers we admire most, our guts tells us that these are the guys who enjoy the very finest of glass. I mean, after all, shooting with a good lens means the difference between an okay shot and an awesome shot.

In this post, I'm going to start exploring exactly what camera lenses are. I'll discuss what types of components make up a lens and what characteristics of a lens define its field of view. I'll also discuss field of view as it pertains to the camera itself. Spoiler alert - it has to do with image sensor size. Lastly, I'm going to talk about the two types of lenses photographers shoot with everyday - prime and zoom. So get ready and read on!

What's Inside a Camera Lens​

Back in my early days of photography, I never gave much thought to what was inside of a camera lens. I just assumed the lens consisted of a barrel and a piece of curved glass at either end. It wasn't until later, when I began looking into taking different types of, styles of and higher quality pictures, that I learned the intricacies of what makes a lens. Boy, I was surprised.

Apparently, there's a lot going on inside there. Lenses aren't constructed of merely two pieces of glass, but groups of pieces of glass. These groups are called "elements" and their primary goal is to send light, as accurately and cleanly as possible, to the camera's image sensor. Let me explain.

Let's say you'd like to construct your own looking lens, which is sort of like a telescope. You decide to use a round tube you found laying around. Since you've got curved glass laying around too, you pop one of these pieces of curved glass on the end of your tube. Extremely proud of yourself, you decide to run outside, hold the tube up to your eye and look through it. Much to your dismay, you find the image you see through your tube all distorted. Since you know a bit about how light travels, you decide to run back inside to assemble another piece of curved glass in your tube. You do this, look through the tube again and find the distortion issue has been solved. There's only one problem - now your image is blurred. To solve this, you add another piece of glass to your tube and there you have it, a clear image. The only problem is...I think you get the idea.

Like I mentioned above, inside a camera lens, there are individual pieces of glass, grouped up and called elements. Some of these individual pieces of glass are placed in the lens barrel to satisfy the reason you purchased it. They magnify, widen, narrow or do anything else someone might want to attach a specific lens to a camera for. The problem is, when these purposeful pieces of glass are used, they cause unintended consequences. And in order to alleviate these consequences, more glass needs to be added offering, hopefully, an end result of affordable, clear and great quality.

Are you curious what types of aberrations various types of glass can cause? Well, you may already be familiar with them. Not all lenses do a great job of curing all issues and oftentimes there's a trade-off between price, size, weight, quality and what you're trying to accomplish. But just to satisfy your curiosity, lens aberrations consist of blur, distortion, vignetting, chromatic aberration and low contrast. I personally have a telephoto lens that suffers from low contrast and a wide angle lens that suffers from distortion. Again, in order to stay within budget, you often need to make trade-offs when it comes to purchasing camera lenses.

Angle of View & Field of View​

Inside every camera, there's an image sensor. This sensor sits in a specific location. In every camera, there's also a lens. This lens also sits in a specific location. Now, for the purposes of this example, let's consider the "lens" I'm referring to as the piece of glass that's furthest from the image sensor, or in other words, the glass you can touch with your fingers. It's the one that's at the end of the lens - not the internal ones.

If the image sensor and lens are one inch apart from one another, the light passing through the lens to the sensor is going to travel through at a specific angle. This angle is called "angle of view." With the sensor and lens being only one inch apart, the angle of view will be fairly wide.

Now, if we move the lens away from the sensor so the two are now two inches apart, you can imaging what's going to happen. Since the distance has increased, the angle has decreased, offering a narrower angle of view. Think about zooming in and out on a subject with your camera lens. All the way zoomed out will give you a wide angle of view and zoomed all the way in gives you a narrow angle of view.

Let's put two and two together here by continuing to talk about the zoom lens I just referred to. If we focus on a subject and zoom all the way out, we can see a lot of stuff. We're going to have more objects visible to us through our lens. The area we see is called the "field of view." Field of view is a measurement. If we're all the way zoomed out, we might be able to see an area that's one hundred feet wide (in actuality). Now, if we zoom all the way in, the area we can see through the lens shrinks to maybe only be five feet wide. So, it's logical to conclude that by having a wide angle of view, we get a large field of view and by having a narrow angle of view, we get a small field of view.

Focal Length​

There's a term I purposely left out of the previous section. My intention was to keep things as simple as possible. I know that it gets kind of confusing going through the terminology surrounding camera lenses and by piecing things out, the whole topic is easier to absorb. I am going to introduce something else now, but this one is really simple to grasp.

If you refer back to the previous section, you'll see that I talked about the distance between the sensor and the lens. What I was referring to is called the "focal length." In more formal words, the focal length of a lens is the "distance from the optical center of the lens to the camera's image sensor when the lens is focused on an object at infinity." Basically, it's what I said above, just with more words.

Now, if you've been interested in photography for any amount of time and have looked into purchasing a lens, you've most likely already seen focal lengths in practice. These are the numbers people discuss when they said, "I've got a 50mm prime lens." Folks may also tell you that they're favorite lens is an 18-135mm zoom lens. In the first example, the focal length is 50mm and in the second example, the focal length ranges from 18mm to 135mm, depending on how far the lens is zoomed in or out.

Image Sensor's Impact on Field of View​

Up until now, everything has been fairly straightforward in this post. I'm going to throw a curve ball at you though. Not because I want to, but because I have to.

I know that I just explained the angle of view and field of view. Things were swell. What if I told you, though, that those two measurements actually depend on your camera's sensor size? That they aren't equal across the board? Unfortunately, that's the truth. Many cameras out there have different size sensors which screws up simplicity when it comes to calculating field of view. I'll give you a bit of background.

I'm sure you've heard of 35mm format film. This is the stuff people used back when I first began toying with photography years and years ago. When using 35mm format film and a 50mm lens, it's been said that the field of view that stems from this configuration is "normal," meaning, it's the typical field of view someone would have when looking at something with their naked eyes.

When talking about digital cameras, those with "full frame" image sensors are those with sensors that are equivalent in size to a piece of 35mm film. So, if you're shooting with a full frame DSLR camera and are using a 50mm lens, your field of view is normal.

Here's the thing - not all DSLR cameras have full frame sensors. Many of them have smaller sensors, which are referred to as "cropped." By this point, I'm sure you're saying to yourself, "Hey, wait a second. If one camera has a smaller sensor than another camera, the first one is going to have a smaller field of view. Even if they both use a 50mm lens." If you said that, I'd say you are correct.

The way it works is like this - the size of the image sensor dictates the angle of view, which determines the field of view. The larger the sensor, the larger the field of view and the smaller the sensor, the smaller the field of view, all other things being equal. The good new is, when you purchase your camera, it tells you what its "crop factor" is. Crop factor is simply how much smaller your camera's sensor is than a full frame.

I like to use the Canon T3i camera body. I've had this camera for years and I like the way it shoots. The T3i is built with a sensor crop factor of 1.6, meaning it's got a sensor that's 1.6 times smaller than a full frame one. If this is the case, when I shoot with a 50mm lens, I don't have a "normal" field of view. I've got a smaller one of them as well.

So, how do I know what my "real" field of view is if I've got a cropped sensor? Well, in order to determine this, I'd have to look in my camera's manual to learn the crop factor. Once I know it, I can simply multiply the crop factor by the focal length and I'll get my field of view equivalent. Let's look at the calculation:

50mm lens X 1.6 crop factor = field of view equivalent of an 80mm lens

I know, it's a bit disappointing because for so many years, I thought I was shooting with a specific focal length, only to learn that I wasn't. So for all those wide angle shots I bragged about, telling friends and neighbors that I took "really wide" angle pictures at 12mm, I would later have to correct myself and confess that those pictures were actually shot at 19.2mm. Trust me, I didn't feel nearly as cool after that confession. On the positive side though, I get an extension on the telephoto side. And that's pretty cool. I just need to keep my sensor size in mind when I'm shooting.

Prime Lenses Versus Zoom Lenses​

A few times in this post, I've referred to "prime" lenses and "zoom" lenses, but didn't talk about what exactly the difference is between these two types of lenses. To clear things up, I'll do so below.

Prime Lenses - This type of lens has a fixed focal length. It can't be changed. The pros of using this type of lens are that, in general, you can open the aperture more than you can on a zoom lens, letting more light through. This would be considered being "faster" than one with a smaller maximum aperture. Also, these types of lenses offer images with less distortion. The cons are that you can't adjust the focal length.

Zoom Lenses - With zoom lenses, the focal length changes, based on the photographer's needs. So, this type of lens is said to have a "variable" focal length. The pros with zoom lenses are that you can adjust the focal length while you are in the field, which offers a nice amount of flexibility. The cons are that they usually weigh more and are sometimes bulky.
------

If you enjoyed this post on lenses, please share it with friends. Also, if you have any comments or questions regarding this post, please leave them below. Thanks!
 
KristinaW

KristinaW

Member
Joined
May 7, 2021
Messages
127
Reaction Score
0
Points
18
  • #2

What is a Fast Lens?​

Fast lenses are things you’ll hear about during your entire photography hobby or career. Amateurs and professionals alike enjoy throwing this term out there to describe a certain type of lens that’s usually sought after for reasons I’ll explain below. I think you’ll notice photographers describe their lenses like they describe their cars. “Dude, I just bought the fastest lens I’ve ever seen. It’s wicked fast!”

So, what the heck is a “fast” lens? Well, to answer that question, we’ll need to look at something called “aperture.” The aperture of a lens is the mechanical opening inside of the barrel that allows light to pass through to the sensor of the camera. The aperture size is what determines the fastness of the lens. If an aperture is large and allows a lot of light through, the lens is deemed fast. If the aperture is small and it doesn’t allow a lot of light through, the lens is deemed slow. Let’s look at the reasons why.

Let’s say you have a fast lens with an aperture of f/1.2. With this size aperture, the hole that allows the light through is huge. Because all that light is making its way through the lens opening, the shutter speed inside of the camera doesn’t need to compensate for any lack of light and can move ultra quickly as a consequence, hence the term “fast.” Because of the shutter speed’s blinding quickness, people refer to the lens as fast.

Conversely speaking, if an aperture is small, the shutter in the camera will need to compensate for the lack of light with a slower movement. Yep, you guessed it. Lenses with small apertures are referred to as slow.

Would you like to read more about fast lenses? Do you have any additional information about these types of camera lenses? If so, please let us know below. Thanks!

Comment: Never heard of it before now. Thanks for the detailed explanation about fast lenses.

Reply: You are welcome. If you are a beginner, like you said, you might not have heard about fast lenses. As you gain experience, you’ll hear this phrase all over the place, especially in camera shops and online in photography forums and websites selling lenses. It’s a good phrase to know because you can ask someone, “Hey, I’m only interested in looking at your fastest lenses. Where are they?” That way, all other lenses will be filtered out as to not waste your time.
 
KristinaW

KristinaW

Member
Joined
May 7, 2021
Messages
127
Reaction Score
0
Points
18
  • #3

Lens Help – Deciding Between Two Wide Angle Lenses​

This was an old forum post that my friend Ian initiated. I thought I’d post it here. It’s pretty good!

Hey all,

I’m currently looking into purchasing a lens or two for my Canon Rebel SL1. I’ve taken an interest in landscape photography, so a wide angle seems appropriate. I would also like to pursue astrophotography. I’ve been doing some research on lenses but would really appreciate some feedback on what you all think.

How significant will the difference in quality be with astrophotography when comparing lenses that can open to 1.4 aperture vs. 2.8? I ask because I’m torn between getting what seems like an all around lens that can do everything fairly well like this Tokina. Or should I invest slightly more $$ into two lenses; one specifically for wide angle landscape like this Canon, and one designed for astrophotography like this Rokinon – check out the amazing star photos this guy gets with this lens Youtube.

Thanks for any feedback!

Reply from Me: Excellent question Ian. And might I also add, very well written!

Here’s my opinion. I guess we need to get past the fact that we’re not going to find a sweet F/1.2 10mm wide angle lens for $300. That’s a given. I just did a quick look and found a 24mm F/1.4 for about $1500. Any wider than that will only get more expensive. There seems to be dozens of 10mm Canon or Canon-fitting wide angle lenses at F/2.8, F/3.5, and F/4.5 apertures in our price range, but those won’t do what we want when it comes to astrophotography. So we need to put the dream of cheap star photography to bed. Not that you can’t get it reasonably priced, but out of one lens? No.

For regular daytime and dusk wide angle photography, I’d personally pick up the Tokina you referred to. It’s very wide, has a quiet auto-focus motor, which matters for any type of video you’ll be shooting and the aperture is actually pretty wide. You’ll be able to get some nice shots during the blue hour, that’s for sure. I just checked and it fits your camera. The only problem is, it’s currently listed for $379. I think I saw it used for $299 a while ago. That’s why I put this one in my Amazon shopping cart. It’s been sitting there for about a year.

Whoops, it’s actually selling used on Amazon right now for $298. That’s a great price. And that comes with free delivery.

Moving on. Here’s the problem with star photography. The primary issue has to do with very little light in the atmosphere. Because of this low light, you’ll either need to step up your ISO values, which will result in tons of grain, or you’ll need to decrease your shutter speed so the shutter stays open for longer than 30 seconds. As I mentioned to you, longer than 30 seconds causes light trails and I’m sure you don’t want that. Take a look at these star photos I took a while ago. You most likely can’t see it, but they’re full of grain. It’s terrible.

As I stated in the post, I captured these images with my Canon 24mm F2.8 lens. While the coverage was okay, the amount of light allowed into the lens was no where near sufficient. I wasn’t even going to try with my Sigma 10-20mm F/4. The photos would have come out horribly.

The only other place you can look for light is your aperture, so you’re definitely on the right trail when it comes to that. The Rokinon lens you linked to above seems like it’s got good reviews. I definitely wouldn’t go any smaller than F/1.4 though. I’d love to see an F/1 or F/1.2 someplace in the same price range. Or even something a bit wider than 24mm. The focal length sometimes doesn’t matter too much because of the way the manufacturer bends the glass, so you’ll just need to check out the sample photos in the reviews.

Another reason you’ll likely need a dedicated astrophotography lens is because you’re eventually going to want to capture the Milky Way (like in the sample review shots). That’s super low light and only a huge aperture will get you there.

Now that we’ve pretty much decided on a great daylight wide angle lens (I’m so presumptuous), are there any other options for astrophotography lenses that you like? Maybe three different models that we can analyze?

If this were me, I would pick up the Tokina first to practice with. You can do both star shots as well as regular wide angle photography. Then, once you’ve gotten bored with that, look into getting the purely astrophotography lens.

PS – I would choose the Tokina over the Canon for regular wide angle landscape. It’s got a larger aperture and that’s just awesome to have.

Oh yeah, one more thing, I’m wondering if laurag can post a few sample shots that she took of the lake the other day with the Sigma 10-20mm. With our cropped sensors that our cameras come with, the 10mm will essentially be seen as a 16mm, but that’s still super wide. With a 24mm lens attached to your camera, you’ll be seeing what a full frame camera would see at 38mm. Be careful here because those sample shots you’re seeing on the Amazon page may have been taken with full frame cameras. You may not see similar results. Yours may be much more narrow.

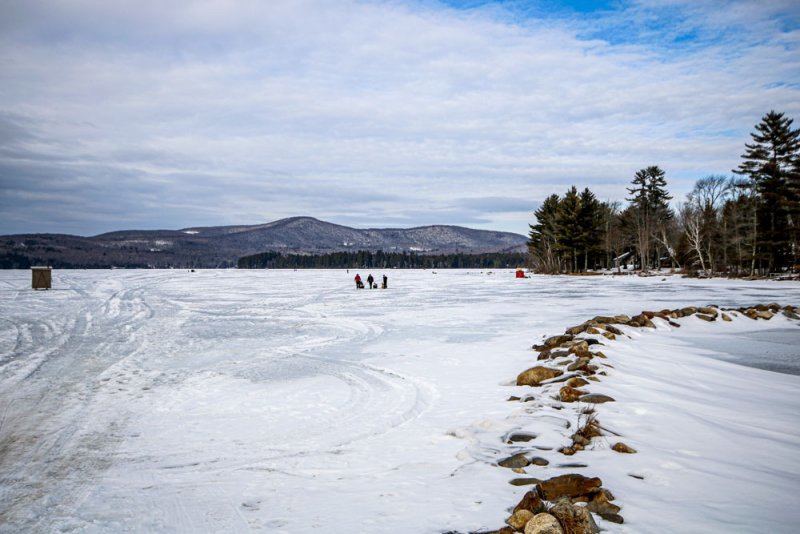
clearwater-lake.jpg

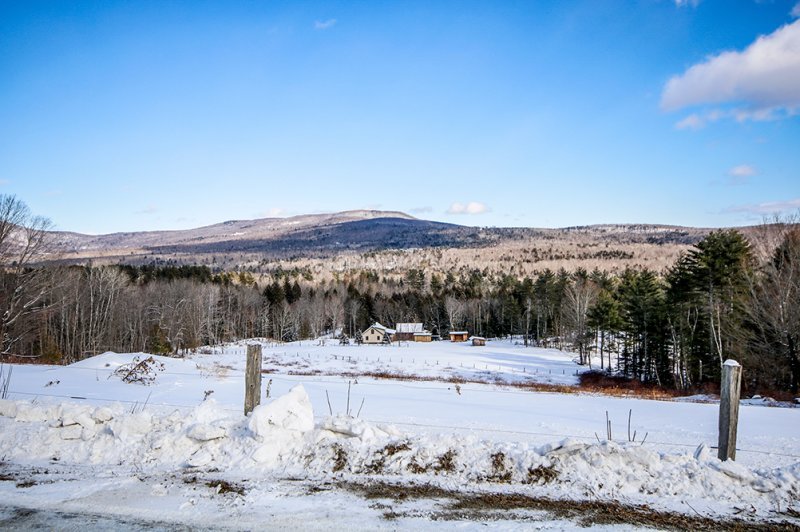
house.jpg

Reply from Ian: Thanks for the replies! I decided to order both the Tokina and the Rokinon. I’ll be sure to share my experience with both lenses soon!

Reply from Me: Ian and I went out the other night to test out his lenses. Here are my shots with the T7i. I was using the Rokinon lens. If memory serves, my settings were as follows:

Aperture: f/1.4
Shutter Speed: 13 seconds
Focal Distance: 24mm
ISO: 400
2 second timer
etc…

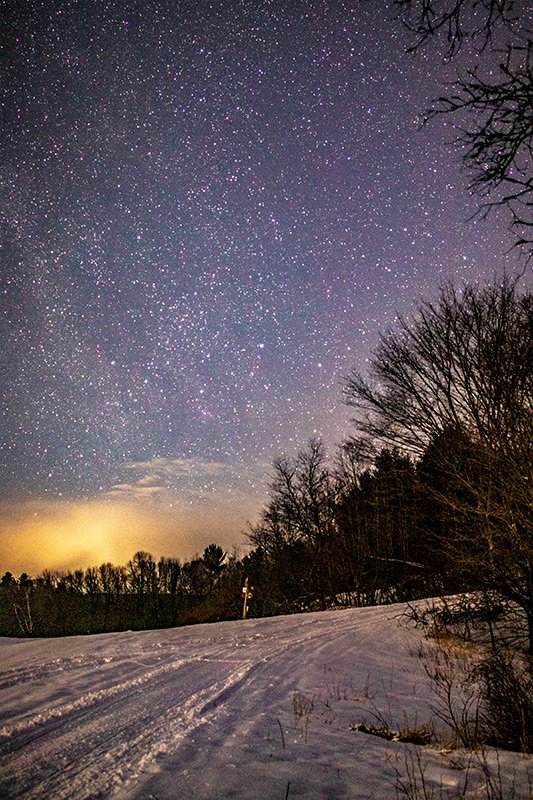
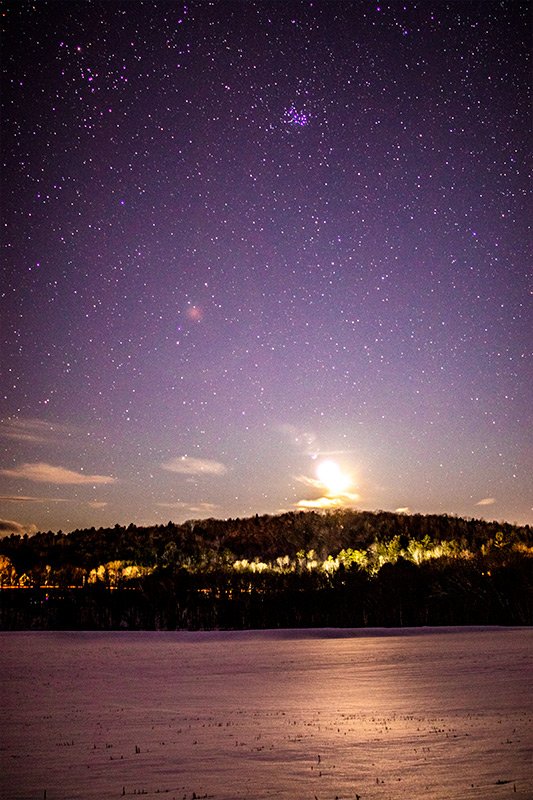
Here are some sample shots with this lens. I took a bunch more, but the lens wasn’t in focus for the beginning shots. I fixed that and continued on. Also, I lightly edited these shots in Adobe Camera Raw.

sky-stars.jpg

stars-moon.jpg

Overall, I really liked the lens. The focus is very sensitive so that needs to be set during the day when you can see what you’re doing. When you find the proper setting, tape the lens so it doesn’t move. Also, since this is a manual aperture setting, do that during the day too. Obviously, since you’ll be doing night star photography, you’ll want to use the widest f/1.4 setting. I would have loved to have had this large aperture with a 10mm wide angle, but we can’t have everything. Ian will hopefully post his sample shots as well. He was using the Tokina 10-16mm.
 
KristinaW

KristinaW

Member
Joined
May 7, 2021
Messages
127
Reaction Score
0
Points
18
  • #4

When Should I Use a Lens Hood?​

I’ve got a new one for you. It’s snowing in the northeast today and my friend is outside taking pictures of birds as I sit here and type. She asked if she should use her lens hood. I didn’t even think of that. I answered that she should. That’s genius! Use the lens hood to keep snow off the camera lens. I’ll have to add this one to the list of lens hood uses.

I wrote a post yesterday that covered some reasons why camera lens hoods are important. They really do have so many purposes. We already have the snow thing, but did you know that lens hoods can protect the end of your lens from damage? Think about it – it’s a big piece of plastic that covers the side of the lens, where the glass is. Since that’s such a sensitive area, it’s important to protect it whenever you can.

The most important reason to use a lens hood (tulip) is to shield the camera’s sensor from light that reflects in and through the lens tube from an angle. This type of light can cause ghosting and flares. If you’ve ever looked at your shots after a photo shoot and saw weird spots on them, those are most likely flares. Those aren’t supposed to be there.

Now, sometimes flares are very cool looking and if you’re going for that type of a look, then, by all means, don’t use a sun shield. But if you want clean shots, keep that shield on your camera as much as possible. Even when you’re not shooting on a sunny day.

Reminder, a lens tulip (shield or hood) won’t protect your photos when you’re shooting and the sun is actually in your shot. That’s another story in and of itself. That’s a special type of photography that we’ll talk about another time.

Questions? Comment? Please share down below.
 
KristinaW

KristinaW

Member
Joined
May 7, 2021
Messages
127
Reaction Score
0
Points
18
  • #5

What’s the Best Way to Protect the Glass in a Camera Lens?​

One of the worst things that can happen to a camera lens is to have the lens glass crack. It’s a horrible sight. Having the glass crack is terrible, but so is chipping the glass, scratching it, and smudging it. Especially smudging it right before taking the shot of your life. There’s a lot that can go wrong with camera lenses and much of that can be avoided.

The first and foremost (and easiest) thing you want to do is to protect your lens. There are a number of different ways you can do this. I’ll list these below.

1. The way you carry your camera. If you use a camera strap and place that strap over your shoulder or head/shoulder, be sure to place the strap in a direction that will cause your lens to be facing your body, as opposed to be facing away from your body. When it’s facing inward, the lens isn’t sticking out there to be whacked and bumped into by every passerby. Even you turning your body can cause your camera to swing outward and hit something. This is one of the primary causes of camera and lens damage.

2. Use a UV filter. UV filters were very popular back in the days of film cameras. Today, amateur and professional photographers alike use UV filters as an added layer to protect their camera lenses from all those things I described above. The way they rationalize this is to say that UV filters can be inexpensive to buy. Which would you rather break, a cheap filter or the lens itself? Other than a few edge cases, UV filters don’t alter a photograph at all.

3. Attaching a lens hood can keep your lens glass at a distance. Lens hoods add, on average, about an inch of distance between the end of the hood and the most outward glass in a lens. This additional distance keeps objects away from the lens and it can even help to keep your hands and fingers away from it as you’re reaching for the camera to take a quick shot.

In my opinion, I like the idea of using both a UV filter and a lens hood. The filter keeps dust and scratches away and the lens hood keeps my hands and fingers away. Doubled up is the best protection.

Do you have any tips or tricks you’d like to share? If so, please do below. Thanks!
 
KristinaW

KristinaW

Member
Joined
May 7, 2021
Messages
127
Reaction Score
0
Points
18
  • #6

Canon 24mm F/2.8 Camera Lens Test – Sample Pictures​

I received my new Canon 24mm f/2.8 lens yesterday and I just went outside to take some sample shots. I didn’t spend much time; just enough to grab some quick photos and to make a determination of its performance. I’ve heard a lot about this lens and I was excited to get down to it. What I’m really looking forward to is taking photos of some very nice scenes while using a tripod. If you aren’t aware, this lens doesn’t have any image stabilization, so there’s the possibility of the images including some camera shake. Luckily, I don’t think mine had any, but it’s a definite possibility when shooting in low light or indoors.

The lens is very small. It’s considered a “pancake” lens and it weighs next to nothing. It’s well built though, For its size, it feels very solid. From the photos I just took, I can tell you right off the bat that I noticed two big things. First, the colors of the images look more vibrant than those taken with my Canon kit 18-135mm lens. Second, the images are very sharp. I heard that you can actually take photos with this lens from farther away than with another lens and you can crop the images and they’ll still be sharper in comparison. I think this may be true. There’s a lot of sharpness.

Oh yeah, one more thing. Well, a few things. I can bring the camera very close to my subjects while using this lens. Very close. It seems like only around six inches. I got nice wide shots and the bokeh is very nice looking. It’s strange, you don’t really notice bokeh until you see it in its high quality form.

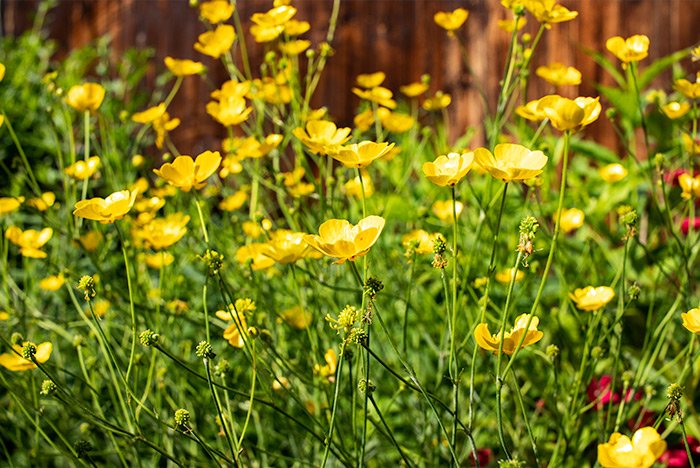
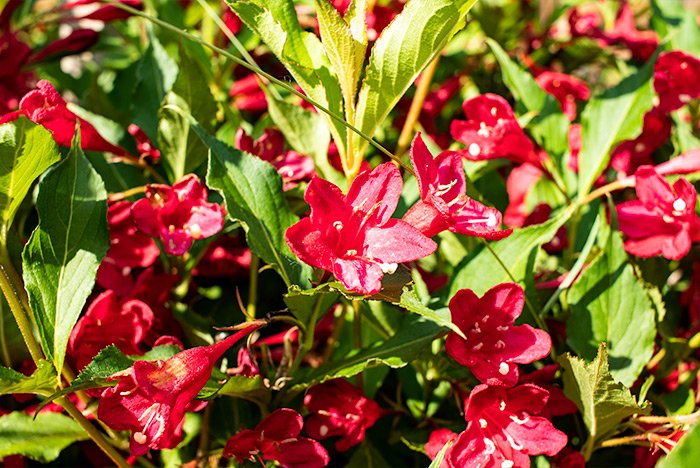
Onto the photos. For the first two, I wanted to see how the lens would handle full sun.

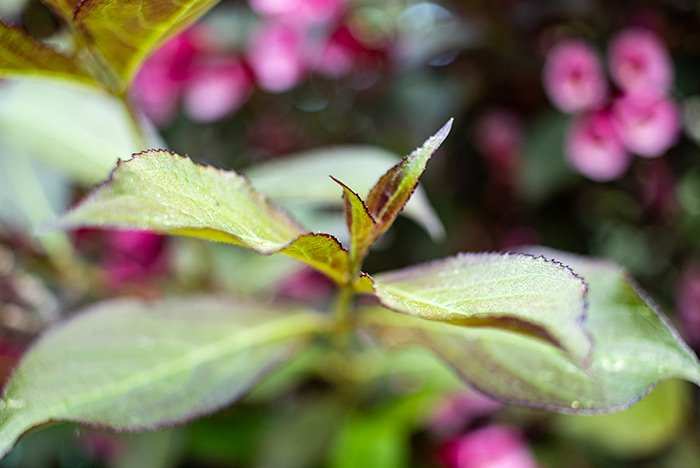
buttercups.jpg

Camera: Canon Rebel T7i
Focal Length: 24mm
Aperture: f/8
Shutter Speed: 1/250
ISO: 100

full-sun-purple.jpg

Camera: Canon Rebel T7i
Focal Length: 24mm
Aperture: f/6.3
Shutter Speed: 1/60
ISO: 100

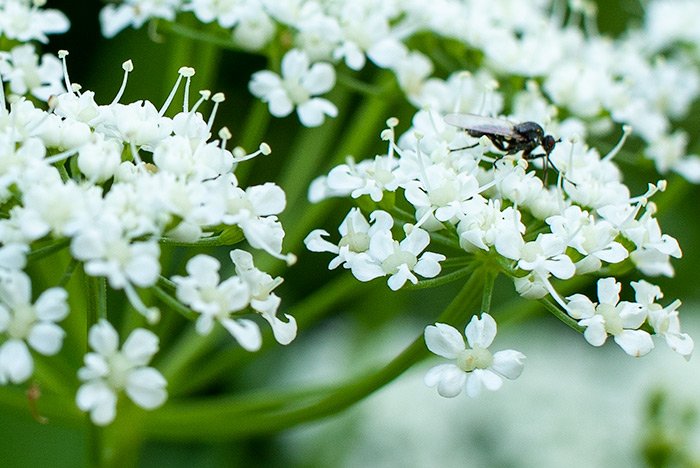
After that, I went around to the back of the house where there was some shade. I took a few more shots. Some of these have been cropped so they show some up-close detail. I think you’ll see which ones those are. Also, I did some very light editing in Adobe Camera Raw, just to add some contrast. Nothing major.

insect.jpg

Camera: Canon Rebel T7i
Focal Length: 24mm
Aperture: f/5.6
Shutter Speed: 1/125
ISO: 100

leaves.jpg

Camera: Canon Rebel T7i
Focal Length: 24mm
Aperture: f/2.8
Shutter Speed: 1/180
ISO: 100

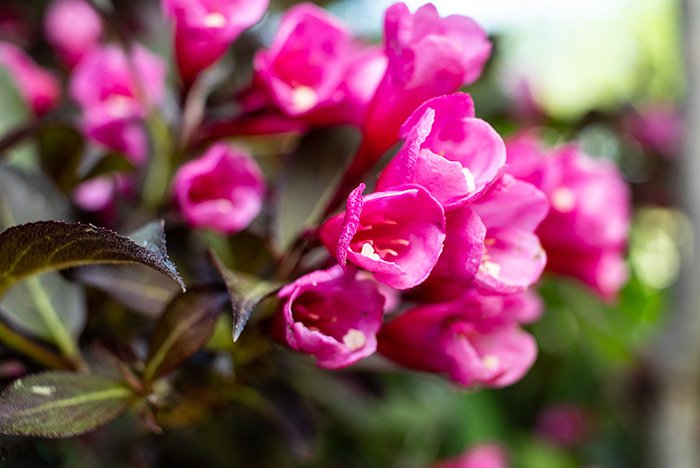
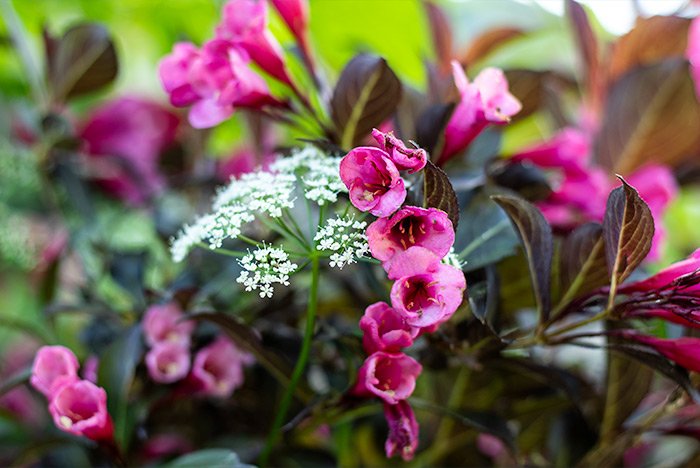
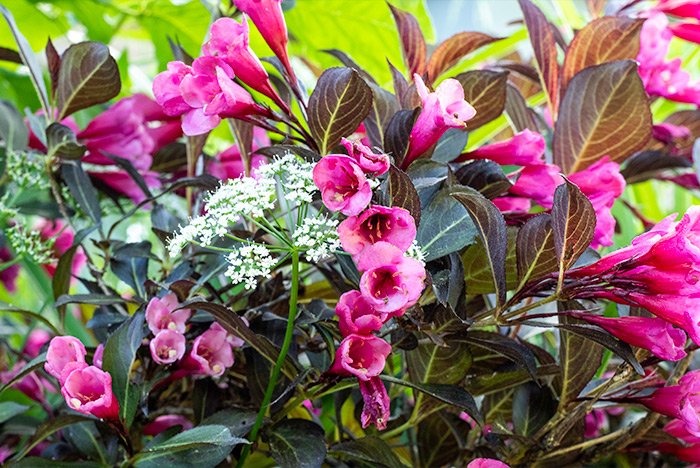
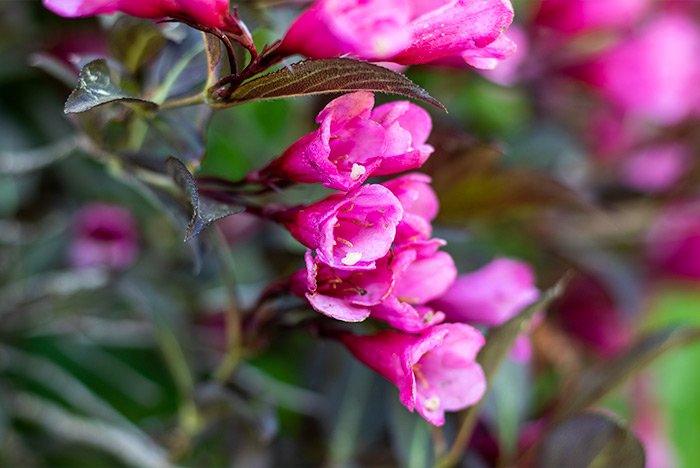
pink-flowers.jpg

Camera: Canon Rebel T7i
Focal Length: 24mm
Aperture: f/4.5
Shutter Speed: 1/80
ISO: 100

pistils.jpg

Camera: Canon Rebel T7i
Focal Length: 24mm
Aperture: f/5.6
Shutter Speed: 1/160
ISO: 100

white-flower.jpg

Camera: Canon Rebel T7i
Focal Length: 24mm
Aperture: f/8
Shutter Speed: 1/320
ISO: 100

So, as you can see, I didn’t use a crazy fast shutter speed for any of these shots and a few of them were teetering on being too slow for handheld shooting. I still got some very nice clarity out of them though. They’re all sharp. I actually didn’t get any blur with any of the shots.

I also wanted to test the depth of field, so with a few of the photos, I brought the aperture down as large as it can go at f/2.8. That’s the way I let the camera increase the shutter speed automatically.

Overall, I think I’ll have a lot of fun with this lens. It seems like it’s going to give me some high quality wider angle photos and I think it’ll be fun to use it as a walk around lens. Also, I think it’s going to be perfect for video because the focus is nearly silent and it’s pretty fast. Because the lens is so light, I think my camera and lens setup will work well with one of those steadycam things.

Until next time…If you have any questions, please ask down below. Thanks!
 
KristinaW

KristinaW

Member
Joined
May 7, 2021
Messages
127
Reaction Score
0
Points
18
  • #7

Use Multiple Lenses For Better Photography​

If you’re like me, you’ve got one lens for your DSLR camera. It’s probably the kit lens that came with the camera when you bought it. When I purchased my Canon Rebel T3i many years ago, I ordered it with the 18-135mm kit lens. I thought that lens was a step up from the 18-55mm. It was. I loved that lens, but when I sold the camera to a friend, I also sold the lens. That’s not such a bad thing because it didn’t include the nice quiet STM focusing technology that I needed for video. I’d hear the motor moving inside the lens in the movies I made, which was highly annoying.

Anyway, when I purchased my T7i, I also purchased the new and improved 18-135mm lens that had the STM technology incorporated. I like this lens and it serves me well. I’ll tell you though, I’m sitting here right now waiting for the UPS man to deliver my brand new 50mm and 24mm primes lenses though. These are going to definitely step up my game when it comes to my picture taking.

Let me cut to the chase. If you’re getting into photography and if you think it’ll become a serious part of your life, plan on investing a little bit of money into a few different lenses. Sure, the kit zoom lens is very good and it will handle many instances you come across. But remember this, there’s nothing like the feeling of photographing a scene while using a wide angle 10mm. I mean, that’s very cool and you can truly squeeze in almost anything you want.

Prime lenses are ultra cool as well. I’ll tell you from personal experience that zoom lenses can make you extraordinarily lazy when it comes to photography and your it’ll show in your photos. If you’ve got a zoom lens attached to your camera, you can easily sit in your beach chair all day and snap away. You’ll get marginal photos as a result. If you’ve got a prime lens attached though, you’ve got to get right up there and involve yourself with the scene. Your angles change and your photos show your creativity. Of course, nothing beats a 600mm zoom for when you’re on safari, but when you’re walking around town snapping away, think about changing from one lens to the other during different situations. Doing this will give you a feel for what you like and don’t like about each one and you’ll become so much better at the craft you’re trying to get better at.

I’d like to say one final thing here; many prime lenses today are very inexpensive. I’m paying only $125 for the Canon 50mm 1.8 and only $129 for the Canon 24mm 2.8. That’s pretty cheap in the world of lenses. Nobody’s asking you to spend a fortune, but if you’re looking to get better at photography and to learn, you’ll need to branch out from that kit lens.
 
KristinaW

KristinaW

Member
Joined
May 7, 2021
Messages
127
Reaction Score
0
Points
18
  • #8

Why Are Some Camera Lenses Called “Fast”?​

Have you ever heard of a “fast” lens? I have. I hear it all the time, usually when I’m reading reviews for lenses online. I also read about these types of lenses in discussion forums a lot. They’re all over the place.

The problem with photography lingo like this is that no one ever actually tells you what any of these words mean. You have to go look them up yourself. This “fast” word is an example of such lingo. What could this possibly mean?

In today’s post, I’m going to discuss lenses and what makes them fast. I’ll do my best at explaining things in such a way as to help you finally understand what everyone is talking about. By the end of this post, you’ll be the talk of the town, or at least the talk of the photography shop in your town.

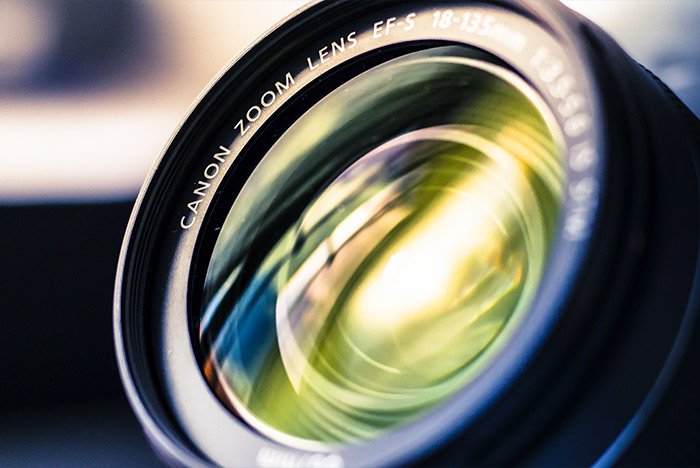
canon-zoom-18-135mm.jpg

What Makes a Lens Fast?​

Simply put, fast lenses have large maximum apertures. The aperture is the part of the lens that lets light in. The larger the aperture opening, the more light is allowed in, thus reducing the need for the shutter to be open for very long. If you remember the relationship between aperture and shutter speed, you know that a large aperture allows for a faster shutter speed and a small aperture allows for a slower shutter speed. And that’s what the “fast” means in the photography world.

Examples of fast lenses might be those with maximum aperture sizes of f/1.2, f/1.8 and f/2. These are really fast. When these types of lenses are used in low light situations, they help out tremendously. Think about covering your eyes with your hand while in a dark room and letting only a small crack of light through. You won’t be able to see at all. Now, think about the same situation but with a huge crack of light coming through. You’ll be able to see much better. Everything slows down when you’re only letting a small amount of light through.

Who Uses Fast Lenses​

In general, photographers who take pictures in either low light or high movement scenarios use fast lenses. I just gave you the low light example above, so let’s talk about sports and wildlife photography for a moment here.

We all know that, in general, low ISO values are better when it comes to photography because the lower the ISO value, the less grain there will be in the resulting photographs, in general. I say “in general” here because there’s more than ISO when it comes to noise and grain, but we’ll leave this here for the time being. So, if we keep the ISO value relatively low in our camera, we’re left with aperture and shutter speed to deal with. Now, let’s say you’re out there taking pictures of your son at his soccer game one afternoon. He’s wild out on the field and he’s running all over the place. If you kept your ISO value low and increased your shutter speed to 1/500 of the second because you want all your shots to be crisp and clear, what do you think your camera is going to do with the aperture? That’s right, it’s going to try to open it all the way. The question is, what if you have a slow lens, or more specifically, a lens that doesn’t have a large maximum aperture? I’ll tell you what’s going to happen. Your camera is going to take the shots, but your photos are going to come out dark because of the lack of light getting through to your camera’s sensor. Something has got to give in situations like this. In your situation, because you’re bound by your camera’s restrictions, you either have to slow down your shutter speed, which you don’t want to do because you’ll have photos full of motion blur, or increase your ISO value to make your camera’s sensor more sensitive to light. I’m betting you’ll turn your ISO value to “Auto” and you’ll let your camera do its thing. That’s probably the smartest move.

Now let’s pretend that you have a fast lens. A lens with a huge maximum aperture of f/1.2. In this case, you’ll most likely be able to keep both the low ISO value and the fast shutter speed because of all the light the lens is letting through. Just remember, large apertures cause shallower depths of field. If you use one of these types of lenses, you’re going to get some blur in the foreground and background of your shots. This isn’t a bad thing. It’s actually a good thing because it can effectively isolate your subject.

Oh yeah, one last point. Have you ever tried to use auto focus in dimly lit scenes? Has all the hunting of the focus driven you nearly mad? I’d say that’s some slow focusing under those conditions. Fast lenses can make focusing faster too. Keep that in mind. They let more light through, which the focus mechanism just loves.

I hope I effectively explained what fast lenses are when it comes to photography. If you have any questions regarding this post, please let me know down below. Thanks for reading!
 
KristinaW

KristinaW

Member
Joined
May 7, 2021
Messages
127
Reaction Score
0
Points
18
  • #9

What’s the Best Lens for Food Photography?​

Question From a Reader: I’d love to get the opinions of others on this topic. I know everyone is going to say something different, but I’m flying blind right now. As it stands, I’m using my Canon kit lens that’s 18-135mm for my food photography and it’s working okay. The thing is, I was taking some food shots last night and after I downloaded them, I realized they were somewhat grainy. Then, I noticed that my ISO setting was at 6400. That’s just crazy. I didn’t have a lot of light, so I’m assuming that’s what caused the high ISO value. I’ve since lowered that to a maximum of 800, which is going to slow my shutter speed down. I’ll need to begin using a tripod. I was thinking though, what if I purchased a new lens that offers a larger maximum aperture. Right now, I can only open the aperture up to a f/3.5. If I were to use an aperture of a f/2.8, would that be better? It would certainly let more light though. But then again, that might create a shallow depth of field that I don’t want.

Anyway, I’d love to know what kinds of lenses you use for food photography. Please let me know below. I’m currently looking at some Canon macro lenses. 24mm, 40mm and 100mm. Everyone says these are great, but they say everything is great. I want some actual and person experiences. Thank you.
 
KristinaW

KristinaW

Member
Joined
May 7, 2021
Messages
127
Reaction Score
0
Points
18
  • #10

What’s the Best Way to Clean a Camera Lens?​

Camera lenses can get filthy when they’re used a lot. Even if we try to take care of them as best we can, smudges and grease/oil can end up on the glass and other foreign objects can end up inside of the lens itself. If you’ve ever turned your lens to zoom into something and heard a grinding or scratching noise, you should stop using it immediately and have it cleaned.

If you’re like me (and just about every other photographer on the planet), you’ve noticed a smudge on your lens and used your shirt to wipe it off. I mean, that’s what we do with our eyeglasses, so why not camera lenses? While I’m not saying this method isn’t effective for cleaning lenses, I am saying that you should take caution if you employ it. Shirts can have harmful dirt or sand embedded into their fibers and that dirt can easily scratch a sensitive lens. Also, and this is from personal experience, clothing can contain oils from our bodies on it and if we use that clothing to clean some lens glass, we may be transferring the oil from the clothing to the lens. It’s not the worst thing in the world, but it will only make the glass dirtier than it was originally.

If you want to clean your lens properly, you can use a microfiber lens cleaning cloth. These cloths have been and are used throughout the world to clean all types of optics, from camera lenses, to eyeglasses to binoculars. They’re safe and effective. I’ve got a bunch of these things and they work well, year after year.

If all you have on you is a lens pen, you may surely use that to clean your glass. That’s why these things were created in the first place. Just remember, they somewhat annoyingly transfer dust to a lens as you’re cleaning, so gently blowing the surface of the lens as you’re cleaning it can help with that. Also, if you’re going to use a lens pen to clean, please, please, please make sure it’s not been tumbling around in your bag unprotected. Like your shirt, lens pens can have dust, dirt and sand stuck to them and those objects can scratch the heck right out of the glass.

If you’re getting an error message on your camera that tells you something isn’t connected properly, your lens contacts may need to be cleaned. If you’ve got a pencil handy, you can lightly rub the eraser on the contacts and that might help you out. If the error message is persistent, you may need to have a photography repair shop check it out.

Finally, photography can get dirty. If you find yourself hearing a crunching or scratching sound as you’re zooming in or out, you probably want to send the lens out for a thorough cleaning by a professional shop. This isn’t something you want to ignore and keep using. The noise is most likely coming from sand that’s caught in between the fine crevices and it can do a lot of damage if left alone.

How do you clean your camera lenses? Do you have any tricks you’d like to share? If so, please contribute down below.
 
KristinaW

KristinaW

Member
Joined
May 7, 2021
Messages
127
Reaction Score
0
Points
18
  • #11

How Can I Stop Lens Flares?​

Question: It seems like I’m getting a lot of lens flares in both my photography and video lately. I don’t know why this is happening. For the most part, it’s because of the sun, but I’m finding that it’s also because of things the sun is reflecting off of, such as cars, windows and other shiny objects. When I look at my photos on my computer after I come back inside from shooting, I see multiple flares in so many of my shots. Does anyone have any ideas for how I can stop these things from showing up?

Answer: You either love them or you hate them. Lens flares, that is. I know people who hunt down flares and have to have them in almost every shot or video they take. I also know people who avoid them at all costs. You have to admit that they add a certain feeling to a photo or video, especially when they’re included on purpose. So many movies include lens flares on purpose and they set the mood. They accomplish the mission. Just imagine how flat a scene would be if the camera was panning across a desert and there was no flare. It would be fairly boring.

By the way, if you don’t know what a lens flare looks like, take a quick look at this video.


That said, obviously lots of people don’t want lens flares in their shots. Especially when they’re accidental. These orbs of light can really diminish and alter the exposure values of an otherwise normal photograph or video. After a day of shooting in the sun, the results can be disappointing.

So, what is a lens flare anyway? It’s basically a reflection of light (usually stemming from the sun) off of the elements inside of a camera lens that eventually makes it’s way onto the camera’s sensor. This burst of light causes reduced contrast in the area it resides and it also creates a shape, usually a circle. And it can take the form of multiple shapes that seem to be stacked upon one another.

Here’s a quick piece of advice for you, now that you are aware of the existence of lens flares. Be cognizant of the angle of your lens to the source of the light in your photo. You’ll find that as you alter this angle, the lens flare will move around in your shot. If you’re careful enough, you can eliminate the flare all together, simply by changing the angle of your camera.

Here’s another piece of advice for you. Try not to include flares in your original photos and video. You can always add them later in post-processing, but you can’t get rid of them if they look horrible in the original. There are tons of filters you can use to add lens flares after the fact and so many accidental flares look like dirt on the lens or the filter, so avoid them at all costs. Of course, unless you know exactly what you’re doing.

The simplest piece of equipment you can use to avoid lens flares is the lens hood, or tulip, as some people call it. These pieces of plastic fit on the end of the lens and face outward to block much of the angled light that may reach the elements inside the lens. The ones that cause the flares. Just be sure to fit the tulip on the lens correctly. They usually ship with lenses attached backward, so you’ll need to remove it and then flip it around so it’s protruding the end of the lens.

Lens hoods are generally made of hard plastic or rubber. They can be even all the way around or they can be sort of bulbous, which gives it the tulip appearance. It’s the tulip ones you want to rotate around the lens to effectively block the offending light.

Also, be careful which lens hood you use with which lens. Hoods are usually specific to certain lenses and if improperly fitted, you may see the edge of the hood in your photos.

Another effective method for blocking light and reducing or eliminating lens flares is to use what’s called a matte box. Matte boxes are larger, more square contraptions that fit on the end of a lens. They serve two purposes; to hold lens filters as well as to hold flags. Flags are simply large light blockers and attach to the sides of the box. You can move them and position them so they best block the light. They’re generally more expensive than lens hoods, but they block a heck of a lot more light.

Finally, to block light from causing lens flares, you can use a flag. All a flag is is something that gets in the way of the light source so it doesn’t reach your camera’s sensor. Professional flags are available and you can usually attach these to a stand, which is very handy, but you can also use a piece of cardboard or simply have someone stand there holding up something that blocks the light. Light blocking isn’t rocket science. Where photographers usually focus is on what’s going to work best for them in the field.
 
KristinaW

KristinaW

Member
Joined
May 7, 2021
Messages
127
Reaction Score
0
Points
18
  • #12

My Sigma 50-500mm Lens​

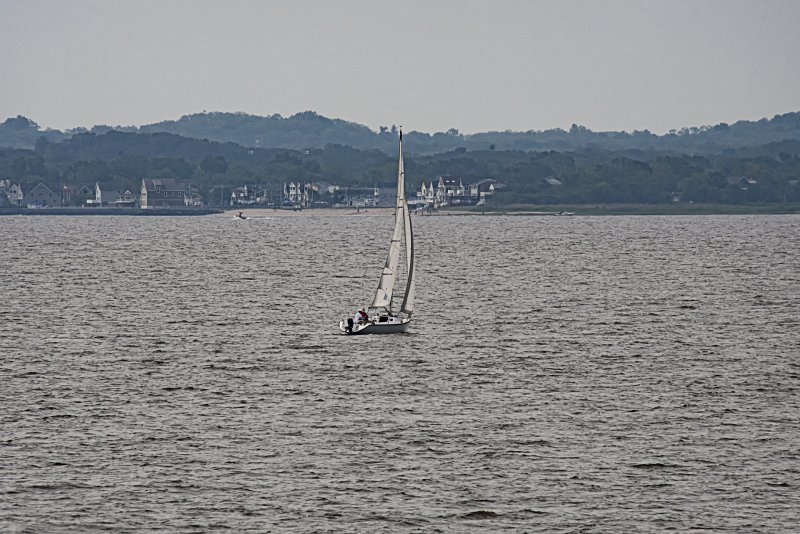
Comment from a reader: This photo might not seem like much, but I was absolutely amazed with it. I took this photo from Mount Loretto, a beach on Staten Island. Mount Loretto is directly across a body of water separating Staten Island from New Jersey. The distance is about 8 miles. Years ago, a friend and I wanted to paddle across in our kayaks, but we never got to do it. If you look across the water from the Mount with the naked eye. all you can make out is green rolling hills. This day I was trying to shoot some seals, birds, or whatever. There was nothing around, so I concentrated on the passing sailboat. I was at 500mm (750 cropped), ISO 500, f/22, and 1/250th shutter speed. When I got home, went into RAW, cropped, and enlarged the photo, I was amazed to find that not only was I able to now see the beach on the Jersey side, but houses and people standing on the beach. All this from a distance of 8 miles!

New-Jersey-from-Staten-Island.jpg

New Jersey from Staten Island.

Reply: Hi Herb – This is an incredible photo! I can’t believe you were able to manage such detail from so far away. You may as well use this lens as a telescope as well. This is a wonderful endorsement for Sigma. I have one of their wide angle lenses and I love it. Nothing like your 500mm though.

Reply: I wish there was some way I could find the actual mileage between Staten Island at Mount Loretto, and directly across to New Jersey. I guess I’ll have to give the Coast Guard a call one day.

Reply: From the shore of Mount Loretto Unique Area to Conaskonk Point in New Jersey, it’s 3.75 miles.

From the shore of Mount Loretto Unique Area to Keyport Harbor in New Jersey, it’s 4.6 miles.

From the shore of Mount Loretto Unique Area to Keansburg Amusement Park in New Jersey, it’s 5.35 miles.

From the shore of Mount Loretto Unique Area to Sandy Point Hook Beach in New Jersey, it’s 11 miles.

These points are all almost directly south and southeast of Staten Island.

If you download Google Earth, there’s a Ruler tool that you can use to measure things like what you’re interested in. I use it all the time.

Reply: WOW! Thank you so much for taking the time in getting that info. Sometimes it pays to keep up with the technology which makes all this info readily available.It’s like I am living in a cave during the stone age. Although I am not certain, I think it might be Keyport Harbor I am seeing directly across from the Mount. Not the 8 miles I though it was, but still a great achievement for that lens. I see that Sigma now has a 60-600mm zoom. I think though tempted, I’ll hold off on that for a while.

Reply: I thought you’d like that. I was excited to share these distances with you because I felt like a whizz. The Ruler tool in Google Earth (not Google Maps online) is one of those little hidden treasures. It’s fun to use it to see how long you’ve hiked or walked or whatever. I see that it’s also now good for photography. Glad to help!

And yes, I think your 500mm is pretty good for now. I agree with you though, an extra 100mm is so cool.
 
KristinaW

KristinaW

Member
Joined
May 7, 2021
Messages
127
Reaction Score
0
Points
18
  • #13

Canon 50mm F/1.8 Camera Lens Test – Sample Pictures​

This is my second lens test post. Yesterday, I received two lenses in the mail. One was the Canon 24mm f/2.8 pancake lens and the other was the Canon 50mm f/1.8 prime lens. Well, they’re both actually prime lenses, but I like to differentiate.

This lens is a bit different than the 24mm. It’s much more zoomed in. It’s also more susceptible to camera shake. When I was taking these test shots outside just a moment ago, I noticed that I wasn’t getting the sharpness that I was able to get with the wider lens. With that one, the camera shake didn’t seem to matter. With this one, I think I’ll have to use a tripod much more often than not. Again, neither of these lenses have built in image stabilization. I didn’t expect that at only $125 and $129 for the 50mm and the 24mm respectively. By the way, yes, this is the “nifty fifty” that everyone always talks about. This is the most recent iteration with the metal ring as opposed to the plastic one.

Comparing the two lenses, I can already see that I’m not getting as much color with the 50mm. Also, like I said, it’s not as easy to take sharp images either. The 50mm is larger than the 24mm, but I don’t think it weighs any more. And if it does, it’s marginal and not noticeable. When it comes to how close you can bring this lens to your subject, it’s pretty close, but not as close as the 24mm. I think this one is about a foot and that one is about half that.

Let’s get on with the sample shots. Since this has got a huge aperture, I had to test that out.

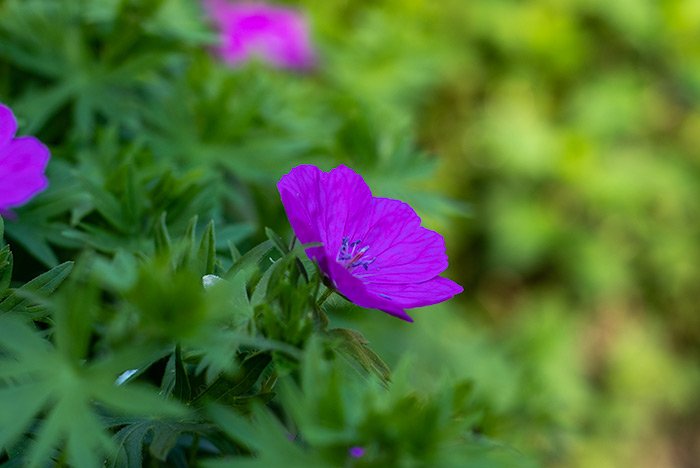
This is the first photo I took. I don’t like it at all. There’s a strange outline around the flower that’s all the way to the left and the one in the center is far too saturated. I know I could have taken a better photo, but I wanted to show you nonetheless.

shade-saturated.jpg

Camera: Canon Rebel T7i
Focal Length: 50mm
Aperture: f/4
Shutter Speed: 1/160
ISO: 100

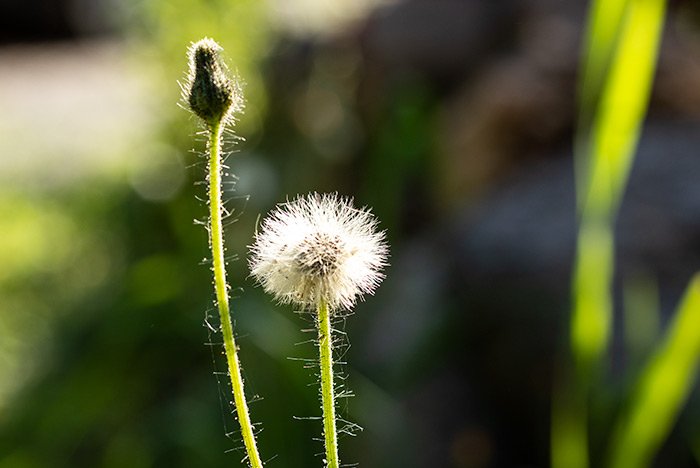
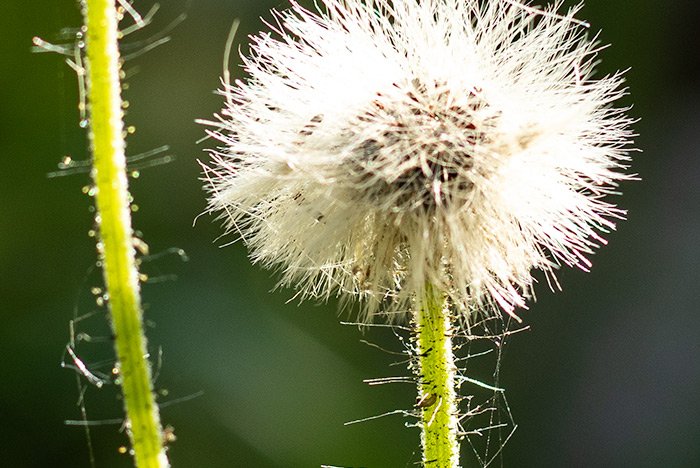
This shot was a clarity and sharpness test. I think it passed. I held the camera about two feet away from this flower and the details are clearly visible. I cropped the second shot pretty far in so you can see the detail the camera and lens picked up. Not bad, considering there was a light breeze outside and this flower was swaying back and forth. Talk about shallow depth of field.

puffy-clear.jpg

clarity-flower.jpg

Camera: Canon Rebel T7i
Focal Length: 24mm
Aperture: f/5
Shutter Speed: 1/200
ISO: 100

For these next two shots, I wanted to take a look at some different aperture settings. I set the aperture to f/2.8 for the first photo and f/11 for the second. I think I like the second one better. I will tell you that if I was serious out there and if I was using a tripod, I would have locked the ISO down to 100 and let the shutter speed go much slower.

shallower-dof.jpg

Camera: Canon Rebel T7i
Focal Length: 24mm
Aperture: f/2.8
Shutter Speed: 1/180
ISO: 125

deep-dof.jpg

Camera: Canon Rebel T7i
Focal Length: 24mm
Aperture: f/11
Shutter Speed: 1/25
ISO: 800

For these next few shots, I was just messing around. I changed the aperture setting a few times and got lucky that there was no camera shake in any of these. I like each of them. I can definitely see the potential of this lens if I use a tripod in the future. It’s extremely sharp and under the right circumstances, I think it would be a great walk-around lens. I’ll most likely bring both the 50mm and the 24mm with me at all times. And my 18-135mm zoom, of course. It’s just that the zoom lens weighs a ton.

bright-pink.jpg

Camera: Canon Rebel T7i
Focal Length: 24mm
Aperture: f/2.8
Shutter Speed: 1/60
ISO: 125

flowers-leaning-out.jpg

Camera: Canon Rebel T7i
Focal Length: 24mm
Aperture: f/11
Shutter Speed: 1/40
ISO: 800

pink-flowers-facing.jpg

Camera: Canon Rebel T7i
Focal Length: 24mm
Aperture: f/11
Shutter Speed: 1/20
ISO: 800

Do you own the Canon 50mm lens? If so, please let me know what you think of it down below. Thanks!
 
KristinaW

KristinaW

Member
Joined
May 7, 2021
Messages
127
Reaction Score
0
Points
18
  • #14

Canon 18-135mm STM Lens Extends By Itself When Facing Down​

I recently purchased a really nice Canon 18-135mm STM lens and noticed that when I point it straight down to take food photos or something like that, the lens slowly extends by itself. For years, I used an 18-135mm Canon kit lens and that didn’t do this at all. The reason I purchased this new lens was because it has a somewhat of a silent motor inside of it. When shooting video with my old lens, the sound of the focus motor was very loud. So loud you could here it in the video itself.

I was talking to a fellow amateur photographer out on a trail a few weeks ago and told him about the problem. He said that if it were him, he would have returned the lens immediately. I sort of agreed, but it’s past that point now. Is there anything truly wrong with the lens? Is this normal? I’ve actually only owned a handful of lenses like this and this is the first time I’ve experienced this. I’ve heard about some sort of thick rubber band type things that you can put around the lens itself that will stop it from creeping. Is that something worth looking into? Any information would be appreciated.

COMMENT: Hey, I have the same lens and mine acts the same when pointed downwards. It keeps in place up to about the 35 mm-mark on the zoom, after that it can’t keep up with it’s own weight. I don’t think there’s anything ‘wrong’ with it, apart from being a cheap construction. But it’s a cheap lens with a great zoom range and good image quality, so the trade off is in the materials and construction.
 
Top