KristinaW
Member
- Joined
- May 7, 2021
- Messages
- 127
- Reaction Score
- 0
- Points
- 18
- #1
Before I get into how to correct lens distortion in Adobe Camera Raw, I think we should define what lens distortion is. Believe it or not, many people don't recognize the effects of distortion when looking at photos. It's not until they're presented with a side-by-side view that they become alarmed at how prevalent this type of defect is. Now, I say "defect" because lens distortion can be overwhelming and unintended in many cases. Of course, if your goal is to distort your photograph with this type of alteration, please disregard my previous statement. It's just that oftentimes photographers would rather have minimal distortion and as accurate a photograph as possible.
I'm going to primarily discuss how to correct lens distortion in this post. While photographers also often face issues with perspective distortion, which Camera Raw can correct as well, lens distortion is generally more unintended and caused by the lens used. As a general rule, using less expensive and lower quality lenses can result in photographs with more apparent distortion of this type.
I did a bit of poking around on the internet and found a post that gives a very thorough description of both types of distortion. If you go ahead and read the post, I think you'll meet the requirement for obtaining the background you'll need to progress through the rest of my post.
What is Distortion?
Opening My Image
The first task I need to complete in order to do any type of editing is to open an image into Camera Raw. I use Adobe Bridge to browse my photos and after I select which one I'd like to edit, I open it from there. In this case, I chose one that I know I used a wide angle lens to capture. As indicated by Bridge, I shot this image with my wide angle 10-20mm lens. For this photo, I was zoomed all the way out at 10mm. It should offer some distortion. Not a whole lot, because I was shooting at a distance, but some. If I were more up-close, the distortion would be more apparent.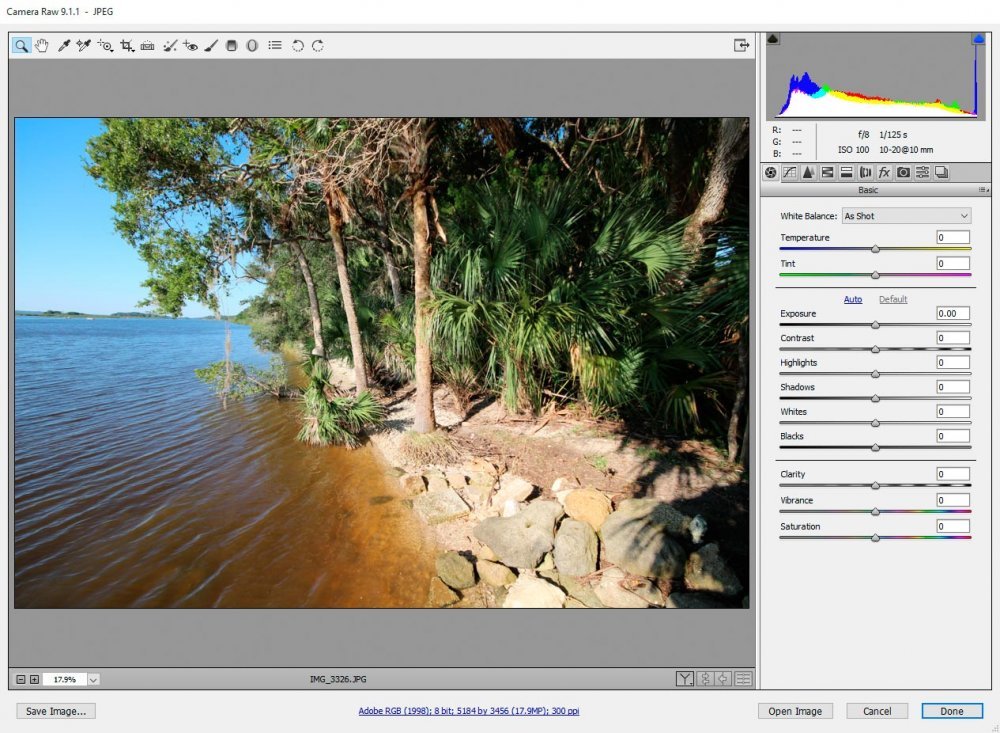
Lens Corrections Panel
Next, I need to visit the "Lens Corrections" panel. To get here, I simply click the appropriate button that's located alongside the other panel buttons.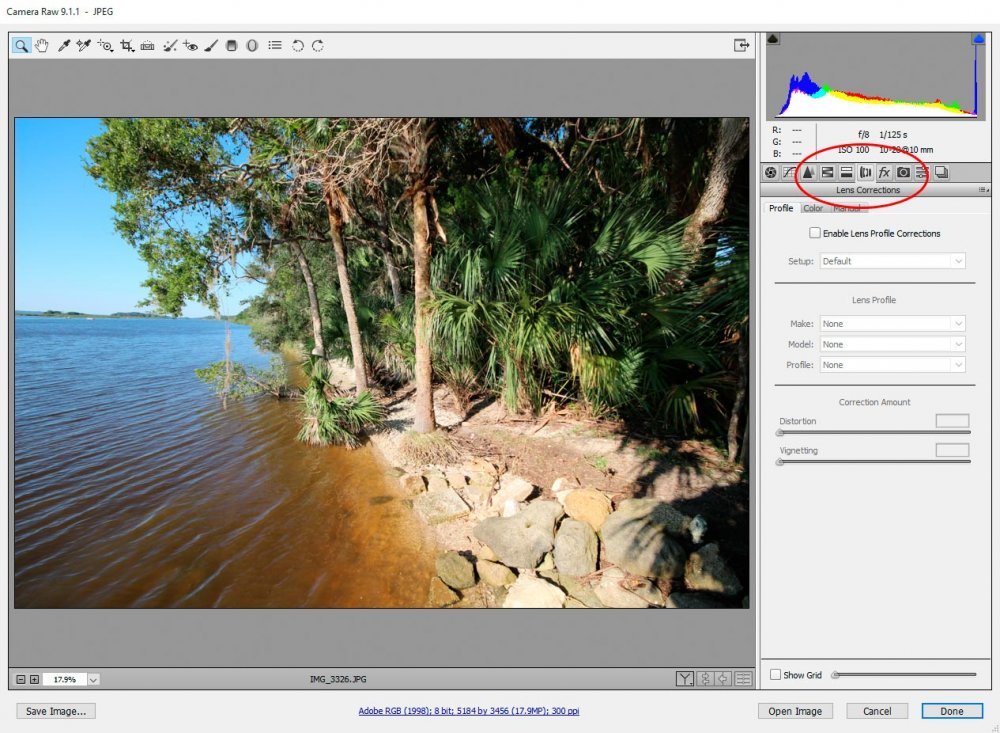
Now, if you'll notice in the screenshot I just posted above, I'm in the "Profile" tab. This tab offers the most simple method of going about editing and correcting lens distortion. If I click the "Enable Lens Profile Corrections" check box, Camera Raw is supposed to search my photo's metadata and apply any corrections based on the make and model of my camera, along with which lens I was using. For some reason though, the application isn't picking up this data, so the drop-down boxes are still displaying their default values, which are nothing.
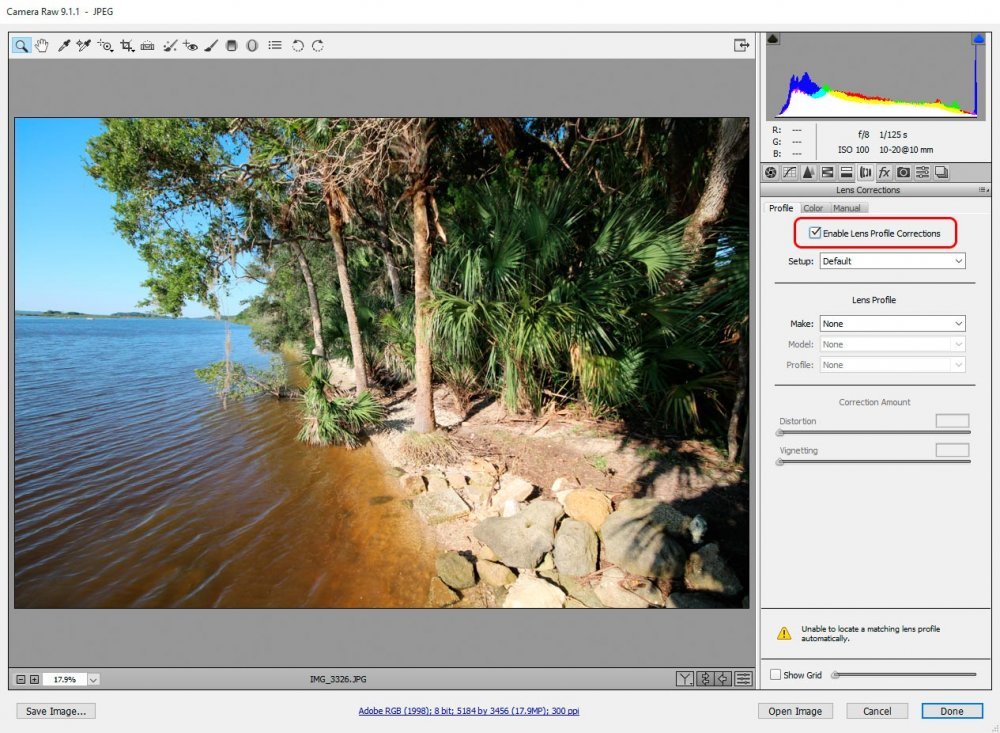
I'm also getting a message at the bottom of the panel that says "Unable to locate a matching lens profile automatically." If Camera Raw could locate the data it needed, the fields above would be filled in and the corrections would be applied.
Since this isn't working in my example, I found a workaround. In the "Make" drop-down box, I chose the make of my camera, which is a Canon. It appears that once I did that, the other fields were filled in almost accurately. The only difference is that Camera Raw decided that my lens manufacturer is Canon, as opposed to Sigma, which it is. The corrections look good though, so I'm not particularly worried around that.
Reviewing the Corrections
Let's take a look at how Camera Raw corrected the lens distortion in my image.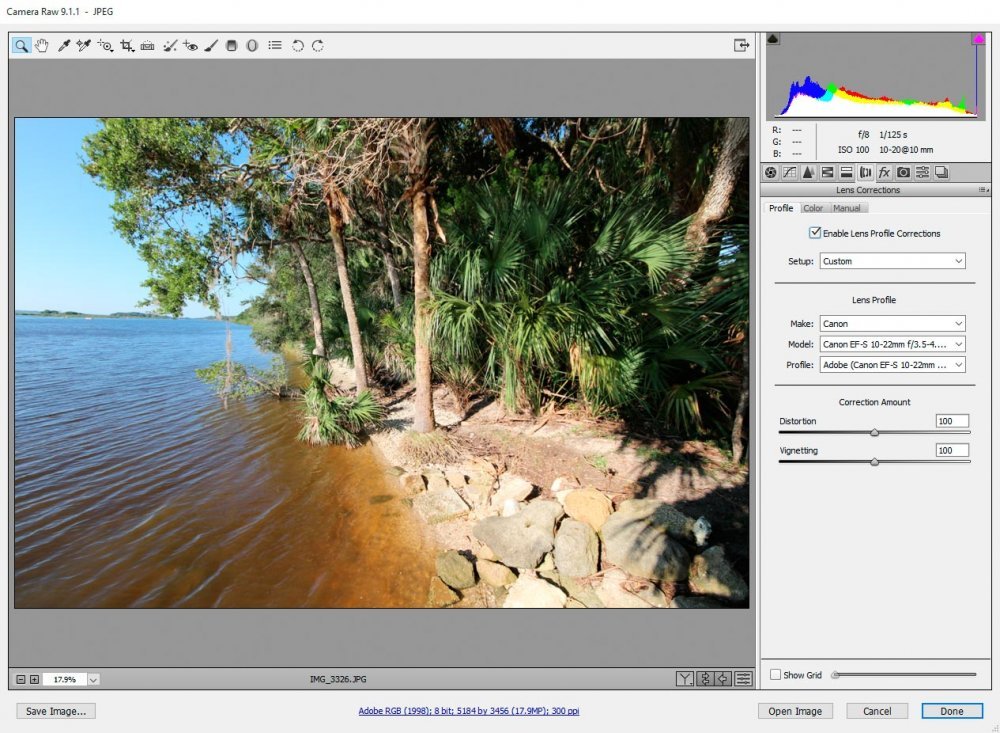
If you don't notice much of a change, it's not your imagination. This photograph didn't have a lot of distortion. It had a bit and clicking back and forth between the original and the edited version, I'm able to see it, but with the naked eye, without clicking, I can't. I welcome you to work these photos in Photoshop and play around a bit to see the edits.
So, what did change? Well, for one, a bit of distortion was removed. Second, any vignetting in the original photo was removed as well. If I move the sliders toward the bottom of the panel side-to-side, I can adjust the intensity of the corrections. I can also undo them completely.
Manually Correcting Lens Distortion
Let's say you don't have any metadata for Camera Raw to pick up on and no matter what you do, Camera Raw can't seem to apply any sort of profile to your image. If Camera Raw can't find any data, it can't correct the image distortion created by your lens. If this is the case, you can always head over to the "Manual" tab and edit your photograph by hand. You may even want to do this to add some artistic effects to your image.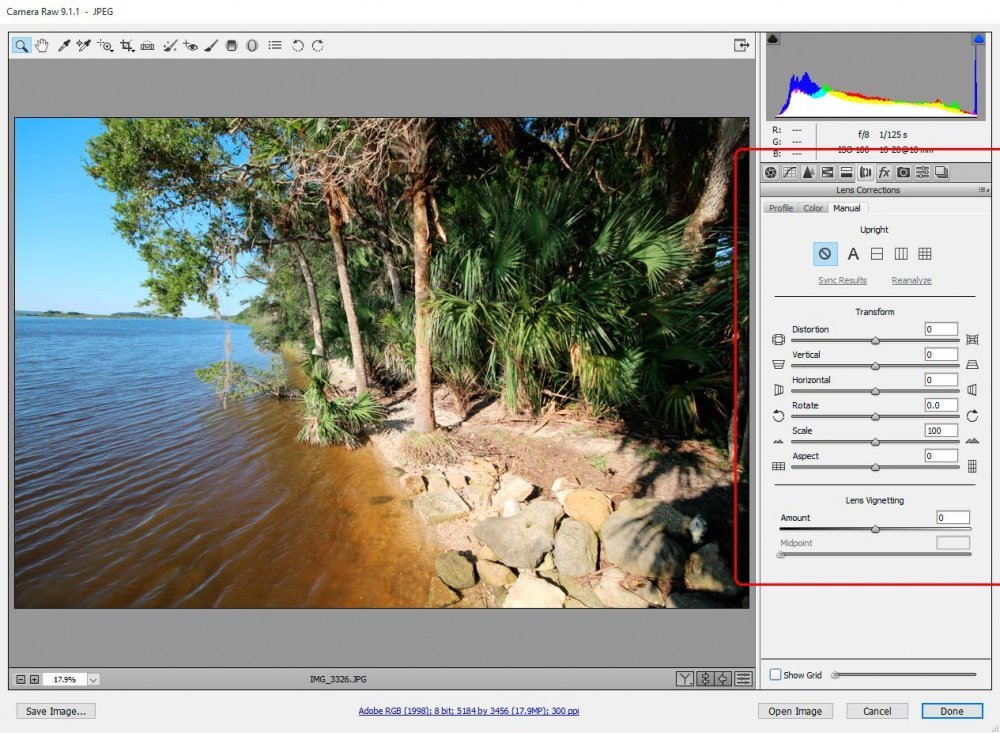
Just as an example, I'm going to wildly adjust the vignetting and distortion sliders in the Manual tab. I'm doing this just to show you haw dramatic these changes can be.
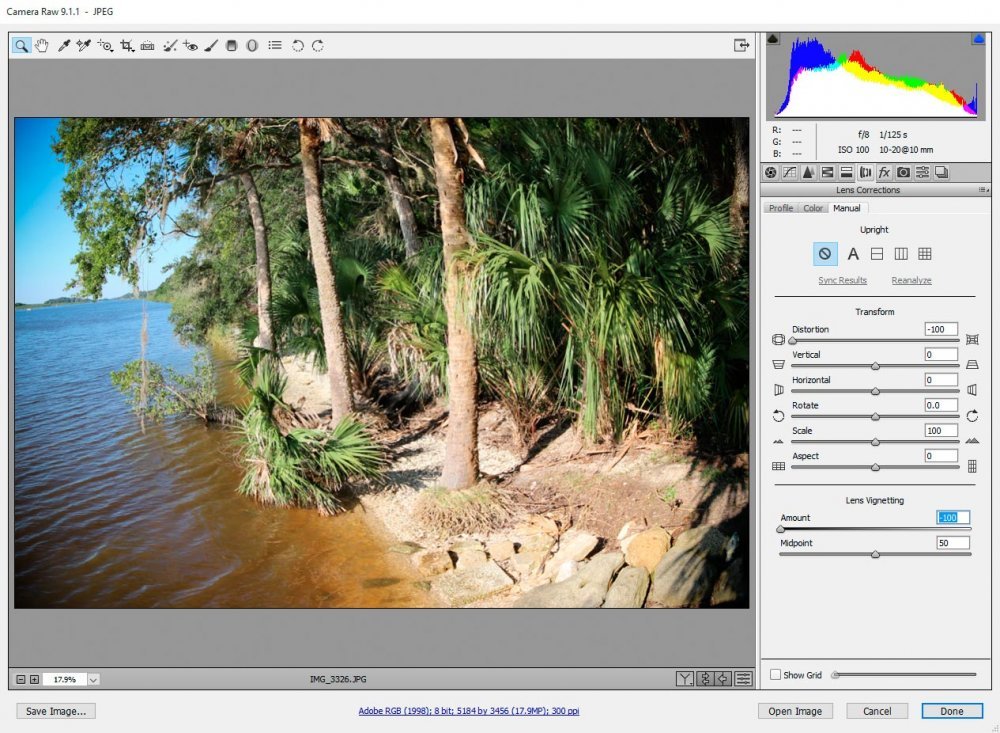
Now, you should be able to clearly see the edits. In your own photos, I encourage you to take advantage of both the "Profile" and "Manual" tabs to edit your images. You really won't know what looks best until you see the actual changes.
------
If you've enjoyed today's post and found it helpful, please share it with a friend. Also, if you'd like to continue learning and would like our post notifications sent directly to your email inbox, simply click the "Watch" button above for the topic you're interested in. We'll send each and every post directly to you. Thanks!
