CampFireJack
Member
- Joined
- May 9, 2021
- Messages
- 118
- Reaction Score
- 1
- Points
- 16
- #1

While much of working inside Photoshop is a lot of fun, the good times really begin when you start to customize your workspace. Customization gives Photoshop more of a personal feel and allows for more efficiency because you can create your own flow.
In this post, I’ll discuss a few key aspects of how to go about making Photoshop simpler to navigate for a particular type of job and how you can easily set it up to help get done what needs getting done. I’ll also talk about how you can set Photoshop to look and function more to your liking.
Defining Colors and Shades of Your Work Area
When you install Photoshop, your workspace will be appear, by default, with a certain look and feel. While these settings will be fine for some users, others may want to modify specific aspect of their workspace so it’s more appealing to them. The very first and easiest area to modify is what controls and determines the colors and shades used in your working area.So, with that in mind, let’s go ahead and lighten and darken the entire program. To do this, we can head up to the top menu and click on “Edit.” After that, we can roll down to the “Preferences” selection and click it. From there, we choose “Interface…”
NOTE: If you’d like a larger view of any example image in this post, simply right click on it and choose “Open Image In New Tab.”
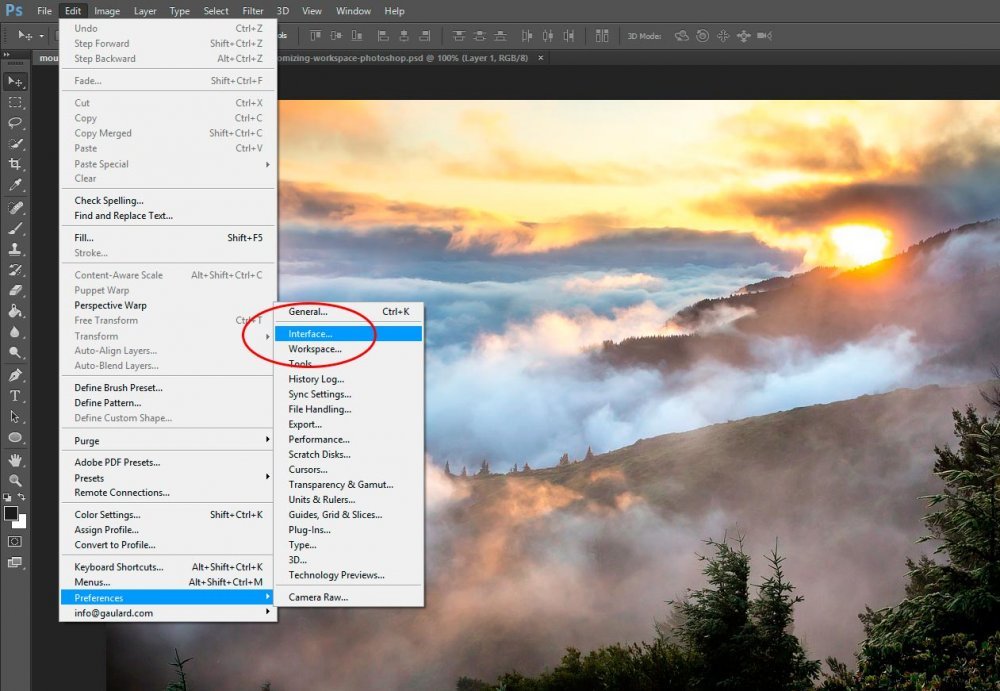
After we click the Interface selection from the menu, we’re presented with a few options. What we want to experiment with is the “Color Themes” area in the “Appearance” box.
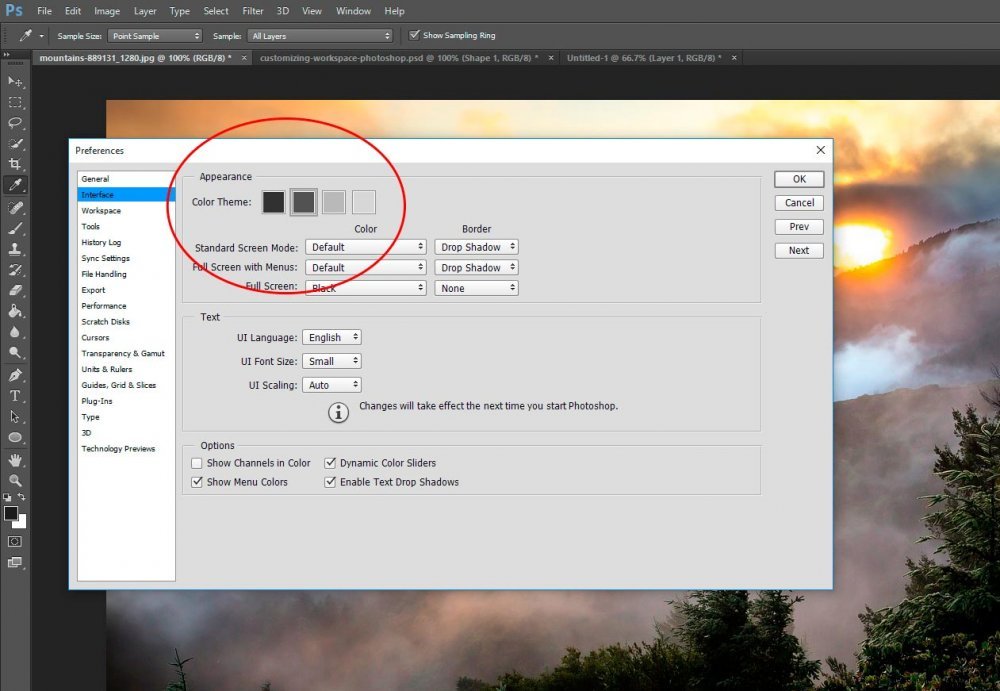
Inside this area, you’ll see four different choices. If you click around a bit, you’ll see almost everything inside Photoshop change shades. For instance, I clicked on the lightest option and this is what I got. Notice how the toolbars and the menus lightened.
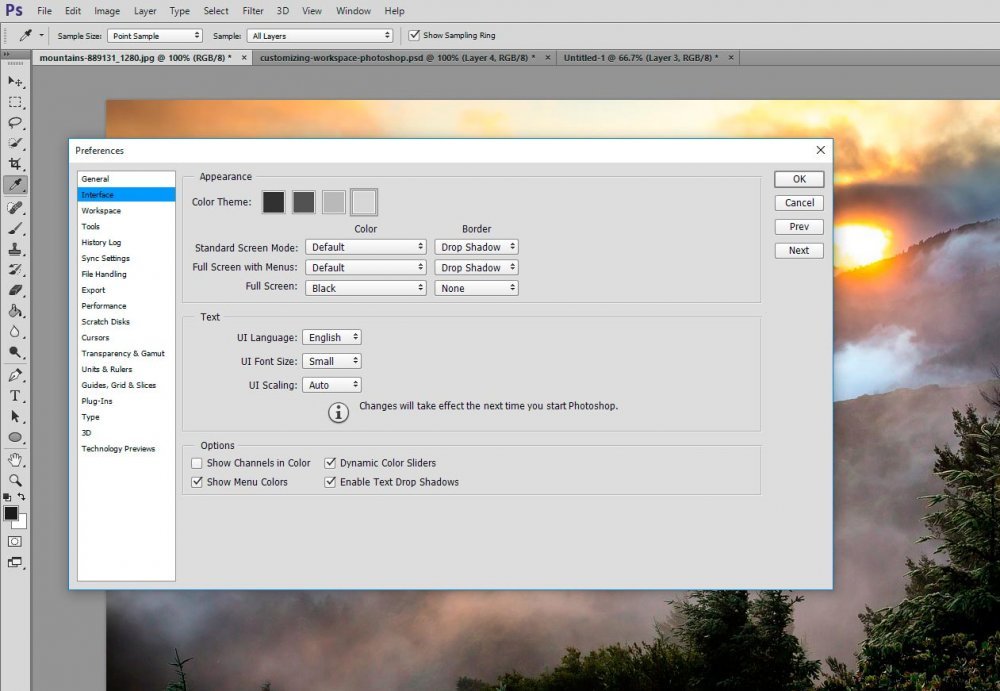
When you find a shade that appeals to you, click on the “OK” button to the right and that choice will be saved inside of Photoshop. Personally, I’m happy with the default darker grey, but that’s all up to personal preference.
Changing Color Outside Your Canvas
Here’s another tip that covers how to set up your personal style within Photoshop. And this one may help when editing images and graphics that consist of certain shades or colors that are difficult to manage. Sometimes, if we’re working on something that doesn’t contrast enough with the color that surrounds the canvas area and we need to see the image edges, we can get frustrated. To fix this, when working on your file, go ahead and right click directly outside your image or graphic.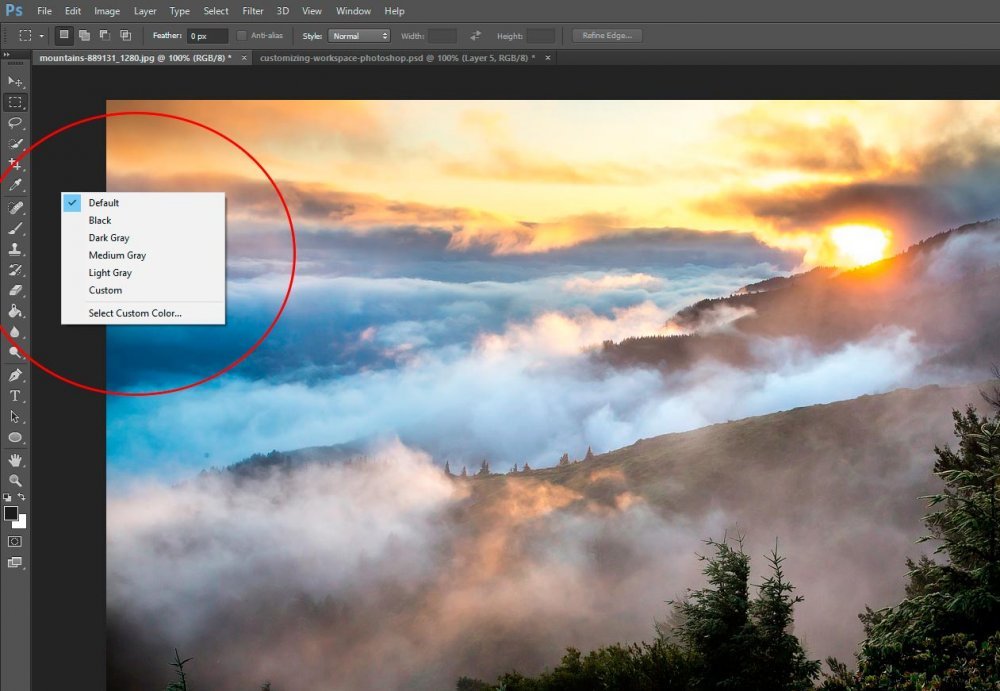
When you do this, you’ll notice a menu pop up that offers some choices. The choices are Default, Black, Dark Gray, Medium Gray, Light Gray, Custom and Select Custom Color…. If you click on one of these, you’ll see that only the area around your images changes shade, as opposed to the entire program changing shade as it did in the previous section of this post. Like I said, this is helpful to regain that contrast between edges that’s necessary when editing certain types of images and graphics.
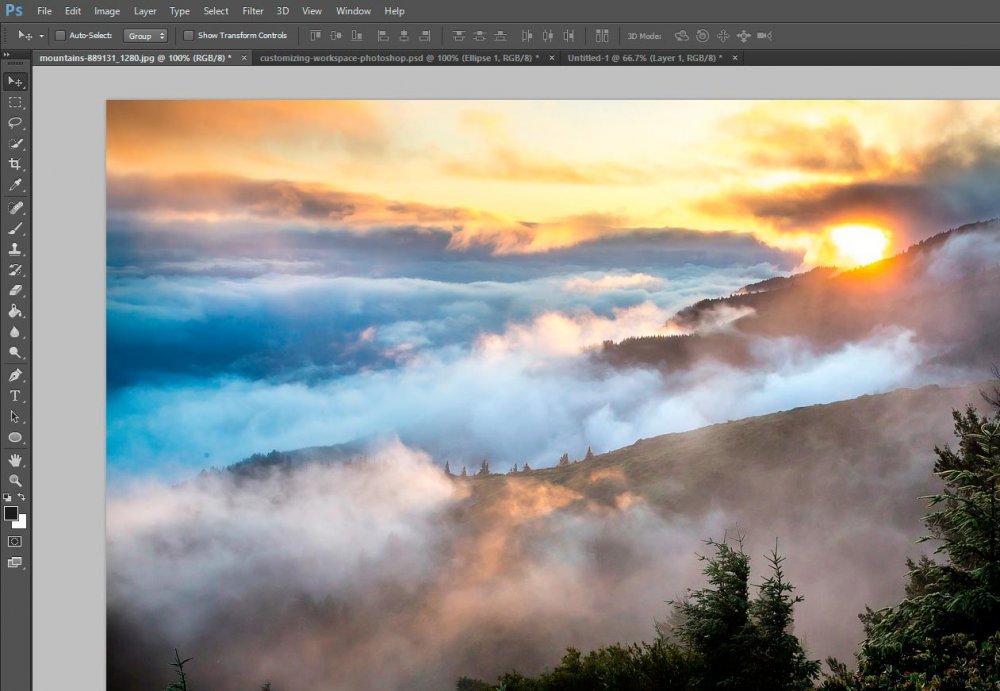
Now, sometimes changing shades in this area isn’t good enough. Sometimes we need to actually change the color. Luckily, we’re able to accomplish this as well. And in order to do it, we need to click the “Select Custom Color…” option.
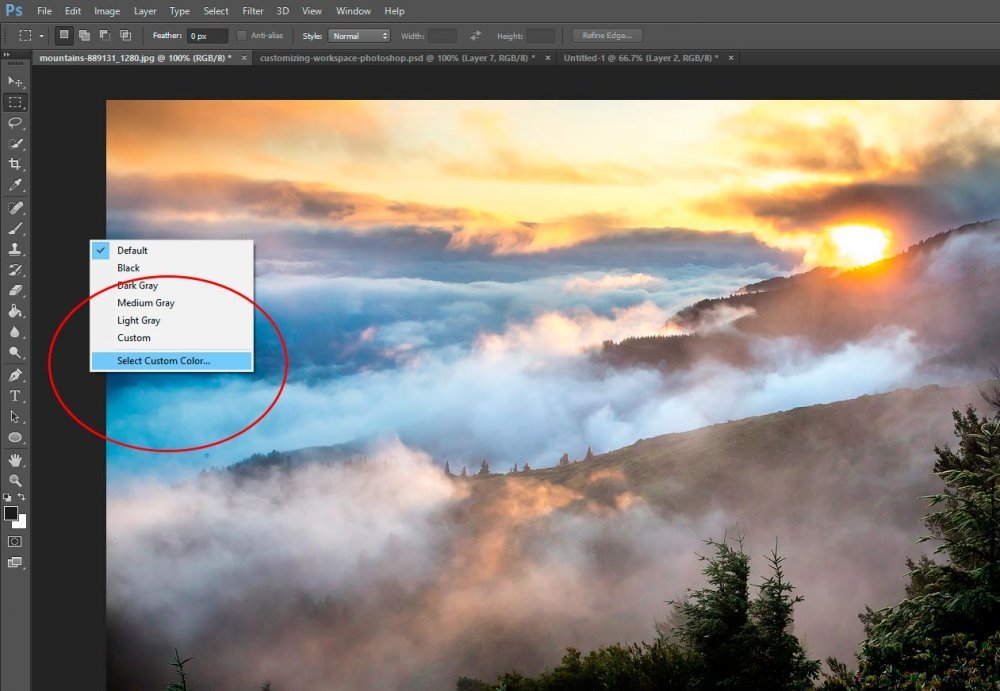
Once you click on this selection, you’ll see your color picker appear. This is the part that’s up to you. Go ahead and experiment with choosing different colors for your background. Once you think you’ve picked something you like, click the “OK” button to the right. You’ll see that Photoshop changes the background to the color of your choice. If you don’t like the color you’ve chosen, simply repeat the process until you find something that better fits your project.
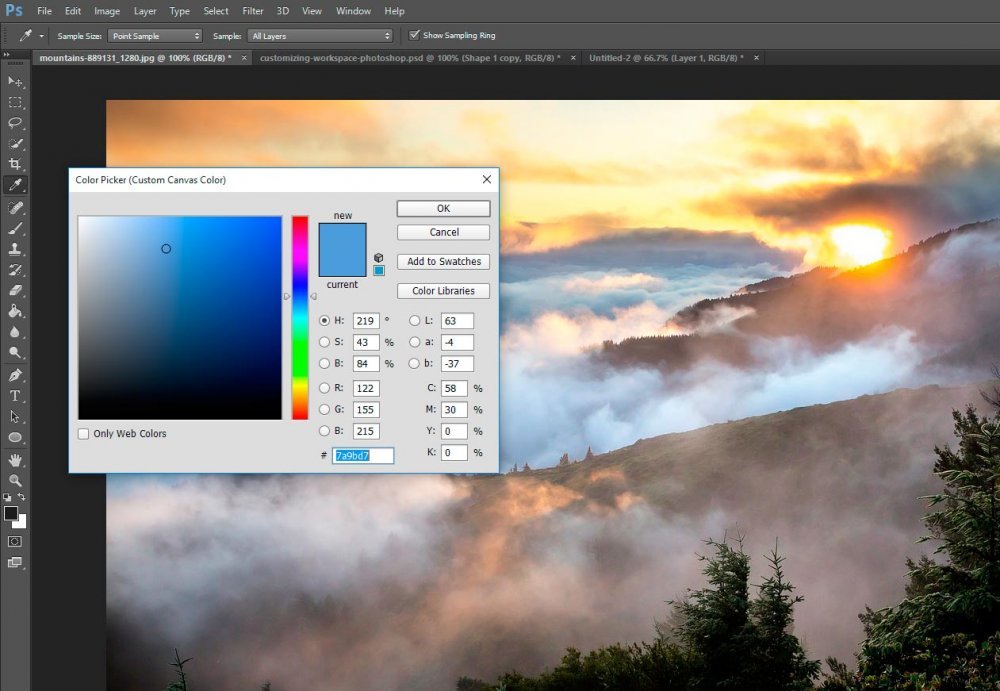
In my case, I chose a shade of green.
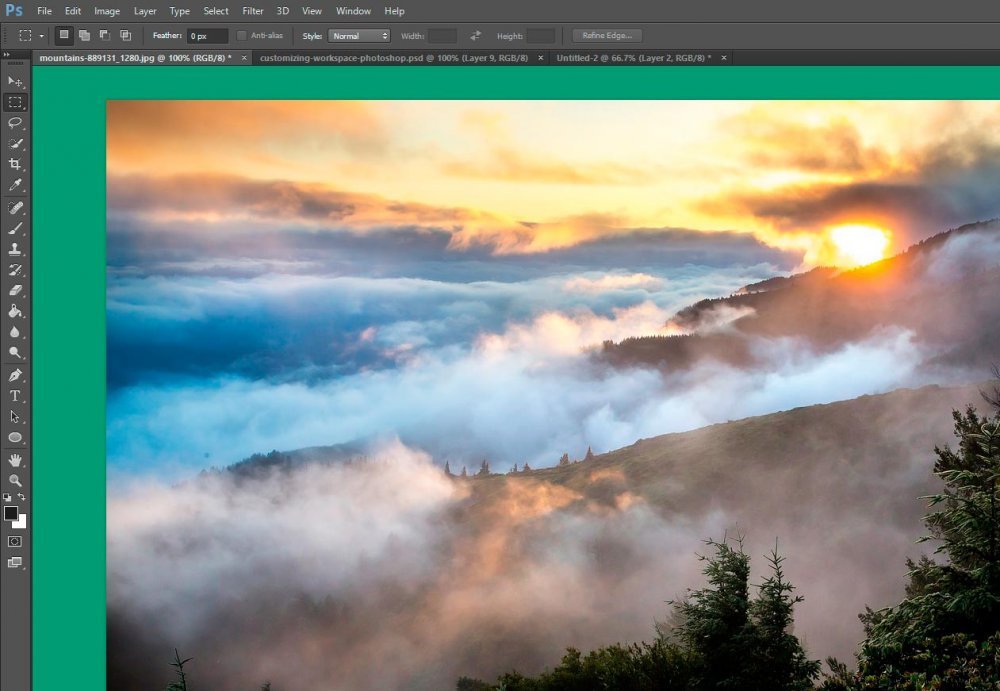
But, I find this shade of green to be rather ugly, so I changed the area’s color back to the default gray.
Selecting a Workspace Inside Photoshop
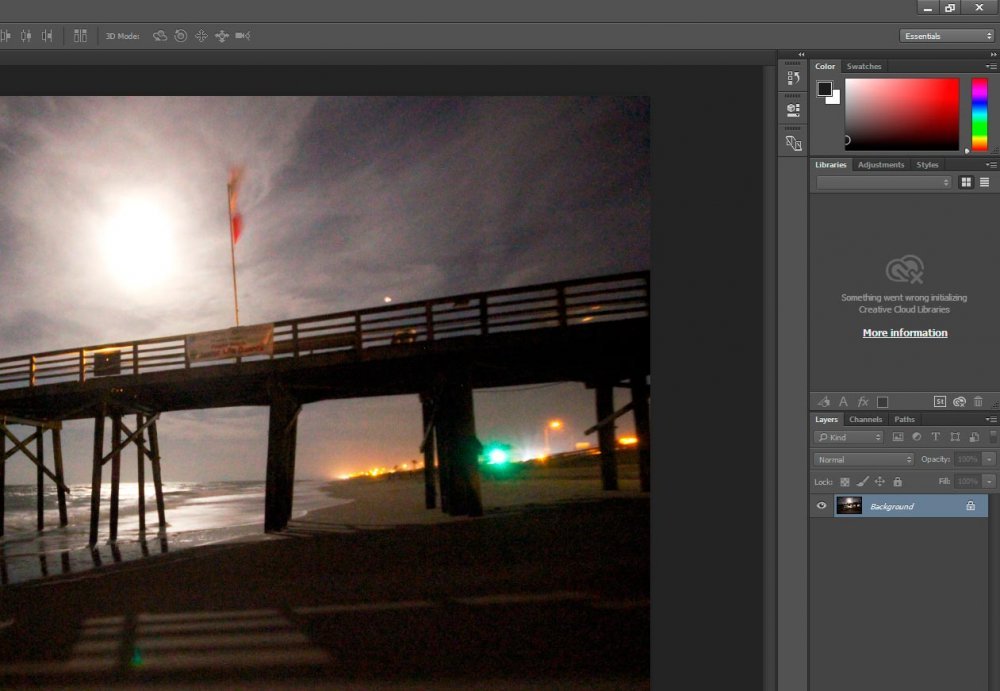
Now that we’ve got some of Photoshop’s color options out of the way, let’s move over to setting up our workspace. Again, when you install Photoshop, your workspace will be set, by default, to what’s called “Essentials.” This settings is evidenced by viewing two areas. The first is all the way in the upper right corner.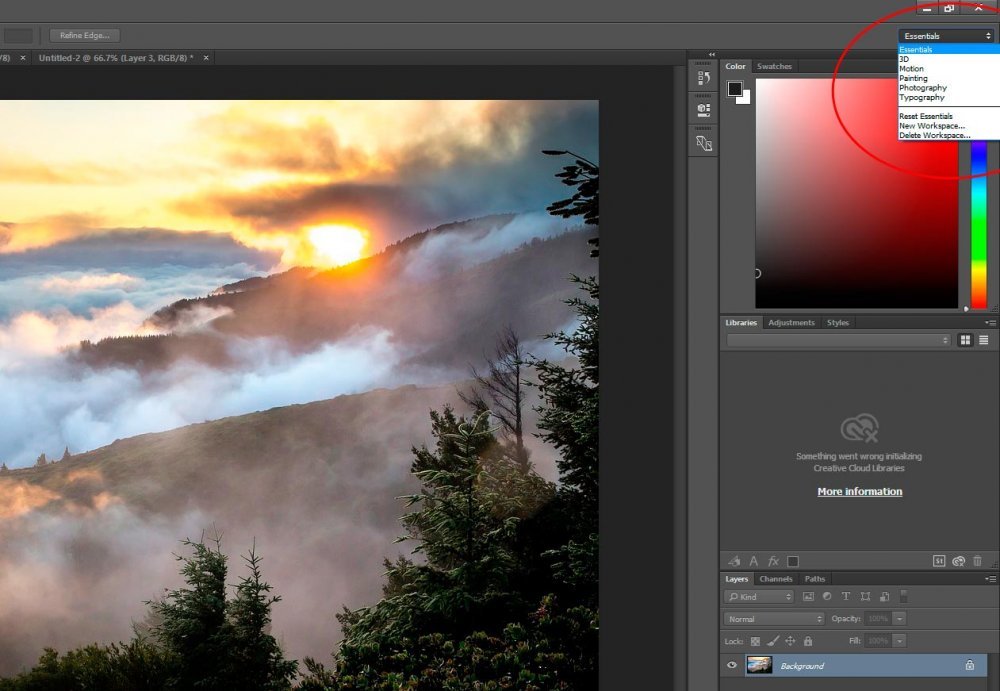
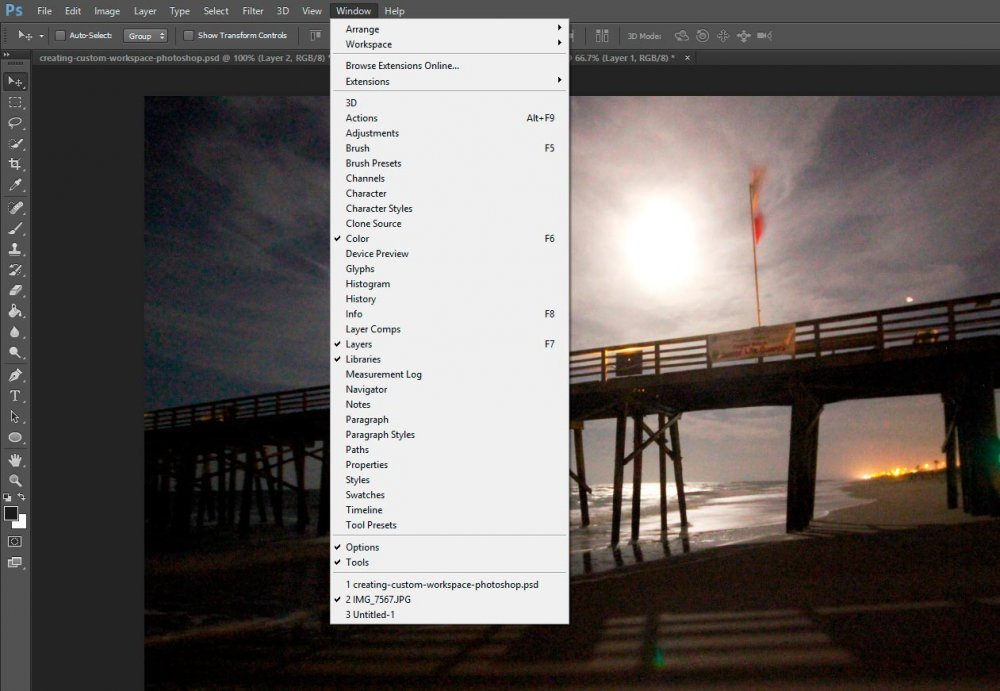
And you can view the second if you go up to the top menu and click on “Window” and then roll over “Workspace,” you’ll find that Essentials is chosen by default.
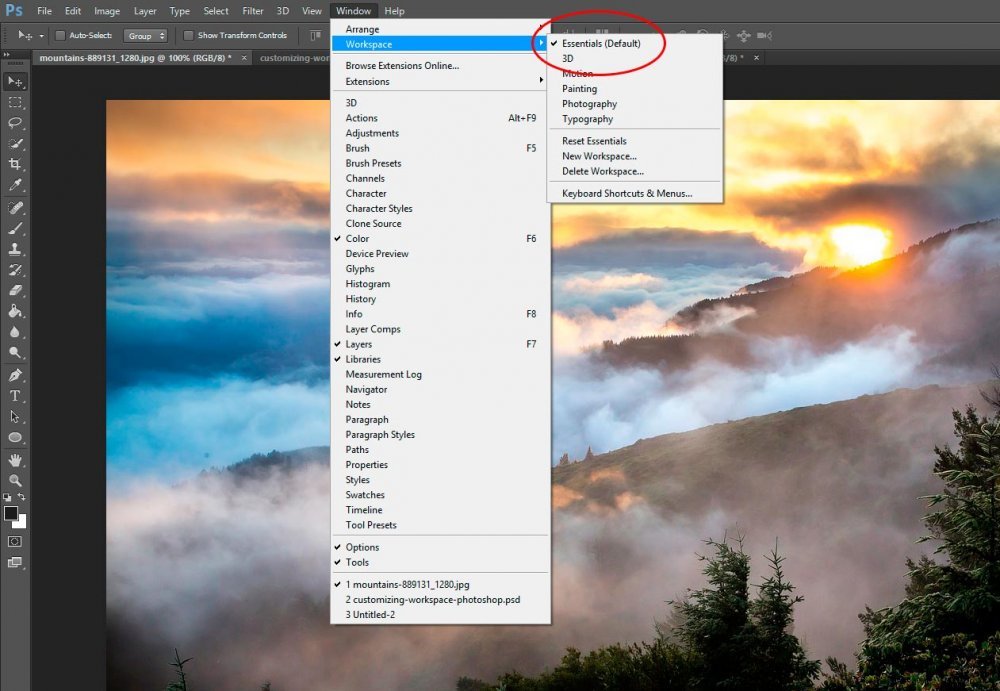
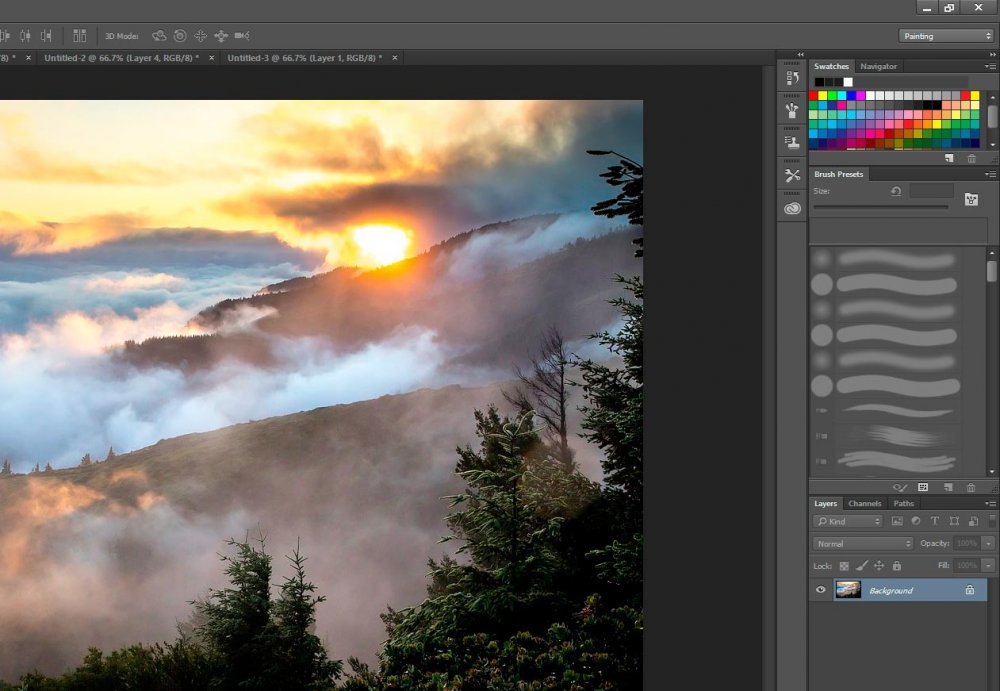
By viewing the two areas I just discussed above, you may have noticed a few workspace options. Those options currently consist of Essentials, 3D, Motion, Painting, Photography and Typography. While Photoshop sets your default workspace to Essentials, that may not fit the project you’re working on. If you’re editing a 3D image, you may want to choose the 3D workspace. Similarly, if you’re painting inside Photoshop, you would most likely want to set your workspace to the Painting option.
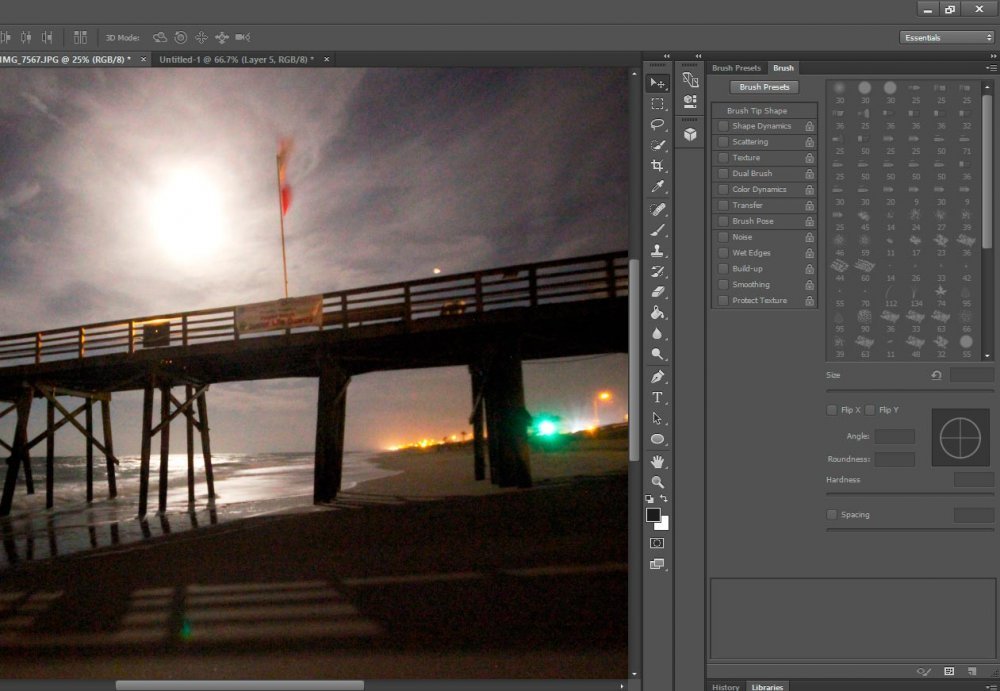
Now, when you switch workspaces, you’ll notice some of the panels around Photoshop change. These aren’t new panels; they already exist inside the program. All you’re doing by editing your selection is bringing alternative panels to life. For instance, if I choose the Painting workspace, I can see the panels over to the right switch from the default ones to the more relevant painting ones.
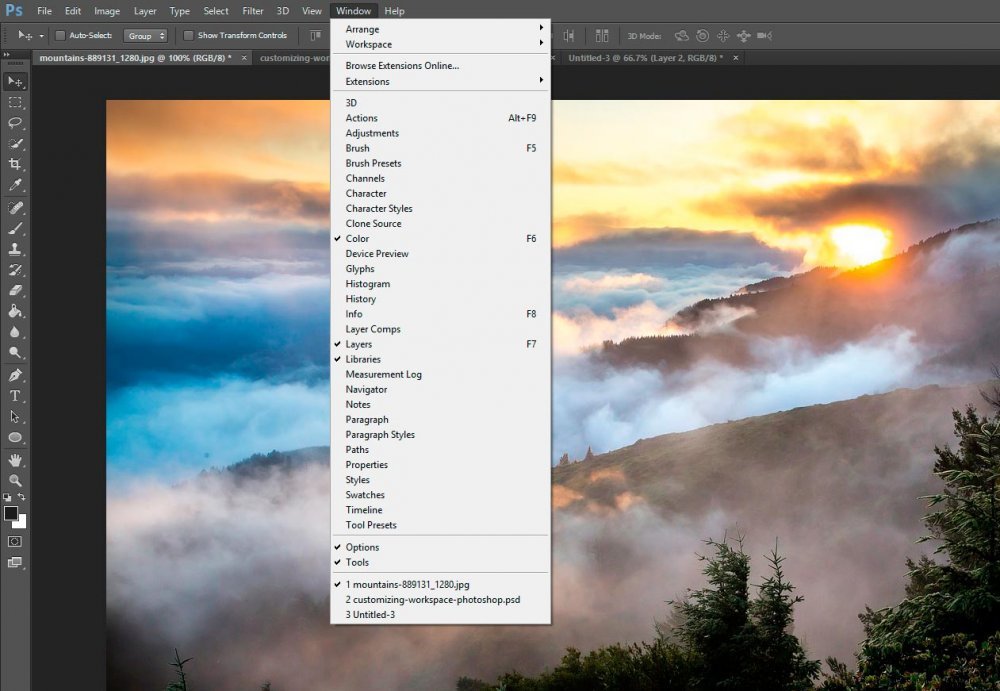
Just to demonstrate what I’m referring to, take a look at the Essentials panel choices from the “Window” menu (they are checked off). They are Color, Layers, Libraries, Options and Tools.
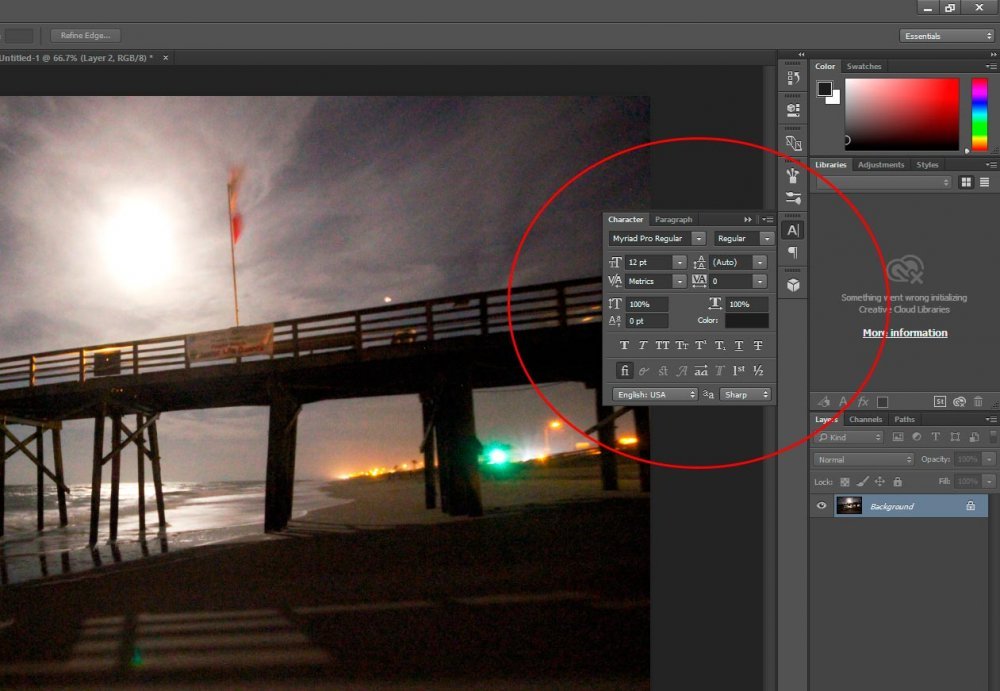
If we choose, say, the Typography workspace, we can see that our panels switch over to Character, Character Styles, Glyphs, Layers, Options and Tools.
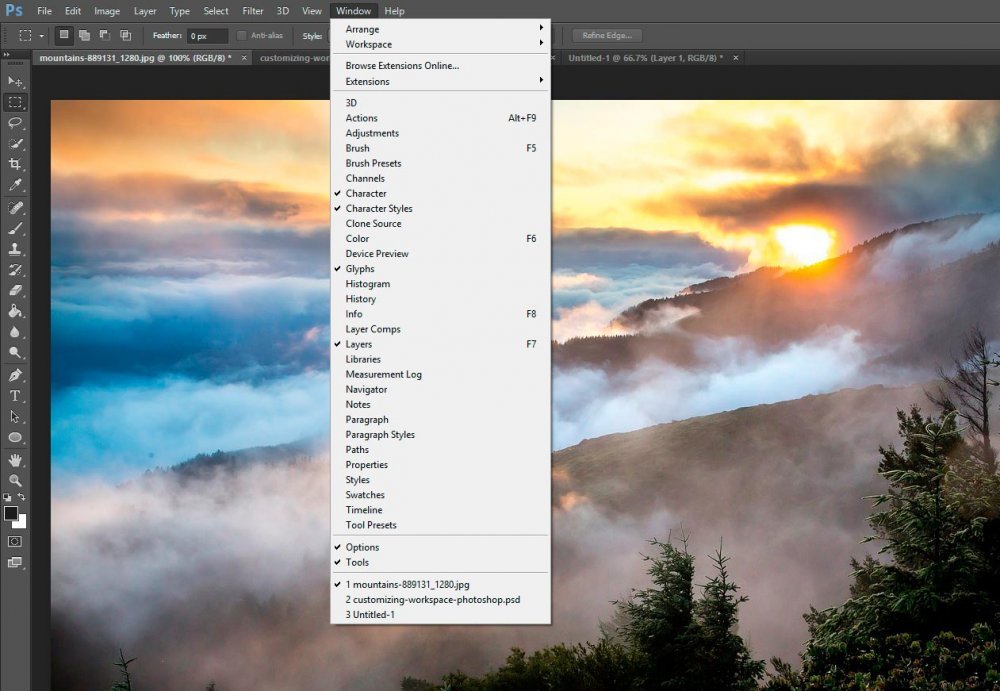
By altering our workspace, we didn’t necessarily discard any panels. We merely hid them from view.
Changing Size of Open Panels
If you’d like a larger or smaller view of the open panels in your workspace, all you need to do is hover over the vertical left border of the panel collection with your mouse, until your mouse turns into a double arrow. After that, click, hold and drag to the left or to the right. You should see the size of your panels change.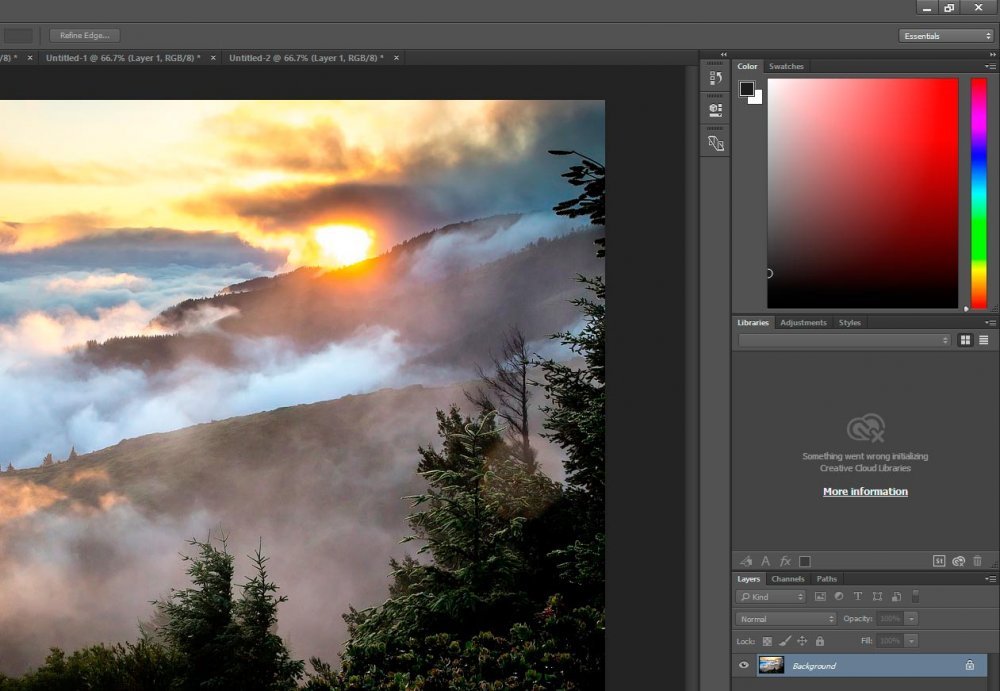
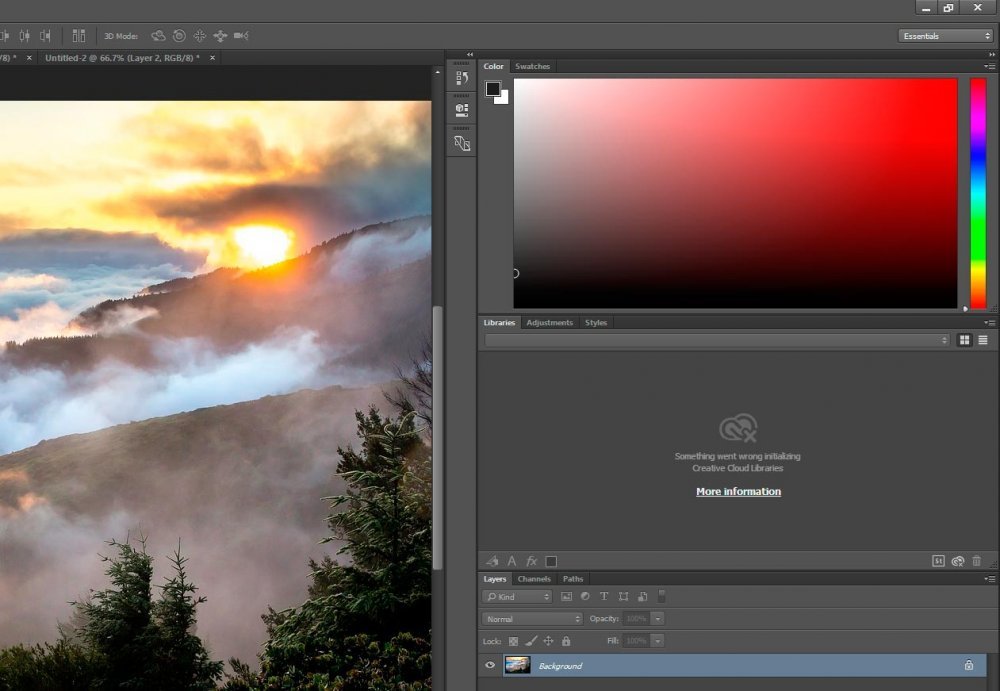
Opening and Collapsing Closed Panels
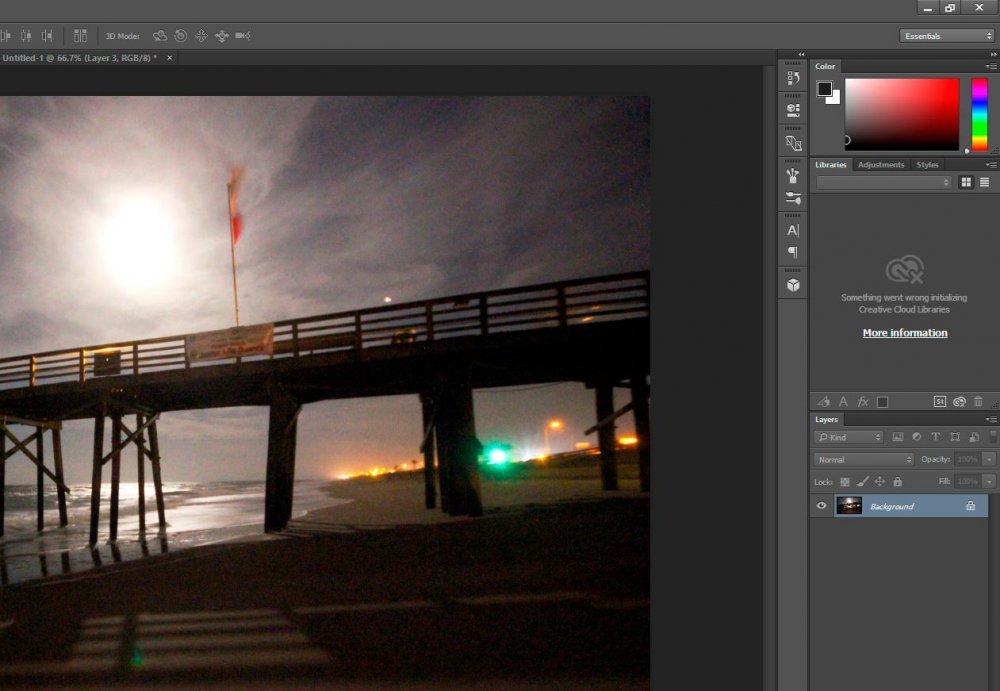
You may have noticed a column of small icons to the left of your larger open panels. These icons are, simply put, more panels that are available to you in your chosen workspace. They just may not be used as often. To open or close any of these additional panels, all you need to do is roll over an icon to find out what panel it is and once you know, you can click the icon. The panel should open right up, ready for use.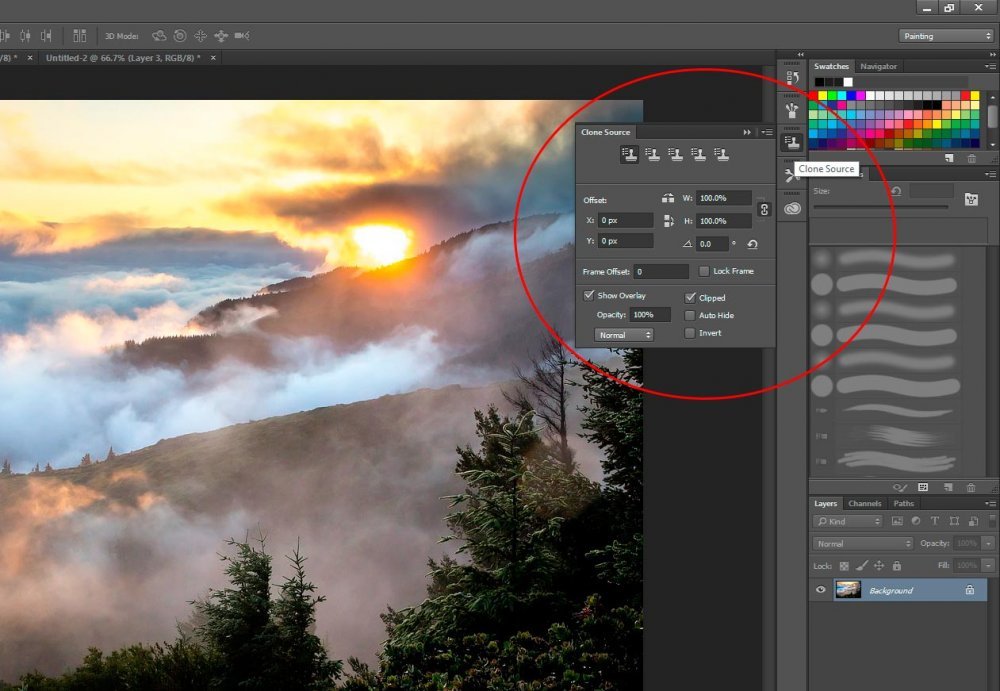
If you’d like to collapse the panel after use, simply click on the right-facing double arrows located in the top bar of the open panel.
If you’d like to open all the panels in that same thin vertical panel, where the icons are located, you can click the left-facing double arrows located in the top bar of the vertical panel. Just to be sure, roll over the arrows and you should see “Expand Panels” appear. But before you do this, be warned that opening all these panels takes up a lot of real estate in your workspace.
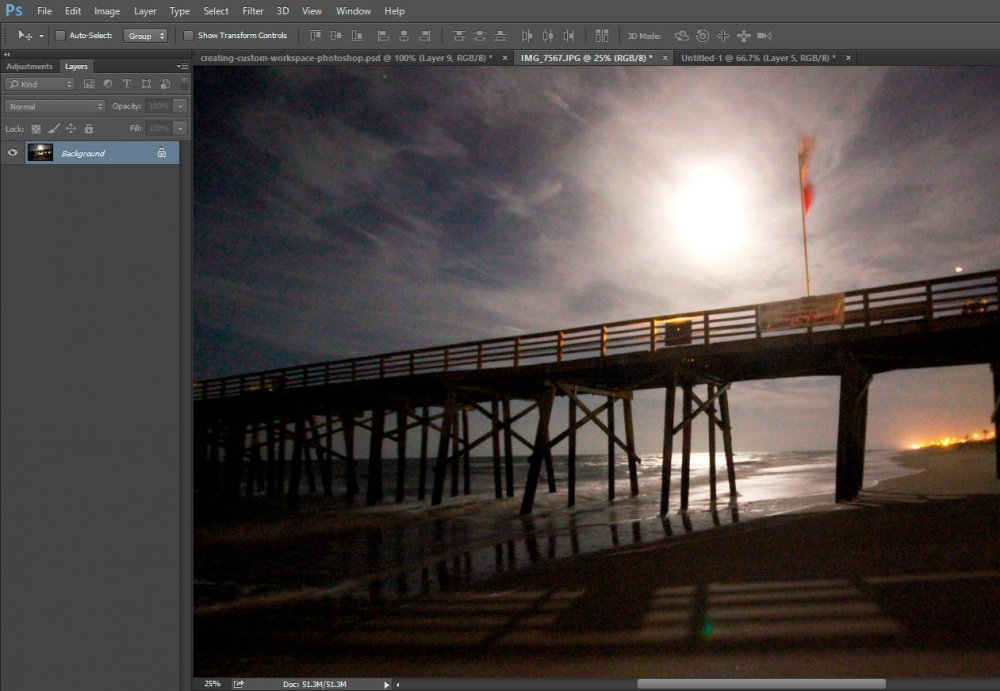
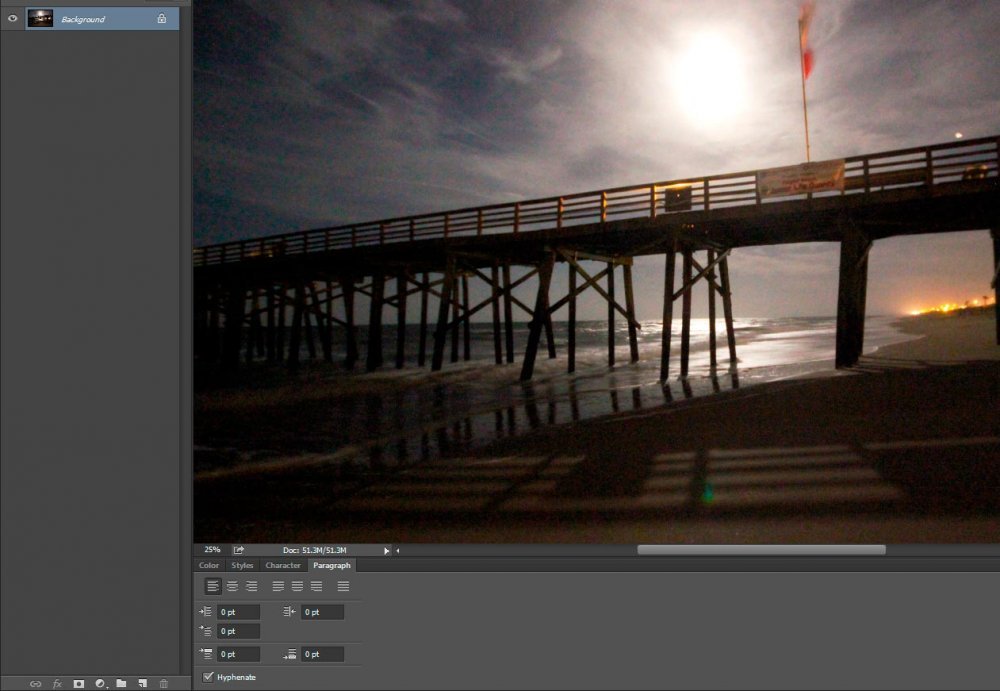
Similarly, if you’d like to collapse the remaining open panels in your workspace, simply click on the right-facing double arrows located in the top bar of the open panels. Once this is finished, your workspace should look like this:
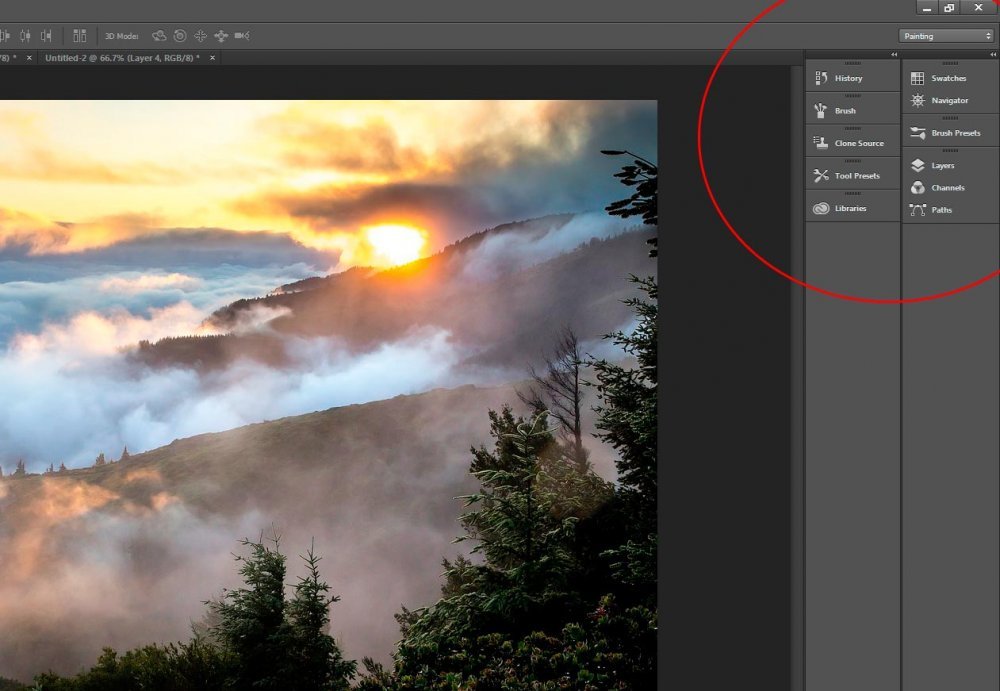
Note that I widened the collapsed panels by, again, clicking, holding and dragging the left border of the panel box.
Removing Panels From Your Workspace
In this second to last section of this post, I’m going to fill you in on how you can remove specific panels from your workspace. Perhaps you don’t use one much or you’d like to shuffle things around a bit. Either way, you want a panel gone.There are a few ways to so this. First, if you’d like one panel from a group to disappear, you can click the name of the panel you’d like gone and drag it out of the group it’s currently in. So for instance, in this next example, I’d like to get rid of the “Color” panel. The thing is, this panel is currently residing in a group that consists of Color and Swatches. So, to remove this one panel, I’m going to click and drag the name of the panel out of the group and into my working area.
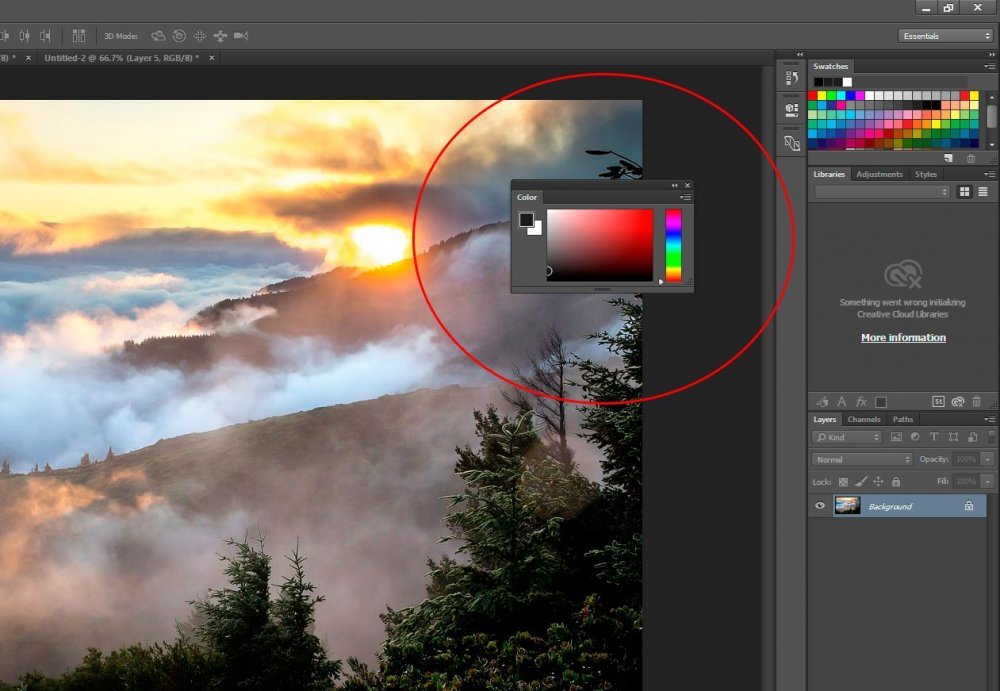
From there, I click on the small icon that consists of four horizontal lines and a down arrow (right below the X in the upper right portion of the panel) and choose “Close.” The panel disappears.
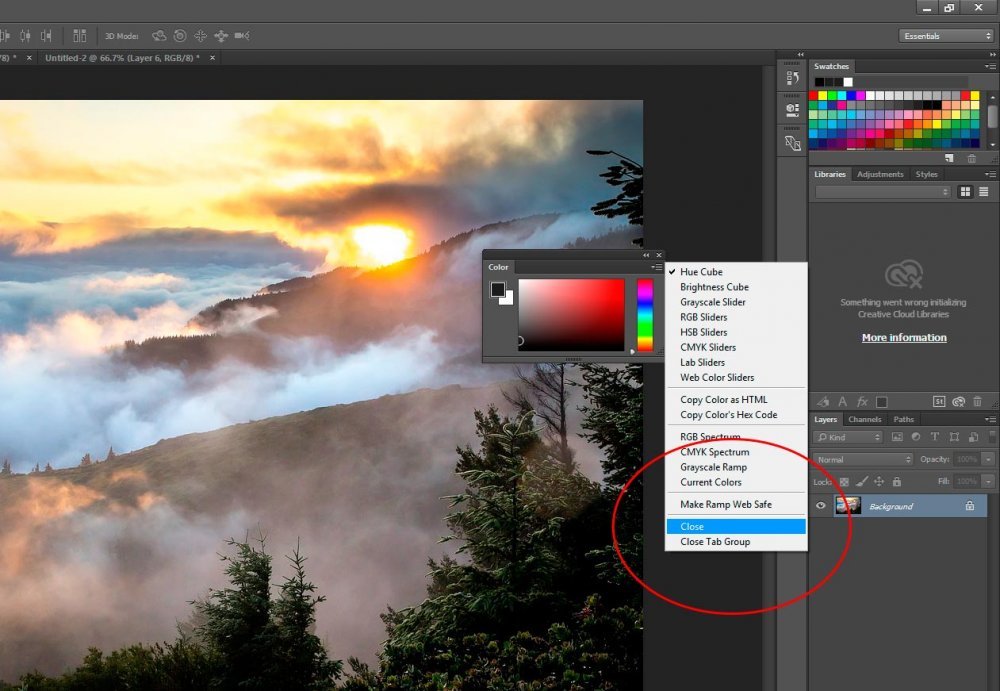
Now, here’s the thing. I could have just as easily right clicked the panel’s name while it stayed in the group and have chosen “Close.” The panels could have been removed just the same. I wanted to show you that you can also drag a panel from the group it’s in as well.
If you’d like to close the entire group of panels, instead of dragging each one out or right clicking on the name of each panel, just click on that small four lined icon again for the entire group of panels. From there, click on “Close Tab Group.”
Restoring (Resetting) Your Original Workspace
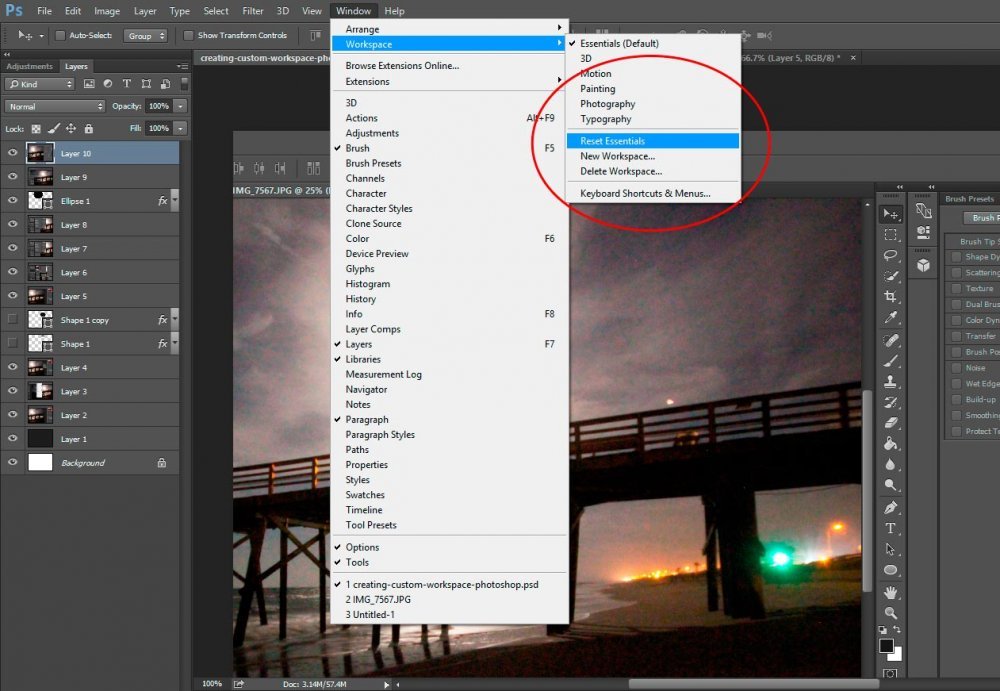
Sometimes, we get a bit overzealous with our panel arrangements and forget where the heck we are. We look at our monitor and wonder what happened to our panels. Things look like a mess and we’d like to start over. Help is here! If we’d like to “clean our room” and reset our current workspace to the way it was when we first selected it for use, simply head back up to the “Window” menu and roll down to “Workspace.” From there, head down to and click on “Reset…” whichever workspace you’re currently working in. In my case, I would click “Reset Essentials” because I’m using the Essentials workspace. By doing this, you’ll remove any customizations you’ve put in place.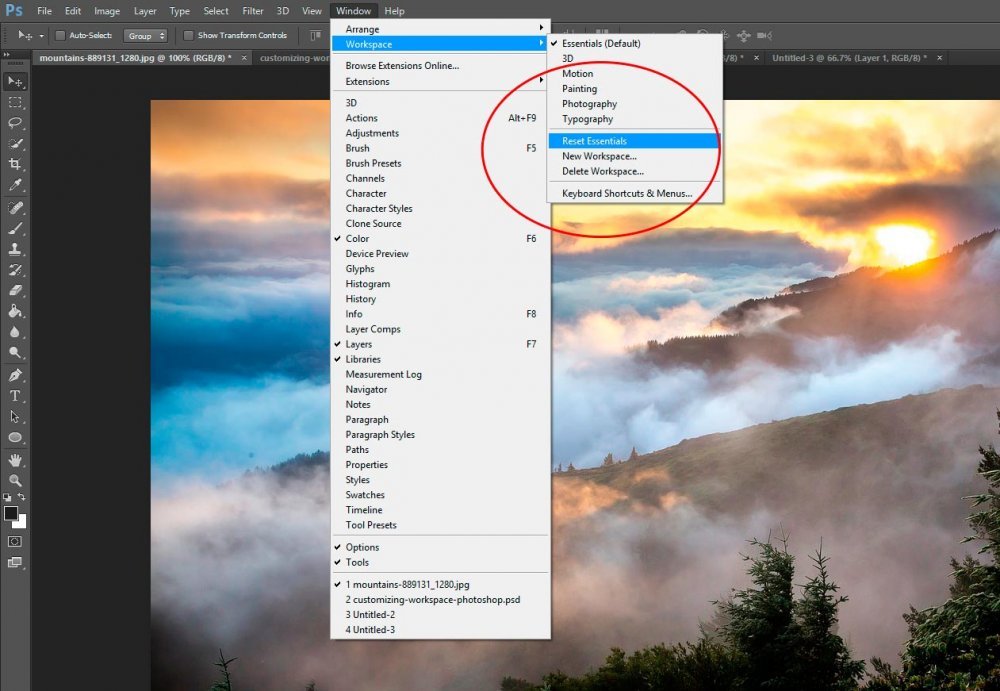
There’s a lot more to cover in the world of customizing your workspace in Photoshop, but I hope I’ve given you a taste of what you can do. In later posts, I’ll go over all the rest, so be sure to keep your eye on the “Photoshop” section of this site.
——
If you’ve enjoyed today’s post and found it helpful, please share it with a friend. Thanks!


