KodyWallice
Member
- Joined
- May 7, 2021
- Messages
- 123
- Reaction Score
- 1
- Points
- 23
- #1

I’ll tell you right now that exploring what Photoshop has to offer is downright fun. What’s almost as good of a time as actually editing photos and graphics in this application, is learning how to manage and set up its interface. So with that in mind, I’m going to continue my series of that learning and discuss another portion of how we can work effectively and efficiently in Photoshop.
In today’s post, we’re going to look into the multiple methods of arranging the tabs that contain your photos and files inside of your Photoshop workspace. Once you get the hang of things, I think you’ll find tabs very helpful. I certainly do.
What Is a Tab?
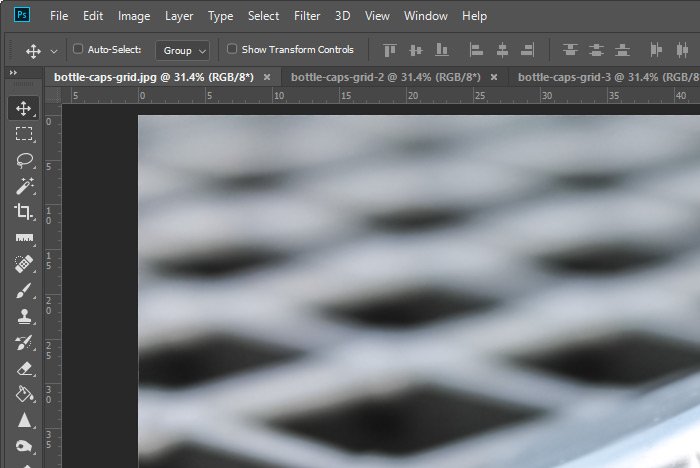
I think it might be helpful for me to explain what I mean by “tabs” in this post. It sort of goes like this – when you open an file in Photoshop, it appears in your workspace. If you look above the image, you should see a small area that holds the name and extension of the file you opened. Here, take a look at the screenshot below.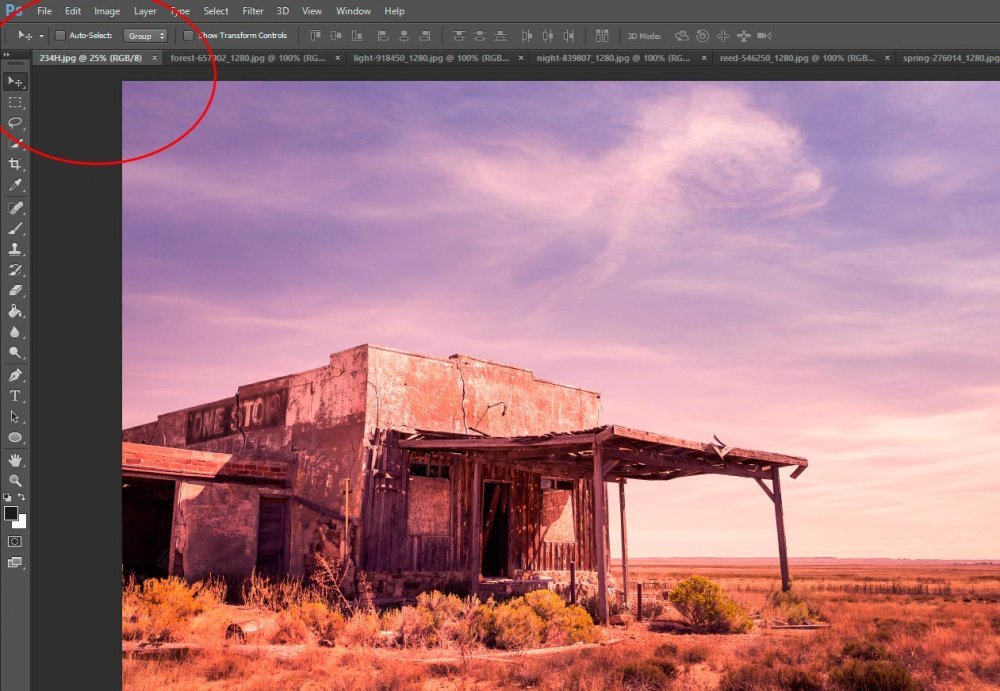
What I’ve circled in red is considered a tab. And if you’ll notice in the screenshot above, I’ve got quite a few files open, resulting in quite a few tabs. For the purposes of this post, I’ll be working with six different image files. There will be eight tabs in all, but two of those are my working screenshots to upload here.
How To Switch Between Files
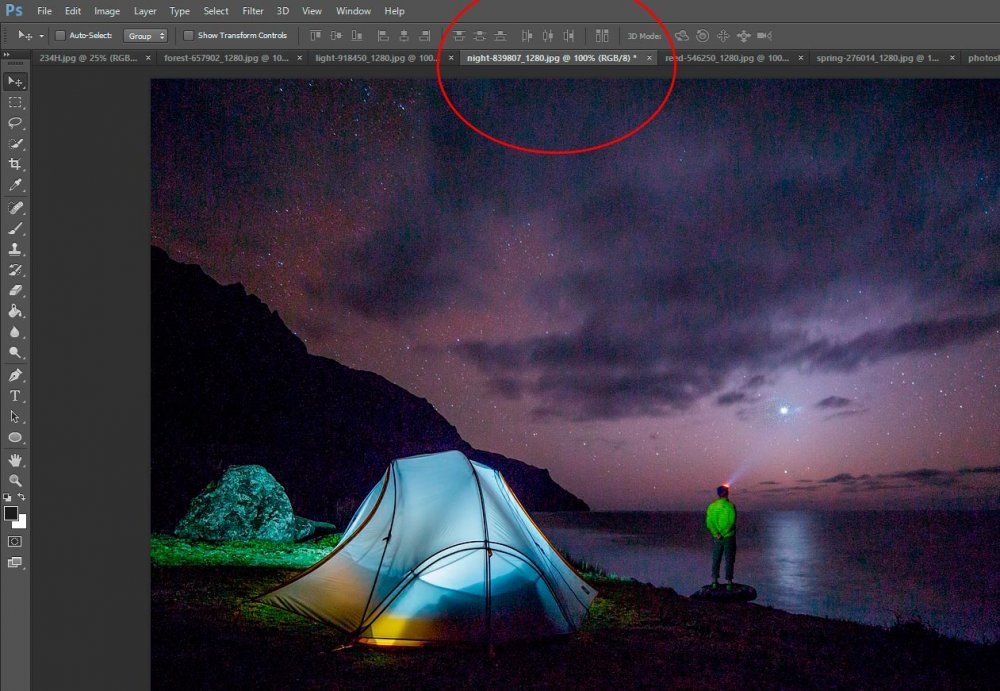
If you’d like to jump between files (or tabs), all you need to do is simply click a tab other than the one you’re currently working in. I know this probably doesn’t need explaining, but extra information doesn’t hurt.If you look at the screenshot below, you’ll see a different photo than what was included in the previous screenshot. You’ll also see that a different tab is highlighted. This new highlighted tab belongs to the photo that’s being displayed.
Reordering Tabs
Sometimes it’s helpful to arrange your tabs in such a way that helps speed up your workflow. I know that when I work with a series of files that are numbered, I like to see my tabs in order from lowest to highest. You might find another use for having your tabs in a particular order. If you’d like to reorder your tabs in any which way, simply place your mouse pointer over the tab you’d like to move, click the tab and then drag it to its new position. As you are dragging, you should see a space open up that displays where your tab was and eventually, you’ll see another tab snap in its place.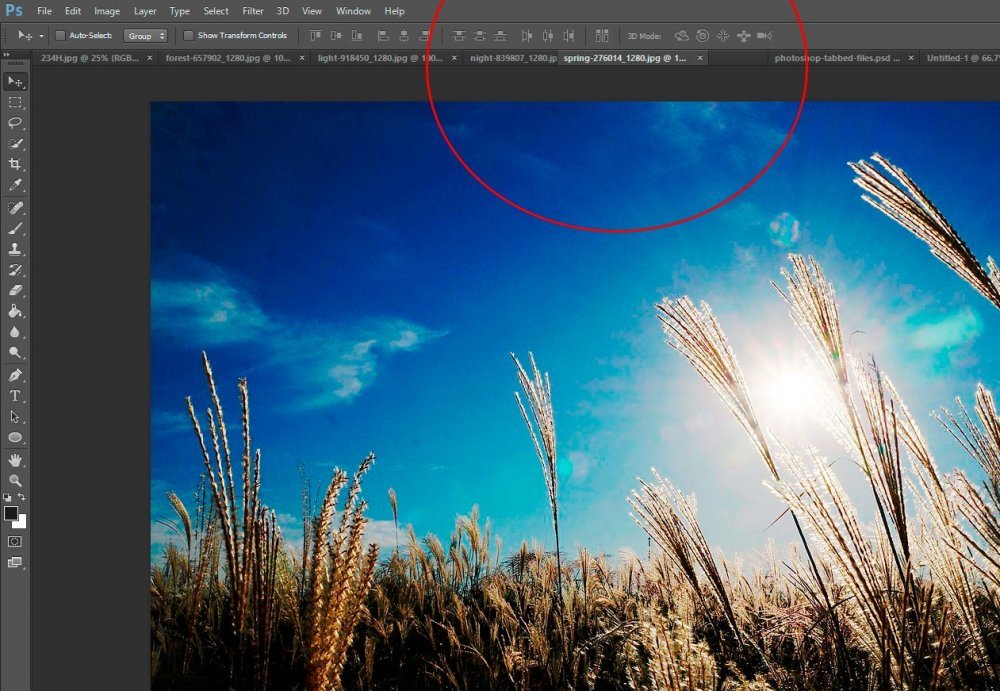
Floating Tabs
There may come a time when you’d like to float a tab, or perhaps, float many tabs. I know that I’ve done this when I’ve had to compare images. If you’d like to float a tab, just head back up to it with your mouse pointer, click and drag it out of the “tab bar” down into your working area. You should see the image “pop” out and float above all your other files.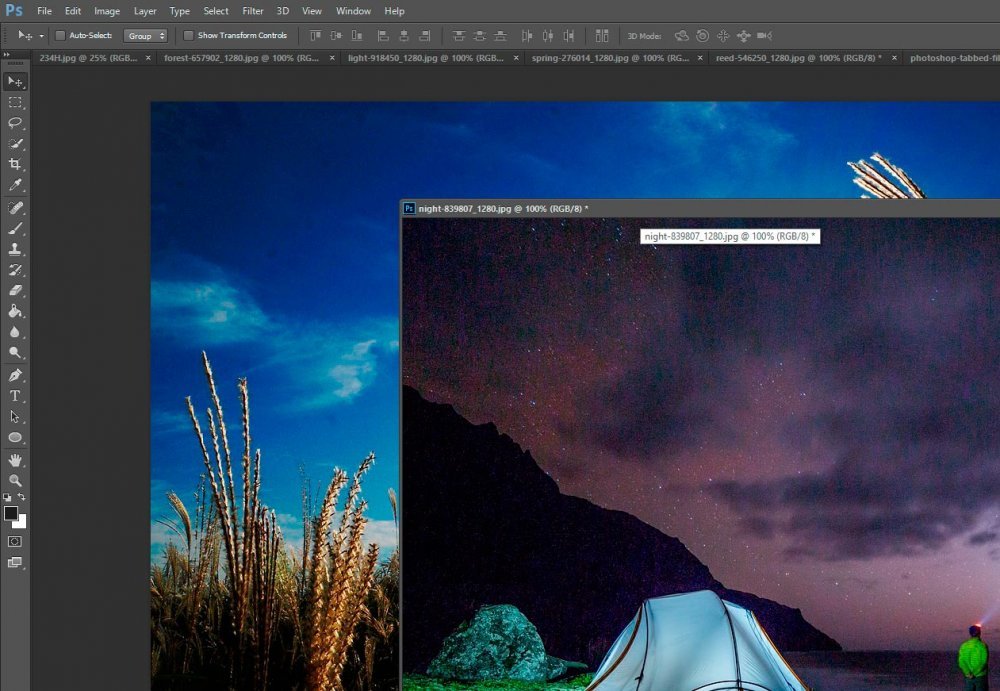
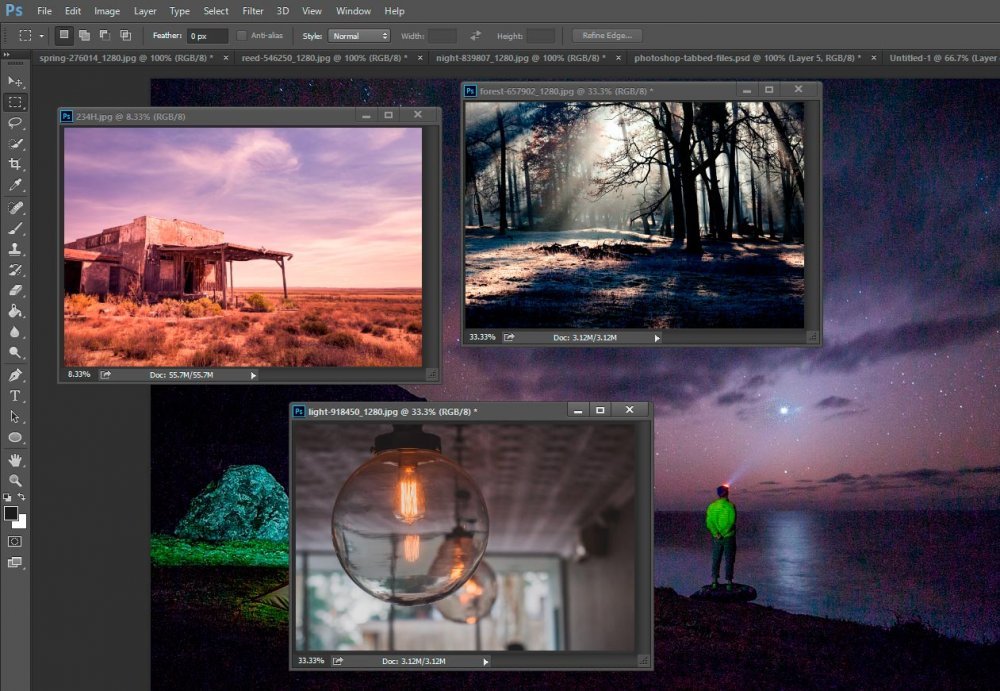
Once you float a few of your tabs, you can resize them or move them as you wish. In the example below, I floated three tabs and reduced their viewing size.
Combining Floated Tabs
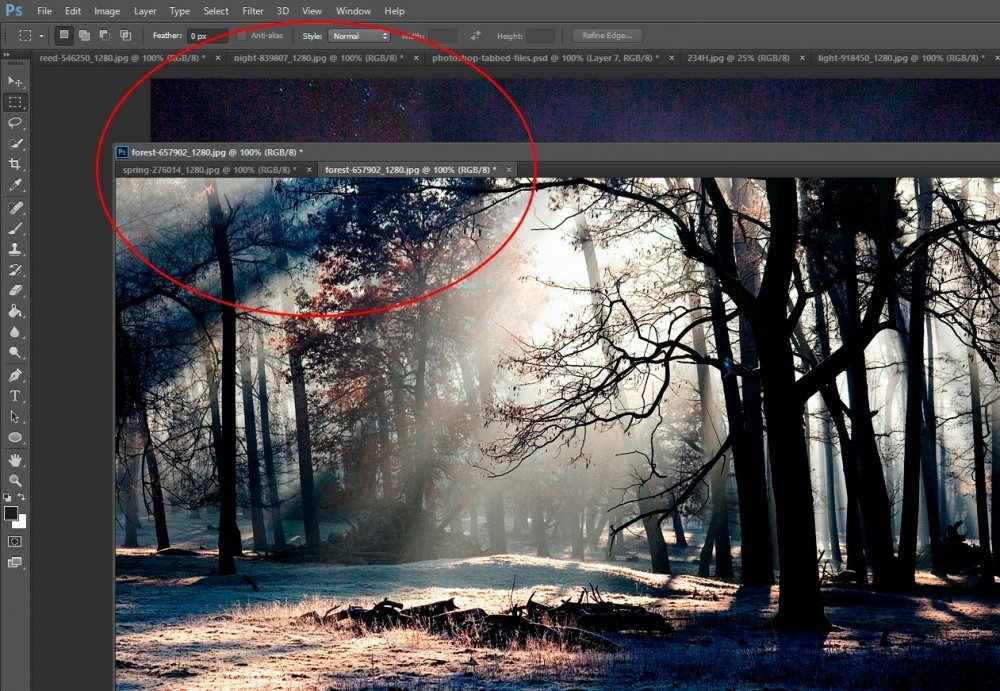
Here’s another quick tip on how to manage your floated tabs. Let’s say you would like to save some room in your workspace and would like to merge, or combine, similar images into one floated window. So, for this example, you would float one tab and then float another one. But this time, instead of floating the second one as a separate window to be floated, you drag it into the first tab you floated, creating a floated window that includes two tabs. Take a look below.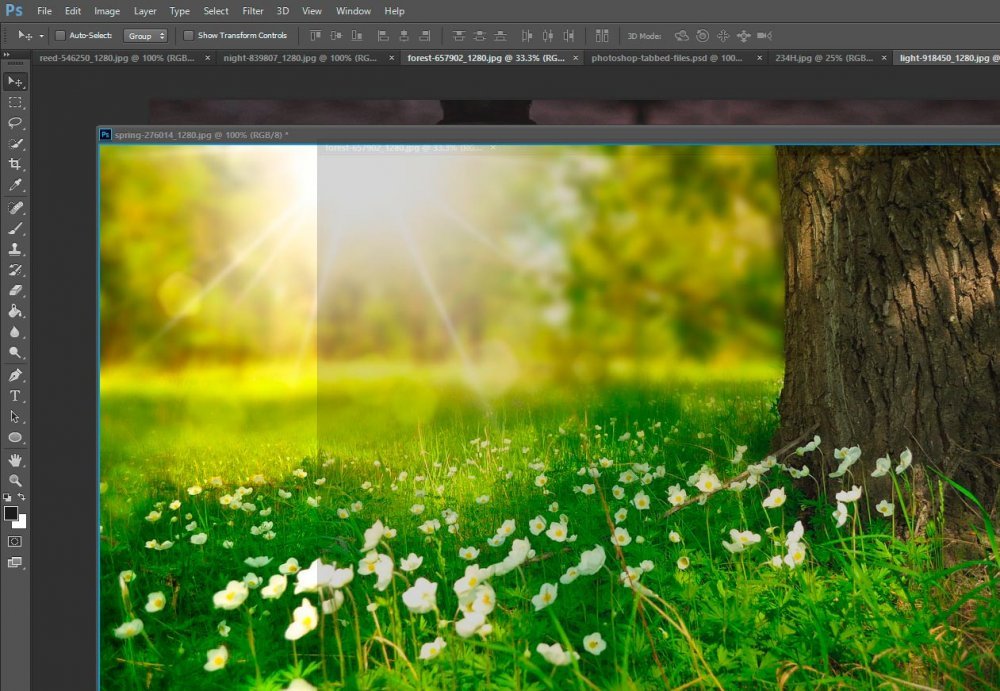
You’ll know you’re in the right place when the outline of the window you’re trying to float your tab into turns blue like above. And when you’re finished and you let go of your mouse, you should see a floated window with two tabs like below.
Minimizing & Finding Tabs
Sometimes, if you float too many tabs, things get a bit confusing. As I was creating my screenshot for the last section of this post, I minimized the floated window so it wasn’t in my way anymore. By doing this, I made the window disappear.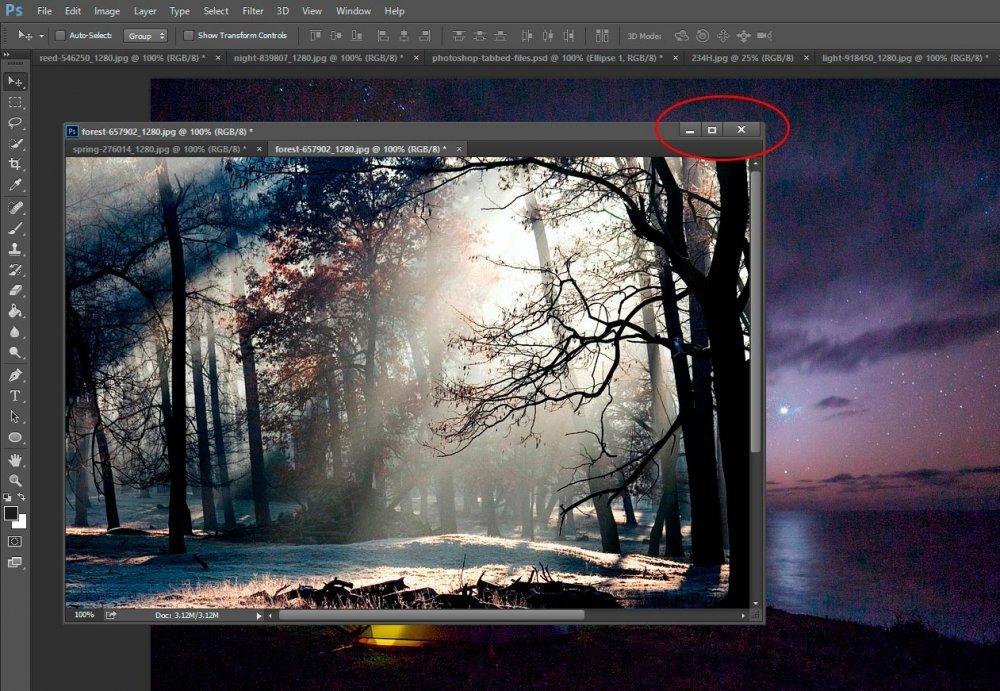
The problem is, once I minimized it, I didn’t see it anymore – anywhere. To find it, I had to do a bit of exploring.
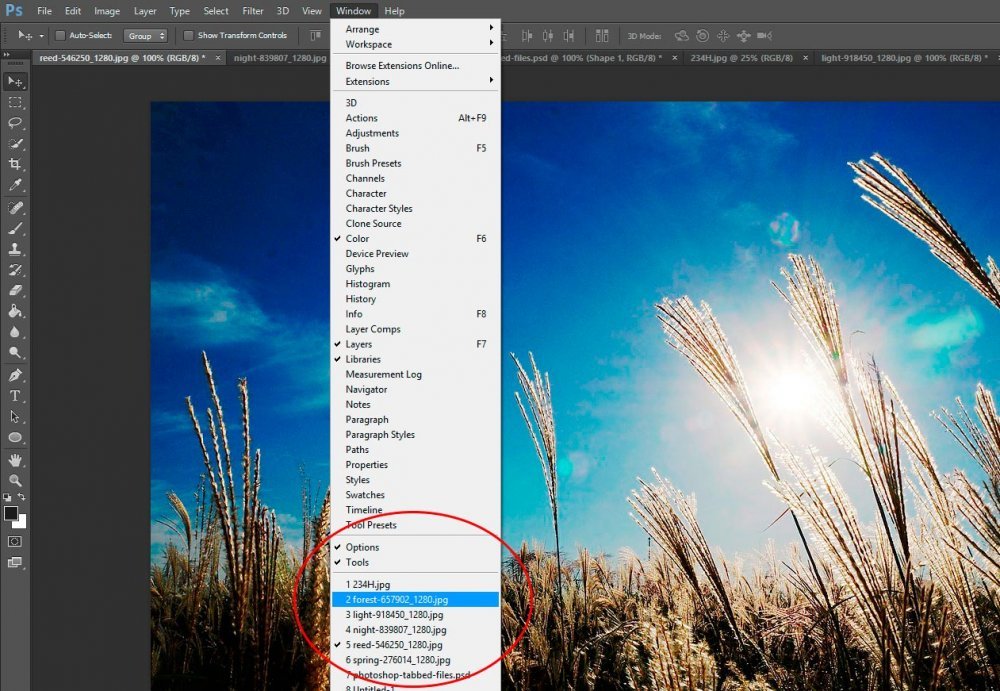
There are a few ways of locating and expanding your floated window to its previous glory. The first method is to head up to the “Window” menu and scroll all the way to the bottom. Once you’re there, all you need to do is look for the name of the file inside the window you’d like to expand, among the list of your open files. In my case, it’s the “forest” photograph. Just click that selection and you should see your window again.
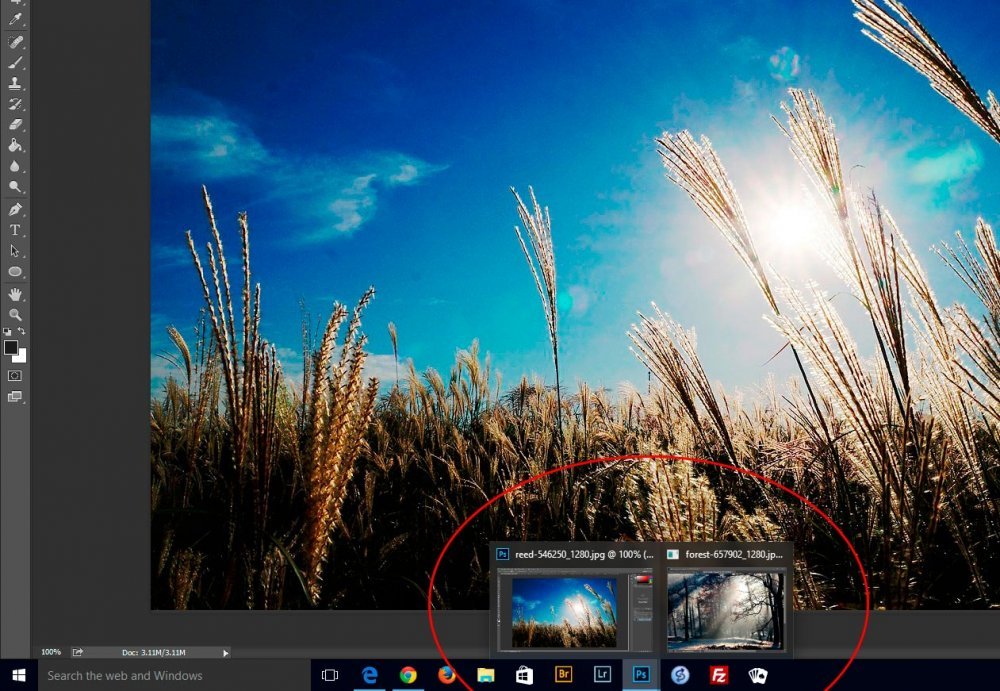
You can follow the instructions I just gave you above, or you can head down to the bottom bar of your computer and roll over your Photoshop shortcut (if you have one). If you do this, you should see two small windows appear. One for Photoshop itself and the other for any minimized windows. Go ahead and click the minimized window and you should see the floated window appear in your workspace again.
Re-including Floated Windows In the Tab Bar
I’m not a fan of floated windows, so I would like to re-include my floated window, or tabs, back inside of my original tab bar. To do this, I simply click the top bar of my floated window and drag it to the top tab bar. As I do this, I should see the entire file area of my workspace outlined in blue and my floated window should become somewhat transparent.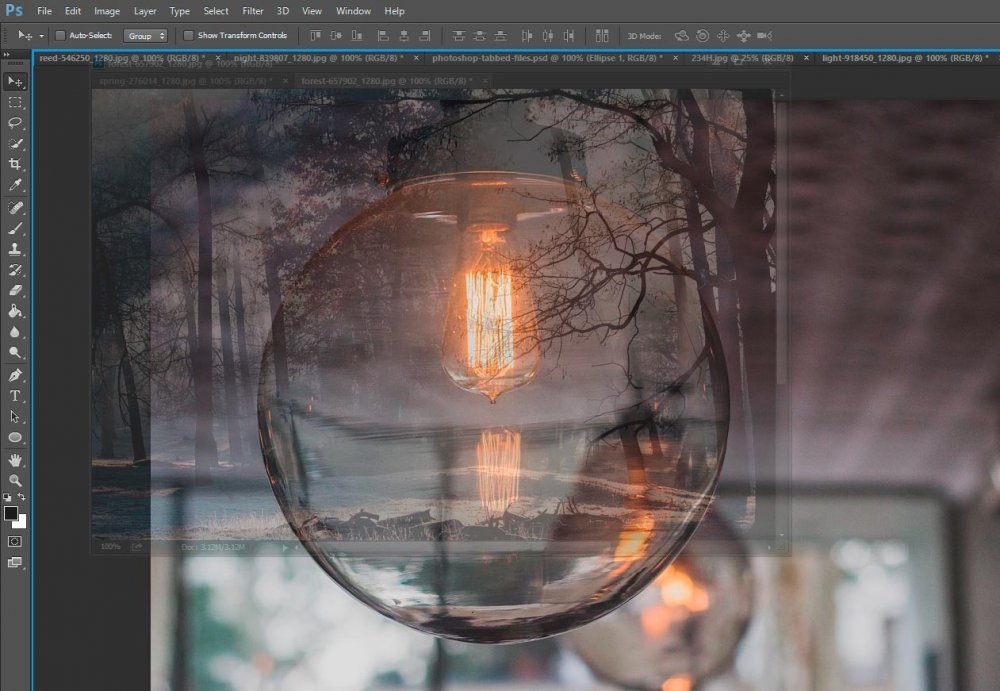
Once I let go of my mouse button, I see that my floated window with its nested tabs are now back inside the tab bar.
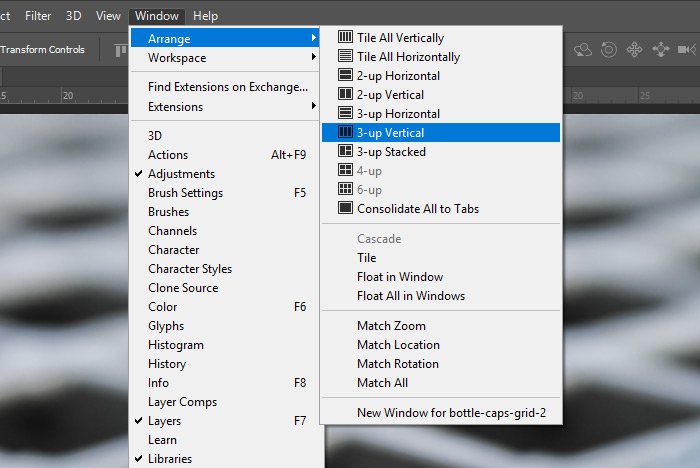
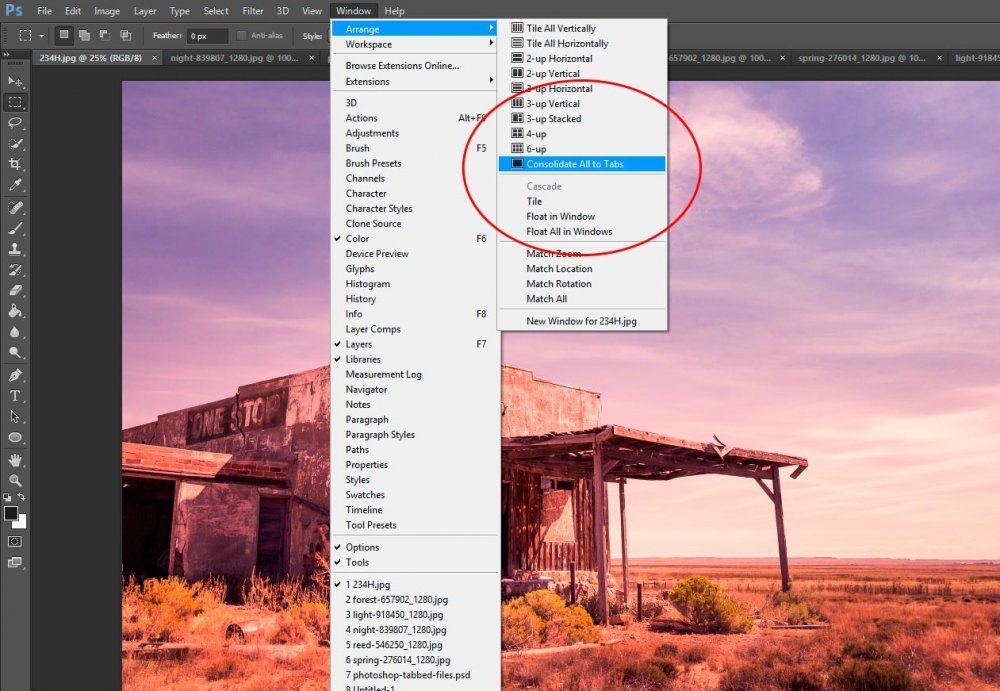
Another method to re-include any floating windows into the primary tab bar is to go to the “Window > Arrange” menu and click “Consolidate All to Tabs.” This will quickly bring you back to an all tabbed workspace.
Arranging Tabs
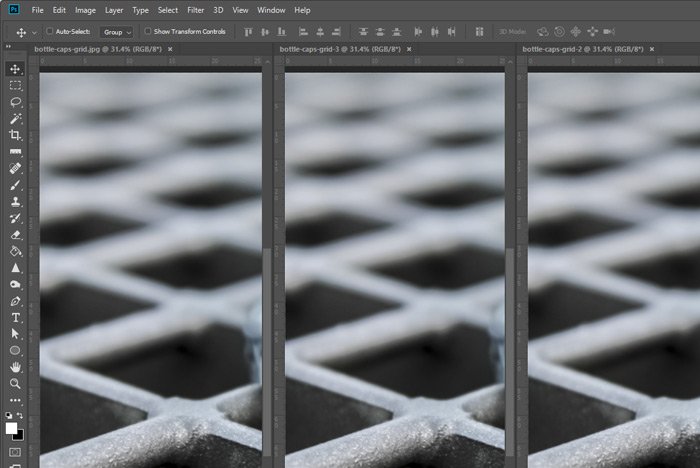
There are a number of ways you might want to arrange your files. Instead of floating each window and then trying to shrink and expand each one so they’re set the way you’d like, you can head back up to the “Window” menu and hover over the “Arrange” selection. From there, you’ll see all sorts of neat selections that will position your files in a variety of ways (refer to previous screenshot). I suggest you play around with these for a bit to see which ones you like the best. I chose to go with the “Tile All Horizontally” to see what would happen. Here’s a screenshot of that.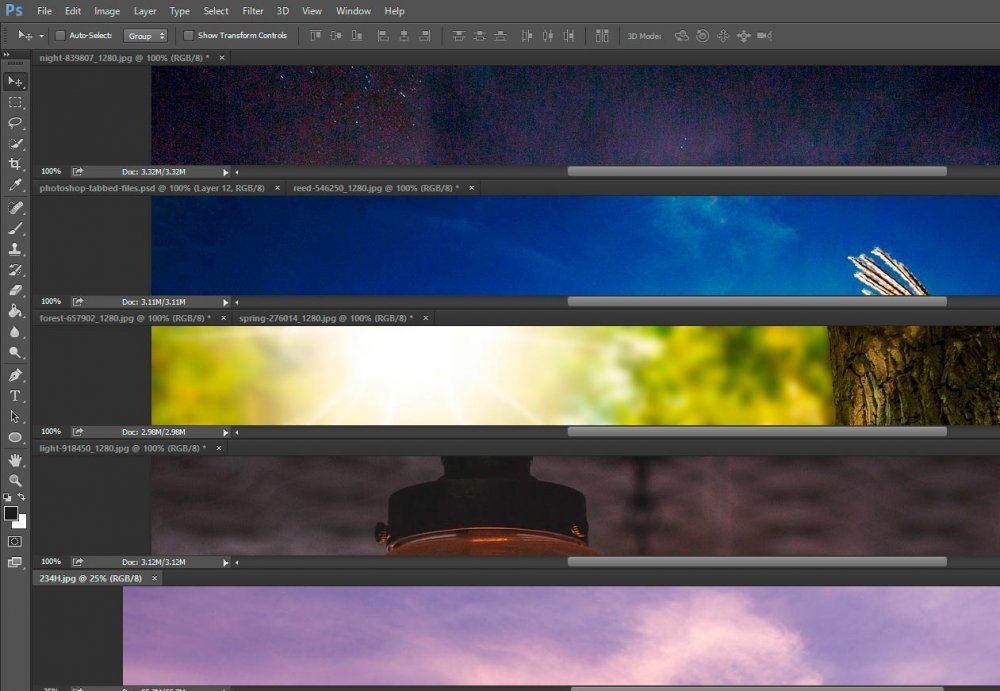
To revert back to all tabs, go to the same menu and choose “Consolidate All to Tabs.”
Closing Tabs & Files
When it comes time to close one file (or tab), you can simply click the small “X” that’s included right inside the tab, next to the file name.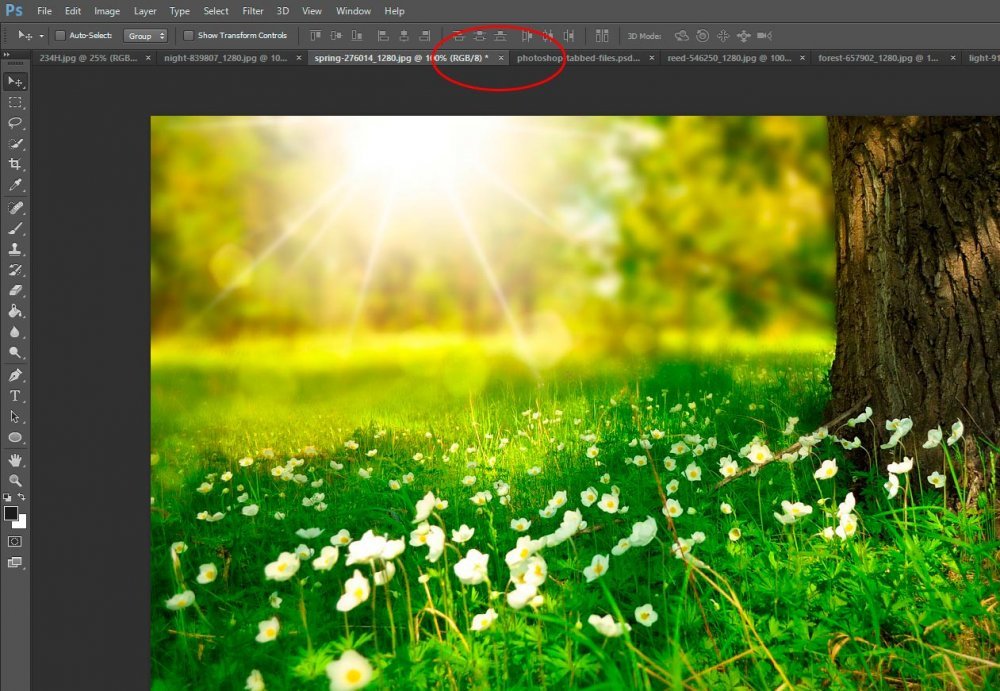
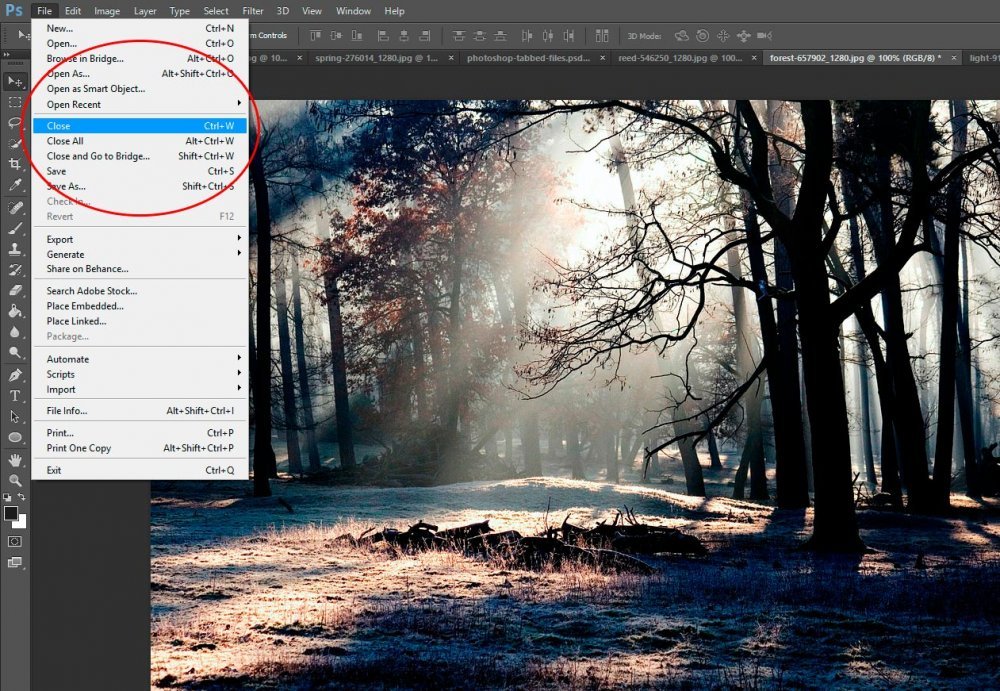
Or, you can head up to the “File” menu and click “Close” to close the active file or click “Close All” to close all files.
If you’ve enjoyed today’s post and found it helpful, please share it with a friend. Thanks!

