CraigHardy
Member
- Joined
- May 11, 2021
- Messages
- 223
- Reaction Score
- 2
- Points
- 18
- #1

If you’re big into landscape photography, you’ve most likely dealt with images that were shot – well, not exactly straight. Crooked photos are a part of a photographer’s life. Oftentimes (as you’ll see below), it’s not easy telling where the horizon actually is. It’s not until you bring the shot home and take a look at it on your computer that you can tell it’s not what you intended.
For years, I’ve been straightening my images by using the Marquee tool, but recently, I discovered a better and much more efficient method. I’ll share all I know with you below.
Opening My Image
I’m not sure any of the shots we took of Wilson Lake, over in Wilton, Maine, yesterday were straight. The issue was having the shore in view. As you’ll see in the photo below, the shoreline on the right side travels from front to back, which throws off the actual horizon (at the base of the mountains), which can be seen all the way at the rear of the photo.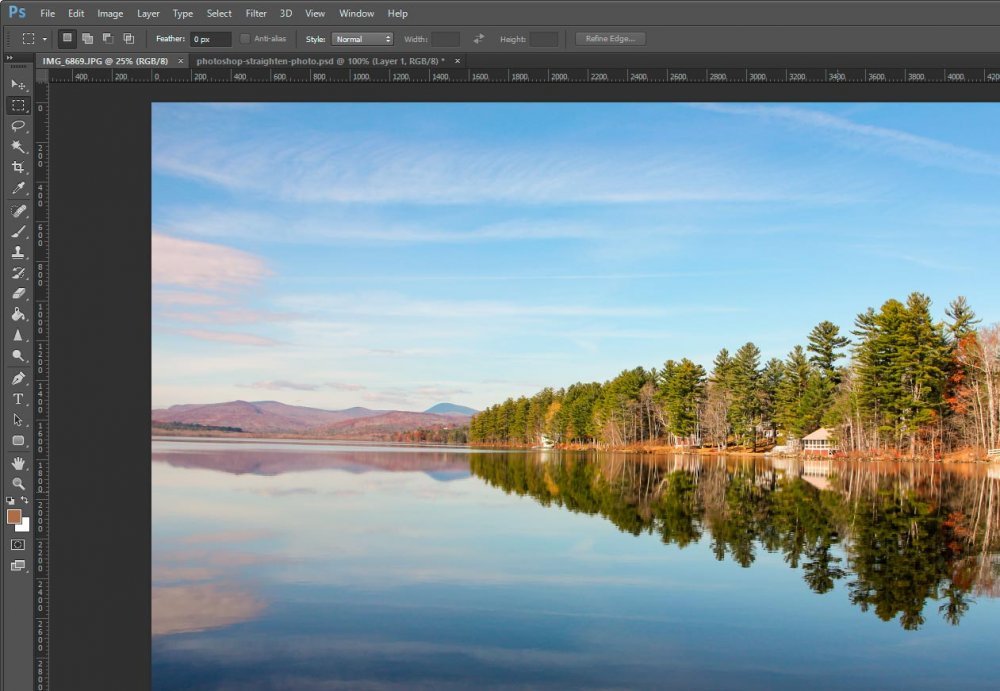
This is often the case – confusion with what’s straight and what’s not. Good thing Adobe Photoshop has got some really simply methods to deal with this type of thing.
The Marquee Tool
This is the method I’ve always used. The first thing I’d do after opening my crooked image in Photoshop was to enable “Rulers” from the “View” menu up top and drag a guide down so it’s near my crooked horizon.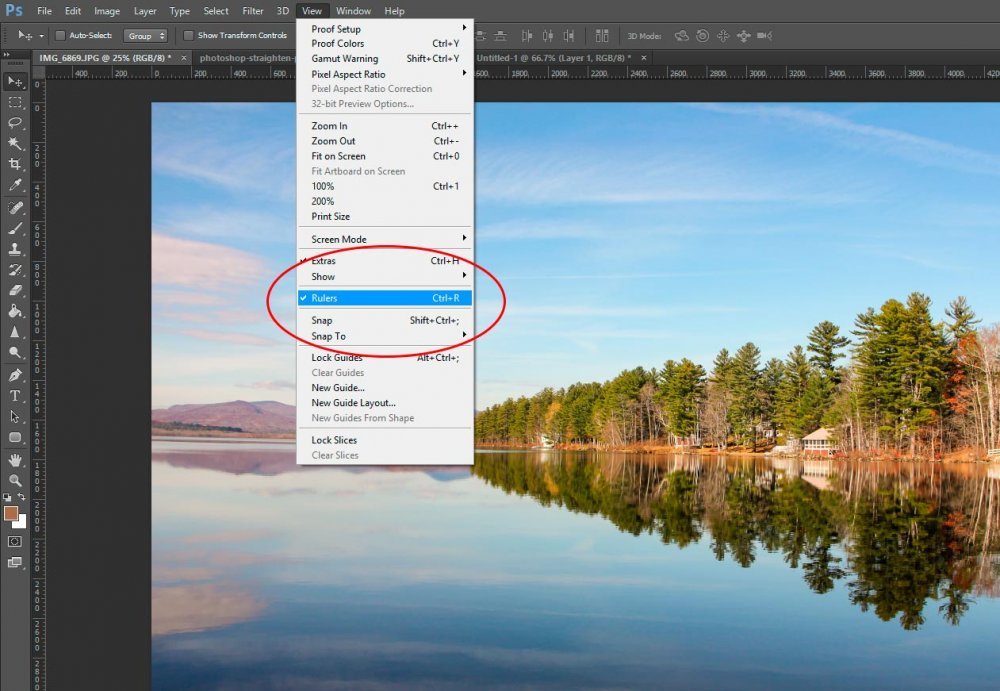
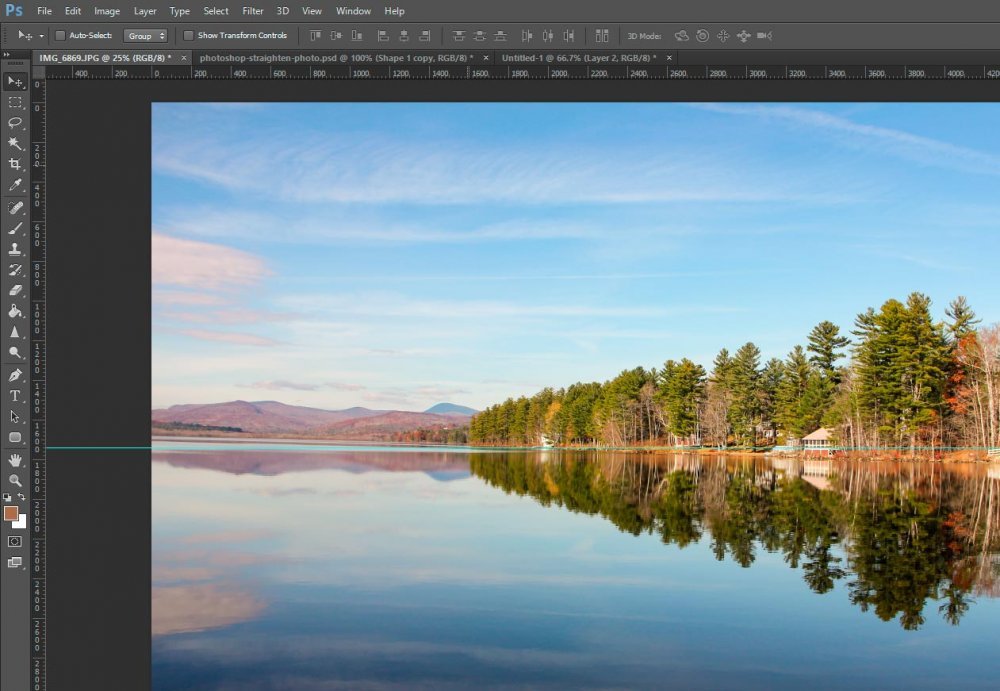
By the way, to pull a guide into your image, simply click somewhere in one of the rulers and drag toward where you’d like to guide to end up. Let go of your mouse and you’ll have a fresh guide. The remove a guide, click right on the guide and drag it out of Photoshop. If you do that, it’ll disappear.
After I place my guide where I’d like it, I would select the entire image with the Marquee tool by clicking “Ctrl A” on my keyboard and then click “Edit > Transform > Rotate” from the top menu.
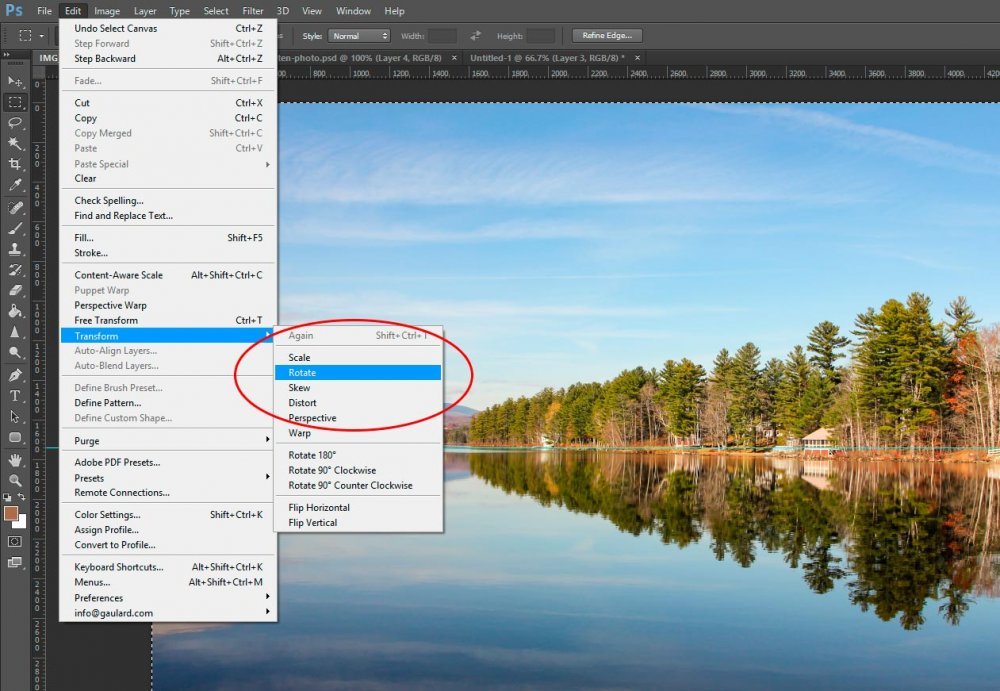
From there, I’d rotate my image by bringing my mouse pointer somewhere outside the work area, clicking, and moving back and forth and if I liked what I saw, I’d leave it and click on another tool, which would bring up a confirmation box. I’d click on “Apply” and the new orientation of the image would be applied.
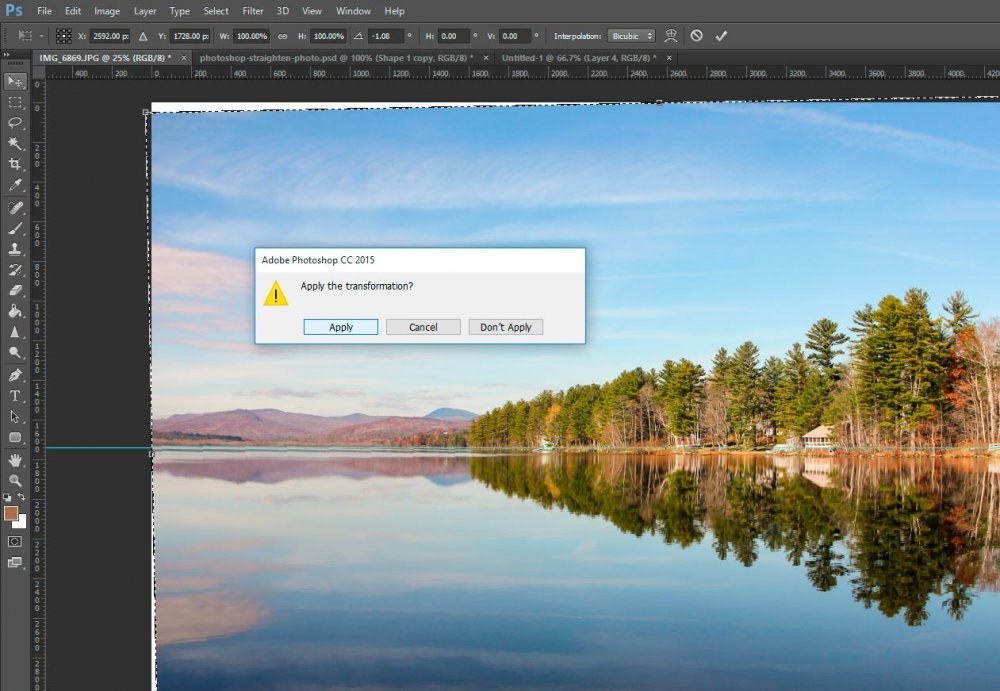
The thing is, if you look at the screenshot directly above, things aren’t all too clear. When you rotate an image in Photoshop this way, the entire image becomes pixelated and jagged and it’s actually tough to see where the horizon is once you begin rotating. From my past experience, I’ve found this method to employ a lot of trial and error. While it can work, it’s really not the best way to go. Also, if you look at the above screenshot once more, you’ll see that I’ve got to crop the image now. Photoshop didn’t take care of this as I was rotating.
The Crop Tool
A better method of straightening a crooked photo is to use the “Straighten” function inside of the “Crop” tool. This is an all-in-one tool that will easily rotate and crop at the same time. This is the tool you’re supposed to use when performing this type of task.To accomplish what I need done, I select the Crop tool from the side toolbar. Once my entire photo is in the crop range, I click on the “Straighten” button that up in the options bar.
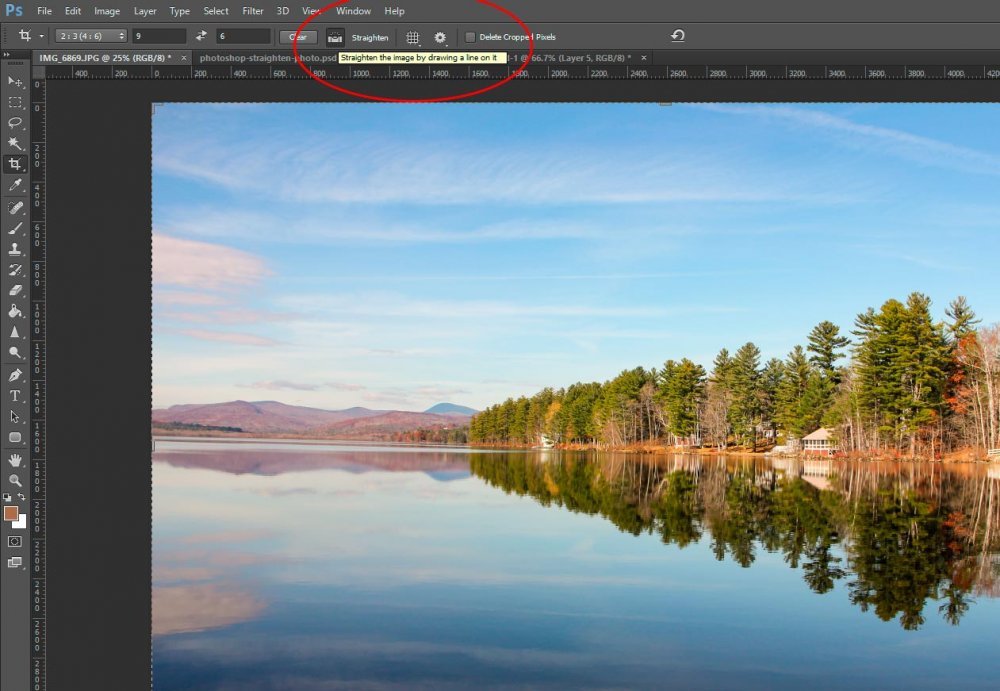
You might be able to see this if you look closely – if you roll over the Straighten button, a small box will appear with the following words – “Straighten an image by drawing a line on it.” Those are fairly good directions. All I need to do now is to click on one side of the horizon I’d like to level out and then drag the line that appears over to the other side of the horizon and let go.
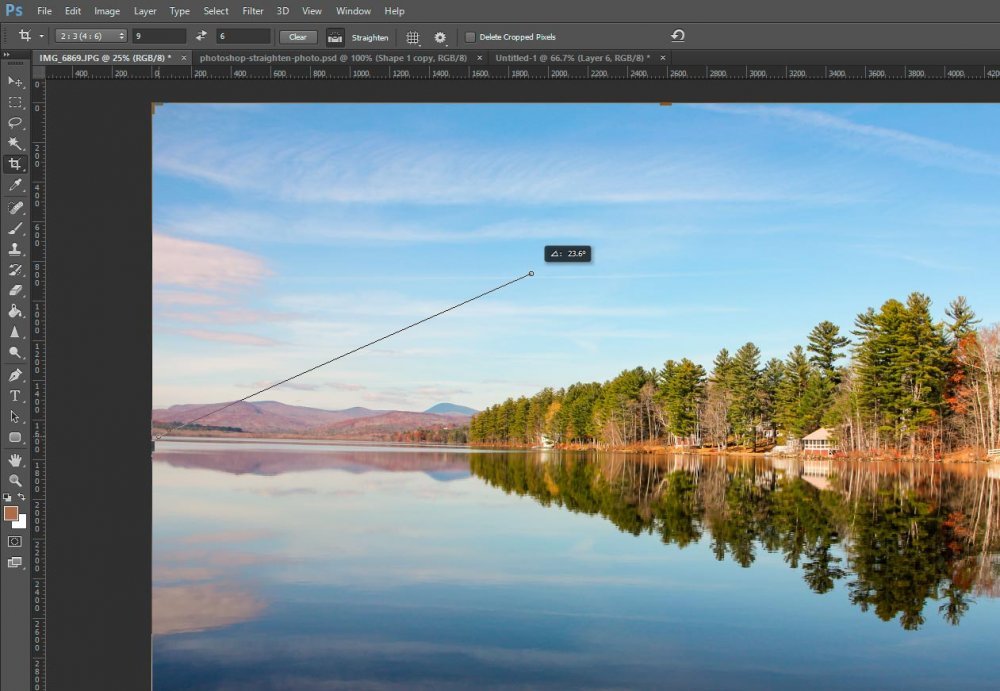
I’m sure you realize that the line I’m dragging in the above screenshot isn’t really the horizon. I merely wanted to show you what the line you’ll be dragging looks like.
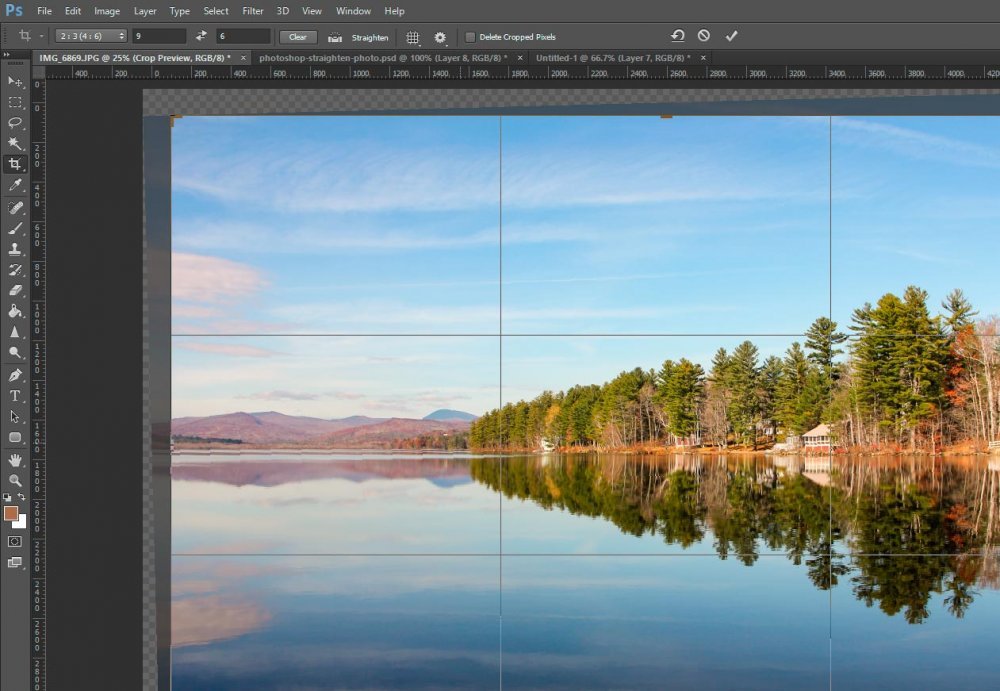
When I let go, my image will rotate and I’ll be presented with a more clear representation of what the final result will look like. If I double-click inside of the crop area, I’ll apply the crop.
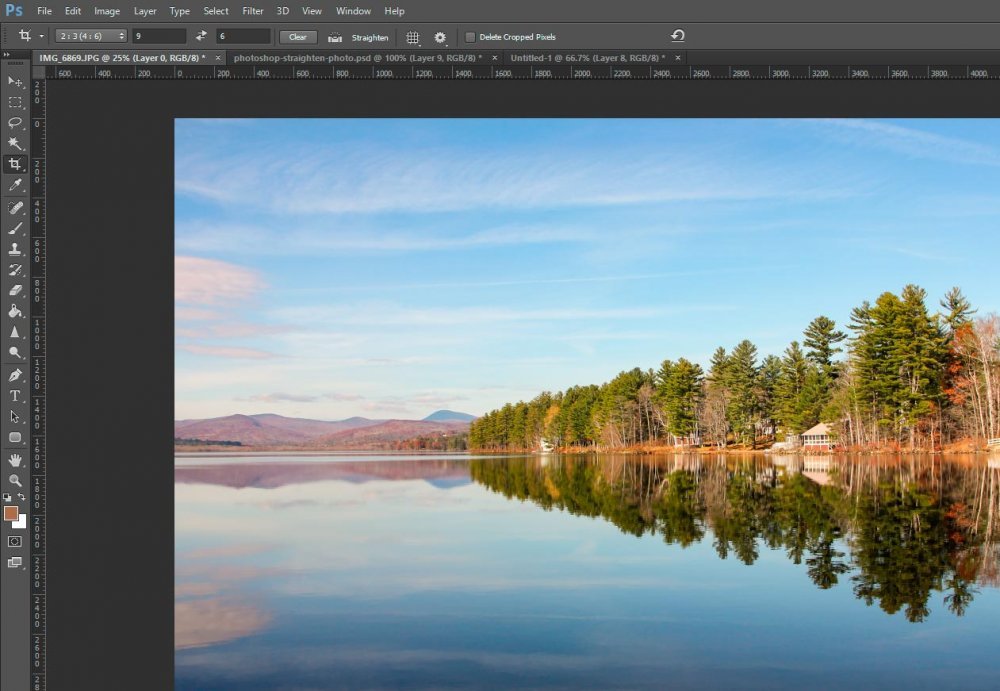
With this complete, I’ve got a straightened photo in Photoshop that I can do with what I please.
The Ruler Tool
This next method is a combination of the first two methods. If I click on the “Ruler” tool over in the left toolbar, I’ll have the ability to click and drag a line across my horizon once again.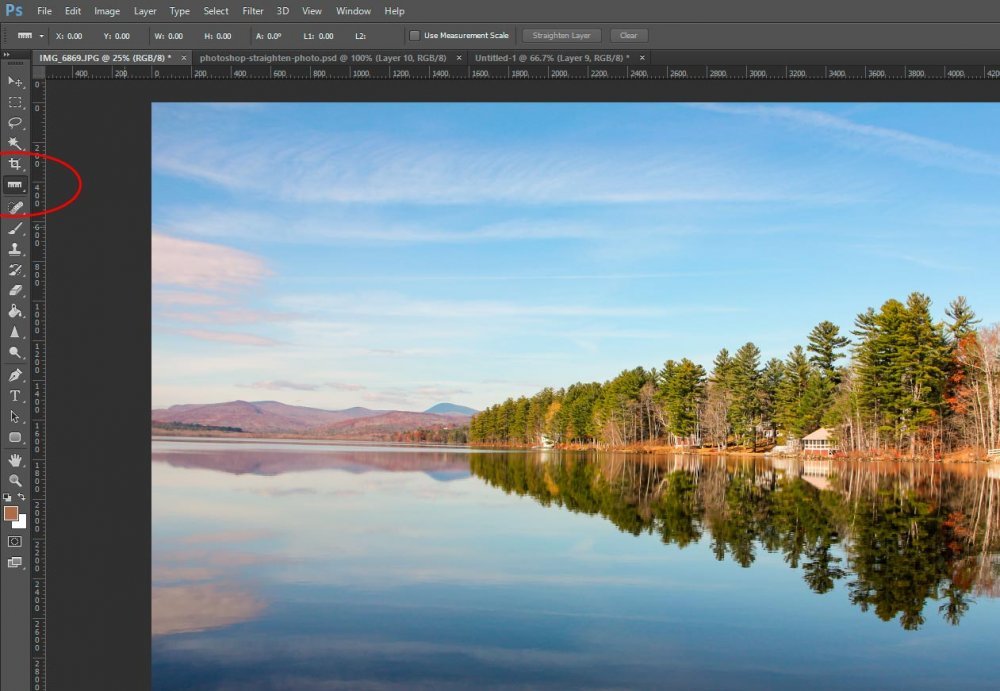
(If you look towards the left, you can see that I’ve circled the Ruler tool in the toolbar.)
Now, once I click, drag and let go of my line that’s across the horizon, as I did in the previous method a new button will appear in the option bar at the top of the application. This one is called “Straighten Layer.” Again, if I hover my mouse over the button for a few seconds, I’ll see a message appear that says “Straighten the active layer to make the ruler level.” Notice the nuances here. While the previous crop method straightened the entire file, the ruler method only straightens the layer. This is important. Also, as you’ll see below, the ruler method doesn’t do any cropping.
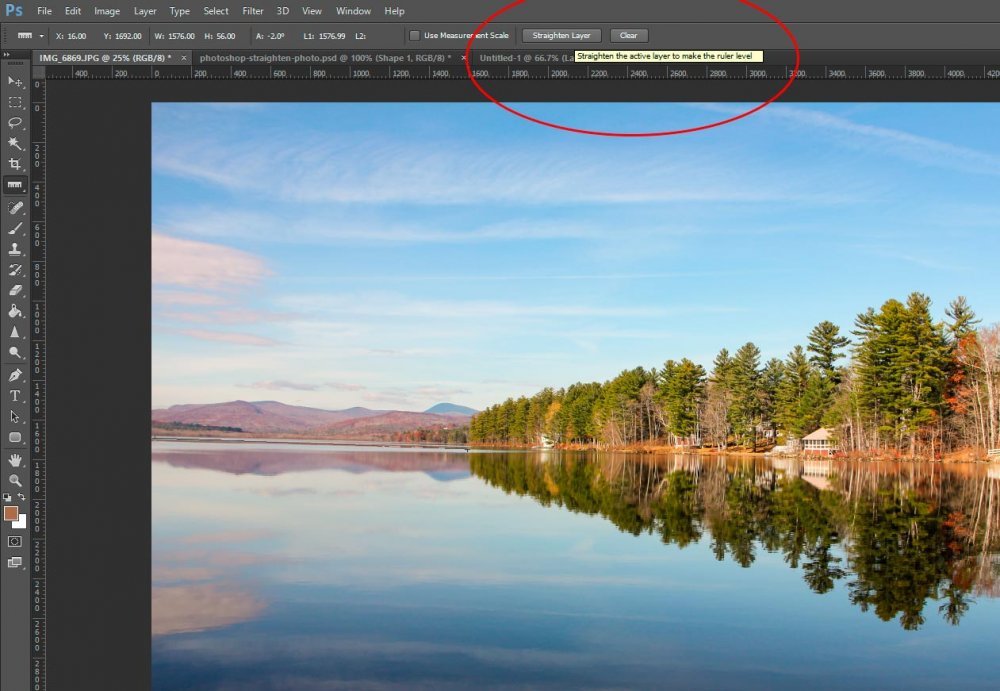
I’ll click the button and see what it looks like.
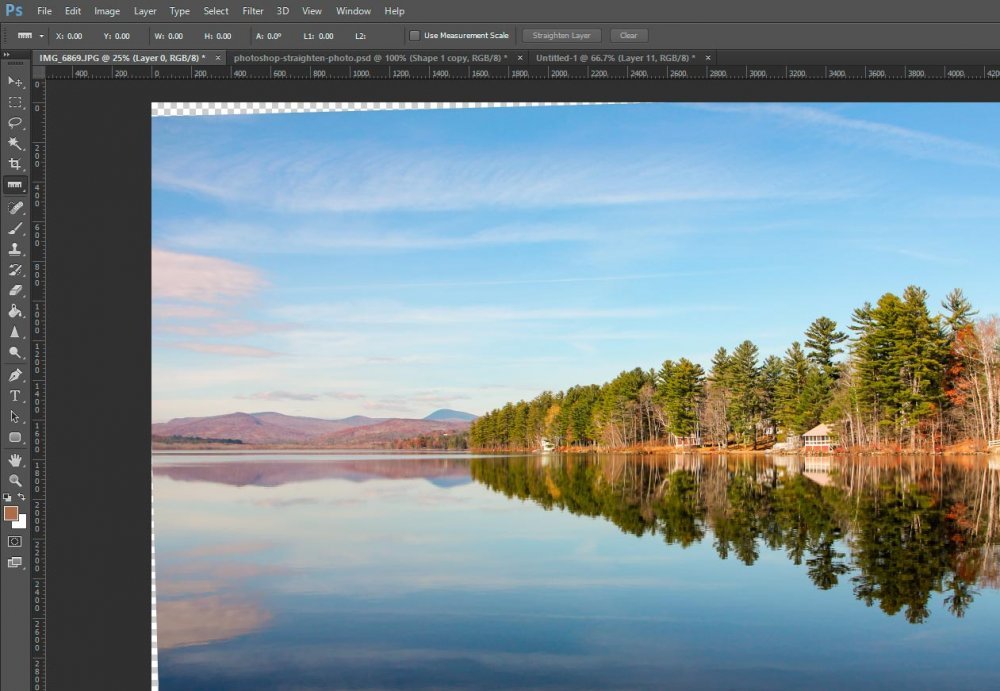
So here we have it, another straightened photo using a different tool. And as you can see, as I mentioned above, I’ll need to do some cropping to get rid of those empty canvas areas that surround my image. Once that’s complete, I’ll be all set.
