KristinaW
Member
- Joined
- May 7, 2021
- Messages
- 127
- Reaction Score
- 0
- Points
- 18
- #1
In this post, I’d like to build off of what I discussed previously, where I combined three images inside one file. In that post, I brought a few images into one document from separate tabs and arranged them by using guides. Today, I’ll be dragging a few photos into one document again, but I’ll use a different method. After that, I’ll adjust the size of my working canvas to properly fit the images.
Combining Images
The screenshot below demonstrates that I’ve got my three files already opened in Photoshop. I outlined the tabs I’ll be working with in red. The fourth tab is my screenshot file that I’m using for this post, so just ignore that.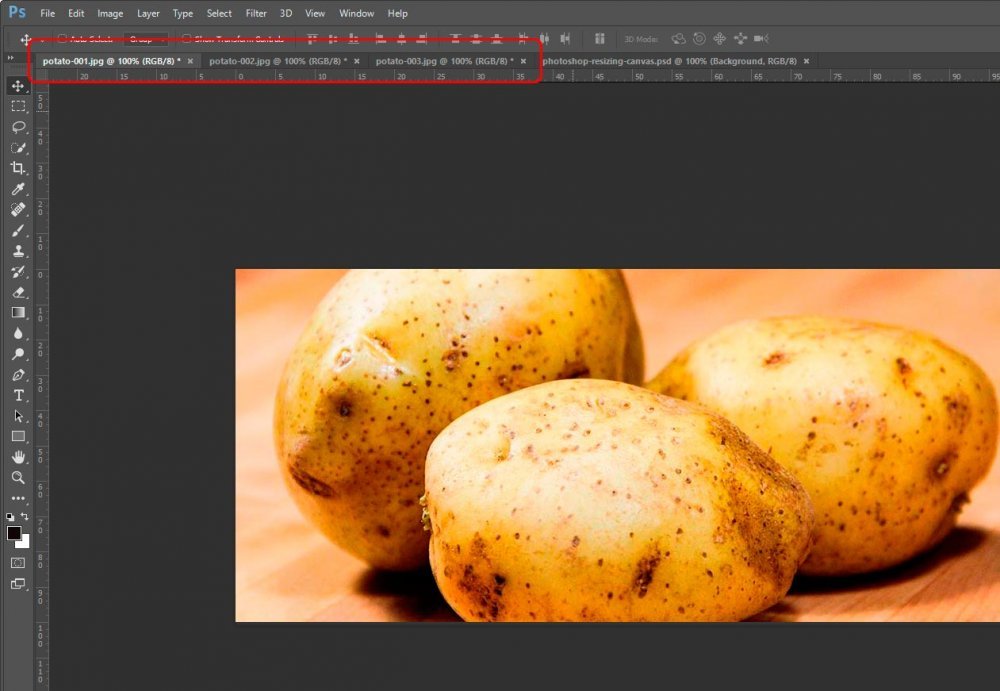
My very first goal with this project is to combine all three tabs into one. Now, if you remember back to my previous post, I showed how to accomplish this using one method. Like I mentioned above, I’ll be using a different method here.
The first thing I’m going to do is to undock two of the tabs so they’re floating in my workspace. Basically, I just click and drag them by the tabs into the middle of the screen. That undocks them.
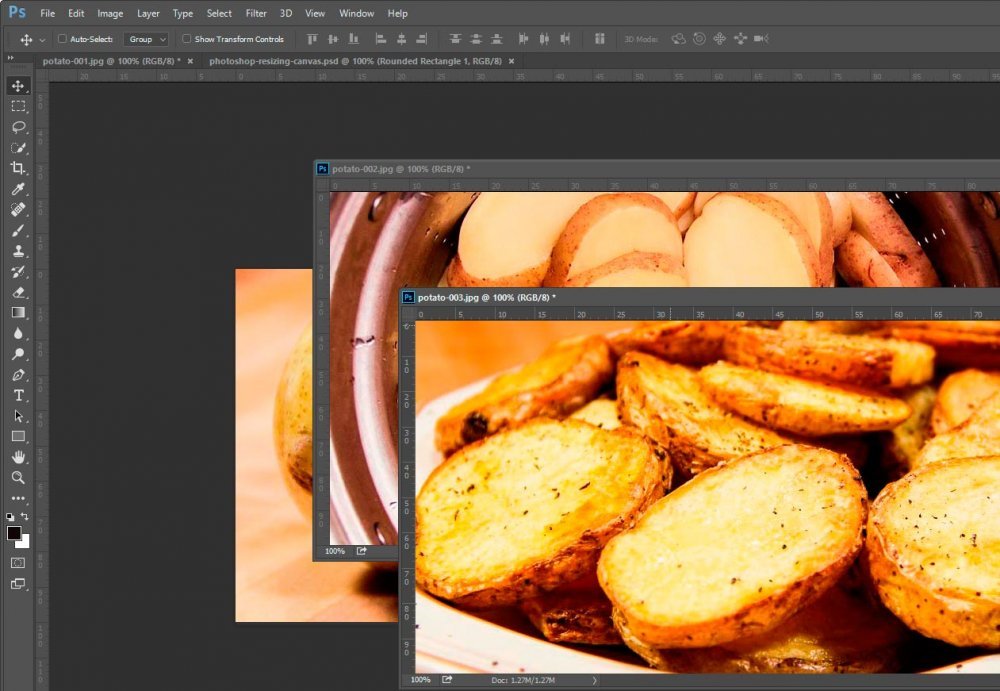
Next, I’m going to use the “Move Tool” to click and drag both images inside the floating documents into the one tab that’s still docked. I’m not going to use “Shift” to center them or anything because I’m going to be moving them around anyway.
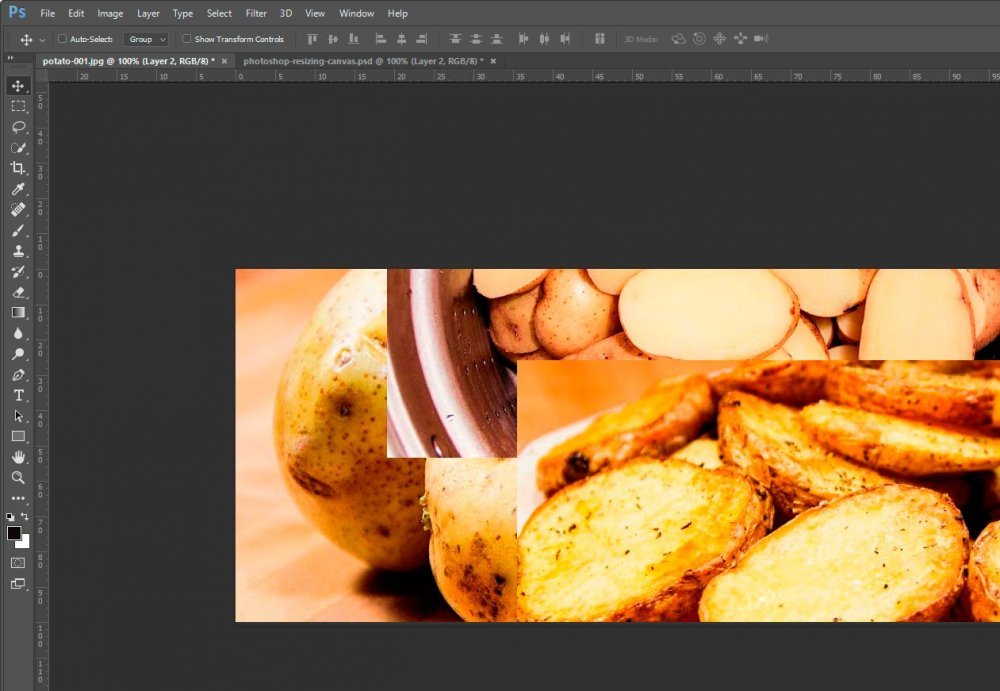
If you look closely at the screenshot above, you’ll see how all three photos are now combined in one file.
Resizing the Canvas – Method #1
As you can see, there is a whole lot that’s cut off from the photos that I merged into this one document. One method of “revealing” the missing parts of an image inside a file like this is to head up to the “Image > Reveal All” menu and click. By using this feature, you’ll essentially be unhiding any part of a file that’s currently hidden by a limited canvas size. By revealing all, you’ll show everything, no matter how bad it looks. If you take a peek at the screenshot below, I think you’ll agree that this layout doesn’t look very good. But still, this is one way to adjust the canvas size to show everything in a file.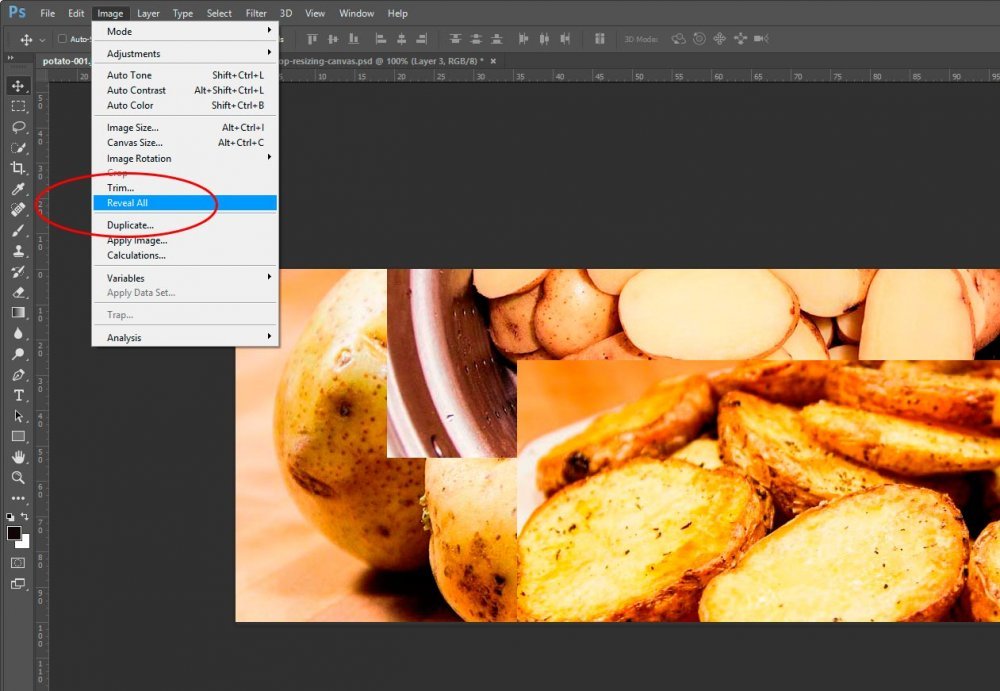
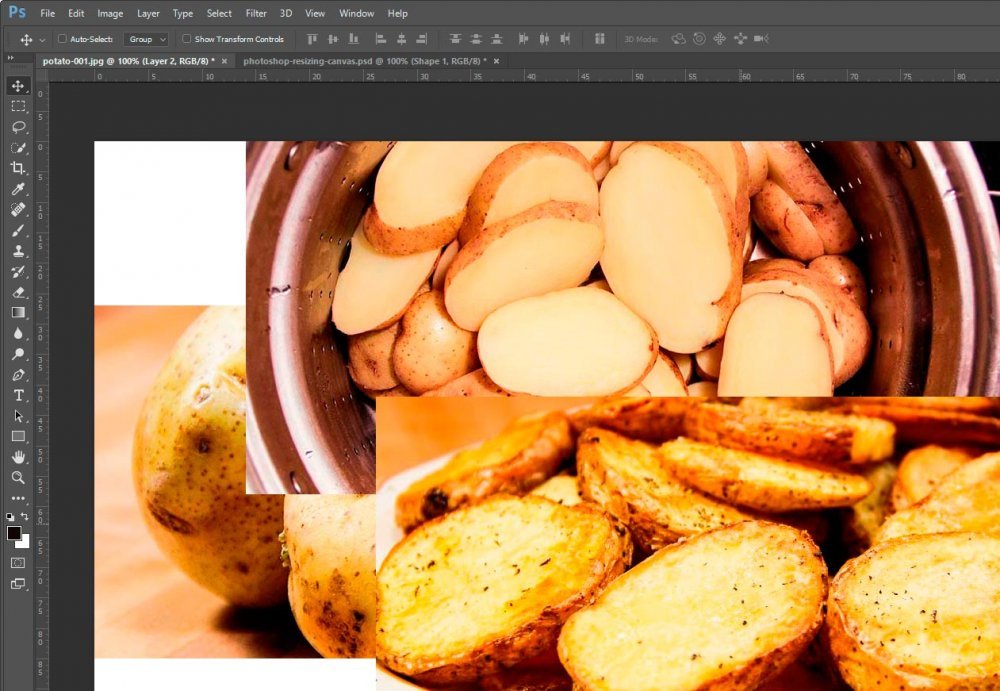
Here’s the thing with this method – if I wanted to go ahead and try to align these images the way I’d like to ultimately see them and then use the reveal all option, I guess it’d be okay. I’d rather work with some breathing room though and that’s why I like to use the next method.
Resizing the Canvas – Method #2
For this next example, I’m going to back to the beginning, where I had all three photos merged into one tab. From here, I’ll try to line up the individual photos that way I want to see them when I’m finished. I want them stacked on top of one another with a small margin in between each one. I’ll also want that same margin surrounding the entire document.So, first I’ll go ahead and move the photos sort of near where they’ll end up.
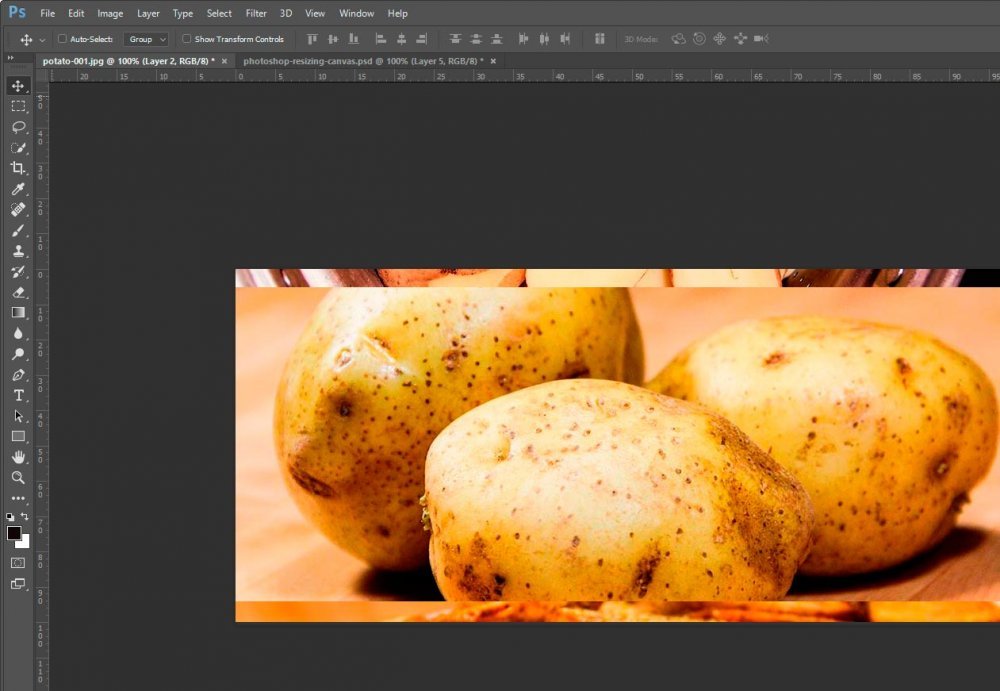
This above step was optional. I didn’t really need to stack these photo like this at this point, but I think it’ll be easier to move them around later.
The next step is to increase the canvas size “relative” to what we currently have. I know that each image is 445 pixels high. If there were no margins at the end, we’d have a final image that’s 1335 pixels high. Since they’re all the same width, we don’t need to adjust that dimension right now. So, to enlarge the canvas so it at least fits all the photos, I need to increase its height by 200%. That’s easy.
To increase the canvas size by a relative percentage, I’ll head up to the “Image > Canvas Size” menu item and click.
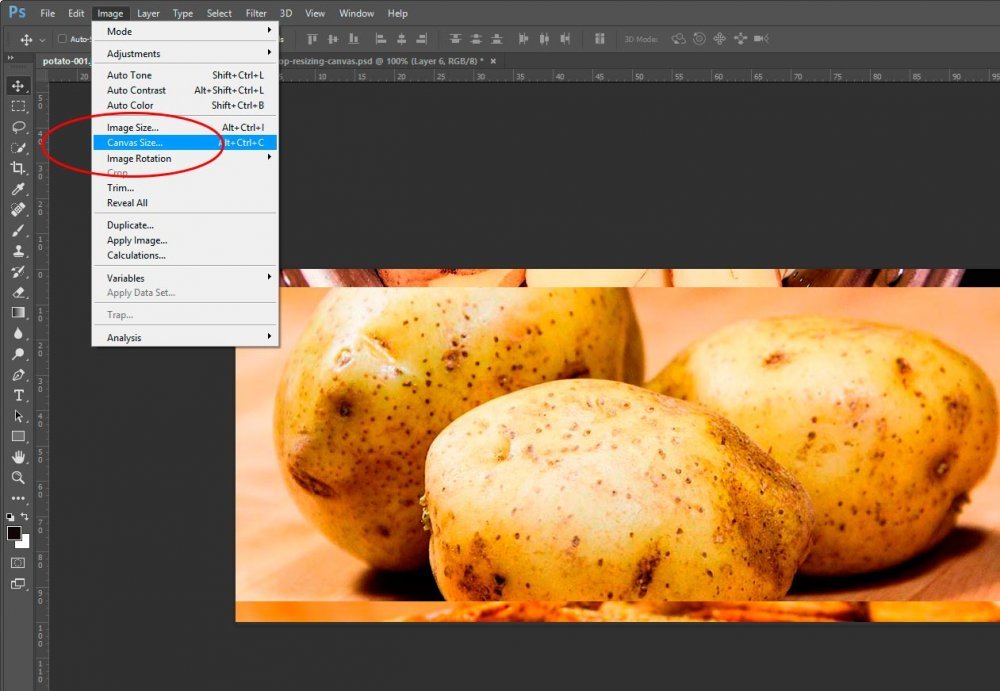
Once that’s done, I should see the “Canvas Size” dialog box appear. Inside that box, I’ll make sure the “Relative” box is checked off and that both drop-down boxes say “Percent.” From there, I’ll leave the width dimension alone and type “200” into the height dimension.
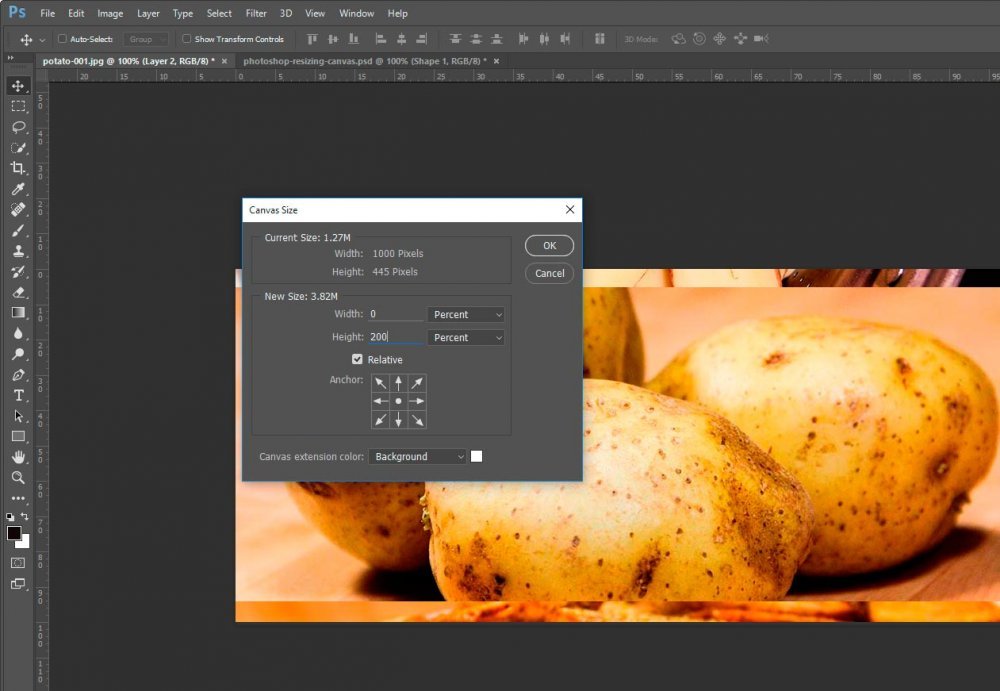
If I click “OK,” I’ll see the canvas size of my file add an additional 200% to the height. Now, if I check my true canvas size, I should see the dimensions at 1000 pixels wide by 1335 pixels high.
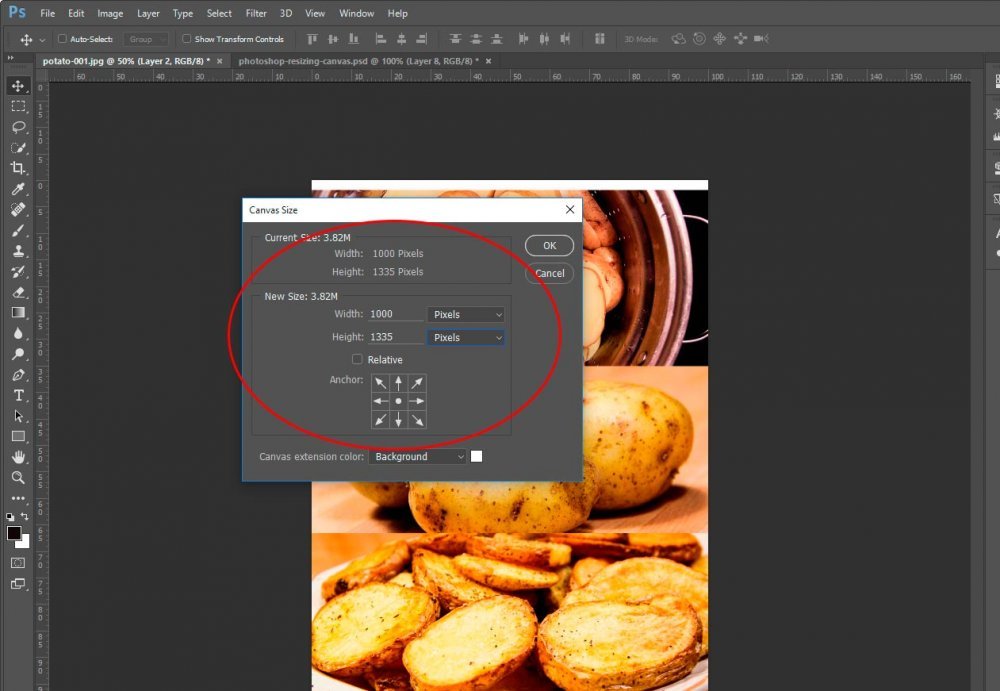
Notice how I unchecked the “Relative” box in the “Canvas Size” dialog. Also, I updated the drop-downs with “Pixels” as opposed to “Percent.” The resulting data gave me the size of my canvas. I also reduced the view size so the entire document fit in my window.
Now, from here, I can nudge the top and bottom photos up and down, respectively, so they fill the entire canvas with no white space.
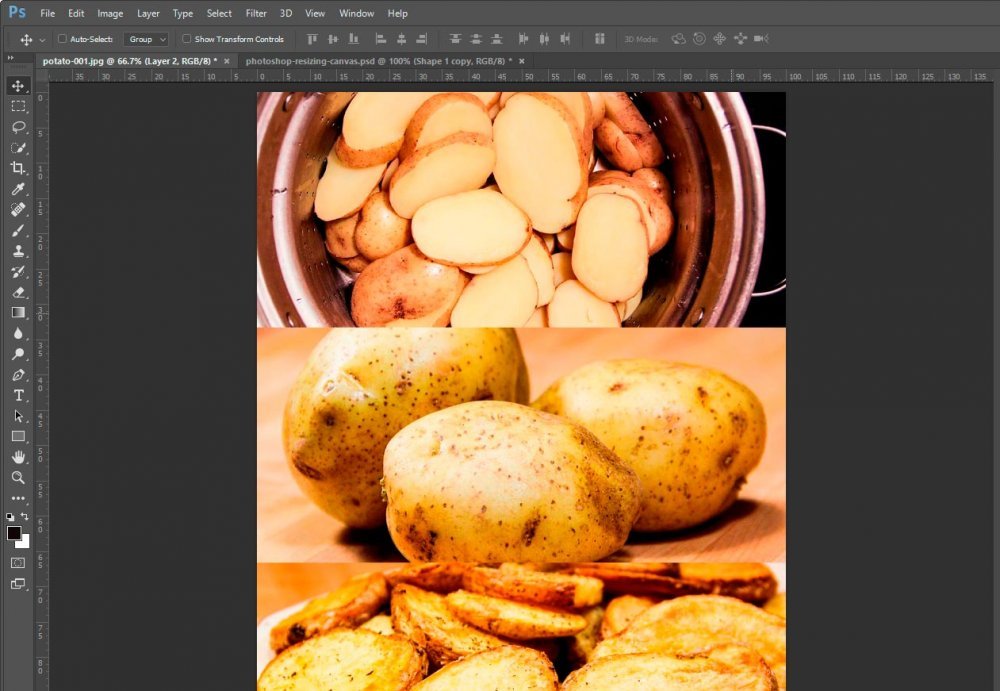
At this point, I need to add the margin around the group of photos as well as in between each image. Again, we need to use the “Image > Canvas Size” menu item. This time though, we’re going to add (relatively) 10% to the width and 20% to the height. That should give us all the room we need. The screenshot below will show you the result of that.
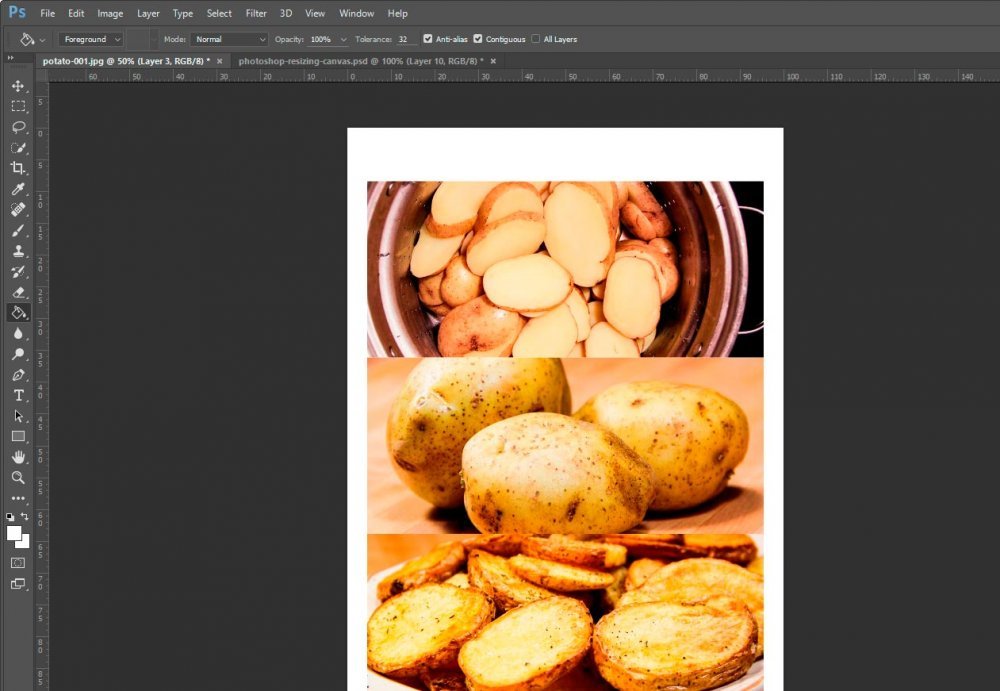
To get the result I have in the screenshot above, I did a few things. Like I mentioned above, I adjusted the canvas size. I also unlocked the bottom layer by clicking the little lock icon. After that, I added an additional layer, moved it to the bottom and painted it white with the “Paint Bucket Tool.” These are all things we’ll go over in later posts, but I wanted to let you know I did them in case you were wondering.
As you can see, we’re almost there. We currently have a nice margin around the photos, but they are uneven. We’ve got a larger margin at the top and bottom of the photo when compared to the sides. We’re also missing the margins in between the photos. To fix this, I’m going to use the “Marquee Tool.”
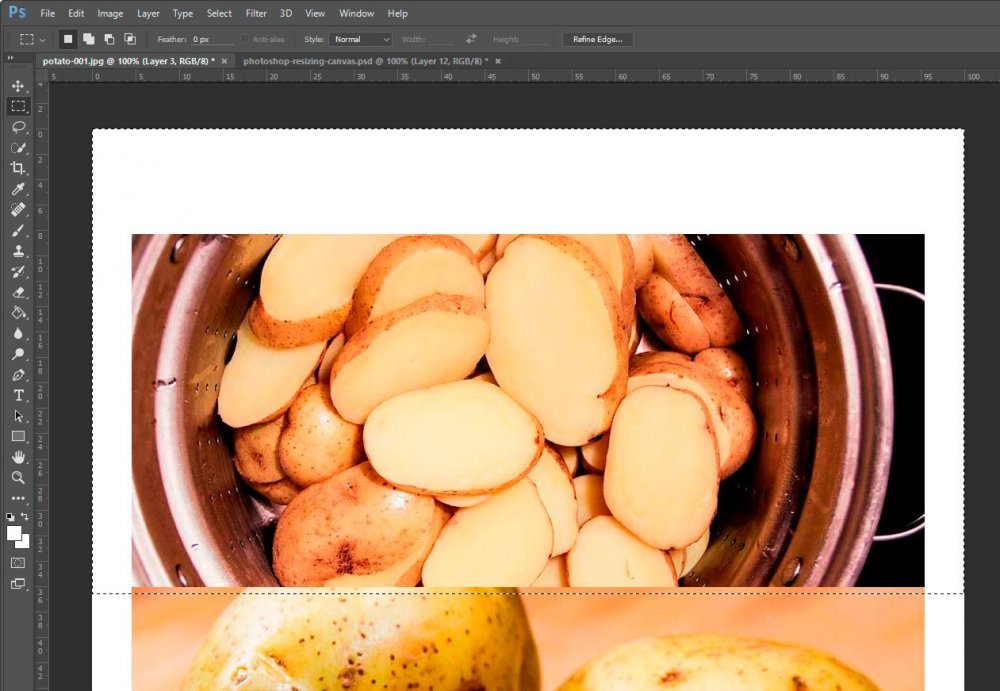
If you look at the screenshot above, you can see that I outlined the top photo with the “Marquee Tool.” I made sure to reach all the way to each side as well as more than cover the bottom. Lastly, I went all the way to the top of the canvas. The reason I extended so far around the photo is so I can align it using the align tool. Since I want this alignment to be as close to exact as possible, I enlarged my view and gave myself some space. When using the align tool in the option bar of the Marquee Tool, whatever it is you’re aligning will only go as far as the edge of the canvas, so in this next step, I’m going to really enlarge the document and then use my up arrow key to nudge the marquee so it’s exactly between the two images.
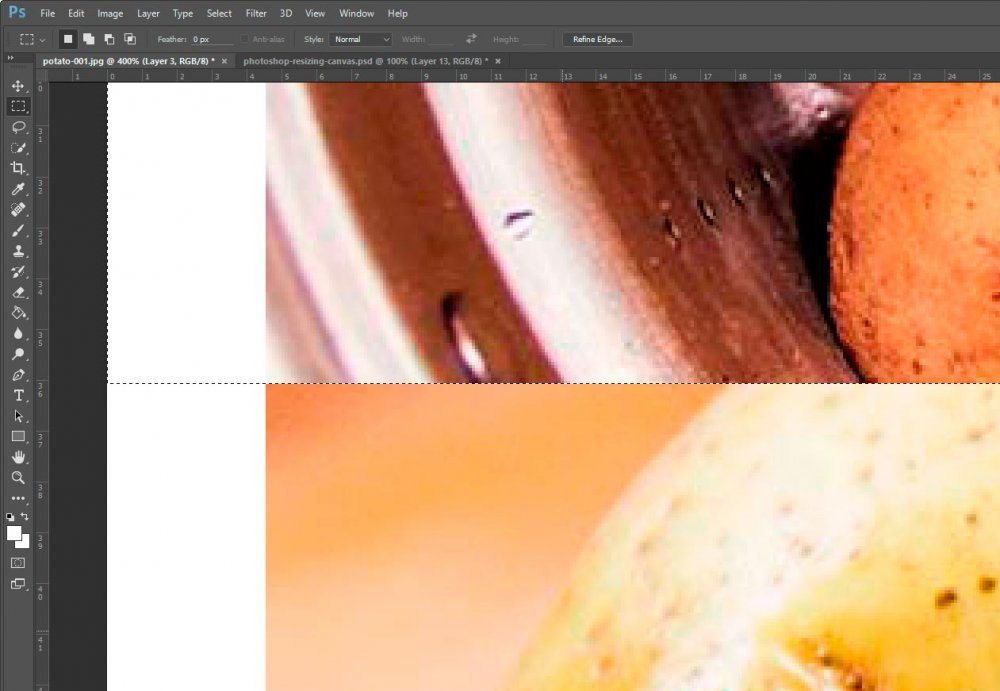
Once that’s complete, I can reduce the size of the document to 100% again and switch to the “Move Tool.” This will activate the alignment options.
Making sure the layer that I want aligned is selected, I’ll go ahead and click on the “Align Vertical Centers” button.
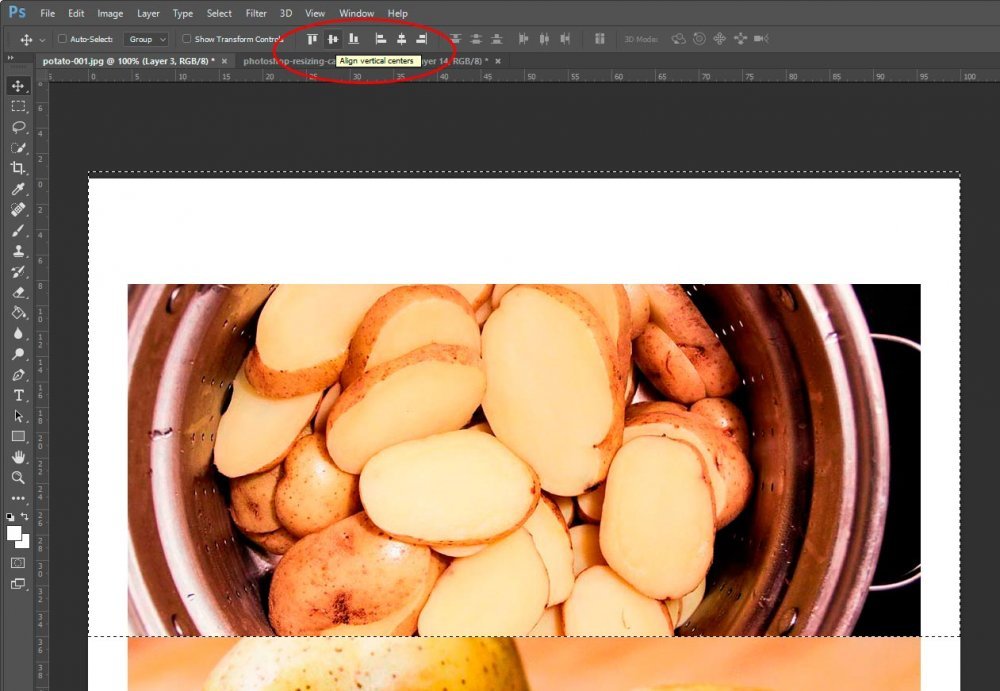
Once that’s complete, I’ll do the same thing to the bottom image. After it’s aligned, I’ll click out of the Marquee Tool and take a look at my final result.
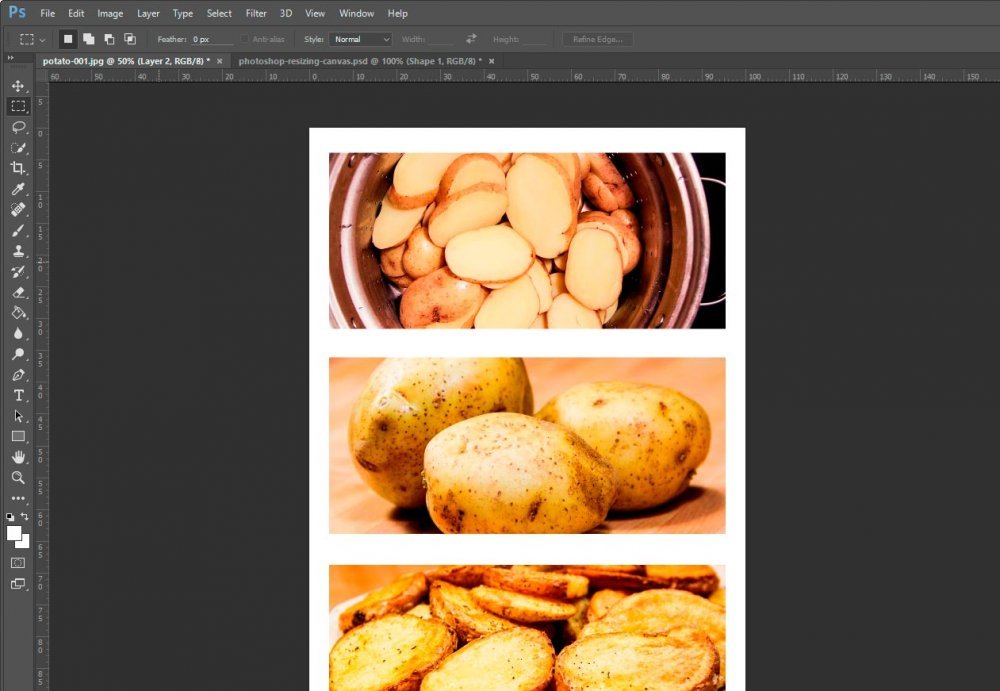
I know this was a lot of steps to create this document, but I thought it was a good project to exemplify how different tools can work together within Photoshop. Really, this was a fairly simply project, so much of the fun is still ahead!
