JodyBuchanan
Member
- Joined
- May 10, 2021
- Messages
- 138
- Reaction Score
- 0
- Points
- 21
- #1

Separating and applying designations to photos in any photo management application is a must. With the volume of photographs being taken in today’s digital world, learning how to manage, identify and reduce the sheer number of them is more important than ever. Luckily, the developers of computer programs, such as Adobe Bridge and Lightroom, know this and have given us ample tools to complete these types of tasks.
In this post, I’m going to discuss the various methods of rating and labeling photos in Bridge. While each method achieves the same result, we have different ways of going about it. They simply depend on our preferences. Some folks like to use keyboard shortcuts while others enjoy clicking around with their mouses. I’ll talk about each below.
My Example Photos
I’ve been compiling an archive of edited photos that I’ve been posting to my blog. These photos have come in extremely handy, due to my need for them over here. I think the ever-growing photo collection is colorful, fun and lets my readers connect easily with what I write in these posts. After all, it’s very realistic, since I used these applications and photos every day for my own work.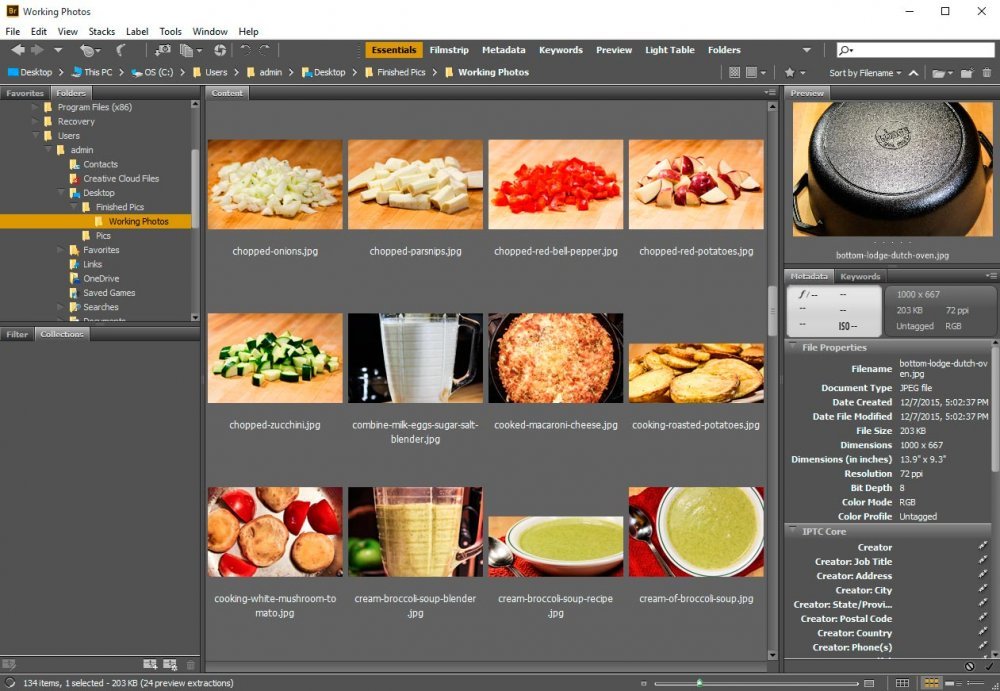
Clicking Thumbnail Area To Rate
This is, by far, the most simple method of applying any star rating to a photograph. If you’re into mere quality indication, this may be for you.If you’d like to tell Bridge to rate a thumbnail somewhere on the scale between 0 and 5, all you need to do is to click to select the thumbnail and then click on one of the 5 small dots below the thumbnail itself (once you select the thumbnail, the dots will appear).
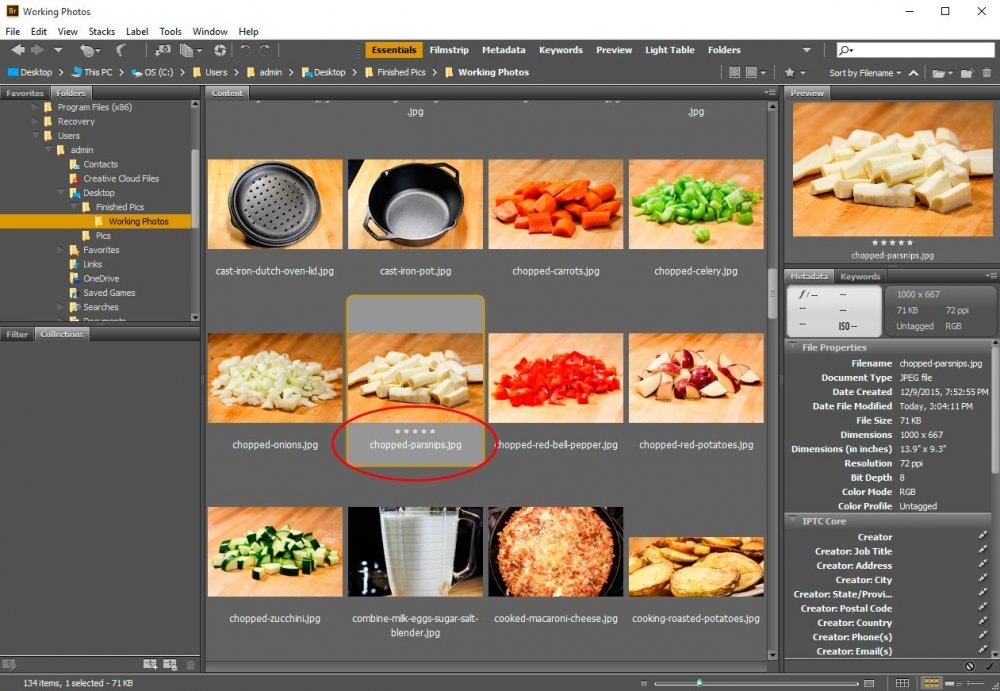
If you look at the screenshot above, you’ll notice that after I clicked on the rating I desired, the rating itself appeared. It also appears under the thumbnail in the upper right corner.
If I want to change a star rating, all I need to do is to click the new rating placeholder. If I want to bring the rating back to no stars, I would click to the left of the first star.
Using the “Label” Menu
If I head up to the Label menu at the top of the application, I could accomplish the same goal as above. I could select a thumbnail by clicking on it, then click on the Label menu item and then choose my star rating.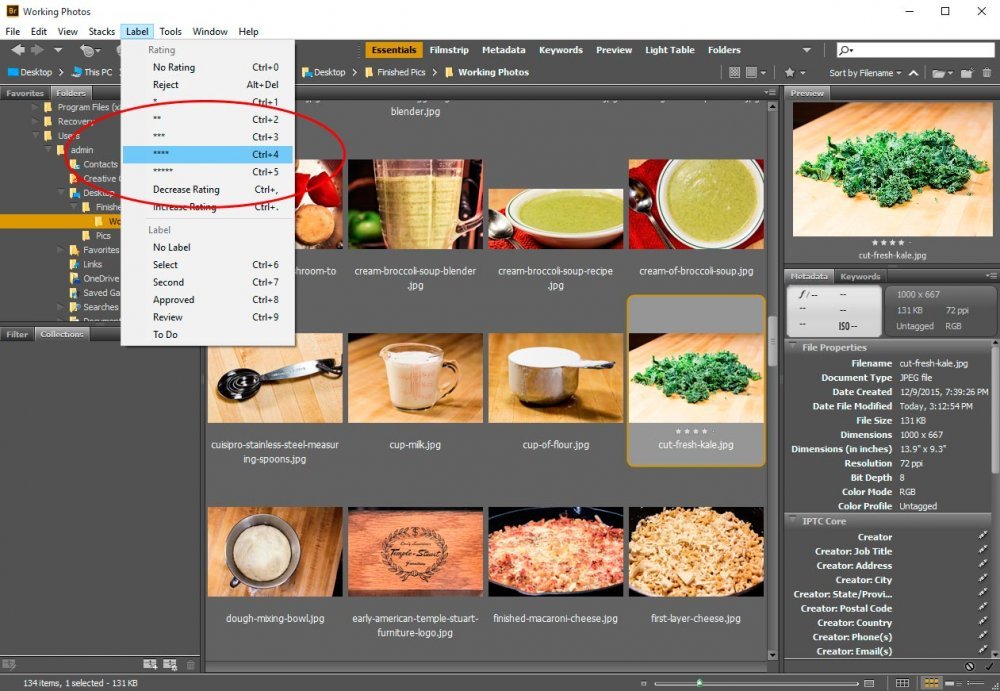
Again, if I wanted to change a rating that’s already been applied, I could simply choose a new rating and the old would be overwritten. To remove the rating altogether using this method, I would click on the No Rating menu item in the same area.
Here is something really neat. If I wanted to label a thumbnail or photo with a specific message or color, I could use the Label menu to do so as well.
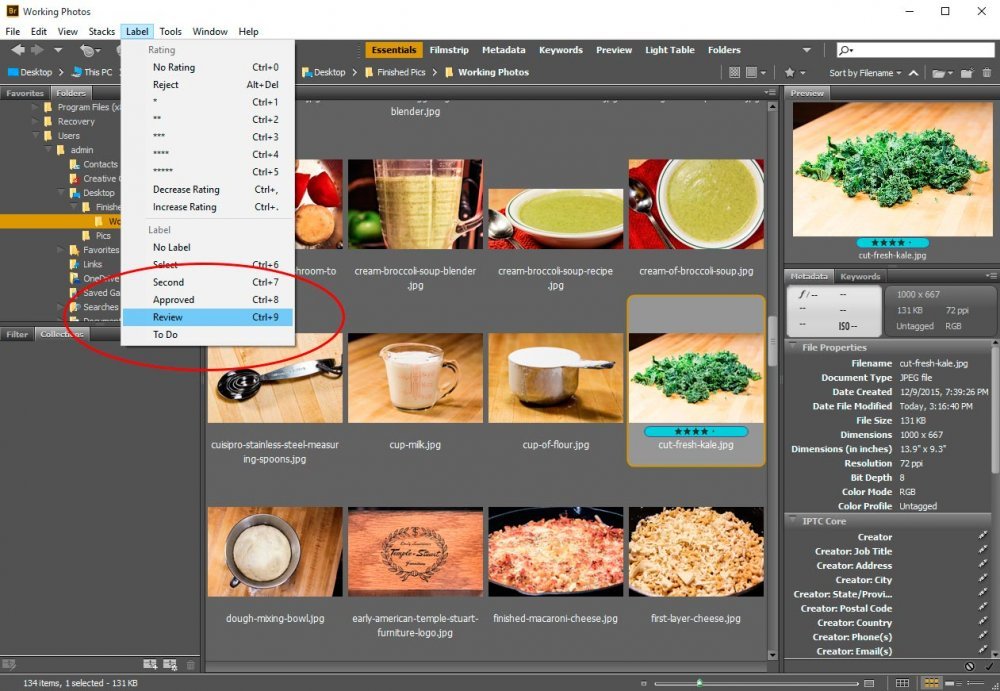
Take a look at the screenshot above. Right below all the star ratings in the Label menu are specific messages. These messages are associated with colors. If I choose a message, the area below the thumbnail in the center column changes color. In my case, I clicked on the Review message, which changed the color below the thumbnail to blue.
Changing the Message
I have a small problem. I don’t have any idea what Review means. The variety of messages or labels I see under the Label menu were pre-programmed into Bridge when I installed it and I’d like to change them. I want it to simply tell me which color I’m applying to the thumbnail, instead of offering words. Below, I’ll go about editing those labels.If I go up to the Edit > Preferences menu and click, I should see a dialog box appear.
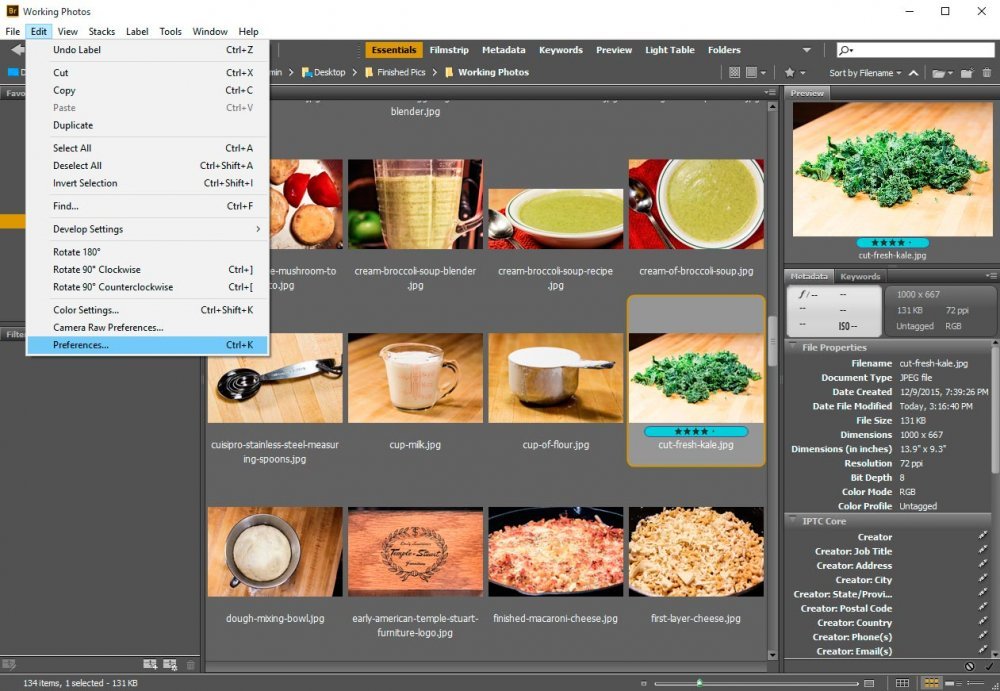
Inside this, if I click on Labels in the left column, I should see something that look familiar. It’s the messages with their respective colors attached to them.
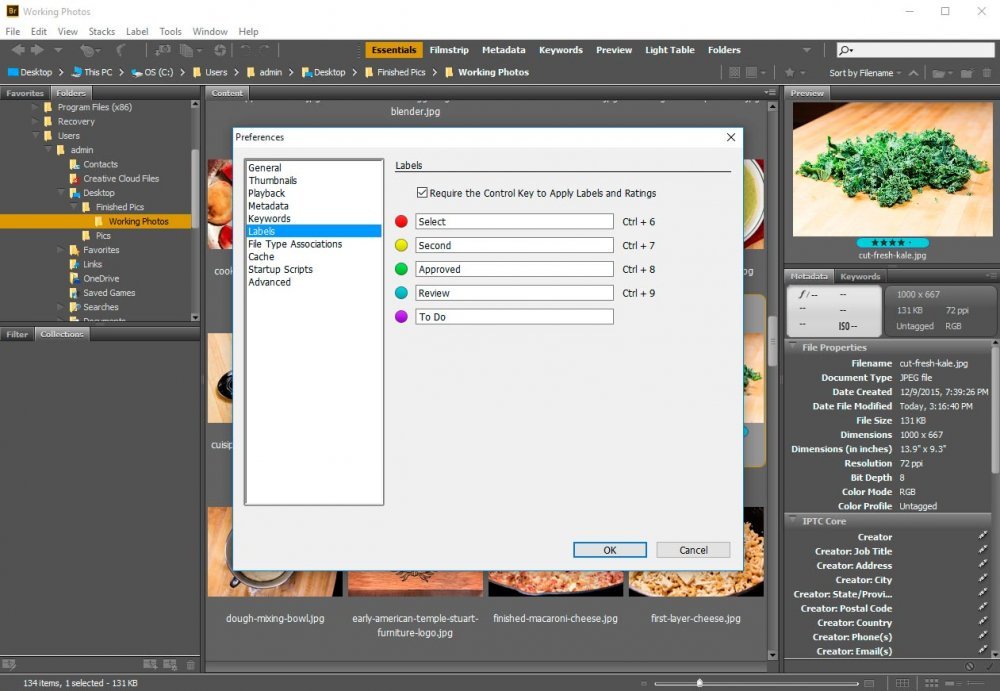
I’m sure you know where I’m going with this. To change a message, all I need to do is edit what’s inside the fields to the right of the colors. In my case, I’d like to indicate with color I’m choosing under the Label menu. So I’ll edit accordingly.
Once that’s finished, I’ll click the OK button and return to the Labels menu up top.
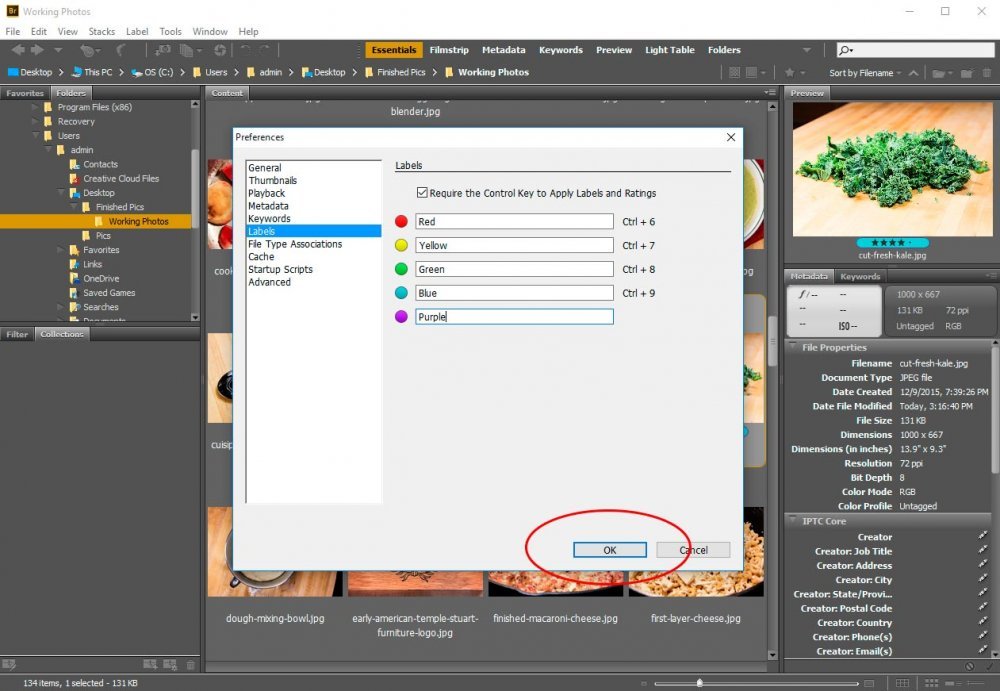
Let’s see if my changes stuck.
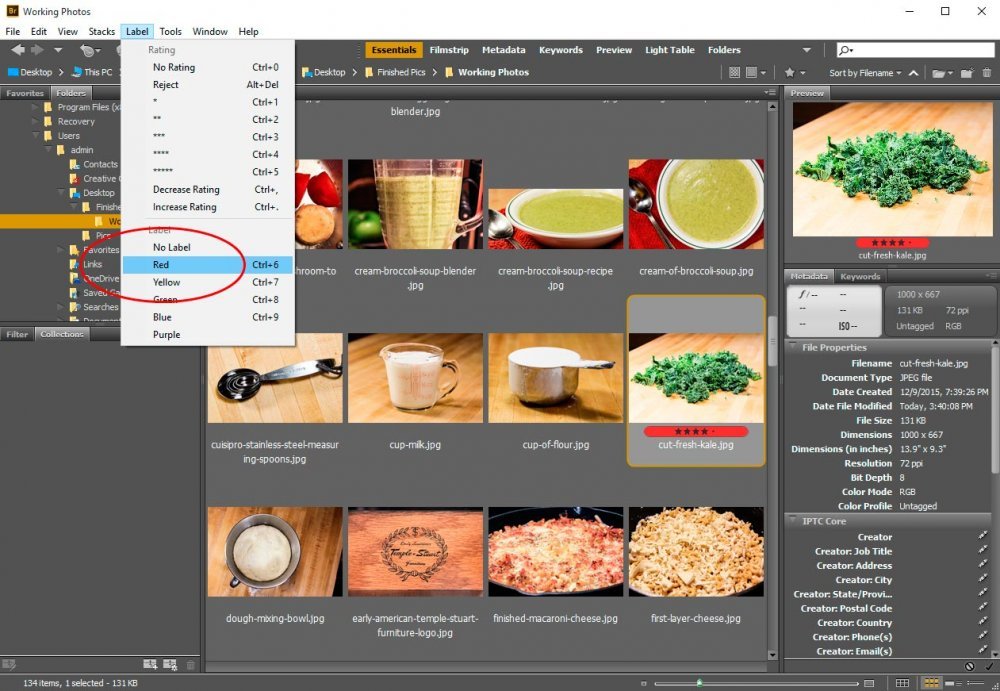
Yes, they did. As you can see above, I’ve got a new set of messages to choose from and I went ahead and chose Red, which changed my original color (label) from blue to red. If I wanted to remove any color that’s applied to a thumbnail, I would choose No Label. Also, please be aware that you can enter any message you’d like, so get creative and customize your application any way you wish.
Using Keyboard Shortcuts
As you may have noticed, when I pulled down the Label menu, there were keyboard shortcuts listed to the right of every selection I could click on with my mouse. Let’s take a look at the Label menu again.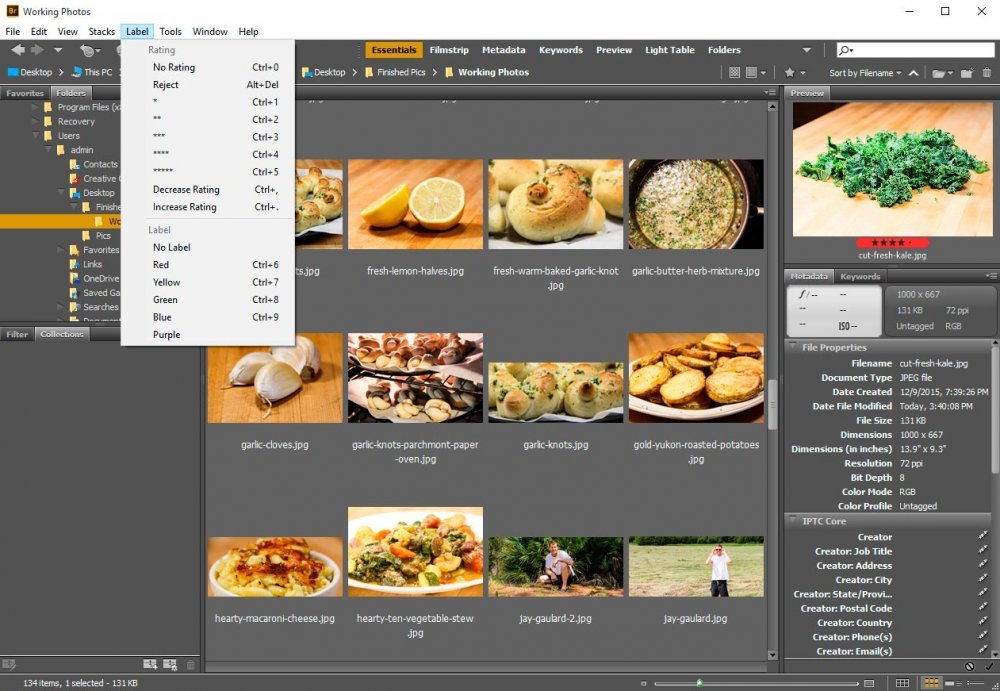
Basically, for every item I can click on, I can use my keyboard for application as well. For example, if I wanted to apply a one star rating to a photo, I’d click Ctrl+1 on my keyboard. If I wanted to label it green, I would click on Ctrl+8.
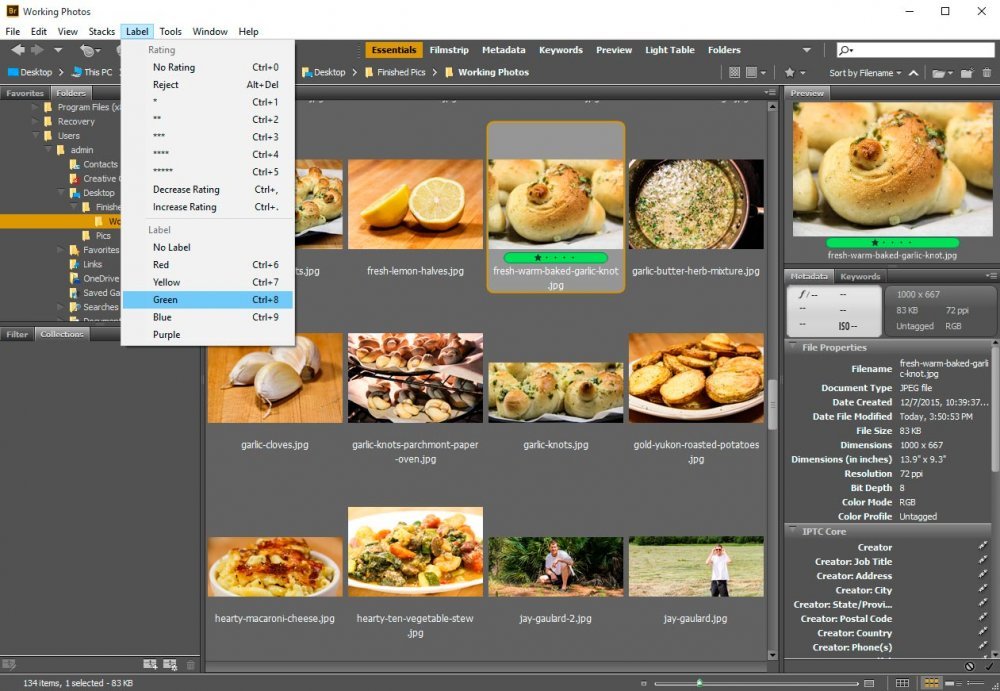
It’s really that simple.
One last thing. I’m not sure if you noticed this while we were looking around the Edit > Preferences > Labels dialog box, but there’s an option to turn off the Ctrl portion of those keyboard shortcuts. So, if you merely wanted to click on a particular number alone to apply a rating or label, you could. All you would need to do is uncheck the Require the Control Key to Apply Labels and Ratings box. I’ll do that below. Please notice how the Ctrl+1, 2, 3, etc… change to 1, 2, 3…etc to the right of the colors and labels.
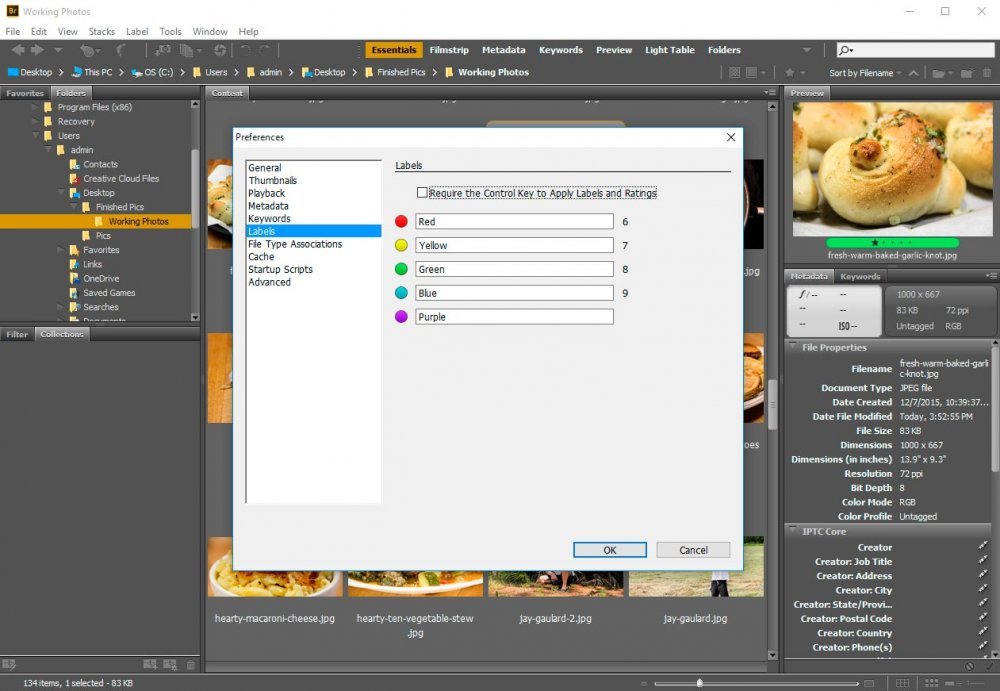
When finished, click on OK and go about rating and labeling thumbnails and photos with your new keyboard shortcuts.
