CampFireJack
Member
- Joined
- May 9, 2021
- Messages
- 118
- Reaction Score
- 1
- Points
- 16
- #1
If you’ve taken photos of dynamic scenes (dark and bright areas or objects), you may have had either under or overexposure issues in your final images. As good as cameras are these days, they still have trouble figuring out photographer’s intent. I actually wrote a post that covers how to best deal with exposure while taking photographs, so if you’d like to learn a bit about that, I welcome you to read up.
The truth of the matter is that it really doesn’t make a difference what the make or model of your camera is – or how much you paid for it. There are going to be cases where you’ll have to accept the fact that some areas of your photos will be darker than you’d like them to be and others will be lighter than you’d like them to be. Luckily, we can use Adobe Camera Raw to make some pretty drastic changes that will breathe new life into photos once thought of as lost.
In this post, I’m going to go over some simple techniques we can use inside of Camera Raw to correct certain aspects of both types of exposure problems. All tools I’ll be using will be contained in the Basic panel and are quick, easy and fun to learn.
Opening Our Photo
I’m going to take this opportunity to open a photo that’s got both underexposed and overexposed elements in it. While this type of image isn’t oftentimes readily available, I happened to locate a few of them in a folder of shots I took from my stint in Palm Coast, Florida. The photos I found have got both shadow and sun, so they should work out well as examples for this post.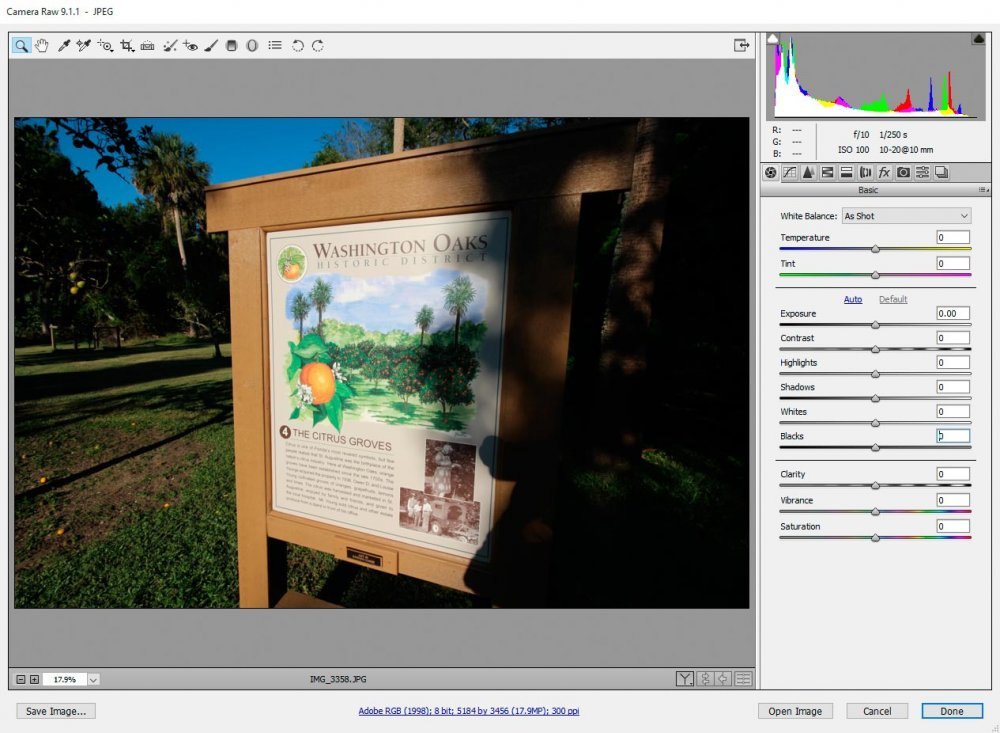
Now, if you look closely at the photo above, you’ll notice that while the histogram is mostly condensed over to the left side (darkeness), it’s not completely pegged out there, meaning, my camera actually did capture data. This is a good thing because it’ll allow some successful editing in Camera Raw.
I don’t thing the challenge with this photo is going to be brightening the shadows or darkening the highlights – I think it’s going to have more to do with keeping some of the contrast between the two. As you’ll see in the sections below, the overall photo can become somewhat muted with too much adjustment.
Underexposed Elements
If we again look at the screenshot above, we can see that a good majority of the photo is underexposed. The right side of the sign isn’t visible and the details of the trees over to the left can’t be seen. I’d like to take advantage of a few sliders to help out with this.Brightening Up the Shadows
In order to effectively edit this image, I need to discern what’s wrong with it. Since I already know it’s underexposed, I have to make the decision about what exactly in the photo is too dark. Are there black elements in the photo that I’d like to lighten or are there shadows? In the case of my photo above, we’ve got a problem with shadows. In this case, I’ll push the “Shadows” slider to the right to increase brightness in them.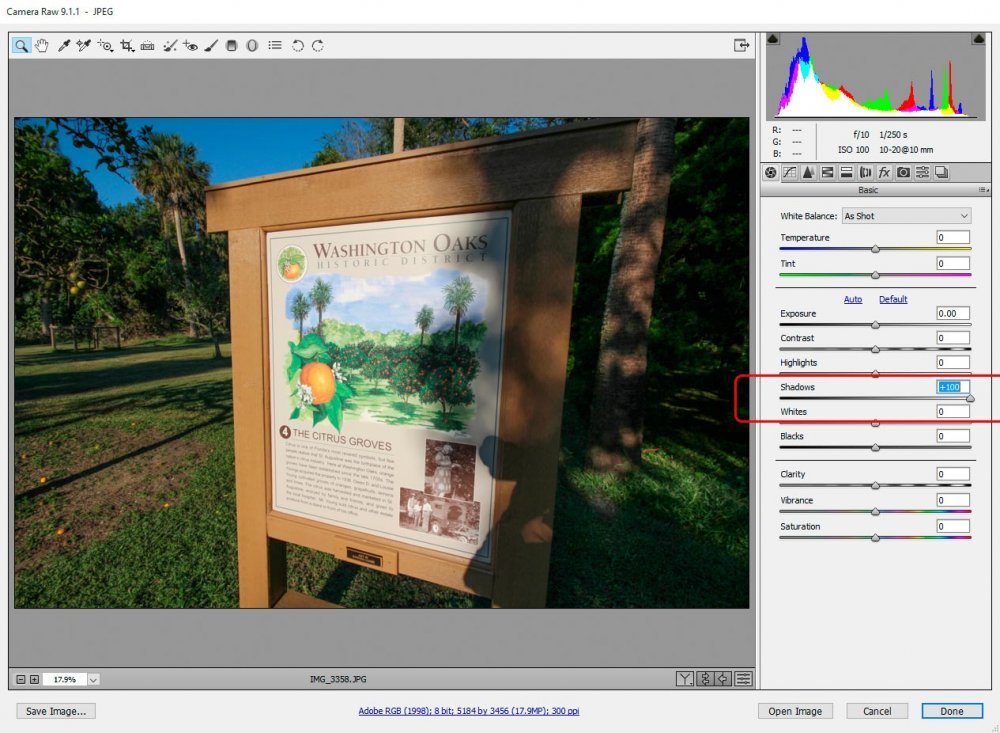
Already, I see a big difference in the visible portions of the photo (the left and right sides). The thing is, I ran out of slider, so this is as bright as things are going to get using the Shadows slider.
Now, I may be tempted to use the “Blacks” slider to correct this problem, but I’m not going to do that. There are no black elements in the photo and if I use up my black editing power, I may be left with problems later on. What I’m going to do is to look toward my histogram to tell me what to do.
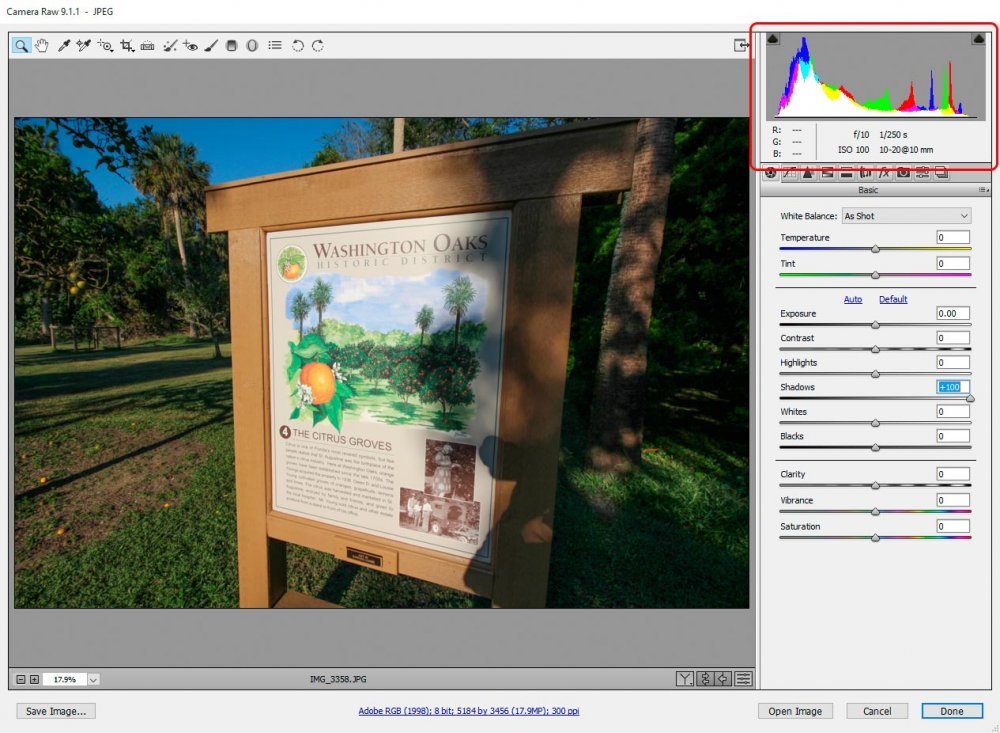
Increasing Exposure
My histogram is telling me that the photo is still underexposed. Since this is the case, I’m going to slide the “Exposure” slider to the right, until I see the histogram balance out.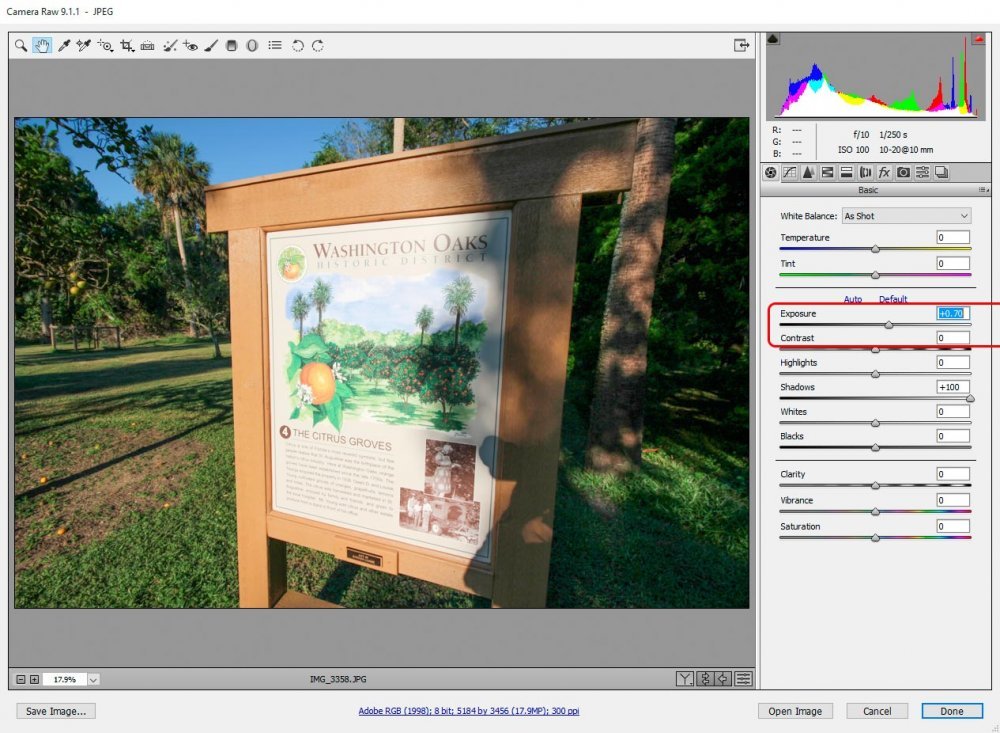
That looks better. The new problem we’re facing is that the sign is looking a bit too bright. Even though the histogram isn’t saying it, we’ve got some overexposed elements in our photograph.
Reducing the Highlights
I’m sure you’re beginning to see how this process goes. I edit one thing, which causes something else to need editing, which may cause something else to need editing and so on. The good thing is that Camera Raw has got plenty of tools to make corrections, so once we get the hang of how to effectively edit, it doesn’t take much time at all to create great looking photos.Since the beginning of this post, I’ve been concerned with how the words on the sign appear. Since they are front and center, it’s important for them to be seen clearly. Right now, they’re way too bright and need to be darkened somewhat. To accomplish this, I’m going to push the “Highlights” slider to the left, to darken any highlights. Let’s see how way I have to push.
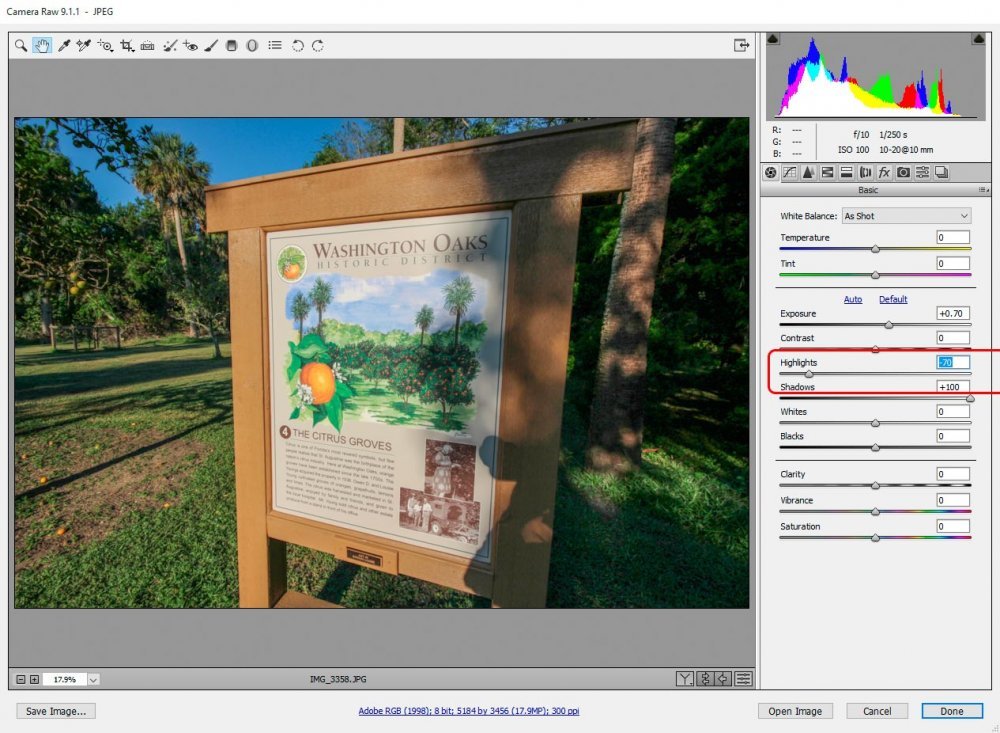
It appears that moving the Highlights slider to a value of -70 worked out well. Any more than that, the sign became too dark overall and that didn’t look good.
Adjusting Exposure
If you’ll take a look at the screenshot above, you’ll see that the histogram has again been pushed over to the left, indicating that the photo is still underexposed. To deal with this, I’m going to move the “Exposure” slider to the right to see what happens. I’ll also move the “Highlights” slider more to the left, because I already know that the sign is going to become too bright again.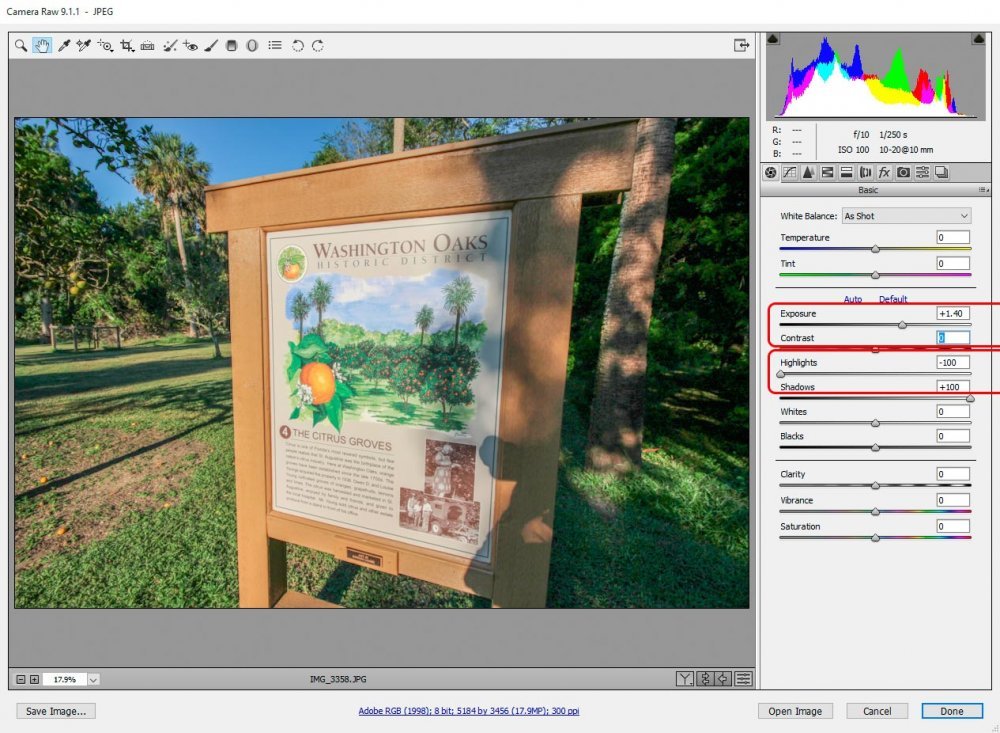
That’s better. The overall exposure looks good and the histogram is in the area I’d like to see it. I don’t think any further editing in this area is necessary.
Adjusting Contrast
One of the issues we face after adjusting exposure, highlights and shadows is that the overall image can become low in contrast, or grayed out somewhat. To deal with this, we can use the “Contrast” slider.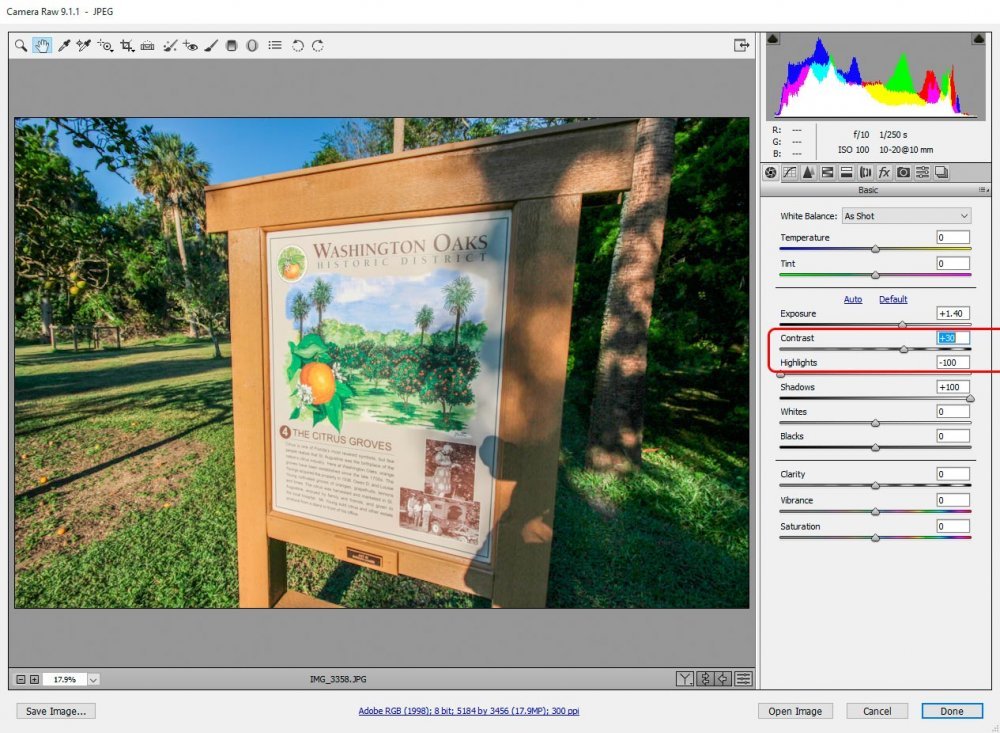
I think the area I was most concerned with in my example photo was the text on the sign. After I slide the Contrast slider to the +30 mark, I was happy with the distinction between the text and the background.
Before & After
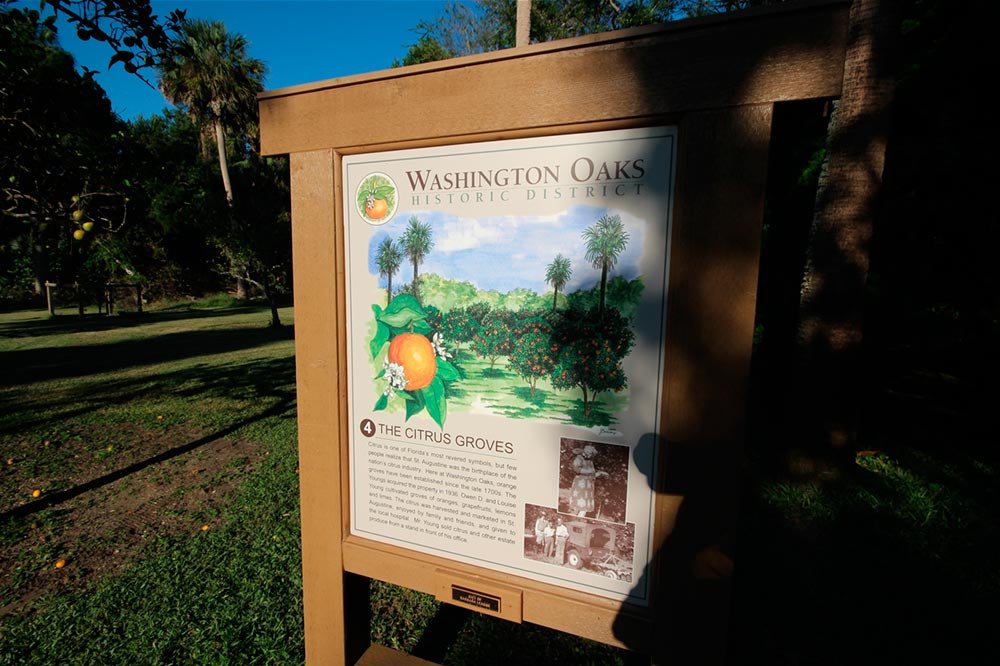
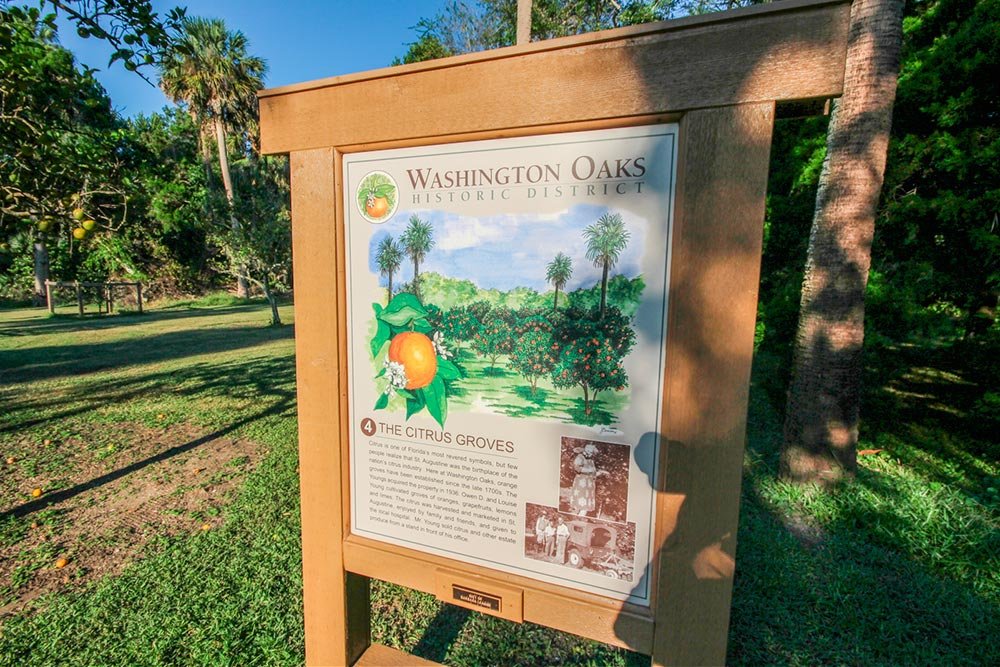
It’s always fun to directly compare the before and after shots of an edited image. In the case of Camera Raw, this is really simple to accomplish. If I press “P” on my keyboard, the image view will flip back and forth between the completely unedited shot and the edited one. I’ll give both examples below.