Phoenix1
Member
- Joined
- May 7, 2021
- Messages
- 135
- Reaction Score
- 0
- Points
- 23
- #1
If you own a DSLR camera, you probably know that you can customize many of its available settings. There are tons of things you can change, from the quality of the photos you take to which buttons you press to auto-focus to how you control the flash. It’s because of this type of customization, amateur and professional photographers alike love their cameras. The camera truly becomes an extension of the human.
There is a small problem with all this potential customization through. As with many things in life, with great power comes great responsibility. If we mess around with the settings on our cameras too much, there’s the possibility of getting lost and having no idea of what we changed and how to get things back to where they were in the beginning.
Now, I completely understand the temptation of customizing your camera. Part of the issue lies with the tons and tons of tutorials one can find online. Someone writes or records a video that talks about how to make the beep sound at this time and someone else writes or records something quite the opposite. Many early photographers fall for the bait of having too much accessible information and start customizing things that they really have no need to customize.
People do this either the way I just described (with help) or they do it all by themselves. There’s a trick to things like this. You need to learn about what settings actually do before you start changing them to what you think you might like or how someone else suggests. And if you do get yourself in a pickle, you should really try your hardest to undo what you did manually. You’ll likely learn a lot in the process. Yet, I completely understand the limitations of time as well. There are times when you just want to get things done and reset the damn camera.
In today’s post, I’ll cover the steps necessary to reset your Canon Rebel T3i to its factory default settings. It’s really rather simple, so read on below. Also, please be aware that if you have another camera from the Canon Rebel series (T2i, T4i, T5i, T6i or the T7i), most of what I write below will apply to it as well.
To start off, I’ll press the Menu button on the back of the camera. In the photo below, I’ve got this button circled in red. It’s in the upper left portion of the picture.
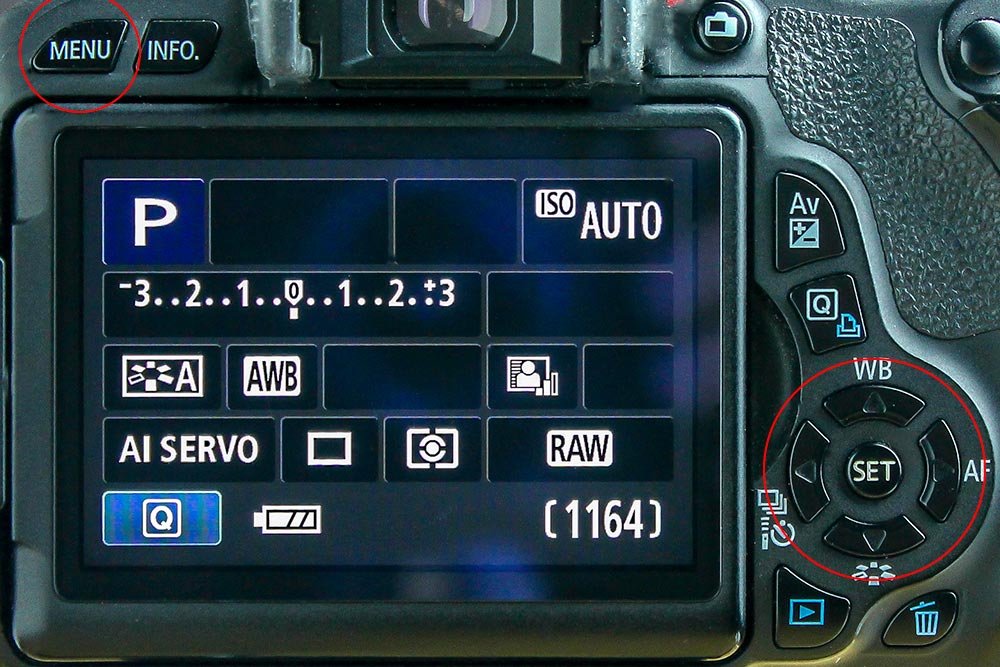
I also circled the arrow controls I’ll be using in the next few steps. These arrows are what I’m going to use to move from menu option to menu option. Once I move to the option I’d like to use, I’ll press the Set button, which lies in the center of the arrows.
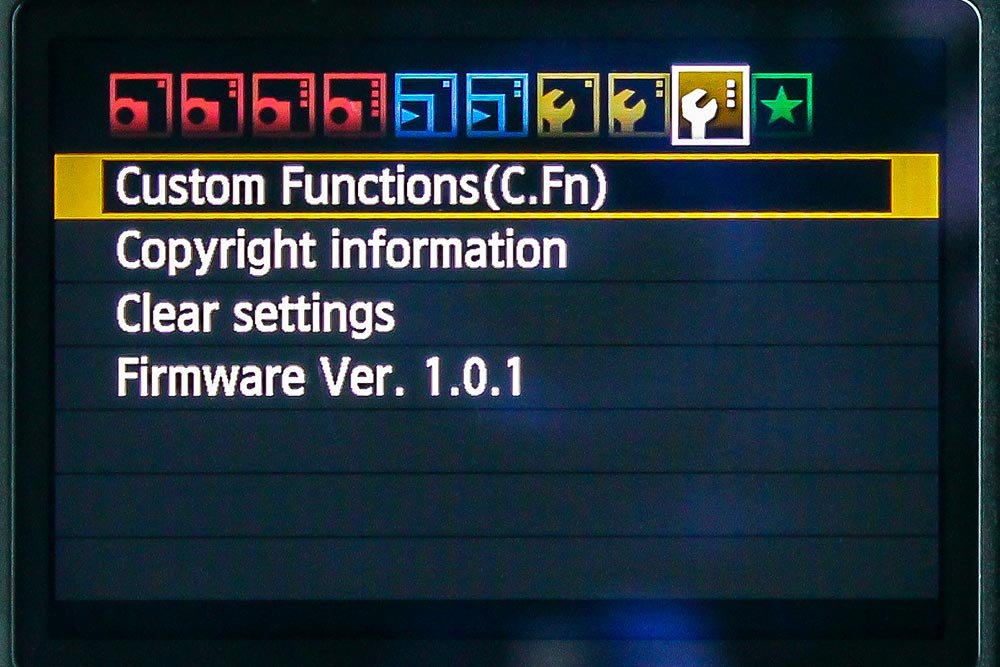
When I press the Menu button on the back of the camera, I’ll see one of the settings screens appear. I’ll push the left or right arrow buttons to bring me to the right-most Tools menu. This menu is characterized by a small wrench in the tab and will have the Clear Settings option available as one of the selections.
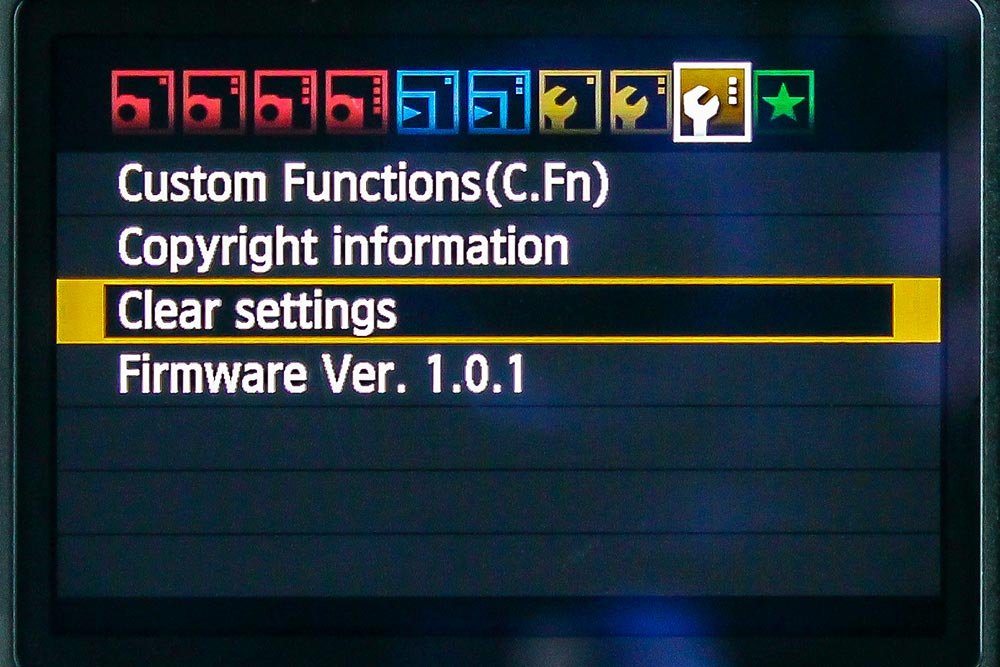
Next, I’ll use the down arrow button to move to the Clear Settings option. Once I’m there, I’ll push the Set button.
This will bring me to the next screen that contains further options.
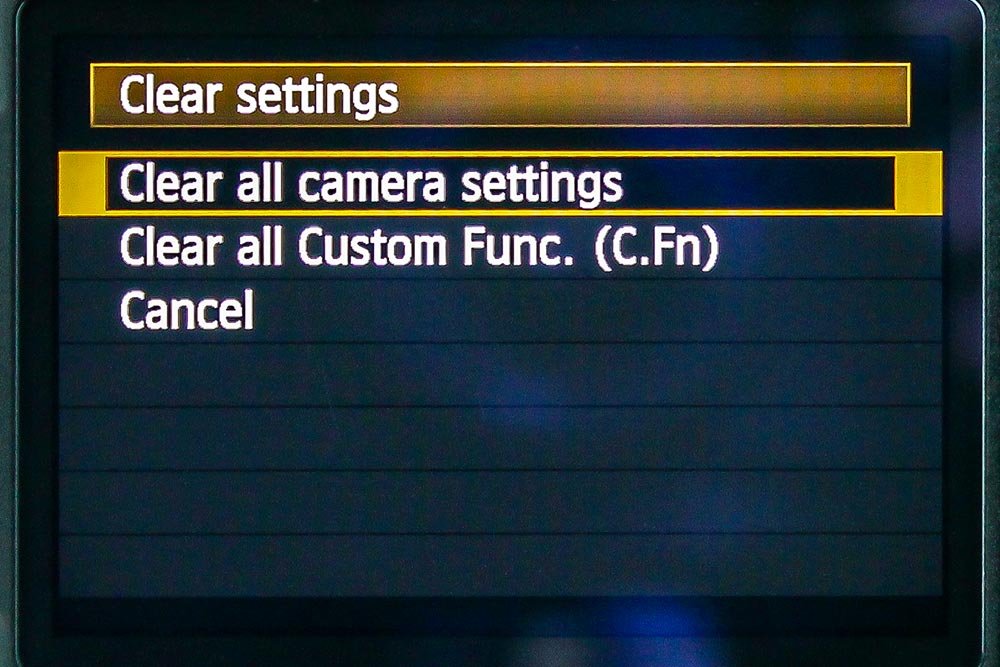
I’ll select the Clear All Camera Settings option by pushing the Set button once again. Doing this will bring me to the confirmation screen.
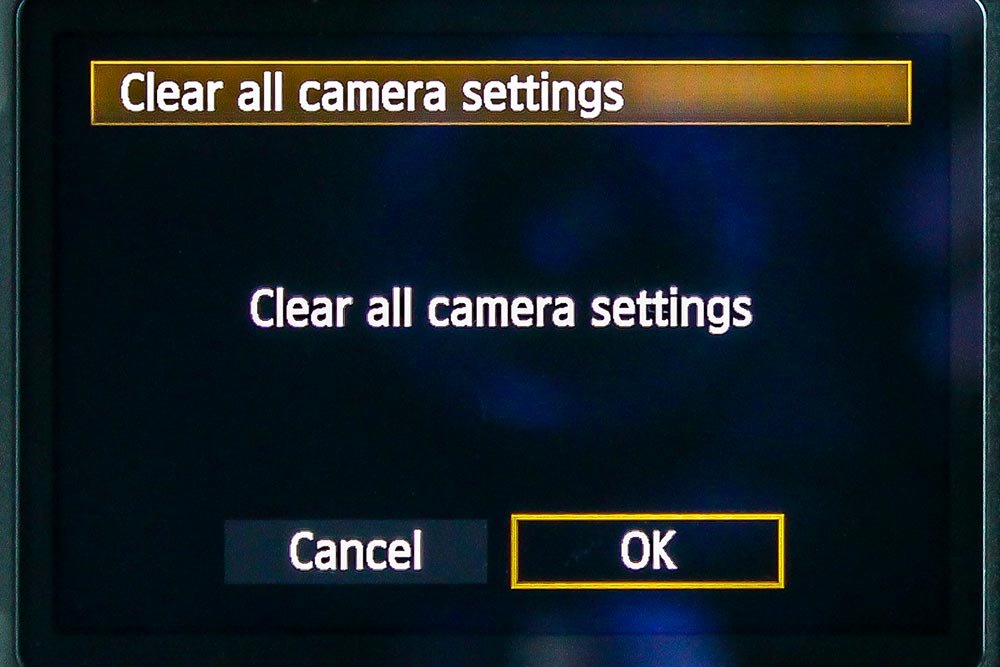
I’ll use the right arrow button to move to the OK option and then I’ll press the Set button again. After that, the camera will take a second or two to clear out any settings I changed and will bring me back to their initial default modes.
To finish things up, I’ll back out of the menu area by either pressing the Menu button the number of times it takes me to get out or I’ll simply half-press the shutter button. Pressing that button while in the menu area will immediately remove me and bring me back to camera mode.
Well, there you have it. I hope I thoroughly explained how to reset your Canon Rebel T3i camera settings to their defaults. If you have any questions or concerns, please leave them below. Thanks for reading!
There is a small problem with all this potential customization through. As with many things in life, with great power comes great responsibility. If we mess around with the settings on our cameras too much, there’s the possibility of getting lost and having no idea of what we changed and how to get things back to where they were in the beginning.
Now, I completely understand the temptation of customizing your camera. Part of the issue lies with the tons and tons of tutorials one can find online. Someone writes or records a video that talks about how to make the beep sound at this time and someone else writes or records something quite the opposite. Many early photographers fall for the bait of having too much accessible information and start customizing things that they really have no need to customize.
People do this either the way I just described (with help) or they do it all by themselves. There’s a trick to things like this. You need to learn about what settings actually do before you start changing them to what you think you might like or how someone else suggests. And if you do get yourself in a pickle, you should really try your hardest to undo what you did manually. You’ll likely learn a lot in the process. Yet, I completely understand the limitations of time as well. There are times when you just want to get things done and reset the damn camera.
In today’s post, I’ll cover the steps necessary to reset your Canon Rebel T3i to its factory default settings. It’s really rather simple, so read on below. Also, please be aware that if you have another camera from the Canon Rebel series (T2i, T4i, T5i, T6i or the T7i), most of what I write below will apply to it as well.
Resetting the Camera’s Settings
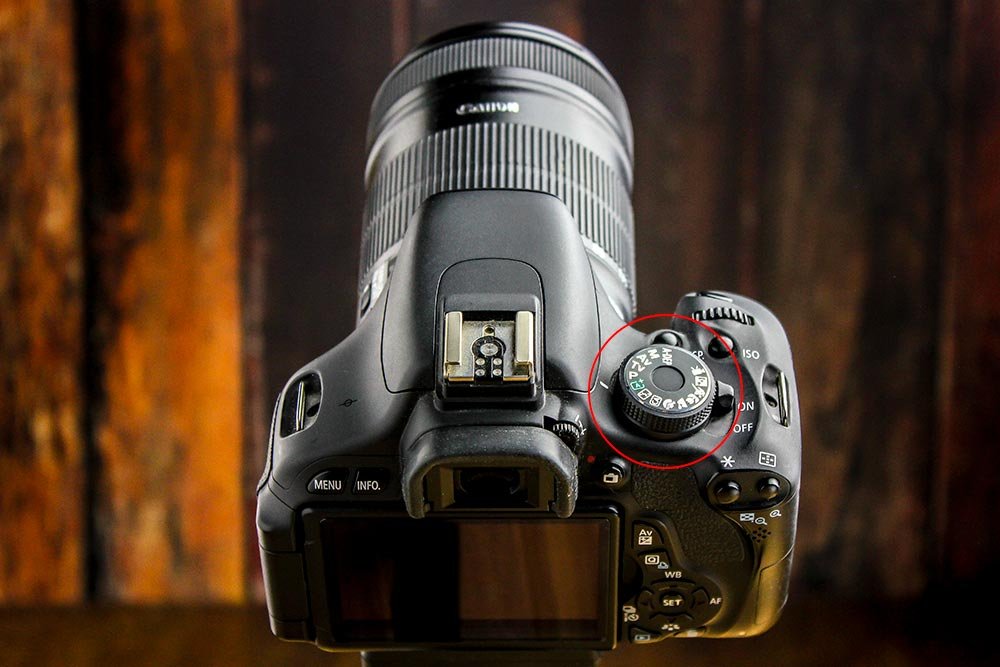
Before I begin, I want to remind you that the menu options in your camera change depending on what mode you currently have the camera set to. With some settings, the options I’m going to use below aren’t available. Before I begin, I’ll set my camera to P, or Program mode. If you’re following along with your own camera, you should do the same.
To start off, I’ll press the Menu button on the back of the camera. In the photo below, I’ve got this button circled in red. It’s in the upper left portion of the picture.

I also circled the arrow controls I’ll be using in the next few steps. These arrows are what I’m going to use to move from menu option to menu option. Once I move to the option I’d like to use, I’ll press the Set button, which lies in the center of the arrows.
When I press the Menu button on the back of the camera, I’ll see one of the settings screens appear. I’ll push the left or right arrow buttons to bring me to the right-most Tools menu. This menu is characterized by a small wrench in the tab and will have the Clear Settings option available as one of the selections.

Next, I’ll use the down arrow button to move to the Clear Settings option. Once I’m there, I’ll push the Set button.

This will bring me to the next screen that contains further options.

I’ll select the Clear All Camera Settings option by pushing the Set button once again. Doing this will bring me to the confirmation screen.

I’ll use the right arrow button to move to the OK option and then I’ll press the Set button again. After that, the camera will take a second or two to clear out any settings I changed and will bring me back to their initial default modes.
To finish things up, I’ll back out of the menu area by either pressing the Menu button the number of times it takes me to get out or I’ll simply half-press the shutter button. Pressing that button while in the menu area will immediately remove me and bring me back to camera mode.
Well, there you have it. I hope I thoroughly explained how to reset your Canon Rebel T3i camera settings to their defaults. If you have any questions or concerns, please leave them below. Thanks for reading!
