JodyBuchanan
Member
- Joined
- May 10, 2021
- Messages
- 138
- Reaction Score
- 0
- Points
- 21
- #1
There are many reasons you may want your Canon Rebel T3i to have an accurate date and time set. First, every single photo you take with your camera will have the date and time attached to its meta data. If you like looking back in time at old photos, this becomes very important. It’s really not difficult at all to see when you took a particular photograph simply by viewing it in a piece of software such as Adobe Bridge. Accuracy matters on occasions like this.
Beyond that, this information is critical when you begin sorting groups of photos and would like to edit them in a particular fashion. It even helps when searching for images via the software I mentioned above (or Adobe Lightroom). Can you imagine searching for a photo you took in May of 2014 when all the dates attached to your photos are wrong? At that point, your search function isn’t going to help much.
What’s more, if you’d like to geotag your photos, you’ll need the date and time set properly. I can go on and on, but I think I’ve said enough on this topic. Just take it from me, don’t have your photos end up like one of my older collections where each and every photo’s meta information told me I took the photo in 1900 some time. That gets depressing.
In today’s post, I’m going to guide you through the process of setting the time and date on the Canon Rebel line of cameras. As an example, I’ll be using my Canon T3i, but really, the entire line (T2i, T4i, T5i, T6i, T7i, T8i) pretty much uses the same method.


Next, I’ll push the down arrow to the Date/Time option and press the Set button to open that particular area.

Really, it’s just a matter of using the Set button to activate an area, the arrow buttons to make a change and then the Set button again to accept the change. It’s sort of like using the Enter key on a keyboard to say “good” or “done.”
In the same menu area, right below the date and time, you can edit the date format itself. There are only a few choices; mm/dd/yy, yy/mm/dd and dd/mm/yy.

Note: If you store the camera without the battery or if the camera’s battery becomes exhausted, the date/time might be reset. If this happens, set the date and time again.
I hope I clearly explained how to set the date and time in a Canon Rebel camera. If you have any questions or concerns, please let me know below. Thanks for reading!
PS – So many of the cameras in the Rebel line behave so similarly that you’ll be able to apply the concepts in this post to the T2i, T3i, T4i, T5i, T6i and the T7i.
Beyond that, this information is critical when you begin sorting groups of photos and would like to edit them in a particular fashion. It even helps when searching for images via the software I mentioned above (or Adobe Lightroom). Can you imagine searching for a photo you took in May of 2014 when all the dates attached to your photos are wrong? At that point, your search function isn’t going to help much.
What’s more, if you’d like to geotag your photos, you’ll need the date and time set properly. I can go on and on, but I think I’ve said enough on this topic. Just take it from me, don’t have your photos end up like one of my older collections where each and every photo’s meta information told me I took the photo in 1900 some time. That gets depressing.
In today’s post, I’m going to guide you through the process of setting the time and date on the Canon Rebel line of cameras. As an example, I’ll be using my Canon T3i, but really, the entire line (T2i, T4i, T5i, T6i, T7i, T8i) pretty much uses the same method.
Accessing the Menu
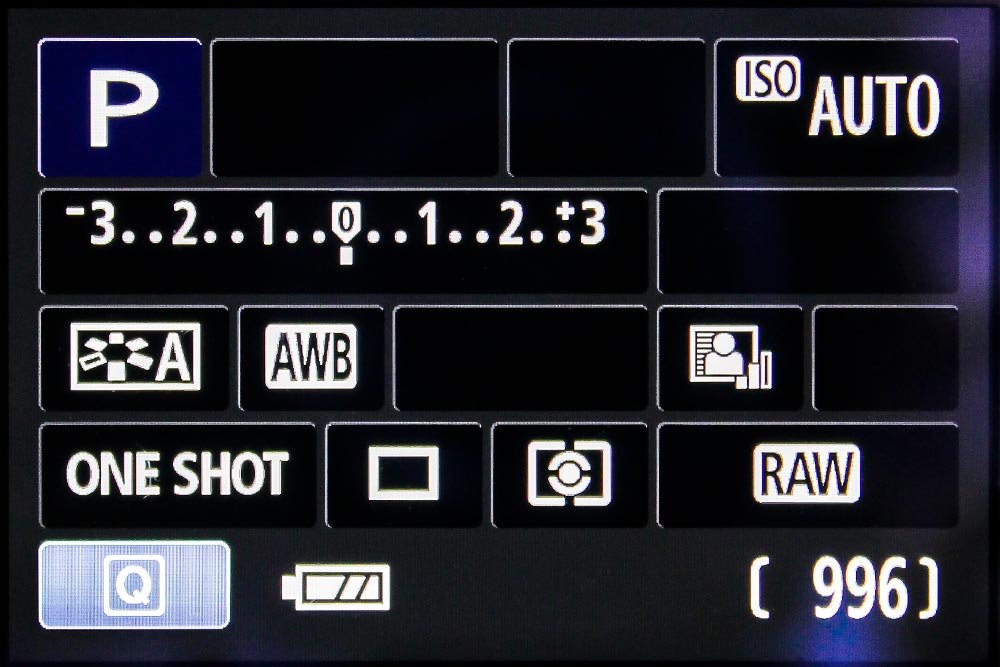
I’ve taken this step in the previous posts I’ve written on the T3i, but I’ll show you what I’m referring to again. To access the camera’s menu, I first change the mode to Program (P) on the top dial. The various modes offer various functions, but I’ve found that P gives us a lot of choices. Once I do that, I simply press the Menu button on the back of the camera.
Accessing the Settings
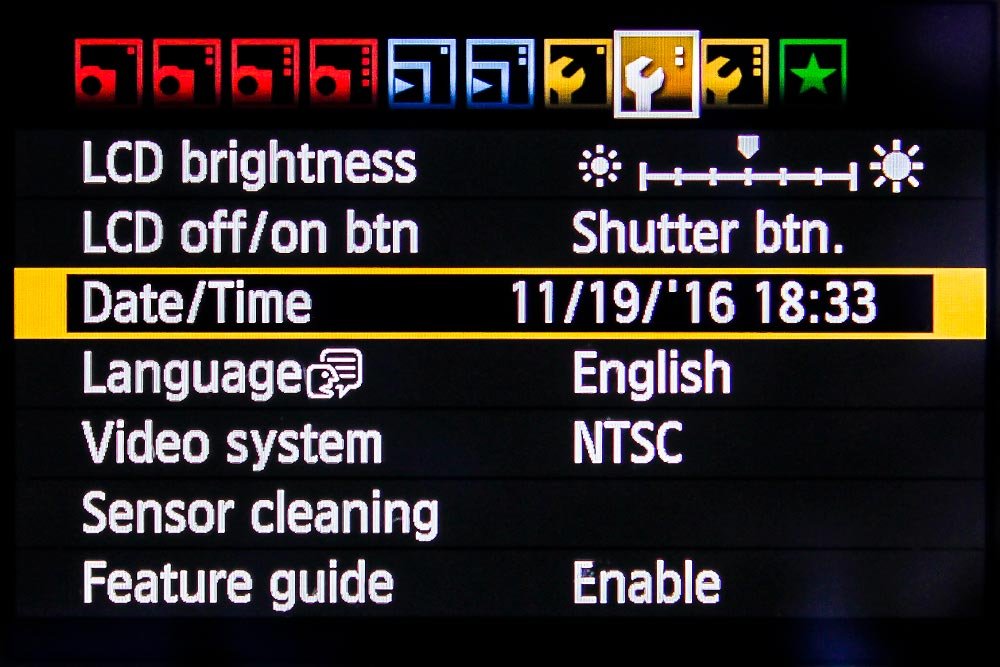
Once in the menu area, I can push the left and right arrows that surround the Set button on the back of the camera. I’ll switch screens until I hit the center yellow Tools menu. When you get to this screen, you’ll know it. The date and time are as clear as day.
Next, I’ll push the down arrow to the Date/Time option and press the Set button to open that particular area.

Setting the Date & Time
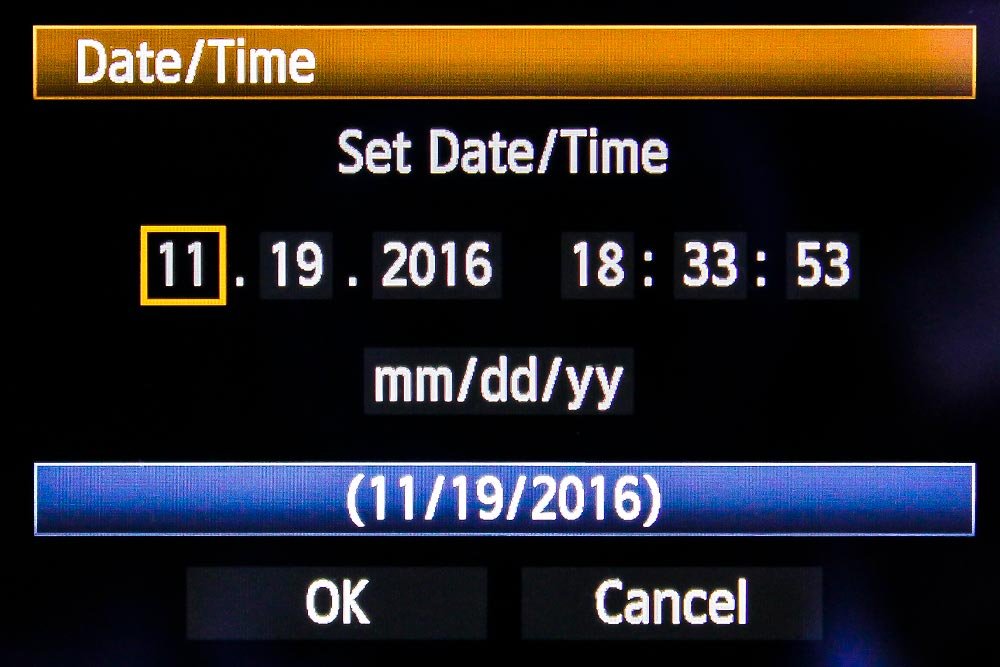
When I make it into the Date/Time screen, I can use the arrow buttons to navigate through the exact areas that need to be changed. Each option will be highlighted when I select it. When I find the one I’m interested in editing, I can again press the Set button to activate it so it’s in edit mode. Then, I’ll use the arrow keys to change the current value. When I’m finished with the one I’m working on, I can once again press Set to accept my change.Really, it’s just a matter of using the Set button to activate an area, the arrow buttons to make a change and then the Set button again to accept the change. It’s sort of like using the Enter key on a keyboard to say “good” or “done.”
In the same menu area, right below the date and time, you can edit the date format itself. There are only a few choices; mm/dd/yy, yy/mm/dd and dd/mm/yy.
Accepting the Changes
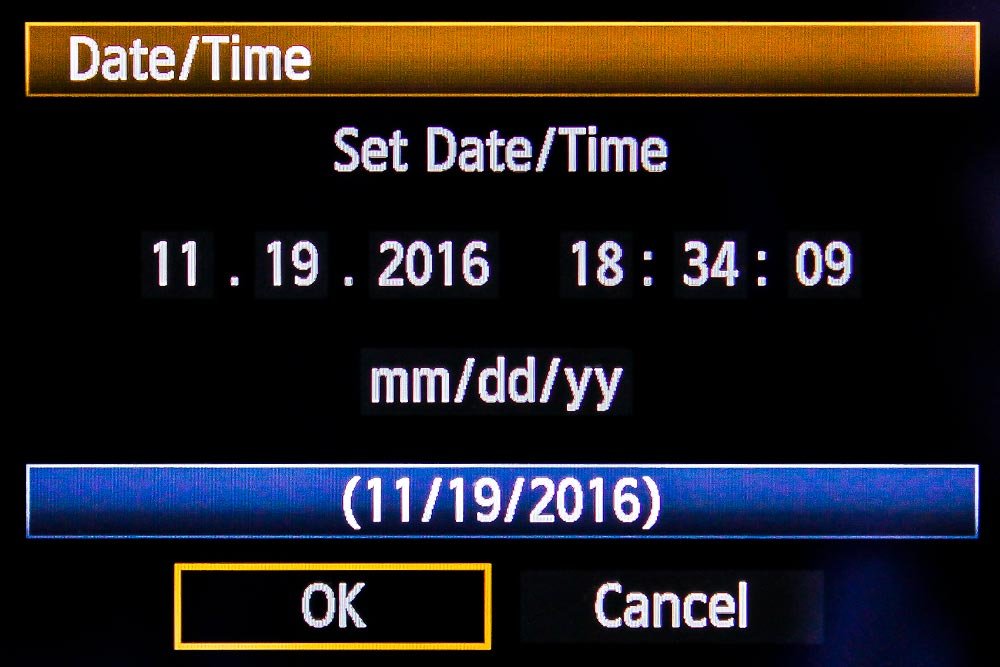
When I’m finished making the changes to the date, time and format, I’ll use my arrow buttons to make my way down to the OK option. I’ll select it by pressing the Set button and then I’ll press the Menu button again to exit the menu area. It’s really that easy.
Note: If you store the camera without the battery or if the camera’s battery becomes exhausted, the date/time might be reset. If this happens, set the date and time again.
I hope I clearly explained how to set the date and time in a Canon Rebel camera. If you have any questions or concerns, please let me know below. Thanks for reading!
PS – So many of the cameras in the Rebel line behave so similarly that you’ll be able to apply the concepts in this post to the T2i, T3i, T4i, T5i, T6i and the T7i.
