CampFireJack
Member
- Joined
- May 9, 2021
- Messages
- 118
- Reaction Score
- 1
- Points
- 16
- #1
If you’ve ever wanted to create a file that contained multiple images in a certain pattern, you surely know that there are quite a few steps to follow. It’s not as simple as opening up some photo tabs and arranging those photos together. If you want precision and accuracy, you’ll need to follow the proper workflow, which I’ll cover below.
In this post, I’ll discuss the steps necessary to import photos, create guides, transform those photos and align them in a specific arrangement. While none of these steps are particularly advanced, they do require careful execution.
Opening Multiple Photos Into Photoshop
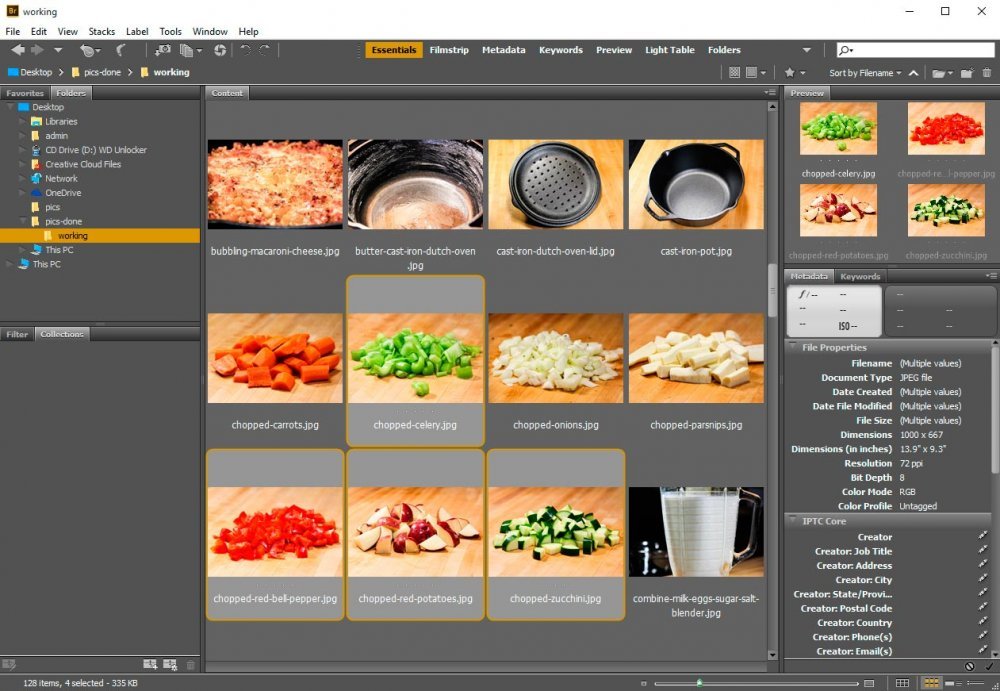
I discussed how to open files as layers in a previous post, but for the sake of completeness, I’ll go over it again.The first thing I’m going to do is to open Adobe Bridge and select the files I’m interested in opening into Adobe Photoshop. I’ve done this in the screenshot below.
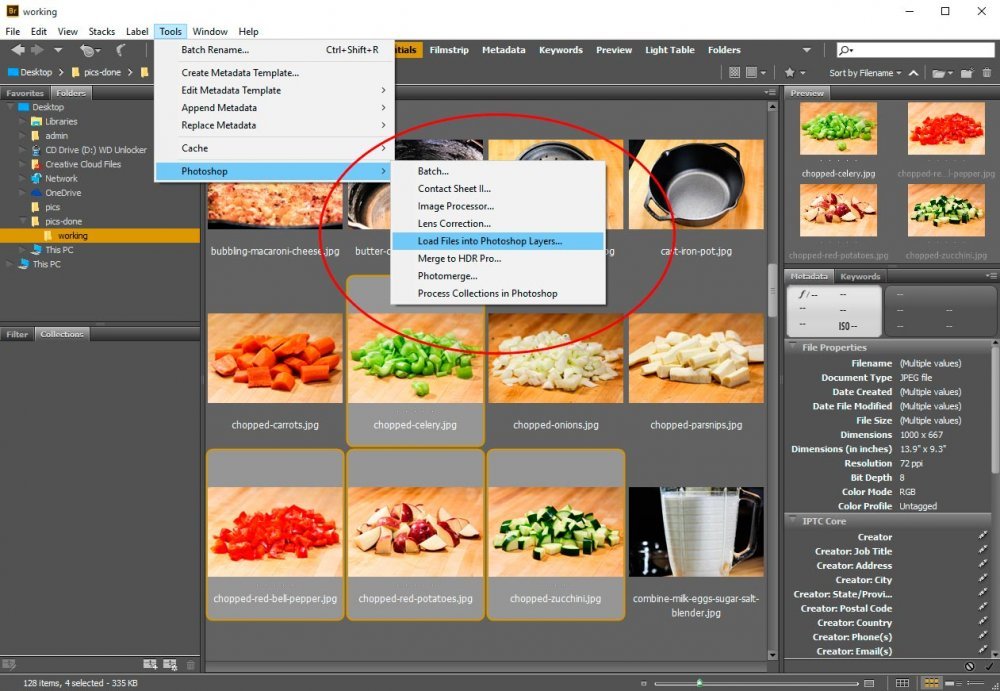
Once those thumbnails are highlighted, I can head up to the “Tools > Photoshop > Load Files into Photoshop Layers” and click.
After I click that menu item, I’ll be transported into Photoshop where my photos can be seen as layers in a new file.
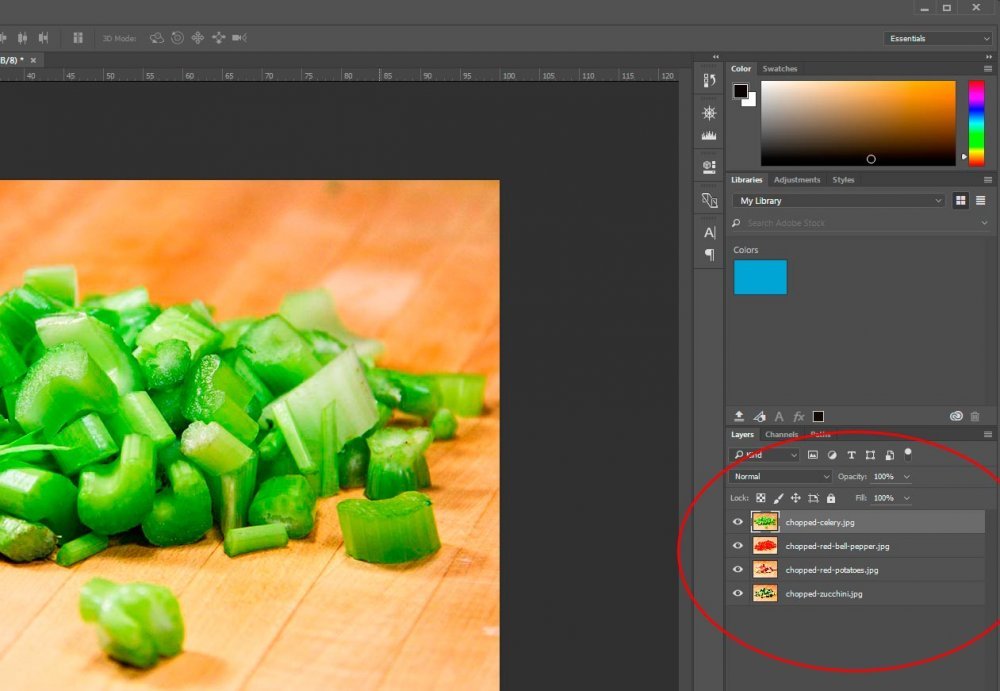
I think we can all admit this is a very handy feature.
Creating a Guide Layout
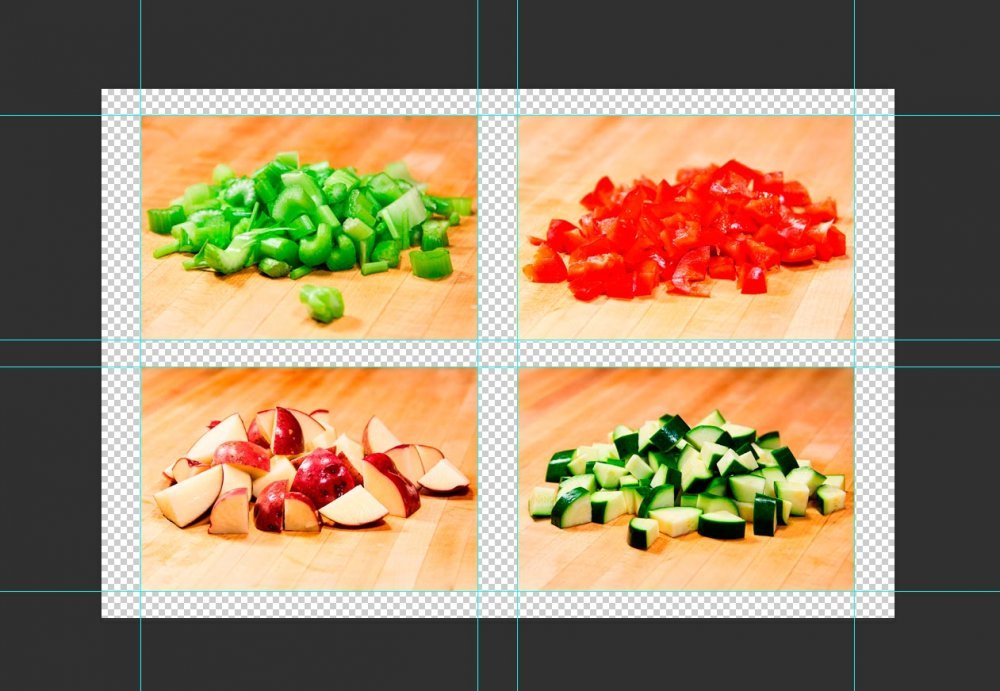
I’m not going to get into document size or anything like that in this post. I’m going to leave the canvas size exactly as it was set to as I was importing the images. This will keep things focused on what I’d like to cover.My goal for this project is to arrange the photos in a square, where two images are on top and two are on bottom. To do this, I’m going to need to use some guides.
To take advantage of the most precise guide layout as possible, I’m going to go to the “View > New Guide Layout” menu item and select it.
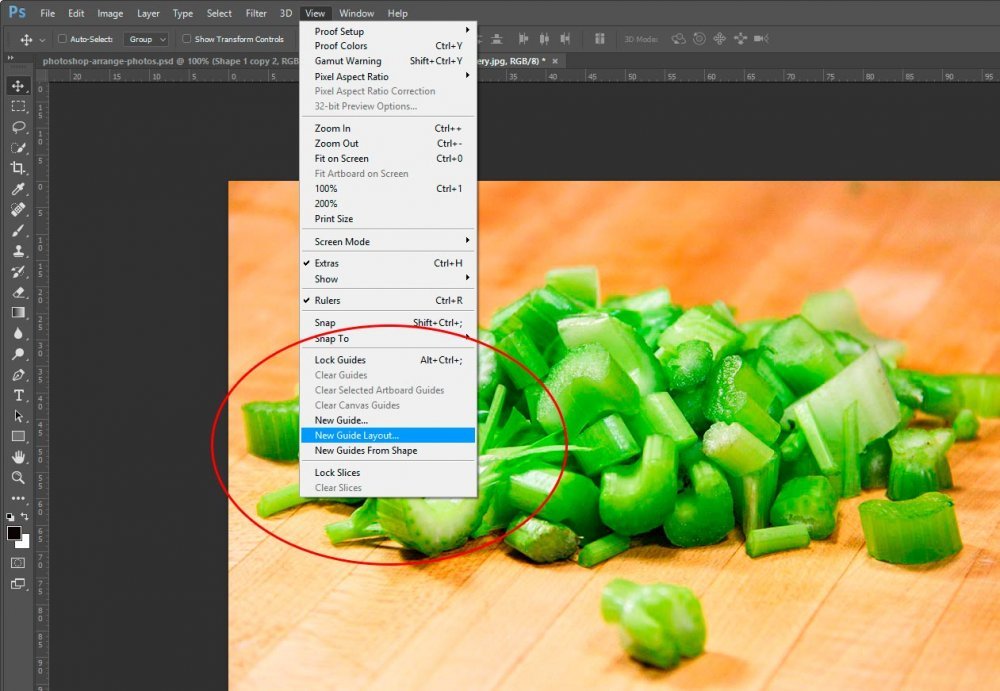
After I click that, I’ll be presented with a dialog box that asks for a bunch of information. I’ll also see a guide layout already set up for me. Take a look.
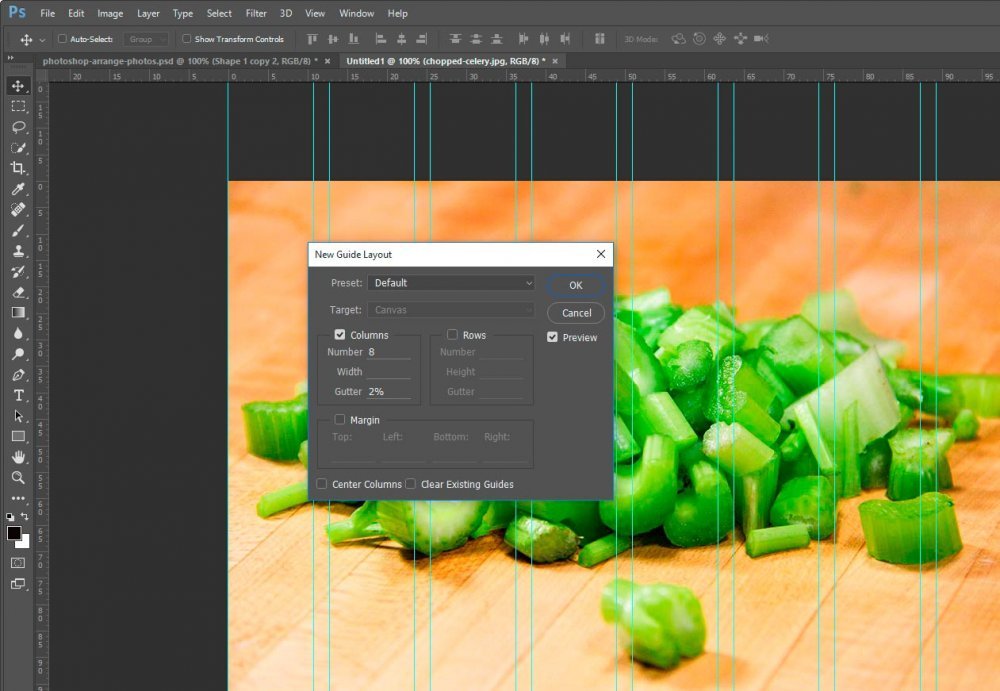
Since all I need are two rows and two columns, I’ll enter some new data. I’d also like a gutter and margin.
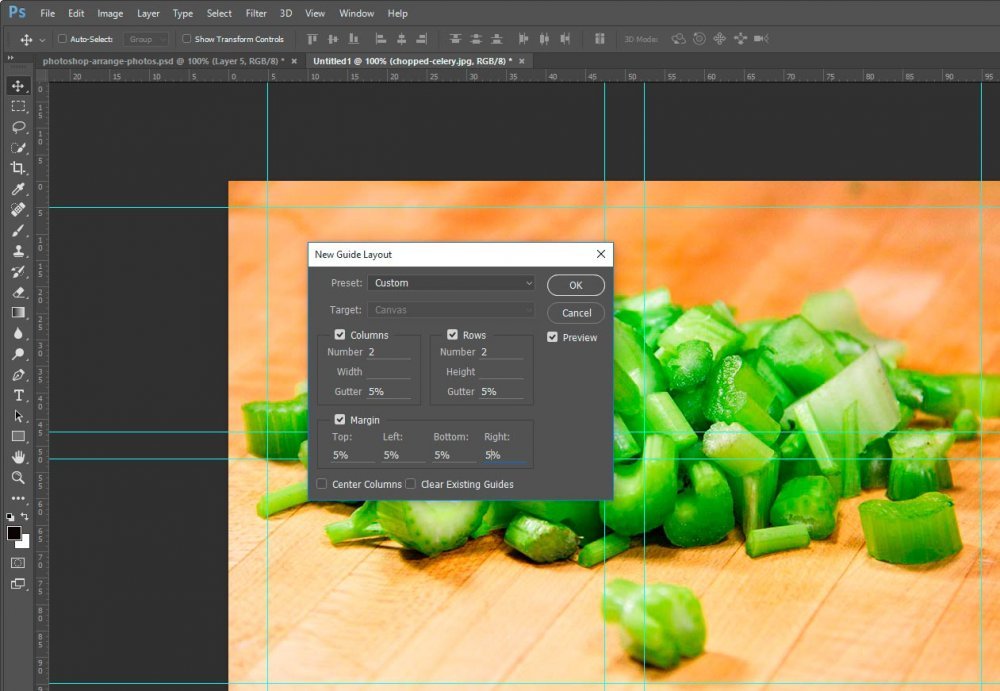
If you look at the above screenshot closely, you’ll see that I created guides that would cover two columns and two rows with a five percent gutter. I also created five percent margins all the way around.
Selecting Layers
I’m almost ready to begin resizing the photographs so they fit into the placeholders that I made with my guides. By the way – I just wanted to let you know, I totally got lucky while creating those placeholders. Somehow, the resized photos are going to fit almost exactly.Anyway, I wanted to share a really neat tip for selecting layers in Photoshop, especially while they are stacked. As you can see in the Layers panel from a screenshot above, I’ve got four layers. As you can also see from the following screenshots, I can only see one of those layers in the work area. The top layer is completely covering the visibility of the layers beneath it.
There are a few methods of quickly selecting a particular layer. I’m sure you already know that you can go over to the Layers panel and click on one of them. Once you do that, you’ll be able to move that layer around with the Move Tool. A not so known method for accomplishing the same task is to right click on the top layer (right inside the canvas area) and choose one of the layer selections. Take a look at the screenshot below to see what I’m talking about.
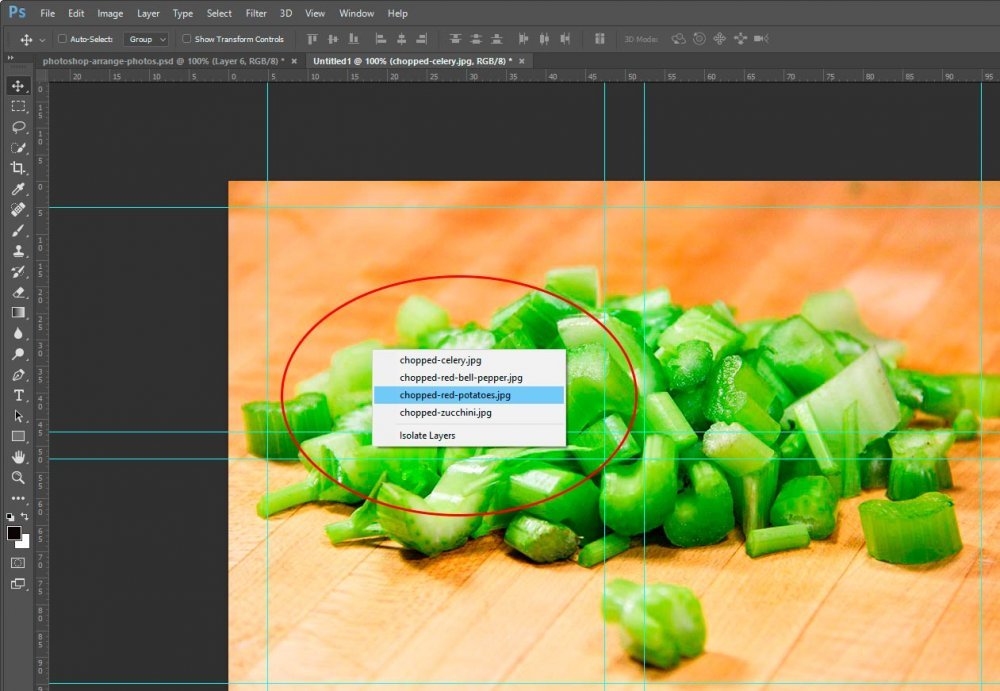
If I select a layer using this method, I can begin to manage that layer quickly. Note – in order for Photoshop to give you a layer selection to choose from, you need to right click over physical layers. You can’t click in an empty area because nothing will be returned.
Resizing the Layers
I’m ready to begin resizing each of my layers. There is something important I need to set first. This is the Snap feature. By using Snap, I won’t need to micro-manage my minute movements when I get the corner of one of my layers next to a guide. Photoshop will “snap” it to its rightful place. To activate the Snap feature, I need to head up to the View > Snap menu and make sure it’s checked off. If it isn’t, I’ll click it to do so.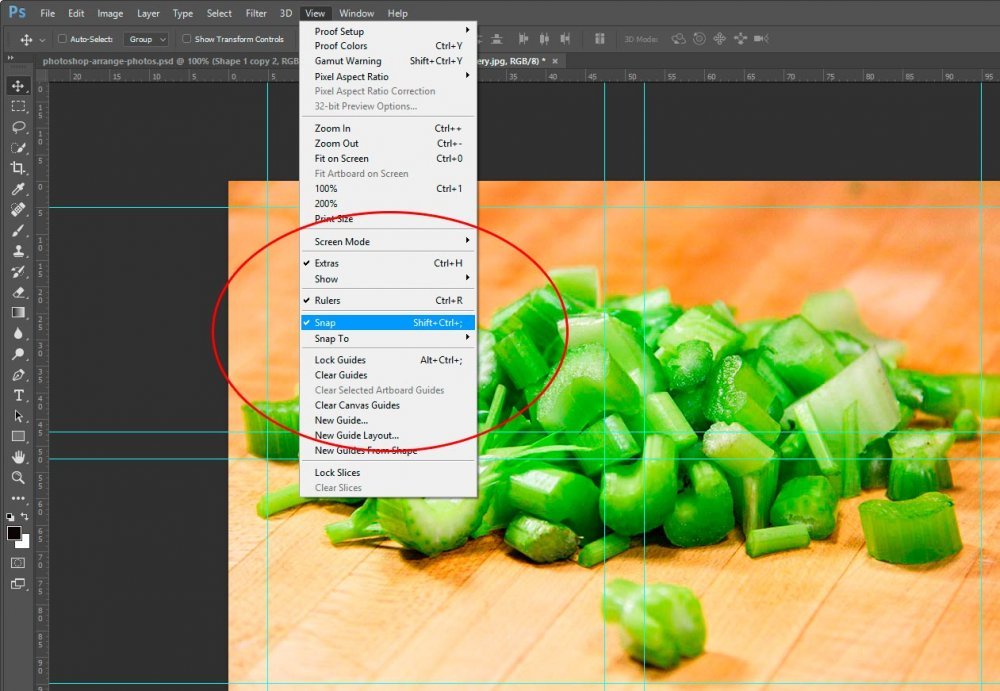
Now I’m ready to begin resizing each layer. To do this, I’ll need to select the layer I’d like to work on and then go to the Edit > Free Transform menu item and click on it.
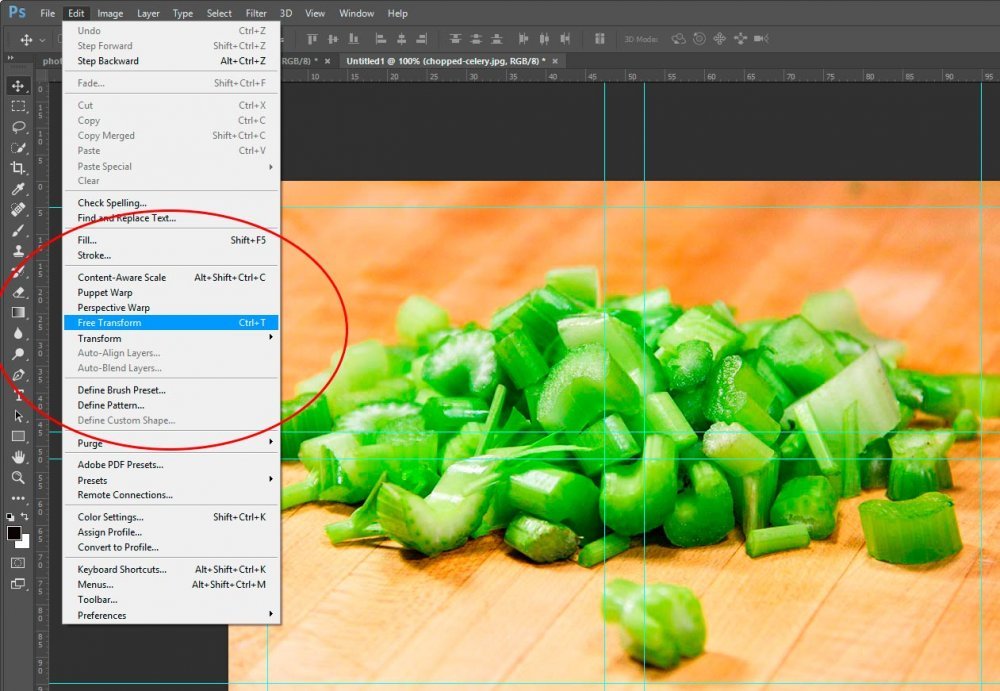
After that, I can click somewhere inside the layer work area and move the corner of the layer to the corner of the area I’d like to resize it to fit. As I do this, I’ll notice that the layer snaps to the guide.
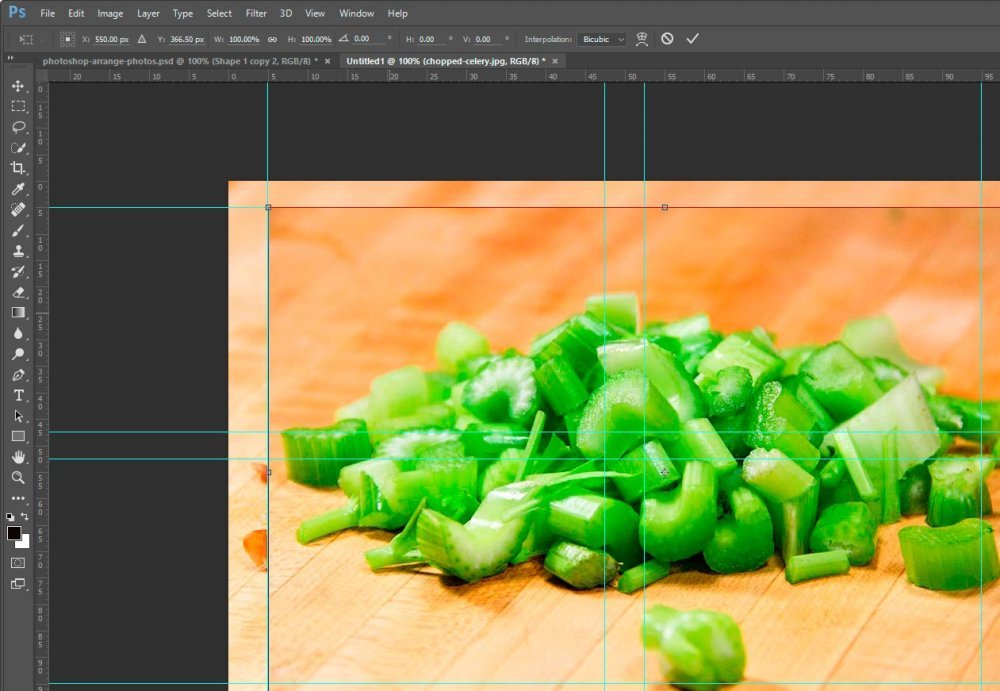
Once the layer is moved into location, I can go down to the lower right corner (in this current case) and, while holding down the Shift key to maintain proportion, click and drag the corner up until it fits in the guide outline.
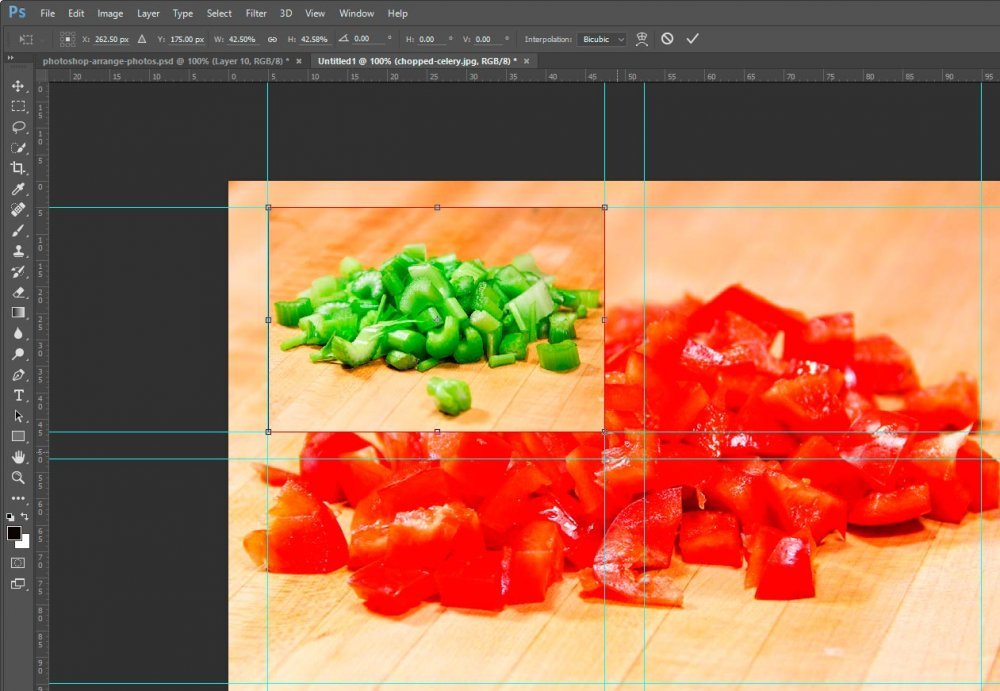
After the layer is sized the way I’d like to see it, I can go ahead and click Enter on my keyboard to apply the resizing. To resize the remaining layers, I’ll simply follow the above instructions for each one.
Aligning the Layers
Now, I know the layers look really good the way they’re currently arranged. The thing is, I’m very particular about these things. Because of me being so particular, I’d like to align both images in each row with one another.To align layers, I’ll need to select both of the layers in question. To do this, I’ll click on the first layer in my first row in the Layers panel, then click my Ctrl key on my keyboard and finally, I’ll select the second layer in the row. It’ll look something like this:
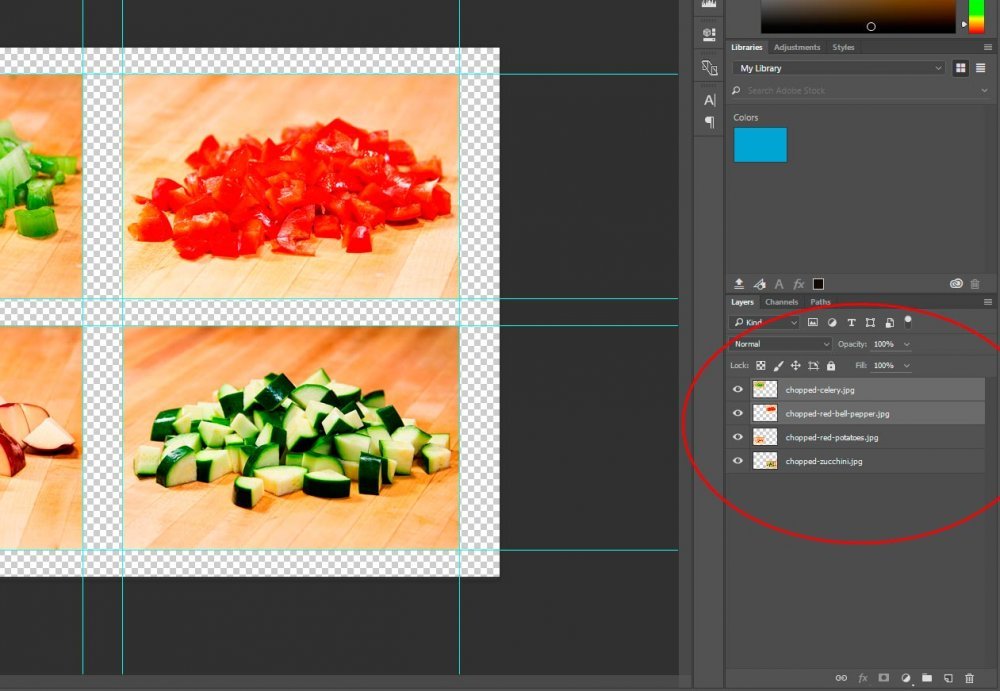
From here, I’ll be sure the Move Tool is selected and I’ll head up to the options bar and select Align Top Edges. This will place both layers along the same X axis.
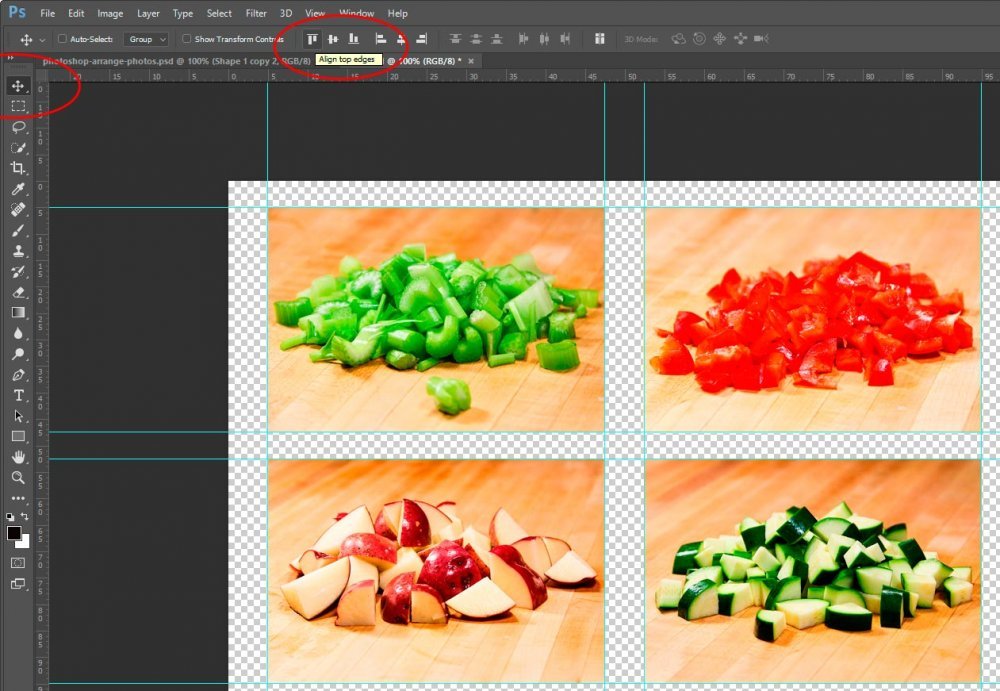
To align the two bottom photos, I’d select those two layers and do the same thing.
I know there is much more I can do to these layers, such as align them to their left or right and trim any excess material they may have, but I’ll save all that for a later post. For right now, this is a good start.
