KodyWallice
Member
- Joined
- May 7, 2021
- Messages
- 123
- Reaction Score
- 1
- Points
- 23
- #1
When it comes to Photoshop, I’m an organization freak. As I’ve mentioned in another post on this website, when working on large files with many layers, things can get out of control – fast. It’s of the utmost importance that these things be tamed. The good news is that the fine creators of this program have given us ample tools to do just that. One of these tools is having the ability to create something called groups inside the Layer panel.
In this post, I’ll explain what groups are and how they can benefit you. I’ll also show some examples of how to create a group, how to add files to it and how to delete it. So, if you like organization as much as I do, read on!
Opening Files as Layers
If you aren’t well versed with how to open files as layers, I encourage you to visit this post. I just wrote it yesterday, so it’s incredibly relevant. Just give the first section a quick once over and then stop back here. In the meantime, I’ll go ahead and open about 10 files as layers in Photoshop to use as examples for this post.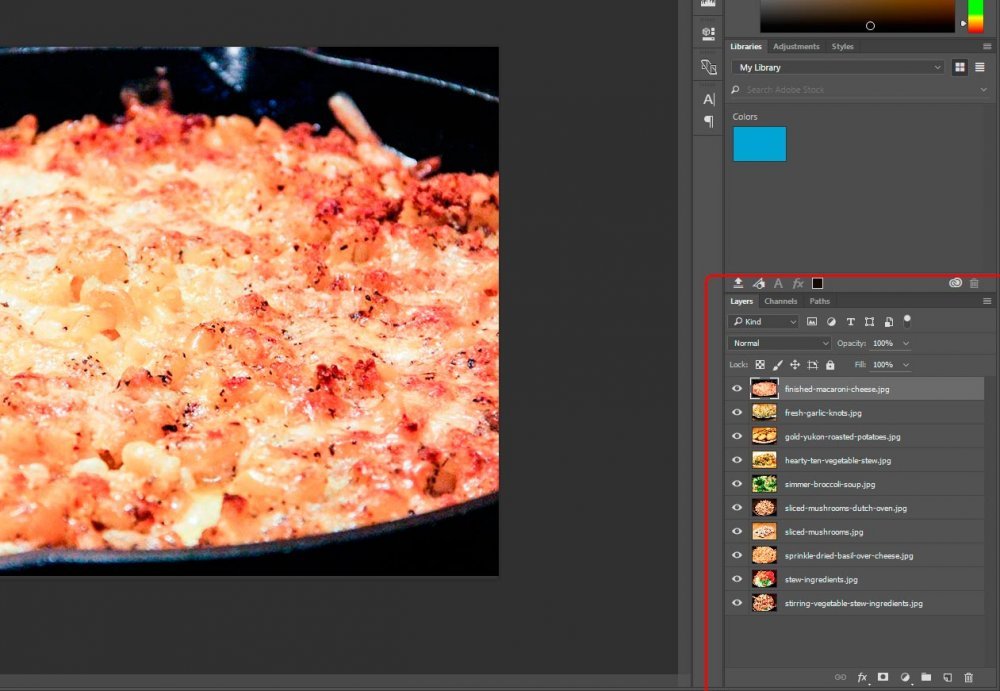
By the way, the photos I loaded above are some that were taken for my cooking blog. I’ve been making lots of great recipes and taking photos the entire time. The photo in the screenshot above is of a delicious mac and cheese recipe. If you like rich macaroni and cheese, you really need to check that one out!
Anyway, as you can see, I’ve got ten layers (photos) now loaded into the Layers panel.
Creating Groups
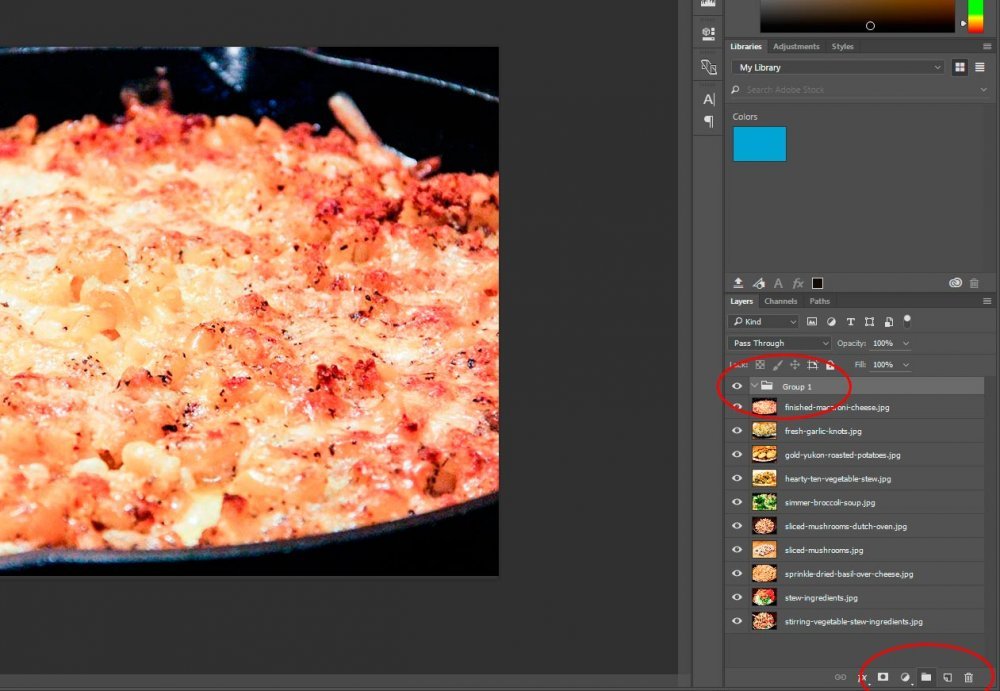
Now, I don’t know about you, but looking at all these layers confuses me. I know that some of the photos are of raw ingredients, some are of in-process cooking and some are of the final product. I’d like to group together as many of these photos so things are easier on the eyes. Before I go any further though, I’d like to mention on thing – by grouping together layers like I’m about to do, nothing actually happens to them. They aren’t altered in any way. This is merely an organization strategy that allows for a more minimal view, as well as an opportunity to move groups of layers in the work space simultaneously, as opposed to moving them one at a time.To create a new group, I’ll simply click the small folder icon at the bottom of the Layers panel. This will create a generically named group up near the layers themselves.
Naming a Group
To name a group, I’ll double-click in the name area and insert whatever I’d like to call it. After I create two more groups, I’ll name them appropriately.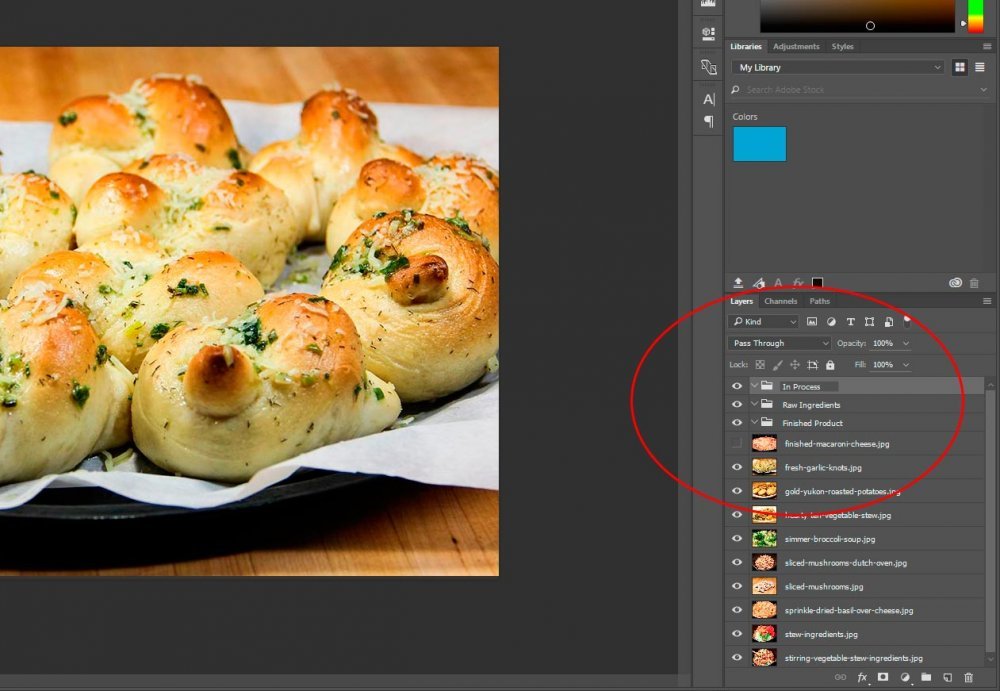
As you can see, I’ve now got “Raw Ingredients,” In Process” and “Final Product.” I also hid the top layer to mix up the photos we’re looking at in the screenshot. Since I’ve got ten of them, may as well keep things interesting.
To edit a named group, simply double-click the name area again and repeat the steps above.
Moving Layers into Groups
To move layers into groups to begin organizing, all I need to do is to click on a layer and drag it into a group folder. This is just like dragging files around into folders on my computer. I’ll go ahead and drag the photos I would like to see in each group.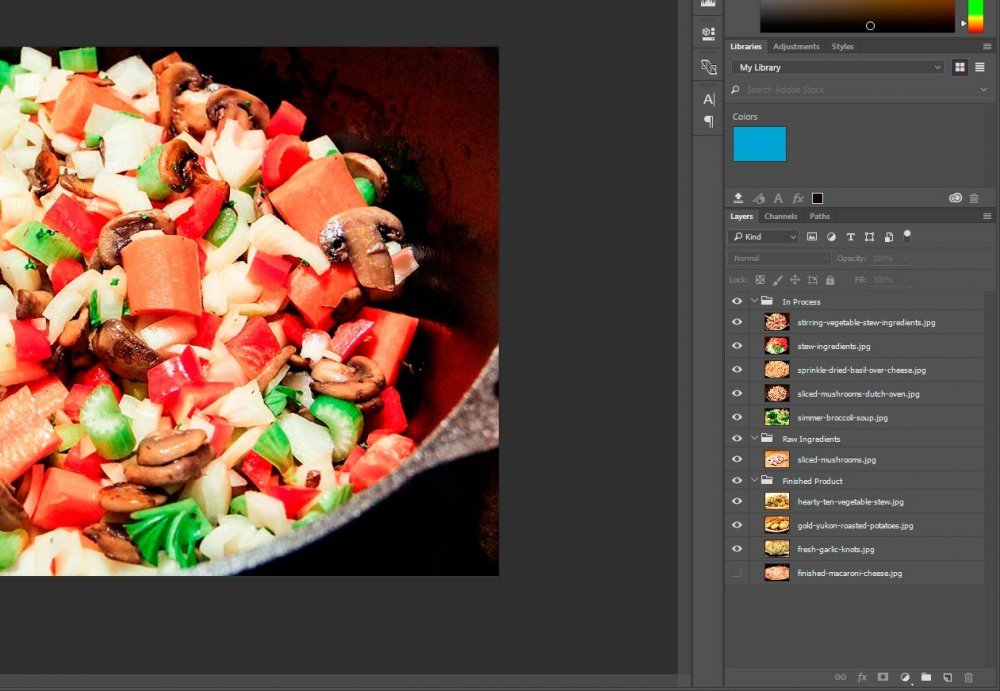
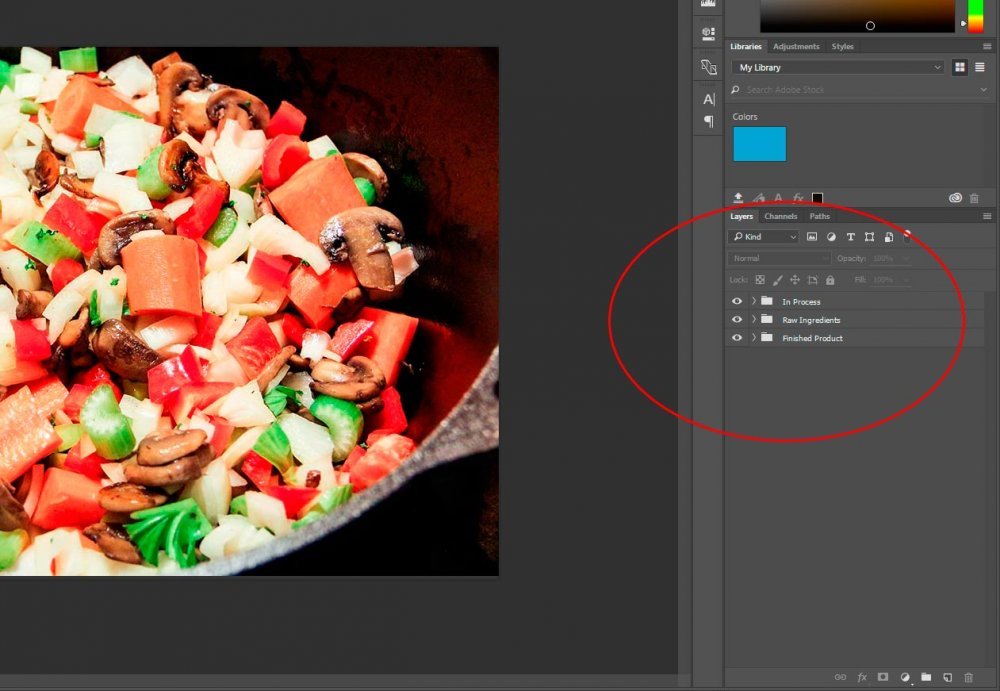
As you can see in the above screenshot, I dragged my photos around a bit. I now have things the way I want them. The only problem is, in this format, I’ve only made more of a mess. To really organize, I need to collapse each group. I’ll do this by clicking on the small arrow to the left of each group name.
Removing Layers From a Group
To remove a layer from a group or to move the layer into another group, all I would need to do is to click and drag that layer into the Layers panel itself or into the group I’d like to move it to. I won’t include a screenshot for this one because it’s fairly straightforward. It’s almost exactly how you would do it when working in your operating system on your computer.Reordering Groups
I’m not going to offer a screenshot for this one either because it’s crazy easy. To reorder groups, meaning to stack the enclosed layers in a different manner, I would click and drag the group layer itself to a different position in the Layers panel. It’s that easy.Alternative Method For Adding Layers to a Group
I’m going to remove all of my layer from the groups I created and then I’m going to delete the groups. Don’t worry, I’ll show you how to delete a group in a moment. What I’d like to do right now is to start from the beginning again. I want to show you a different method of adding layers to a group. A very easy method.Let’s say I want to add the “Finished Product” layers to a group called “Finished Product,” but I haven’t created that group yet. To do so by using a method that’s faster than the one I demonstrated above, I would simply click on the layers I intend on adding to the new group.
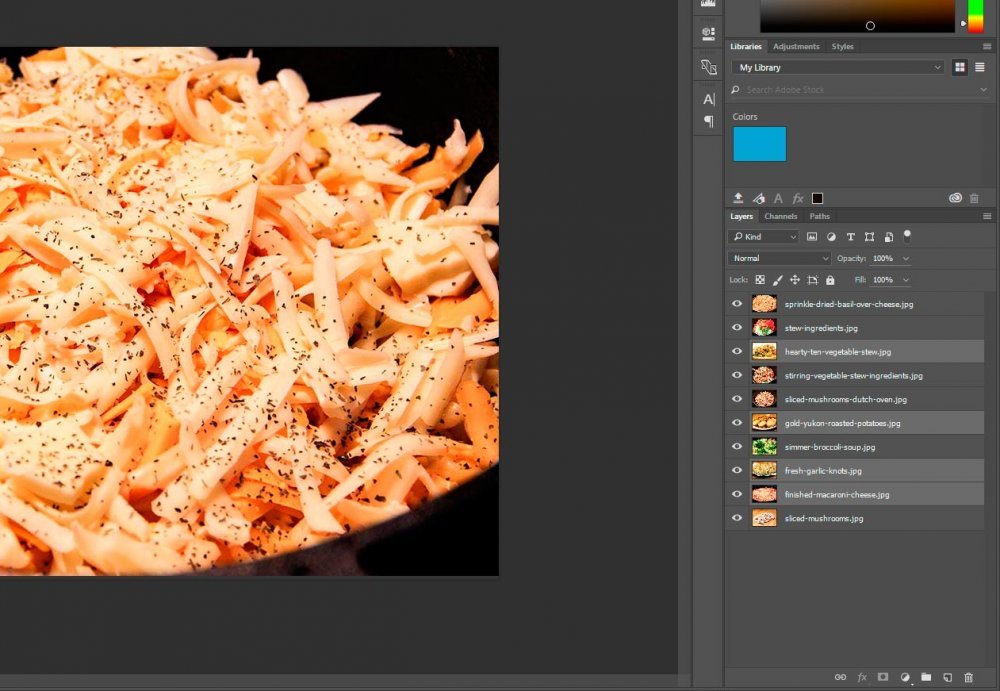
You can see which layers I clicked on because they are highlighted. At this point, to create a group, I can either click on the small folder icon again or I can use a keyboard shortcut. The shortcut is Ctrl-G. Once I complete either of those actions, the layers I selected and highlighted earlier will immediately be inserted into a new group. The group won’t have a name yet, so I’ll need to name it.
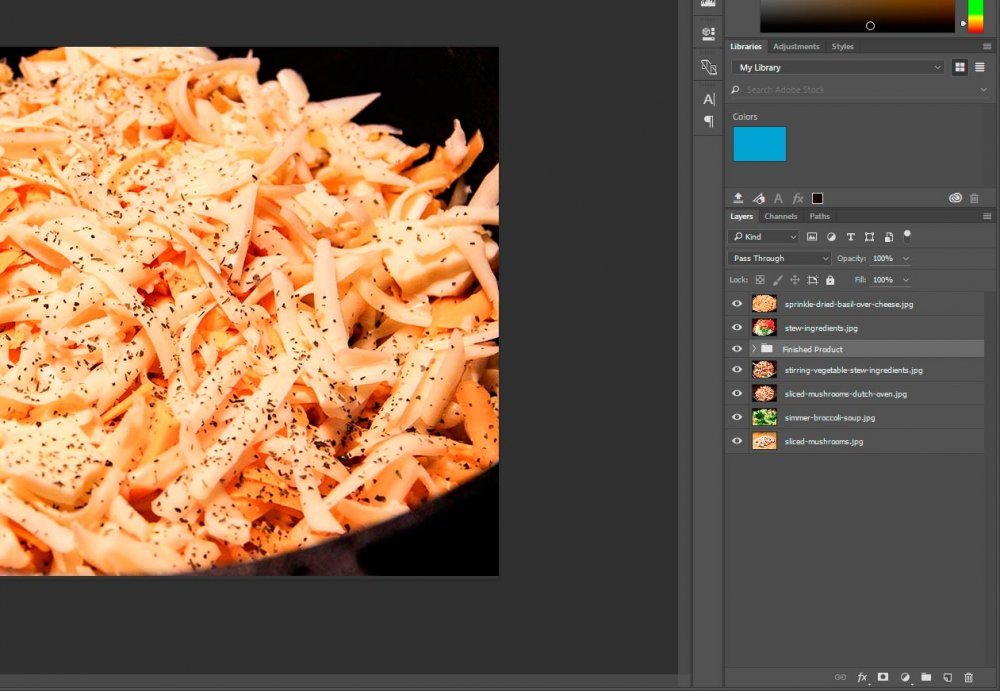
As you can see, I named the group “Finished Product” by following the instructions I gave earlier in this post.
Deleting a Group
This is where I need to be careful. If I’d like to delete a group, but preserve the layers that are inside of it, I’ll need to remove those layer from the group before I go any further. Once the layers are removed, I can go ahead and drag that group down to the small trash can at the bottom of the Layers panel. If I wanted to use my keyboard to perform the same action, I could simply click the Delete key.If I had layers in a group that I didn’t need any more, I could just go ahead and delete the group with those layers still inside of it. By doing this, I’d be deleting everything in one step.
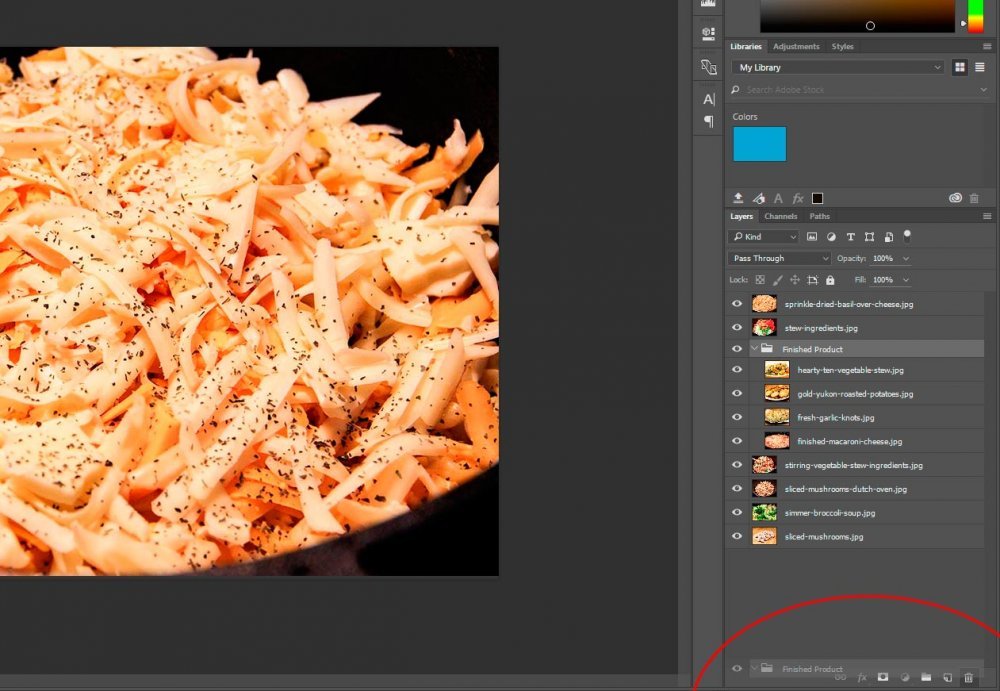
After I perform either of these steps, the group and layers within it will be gone.
