WendyMay
Member
- Joined
- May 11, 2021
- Messages
- 142
- Reaction Score
- 0
- Points
- 21
- #1

How to create and manage collections across both Adobe Bridge and Adobe Lightroom are fairly similar. I’ve already covered a few aspects of them in some previous posts. After all, Bridge and Lightroom are akin to semi-twin sisters. Or at least cousins.
The really neat thing about Smart Collections in Bridge is that you can develop them pretty much any way you want. You have the ability to create, customize and delete at any point in your organizing and editing. This comes in extremely handy during situations where you’ve got many images being managed at once. And this is what we’re going to go over in this post. In the sections below, I’ll go over exactly how to create a new Smart Collection.
How To Create a New Smart Collection
The very first thing we need to do is to open the Collections panel. To do this, head up to the Window > Collections Panel menu item and select it.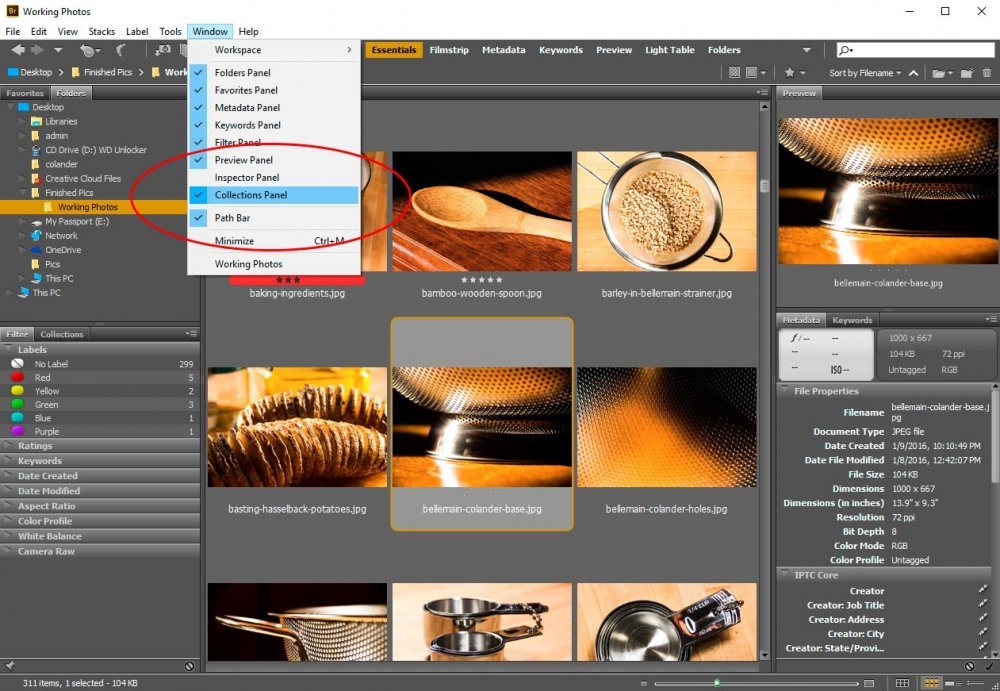
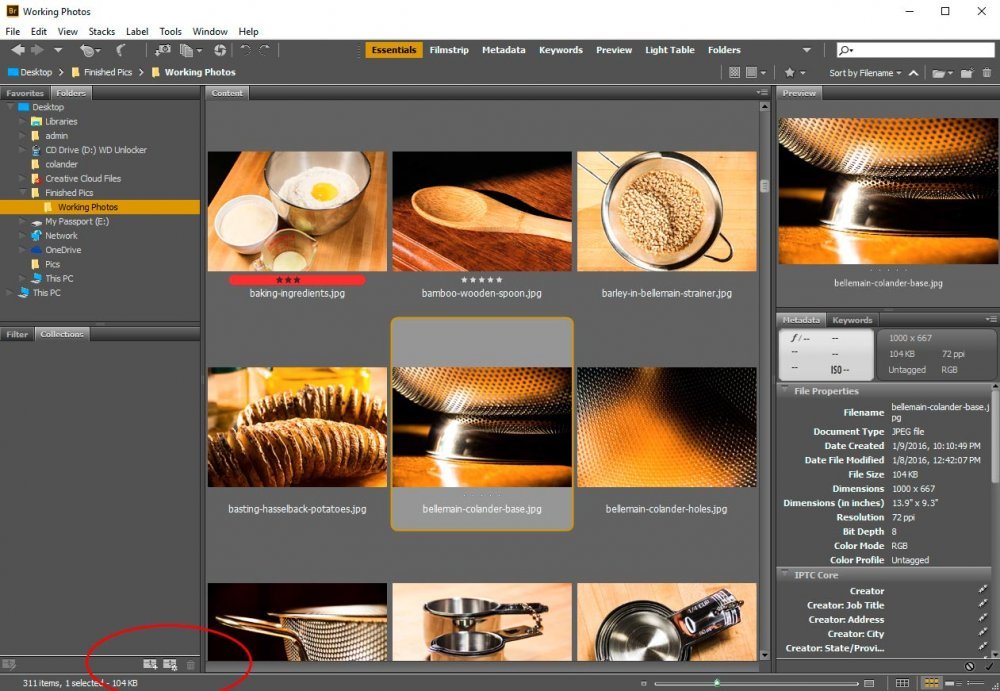
In my case, the Collections panel opened in the left column, down toward the bottom. To create a new collection, click on the small icon at the bottom of the panel. It’s the one with the tiny gear on it. When you roll over it with your mouse, it’ll say New Smart Collection.
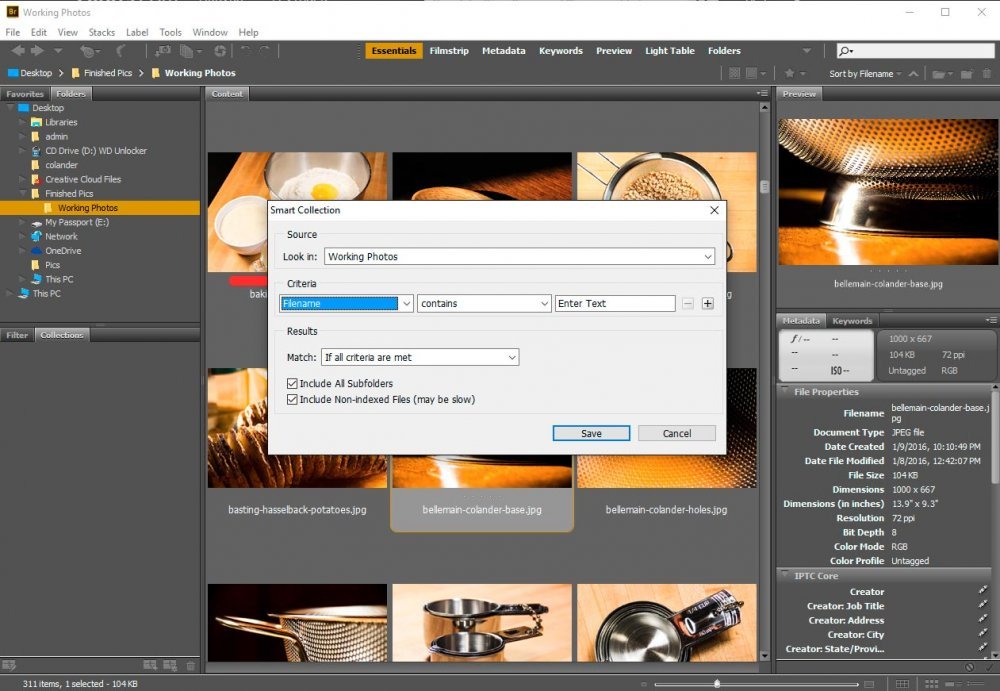
Once that’s finished, a dialog box will appear in the center of the screen.
Customizing the Dialog Box
The choices you make inside the dialog box is what controls how the Smart Collection will appear and what photos it will display. It’s important to take some time to familiarize yourself with this area.If you’ll notice in the screenshot above, the Source drop-down is already set to my current folder. I didn’t have to do anything to make that happen. If I wanted to create a collection for a different folder or folders, I’d have to edit that area. Personally, I find the Browse option to be the more intuitive.
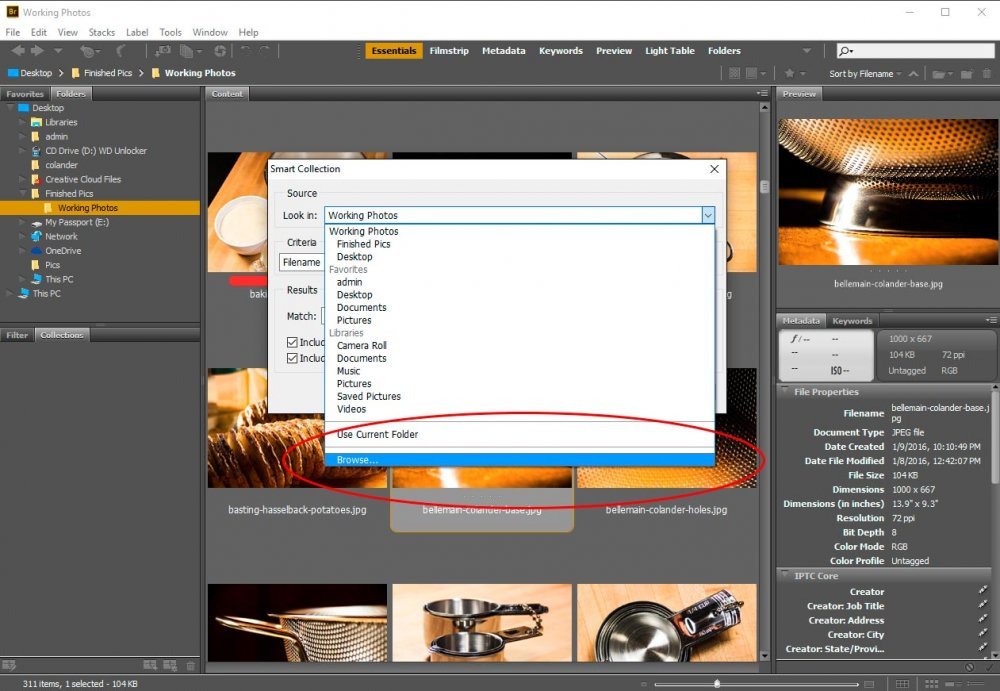
For the sake of this example though, I’ll keep my current folder.
For now, we’ll skip the center Criteria section and go right to Results because it’s got more to do with what I just talked about above. If you want to include all sub-folders from the source you just selected, be sure to check off the box that says Include All Subfolders. Also, if you’d like to include files that haven’t been indexed yet, be sure to check the box that says Include Non-Indexed Files, but beware that this may slow things down quite a bit.
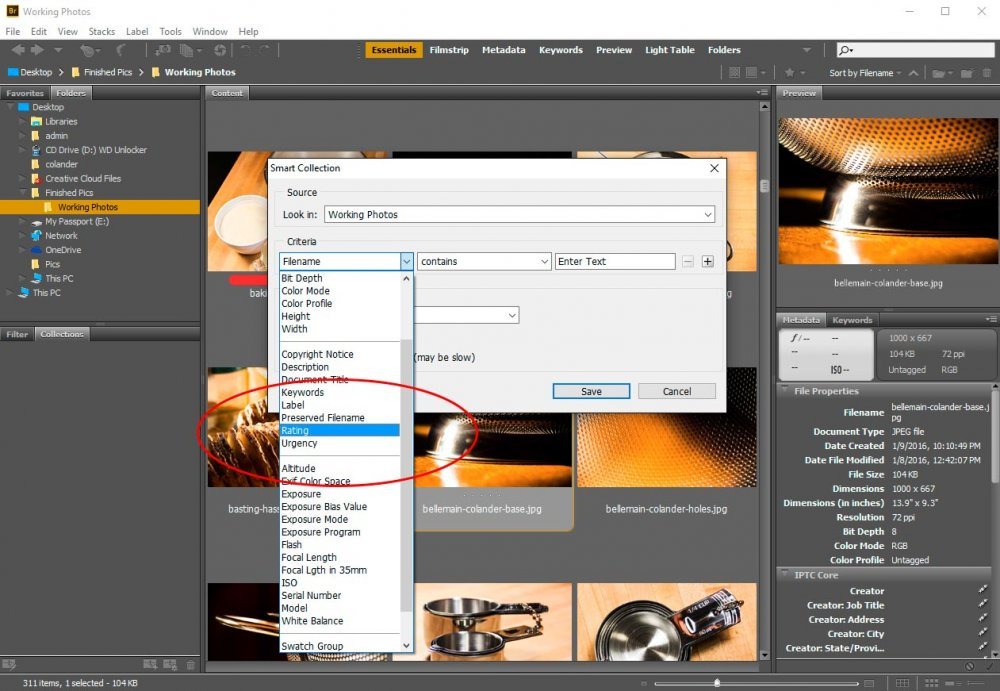
Now, for my example, I’m going to create a Smart Collection based on rating. so, in the Criteria area, I’m going to click on the first drop-down box and select Rating.
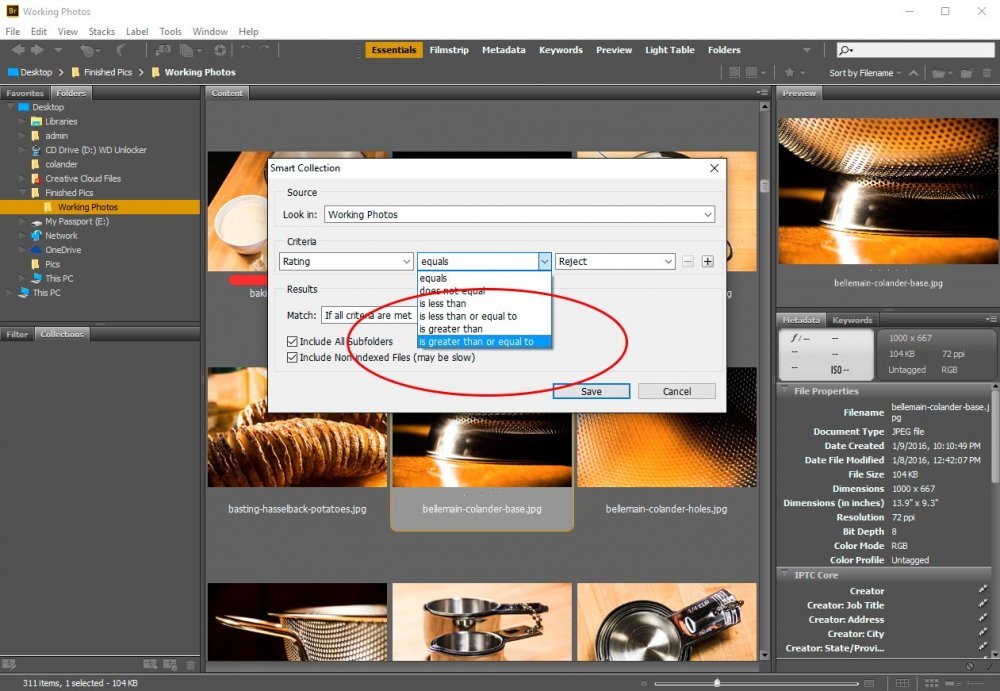
After that, I’ll move onto the center drop-down box. Since I want to return all the good photos that are three star and higher, I’ll select Greater Than or Equal To. This will return photos that have been rated three, four and five stars.
Finally, like I just said above, I’ll go ahead and choose the three star rating in the final drop-down box.
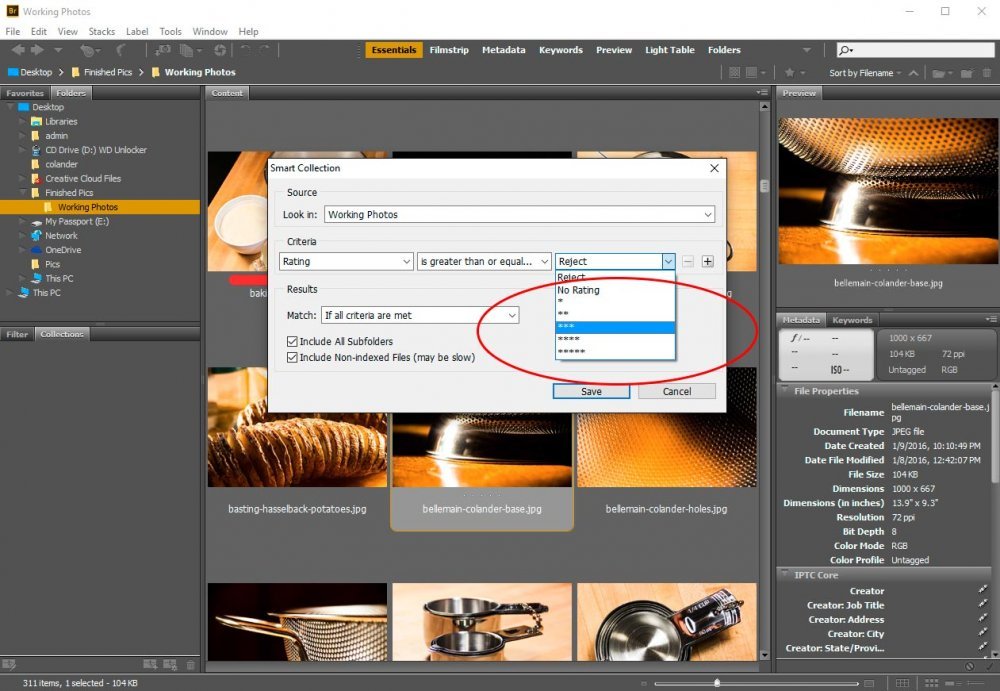
After that, I’ll click Save and watch to see what happens.
Naming a Smart Collection
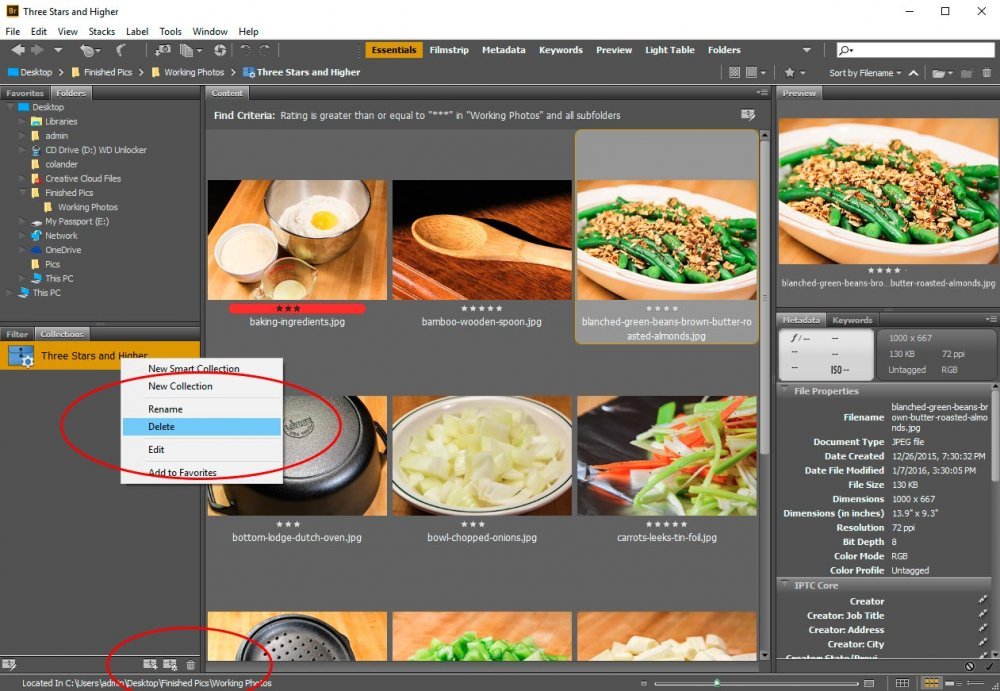
The first thing I see is that the new Smart Collection has appeared in the left Collections panel. The thing is, it wants a name. I’ll go ahead and type the name Three Stars and Higher right inside the field.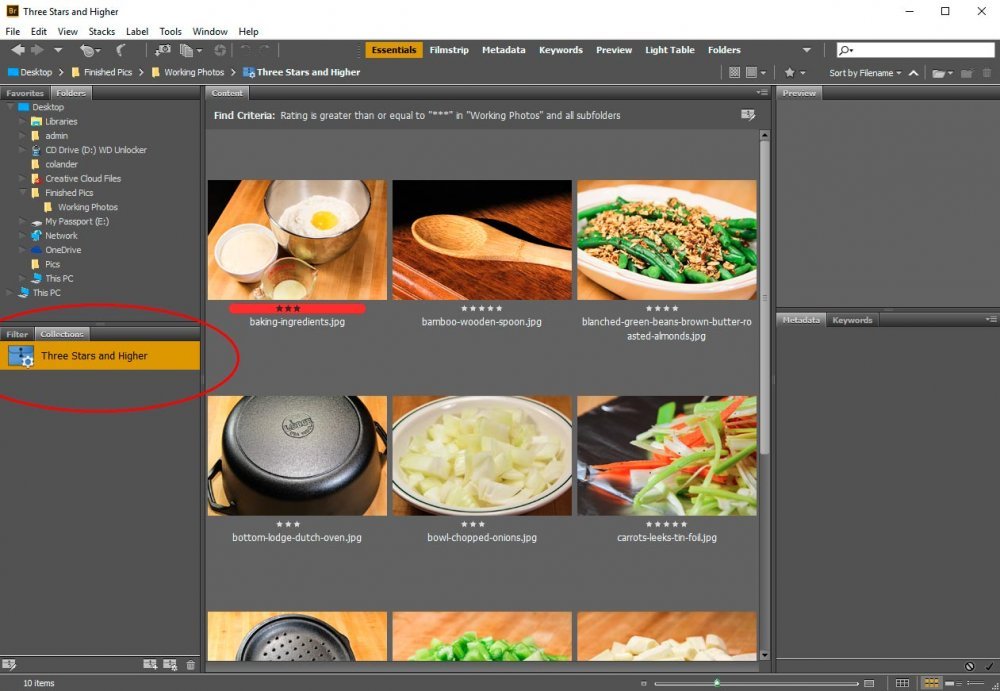
Once I finish typing, I’ll hit Enter on my keyboard. If I want to rename it at any time, all I have to do is click on the name again for it to become editable and simply repeat the process.
Also, if you’ll notice inside the center Content panel, the number of images has been reduced from 311 to 10. Also, only the images with a rating of three stars or higher are being displayed.
Editing a Smart Collection
Let’s say that I wanted to make some sort of a change to the Smart Collection I just created. If that’s the case, I can click two areas to accomplish this. The first is the icon at the top right of the center Content panel and the second is the icon at the lower left of the Collections panel. When you roll over either of these icons, the words Edit Smart Collection appear.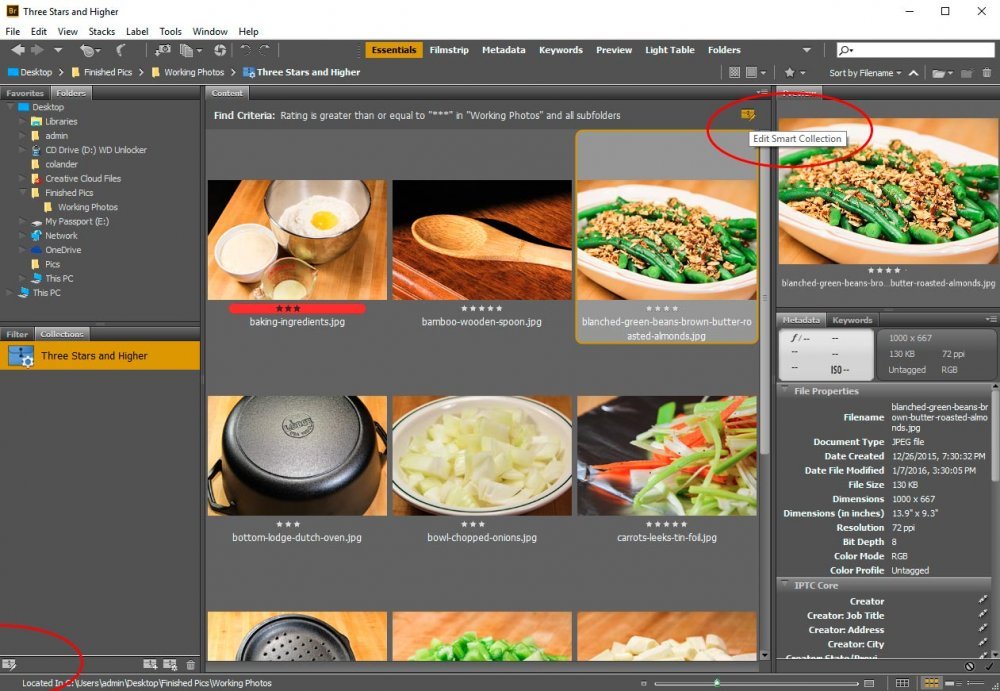
If I select either of these icons, the Edit Smart Collection dialog box appears, which should look very familiar.
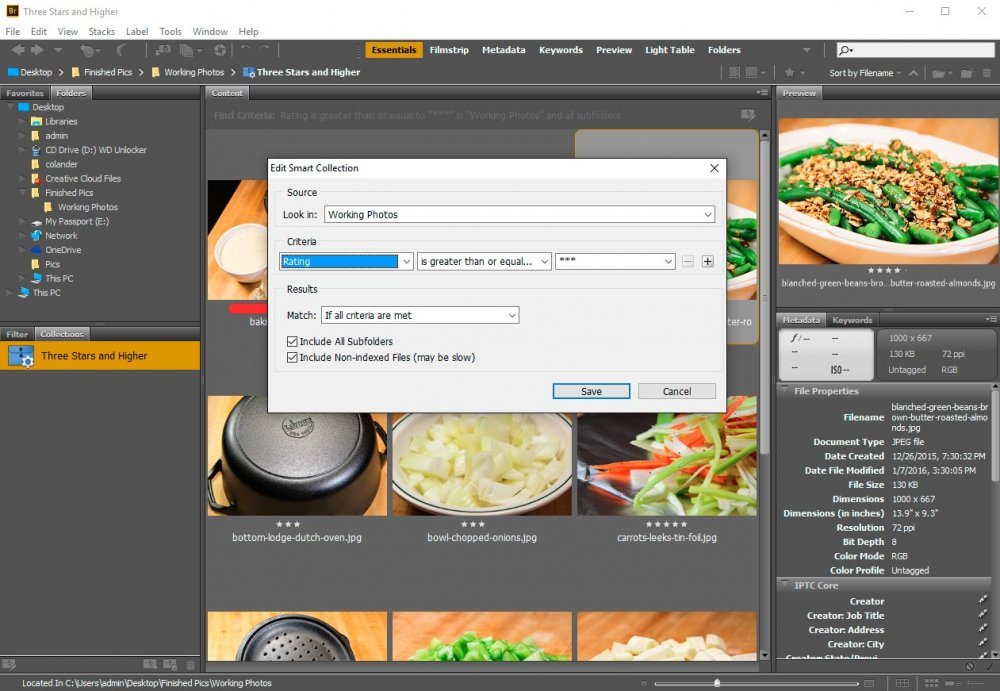
From here, simply go ahead and make new choices and then click Save when you’re finished.
Deleting a Smart Collection
Oftentimes, photographers and designers only need Smart Collections temporarily. These types of collections organize photographs efficiently, but once the need is gone, they want to delete the collection altogether. Luckily, this is very simple to accomplish.To delete a Smart Collection, all you need to do is to select the collection in question and then click on the small trash can icon that’s located at the bottom right of the Collections panel. Either do this, or right-click on the collection itself and choose Delete.
