Search

Creating & Viewing a Photo Slideshow in Adobe Bridge

  • Thread starter 15Katey
  • Start date
15Katey

15Katey

Member
Joined
May 10, 2021
Messages
130
Reaction Score
0
Points
23
  • #1
how-to-filter-metadata-adobe-lightroom.jpg

I’ve got this thing with taking photos of stainless steel kitchen equipment. Since I’m so into cooking these days, there’s a lot of gear that’s being introduced to my life. Since much of it is stainless, there’s no shortage of photographing and showing off what I purchased. The thing is, after I edit some photos and toss them into my “finished” folder, it’s not the easiest thing in the world to shuffle through that folder, copy, paste and then somehow add everything to another folder so I can show someone what I’m specifically interested in. I’d much rather just use Adobe Bridge to set up a slideshow instead. That would be so much faster.

Well, wouldn’t you know it – Bridge can do that. If you’re a Bridge user and a PowerPoint junkie, you’re going to have so much fun with what you read below.

In this post, I’m going to select a handful of photos from a folder with approximately 368 items inside of it. Then, I’m going to explain how to create a slideshow of the photographs that I’ve chosen. Finally, I’ll cover exactly how to access and modify some simple settings to alter the output and appearance of that (and any) slideshow.

Selecting My Photos​

I’m going to start off with the photo collection I mentioned above. I’ve found that by placing the photos I finished using for my other blog into this folder, I’ve got lots of great example content for this site.
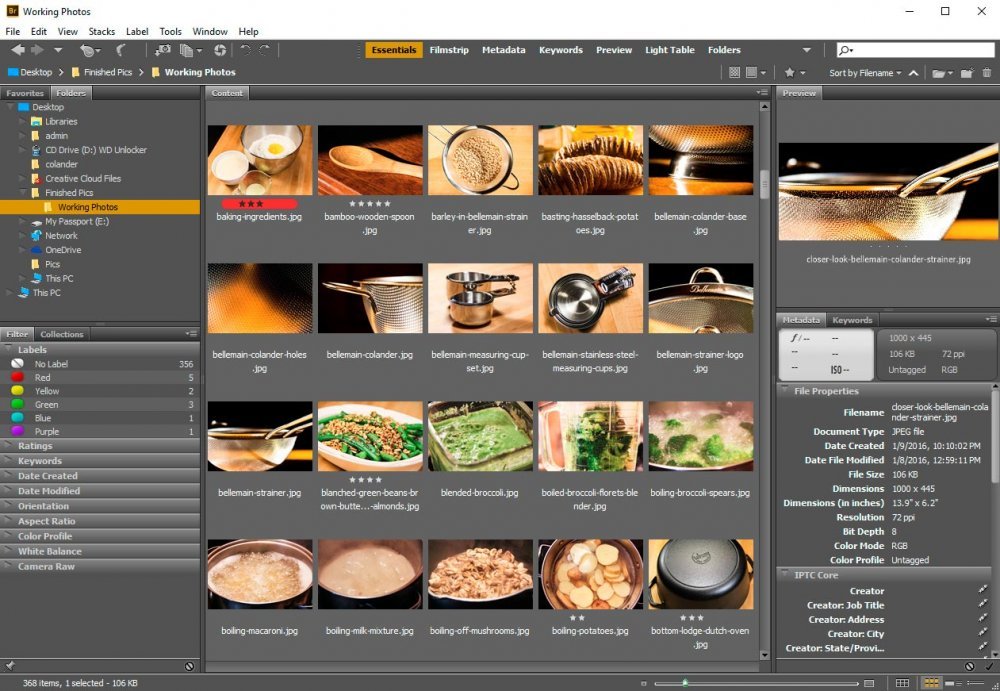
photo-collection-adobe-bridge.jpg

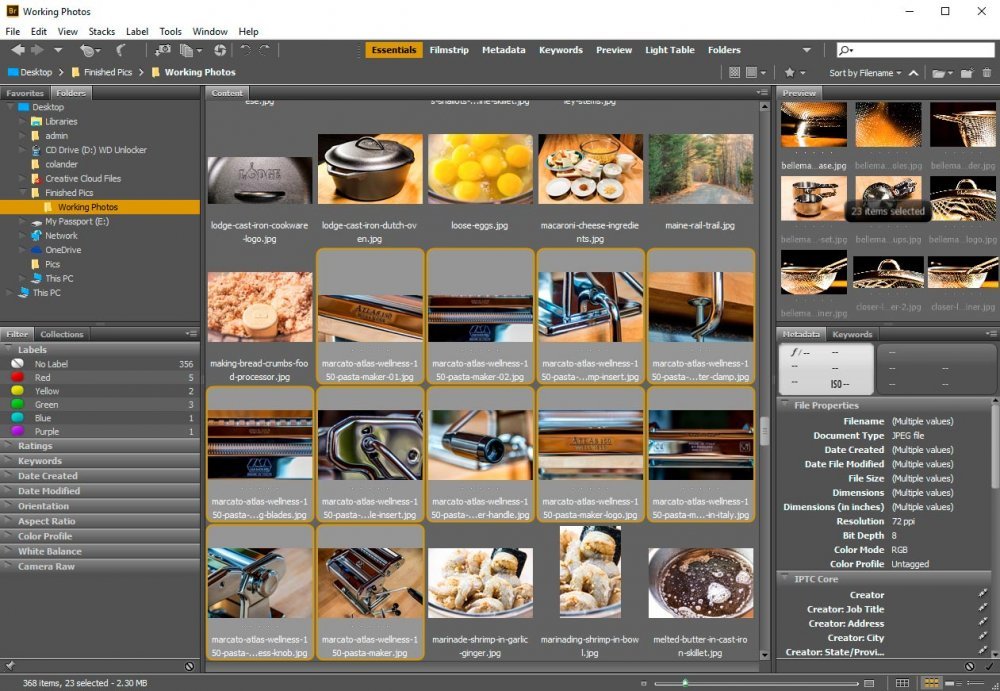
From here, I’m going to go ahead and select the photos I’m interested in. All I’m going to do is click on the first one I want, hold down the Ctrl key on my keyboard, scroll down and click any additional photos. FYI – You can go about this step any way you’d like. You can filter your photos, sort them – anything. Basically, you just need to get the ones you want included in the slideshow selected.
selected-photos-adobe-bridge.jpg

As you can see, I have 23 images selected, but only 9 of them are appearing in the preview box in the upper right corner. Don’t worry about that. It’s a Bridge limitation.

Creating the Slideshow​

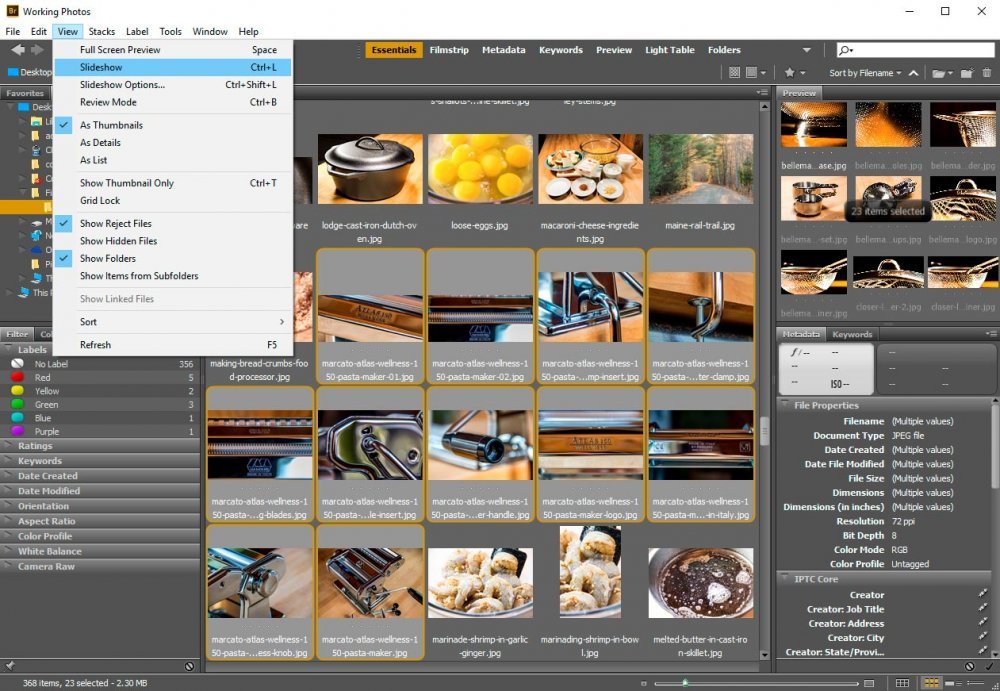
Creating the actual slideshow is so simple. All I need to do is head up to the View > Slideshow menu item and click on it.
view-slideshow-menu-item-adobe-bridge.jpg

Here is the second photo in the slideshow. I navigated a bit by clicking the right arrow on my keyboard to get a photo I like.

slideshow-in-adobe-bridge.jpg

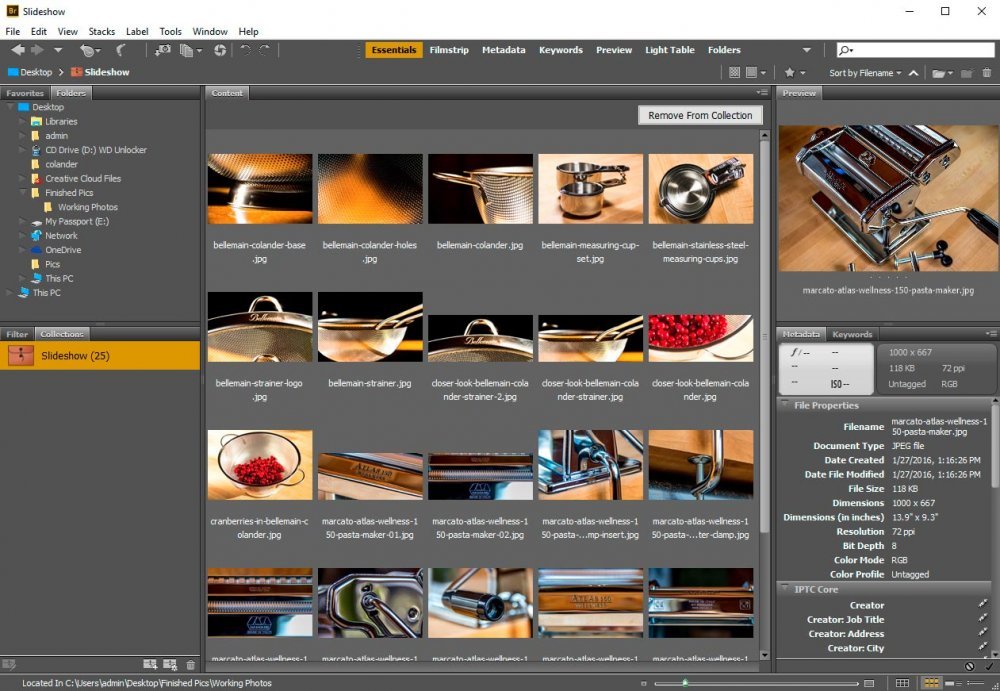
Note: After I selected the photos for this slideshow and went ahead and activated it, I hit Esc to get out of slideshow mode. When I did that, I noticed that the photos I highlighted were no longer selected. Since there are so many photographs in the folder I’m working out of, I realized that it would be a challenge to constantly select and re-select all the photos using this method over and over again. Due to this, I created a new collection down in the lower left Collections panel. Now, I can save a lot of time by simply staying in that collection for the remainder of this post.

Curious how to create a use a collection in Adobe Bridge? If so, check out this post (it’s super easy – I promise).

Here’s a screenshot of the thumbnail photos in my new collection. You can see the actual collection in the left column. It’s called Slideshow and it’s highlighted in yellow. It also has the number 25 to the right of the name. That’s the quantity of photos in the collection (I added 2 more).
collection-in-adobe-bridge.jpg

Slideshow Commands​

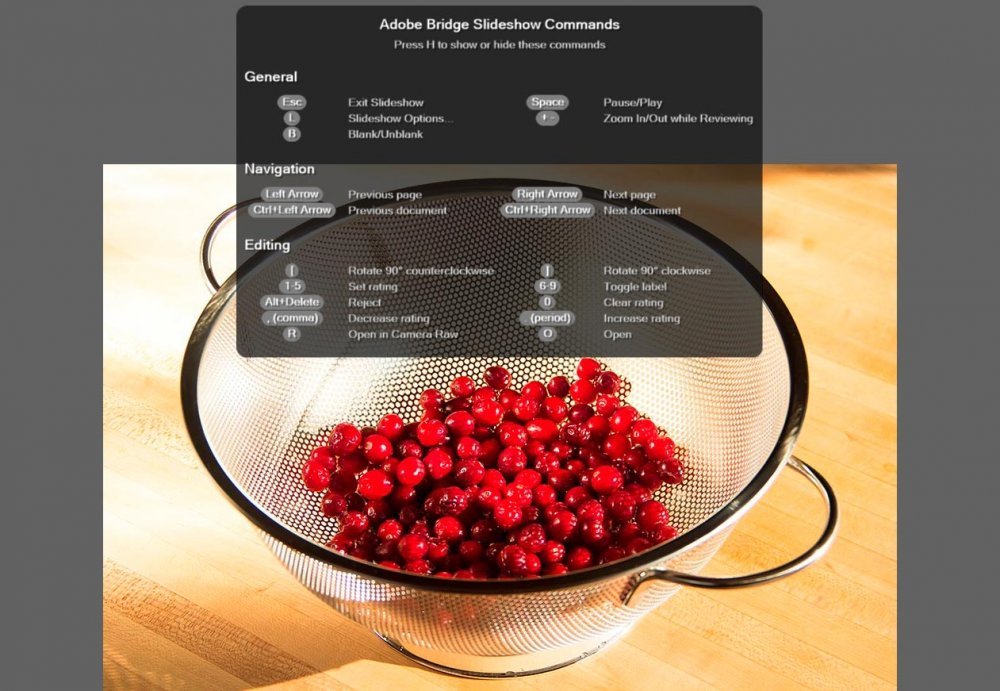
Slideshows in Adobe Bridge are fairly versatile, meaning, you’ve got some control over what’s happening. Take a look at the next screenshot to see what I’m referring to.
slide-show-commands-adobe-bridge.jpg

After I added my photos to the collection, I hit Ctrl+A on my keyboard to select all the photos. After that, I went up to View > Slideshow to start the slideshow once again. While in the slideshow, I hit the H key on my keyboard, which brought up the slideshow commands.

Now, I know the above screenshot has all the commands listed, but I’ll go ahead and type them out below. I’m not sure how clear they are on your monitor or screen.

H – Show/hide slideshow commands
Esc – Exit slideshow
L – Slideshow options
B – Blank screen/unblank screen
Space – Pause/play
+/- – Zoom in and out
Left Arrow – Previous page
Right Arrow – Next page
Ctrl+Left Arrow – Previous document
Ctrl+Right Arrow – Next document
[ – Rotate 90 degrees counterclockwise
[ – Rotate 90 degrees clockwise
1-5 – Set rating
6-9 – Toggle label
Alt+Delete – Reject
0 (zero) – Clear rating
, (comma) – Decrease rating
. (period) – Increase rating
R – Open in Camera Raw
O – Open

As I said, these are very versatile commands. I can picture using the Adobe Bridge slideshow during a legitimate meeting or situation. It’s pretty good and has some options, which I’ll discuss next.

Slideshow Options​

Once I exit the current slideshow, I’ll head back up to the menu and click on View > Slideshow Options.
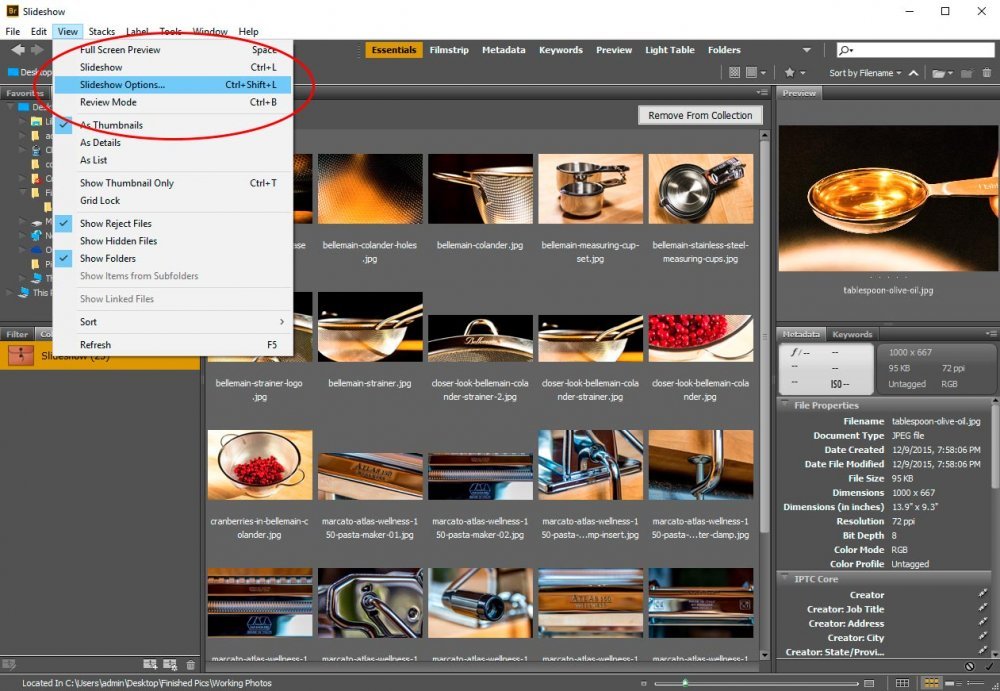
slideshow-options-adobe-bridge.jpg

After I select that menu item, I’ll be presented with a nice dialog box that contains all sorts of options that allow us to customize our slideshows.
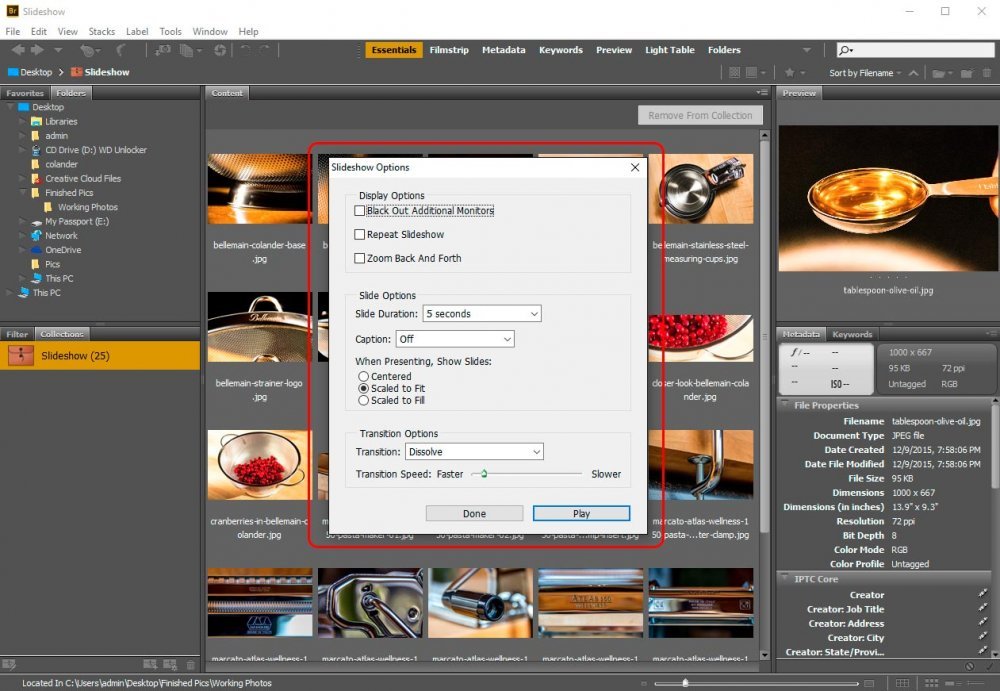
slideshow-options-dialog-box.jpg

Again, I’m not sure how clear you can see the small type in this screenshot, so I’ll type out the available options for you.

Display Options​

Black Out Additional Monitors
Repeat Slideshow
Zoom Back and Forth

Slide Options​

Slide Duration
– Manual
– 1 Second
– 2 Seconds
– 5 Seconds
– 10 Seconds
Caption
– Off
– Page Numbers
– Compact
– Full
When Presenting, Show Slides:
– Centered
– Scaled To Fit
– Scaled To Fill

Transition Options​

Transition
– None
– Move In
– Push
– Slide Reveal
– Scale
– Dissolve
– Zoom
– Flip ‘n’ Fade
– Revolving Door
– Newspaper Spin
– Tumbleweed
– Crossfade
– Random
Transition Speed: Faster – Slower

At the bottom of the dialog box, there are two buttons. One of them is Play and if clicked, will play the slideshow with the settings you just selected. The other button is Done and if clicked, will save the settings for the next slideshow you play. Essentially, both buttons will save the settings exactly the same way. The only difference is when the slideshow plays.

Hint: If you’d like to apply slideshow settings to take effect in a slideshow immediately after clicking the Play button, remember to click and select the thumbnails you’d like that slideshow to contain before selecting View > Slideshow Options from the top menu. It’ll save a second or two.

——

If you’ve enjoyed today’s post and found it helpful, please share it with a friend. Thanks!
 
15Katey

15Katey

Member
Joined
May 10, 2021
Messages
130
Reaction Score
0
Points
23
  • #2

Organizing & Sequencing Photos in Adobe Bridge For a Slideshow​

Here’s a scenario for you. Let’s say you’re an avid photographer who has taken hundreds, if not thousands of photos through the years. Many of the photos are really great and you’re looking for any and every avenue of publicity to show these photos off. You already have every social media account under the sun set up (that you use to share regularly) and you have a photo blog that’s humming right along. You’re wondering what else is out there that you can use to display your fabulous photography.

Enter Youtube. Have you ever looked up a vacation destination or some sort of nature related video on Youtube to find tons and tons of slideshows? We all have. I’m sure of it. Photo slideshows are easy to make and can get you around the burdensome obligation of actually having to take video and speak on said video. Lots of us are either shy or are no good on camera and we’d simply prefer to stay off it. The perfect workaround for the types of people we are is to create video slideshows that can help us get our points across while building up our Youtube video count. I mean, let’s face it, Youtube is pretty popular and there’s a lot of potential when it comes to having a thriving account. You can make lots of money over there.

Okay, so I think I may have sold you on the idea of making photo slideshows and uploading them to YouTube. It’s actually a no-brainer. The next step is to work through all the necessary tasks that will get you up and running to do just that. That’s why I’m here. In this multi-post series, I’d like to walk you through the steps you’ll need to complete to select, organize, sequence and launch your photos into Adobe Photoshop. All the organizing and sequencing will be done in Adobe Bridge beforehand, but all the transitions and fades will be done in Photoshop later on.

In today’s first post, I’ll work through what it will take to choose, organize and sequence, in Adobe Bridge, the photos you’d like to include in your slideshow. Bridge is a fantastic photo organizer and for projects like this, it’s simply perfect. So let’s get going.

Choosing the Photos​

I don’t know if you remember, but over this past summer, I took a bunch of flower photos out in my front garden. I was actually just playing around with one thing or another on my camera and I wanted to test it out. As it turns out, some of the photos actually look pretty good, so I may as well use them to create this first slideshow. I mean, why not?

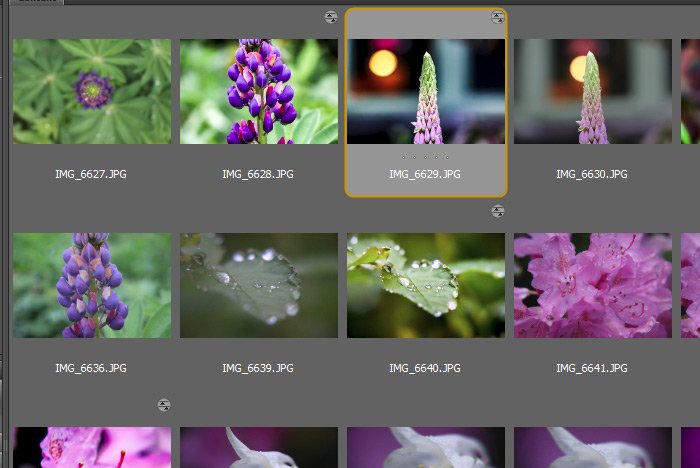
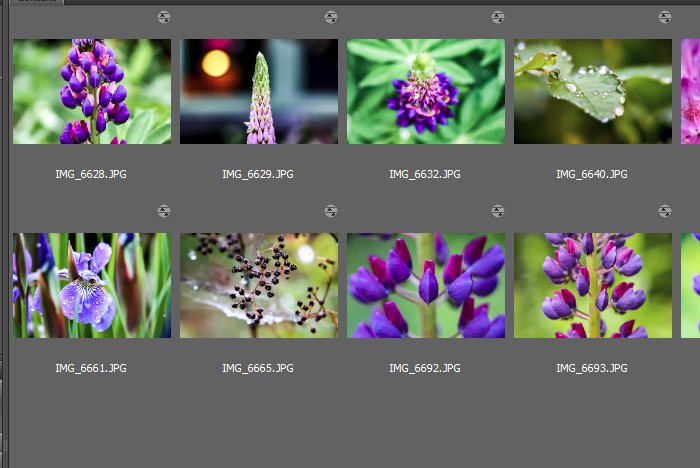
Take a look at some of the photo thumbnails that are currently viewable in Adobe Bridge. All of these photos are located in a random folder that’s on my desktop.

flower-thumbnails.jpg

By the way, if you aren’t aware, Adobe Bridge is included in the Adobe “Photographer’s Package,” so if you’re signed up for the ever updating Photoshop CC, you can also download Bridge for free.

If you look closely at the screenshot I shared above, you’ll notice that out of all the photos in the folder, I’ve only edited a few of them in Adobe Camera Raw. Those edited photos are obviously a bit different looking than the others, but they also have a small circle that’s located above the thumbnail and to the right. It’s these edited images that I’d like to use. If I’m not mistaken, I bet you have a folder that looks similar to this one. One where you’ve got tons of photos inside of it, but only a handful that have been edited and that are ready for production.

Rejecting Thumbnails​

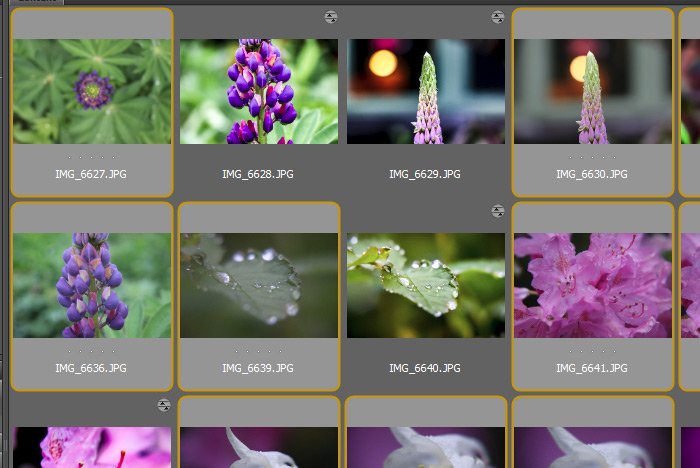
Like I said, I only have a few images that I’d like to use, but many of them are in the folder that’s being viewed in Bridge. To organize things, I’d like to hide the photos that were either never edited or that were edited, but aren’t preferable to use for my slideshow. Hiding the images is simple enough. The first step in doing so is to hold down the Ctrl key on my keyboard and click on every thumbnail that I don’t want to see anymore. This is what the thumbnails will look like once they are selected.

selected-thumbnails.jpg

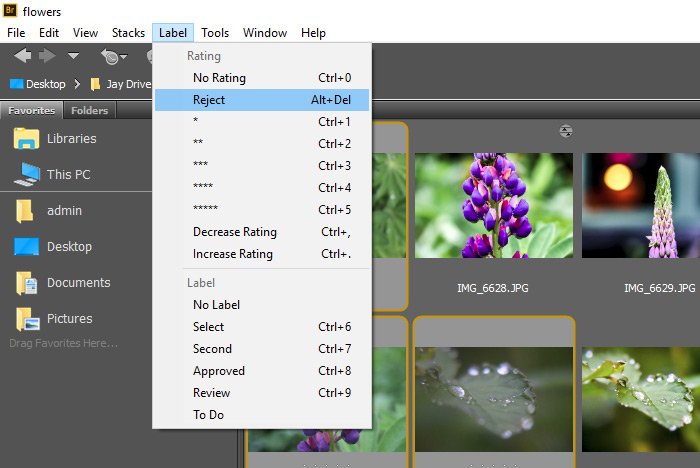
To reject the images, I can either use the keyboard shortcut of Alt+Del or I can head up to the Label > Reject menu item and click.

label-reject.jpg

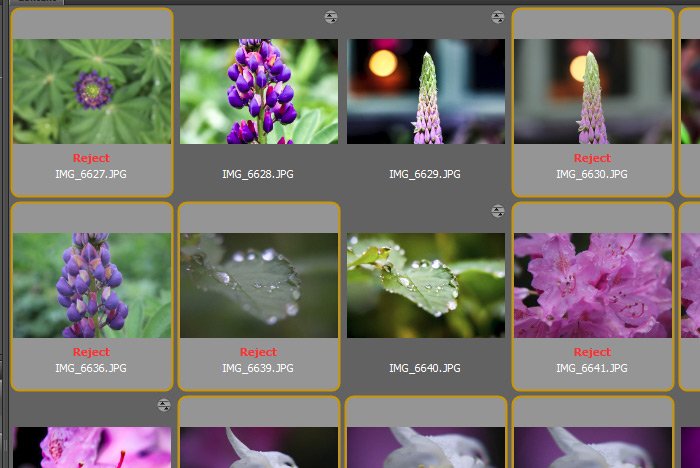
When I do that, a small Reject label will appear in red beneath the thumbnail. Take a look.

reject-label.jpg

This is all well and good, but I can still see the thumbnails. They’re still in the way and they’re confusing me. That’s fine because I need to complete one more step to hide them. If I head up to the View > Show Rejected Files menu item and click to uncheck it, all the rejected thumbnails will disappear. Now check out what I have to work with – only the photos I’d like in my slideshow.

edited-images.jpg

By the way, if I ever want to get those rejected images back, all I need to do is to use the View > Show Rejected Files menu item again and make sure it’s highlighted. Then, once I see those files in the Content panel in Bridge, I can select them and then go to the Label > No Rating menu item and click (Ctrl+0). Doing this will remove the Reject label from each thumbnail.

Arranging the Thumbnails​

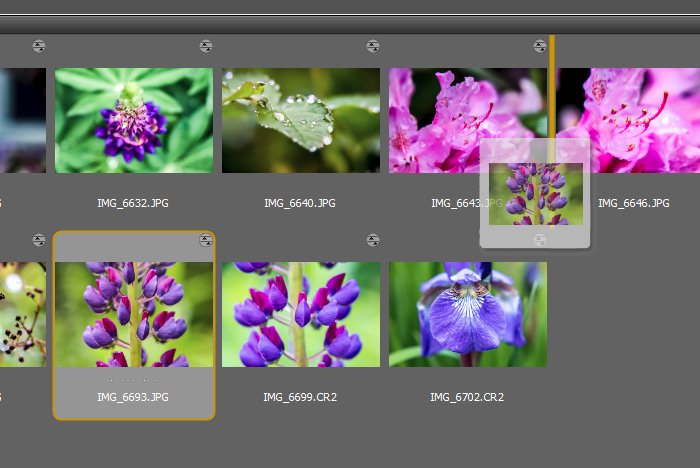
Since my slideshow is going to be moving through a sequence of events, I’d like to arrange the thumbnails to follow that sequence. Now, since I’m dealing with flowers here, there’s not dramatic story or anything going on, but for lots of slideshows out there, the images need to be in a specific order to make sense. In Bridge, all it takes is a drag and a drop to make order of chaos. Literally, to order the thumbnails for your slideshow, simply click on a thumbnail and drag it wherever you’d like to see in in the sequence. As you move the thumbnail around, you’ll see orange vertical lines appear in between the other thumbnails. Those lines indicate where the thumbnail you’re dragging will end up.

drag-drop-thumbnail.jpg

In my case, I’ll just mix things up a bit so similar photos aren’t sitting side by side.

Copying Photos to a New Folder​

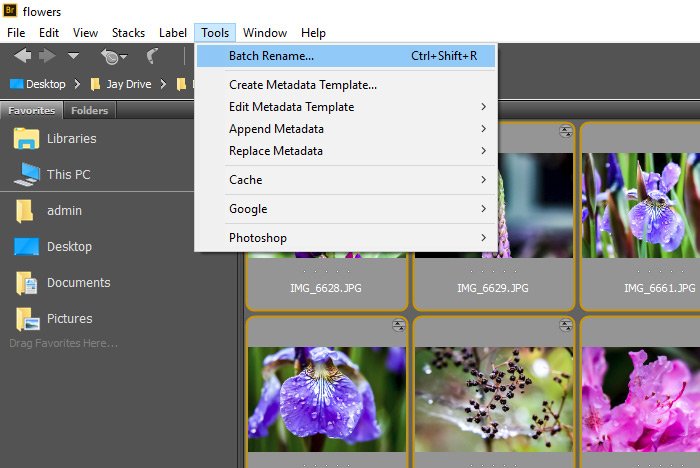
Since I’m going to eventually want to rename these slideshow photos sequentially, it’s important for me to copy them into their own folder. This is for organization’s sake. If I was working with a large number of photos and I didn’t copy them to someplace else, I’d have a mess. To copy selected images to their own folder using Adobe Bridge, I’ll first select the images in question, which, in my case, are the only ones left visible. Then, I’ll head up to the Tools > Batch Rename menu item and click.

tools-batch-rename.jpg

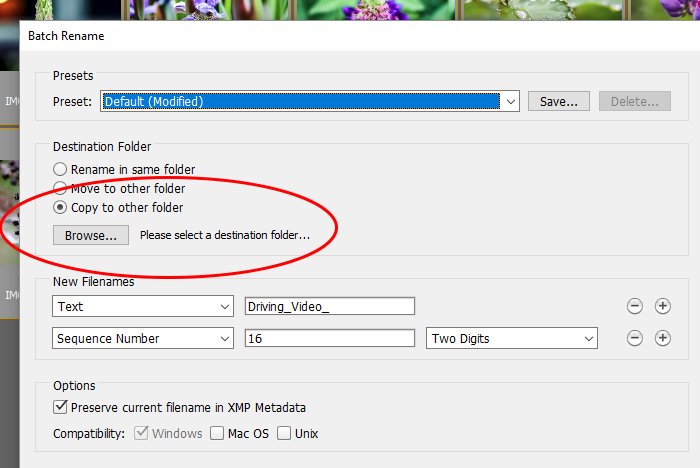
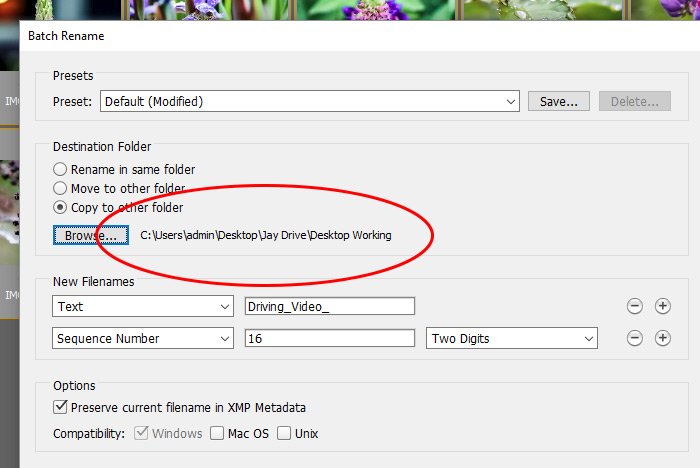
Then, once the Batch Rename dialog box appears, I’ll make sure the Copy To Other Folder radio button is clicked and then I’ll click on the Browse button.

copy-to-other-folder.jpg

From here, I’ll either create a new folder or choose one that’s already in existence to copy to. In my case, I have a “working” folder that I like to use for these types of things, so I’ll just choose that as my target folder.

target-folder.jpg

Renaming the Files​

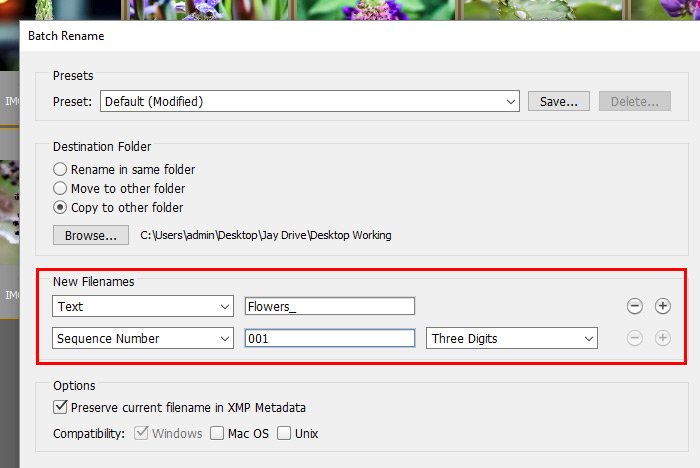
Now that I know where to put the images, I’d like to rename them so they make sense and so they’ll eventually import into Photoshop correctly. To accomplish this, I’ll move down to the next section in the Batch Rename dialog box. This section is called New Filenames.

For the first field, I’ll make sure the drop-down value is set to Text and then to the right of that, I’ll type in the text I’d like my files to begin with. For these images, I’ll use Flowers_.

For the next drop-down that sits directly below the first one, I’ll set the value to Sequence Number. I’ll begin with 001 and then choose Three Digits for the drop-down all the way to the right. If there are any additional rows of drop-downs and fields after this one, I’ll click on the minus button to remove them.

new-filenames-section.jpg

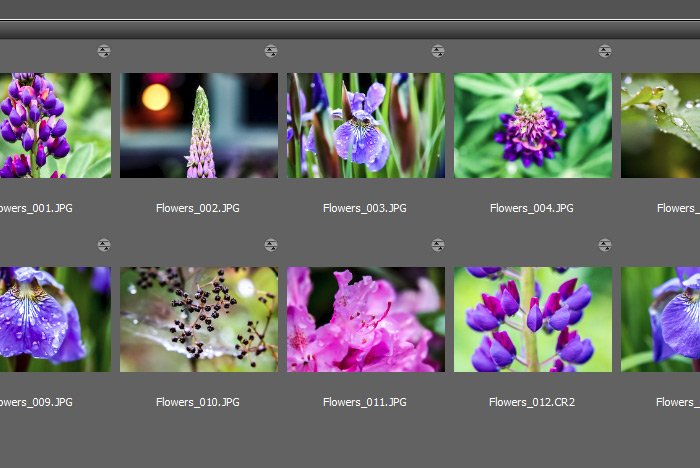
Once I’m finished with all this, I’ll click on the Rename button and watch as all the selected images are copied to and renamed in an entirely new folder.

renamed-files.jpg

Well, I think that’s good for this first post on how to create a photo slideshow in Adobe Photoshop. In my next post, I’ll explain how you can easily import these photos into Photoshop, straight into the Timeline panel. If you have any questions regarding what I included in this post today, please let me know down below. Thanks for reading!
 
Top