KodyWallice
Member
- Joined
- May 7, 2021
- Messages
- 123
- Reaction Score
- 1
- Points
- 23
- #1

There aren’t many things I find more satisfying in life than working with my favorite trio of Adobe applications. The three I’m referring to are Bridge, Camera Raw, and Photoshop. The smoothness between them is remarkable and the workflow unparalleled. Really – this is the best it’s ever been. I can say this from experience, since I’ve been working with Photoshop for over 18 years.
I can remember back to the good old days when my favorites were Photoshop, ImageReady and the absolute best animation program called LiveMotion. Boy, I miss LiveMotion. Of course, this was before Adobe acquired Macromedia – I had to learn a bunch of other things then. One example of what I’m referring to is Macromedia Flash. I took up the challenge and purchased the fattest Flash manual on the market. It took me one month of studying, but I can tell you that after that month, there weren’t many folks who could touch my skills. All of this because my then boss wanted one of those fancy website navigation bars to run across the top of our site. But hey, I learned Flash, which was pretty cool.
I bring all this up because with all the recent changes Adobe has been making to their suite of products, we’re now spoiled more than we’ve ever been. And since we’re so spoiled, I thought I’d catch up on some of the more interesting workflow features that are offered to us and demonstrate how a few of my favorite products work seamlessly together. With that said, I’m going to be including some of these more advanced posts into the mix from here on out. The posts will start off slowly and will gradually become more complex, so if you’re reading along, enjoy the ride.
In today’s post, I’d like to begin with something very simple. This is a question most folks who are new to Bridge and Photoshop ask, which is, How can I open a photo from Bridge directly into Photoshop? While this may seem like a simple question, there are a few caveats to be aware of. I’ll cover them below.
Starting Off in Bridge
If you aren’t aware of the existence of Adobe Bridge, let me introduce you to it. It’s the most wonderful photograph organizer. I absolutely love it and use it every day. And as a matter of fact, I’ve written quite a few posts that cover how it works. Don’t worry, it’s not difficult. I’d say that within a few hours, you can become a Bridge master.The best part about Bridge is its integration with the other Adobe programs. While I’m only going to touch on one tiny bit of that today, let me assure you that things go much further.
Learn Adobe Bridge
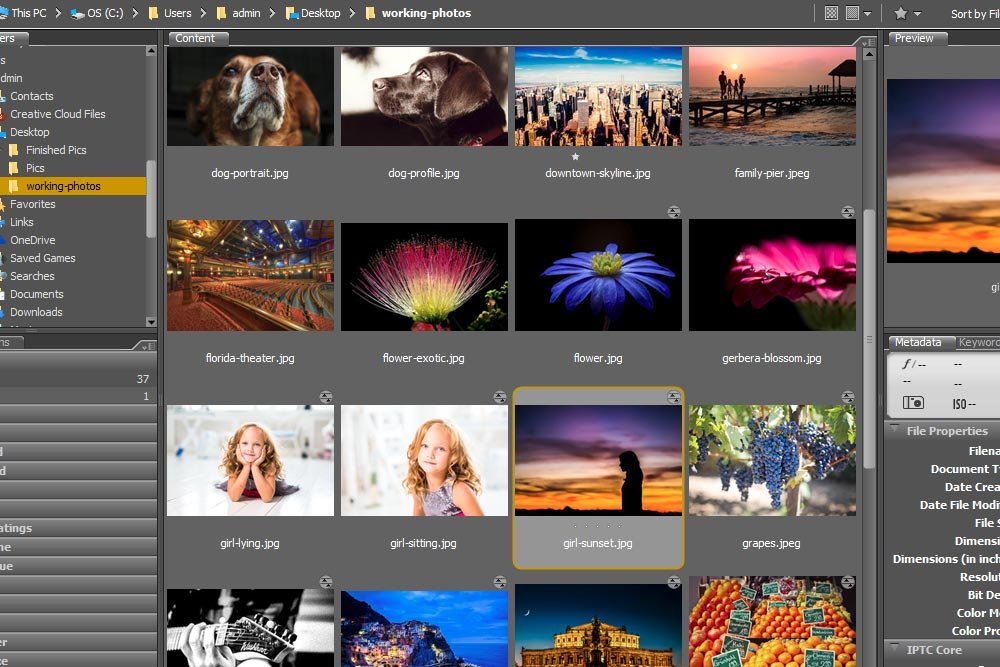
I’m going to start off today’s tutorial by navigating to a folder called “working-photos” that I created on my desktop. Contained inside this folder are many of the photos I’ve used on this website.
Double-Clicking
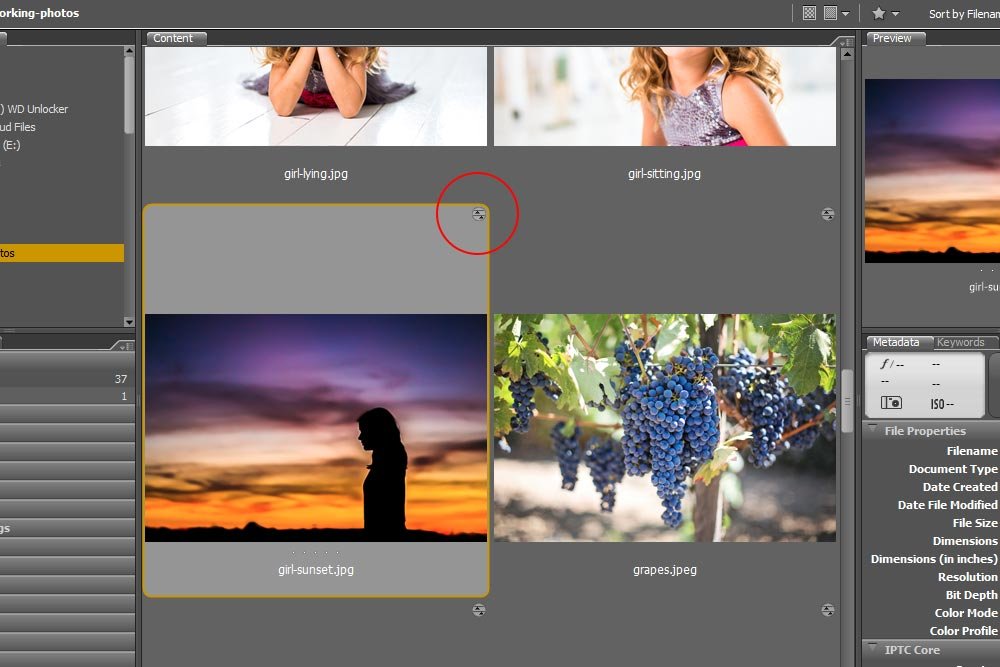
Now, I want to fill you in on how different types of files open from Bridge into Photoshop. And this is a tricky situation if you use Camera Raw a lot and have edited some of your photos in it or are working with RAW files. If I were to double click on a thumbnail of a brand new, unedited, JPEG photo inside of Bridge, that photo would open up inside of Photoshop in its own tab. If I were to double click on a thumbnail of a JPEG photo that I’ve already done some work to inside of Camera Raw, that photo would open in Camera Raw. All RAW files open in Camera Raw from Bridge when their thumbnails are double clicked on.How would I know which photos are which? Well, that’s easy. If you take a look at the thumbnails inside of Bridge, you’ll see small light gray circles with up facing arrows in the upper right corners of those files that have already been edited in Camera Raw. This is true for both JPEG and RAW files. To tell the difference between those two types of files, simply look at their filenames. JPEG files end in .jpg or .jpeg and RAW files end in .CR2, .dng or other names that specific camera manufacturers have created.
Right-Clicking
Right clicking is simply another method for accomplishing the same thing that double clicking accomplishes. If I right click on an thumbnail, I’ll be presented with a menu. If I roll over the Open With option and click on Adobe Photoshop CC 2015 16.1 (or whatever version you’re using), the files, depending on their types, will either open in Camera Raw or Photoshop.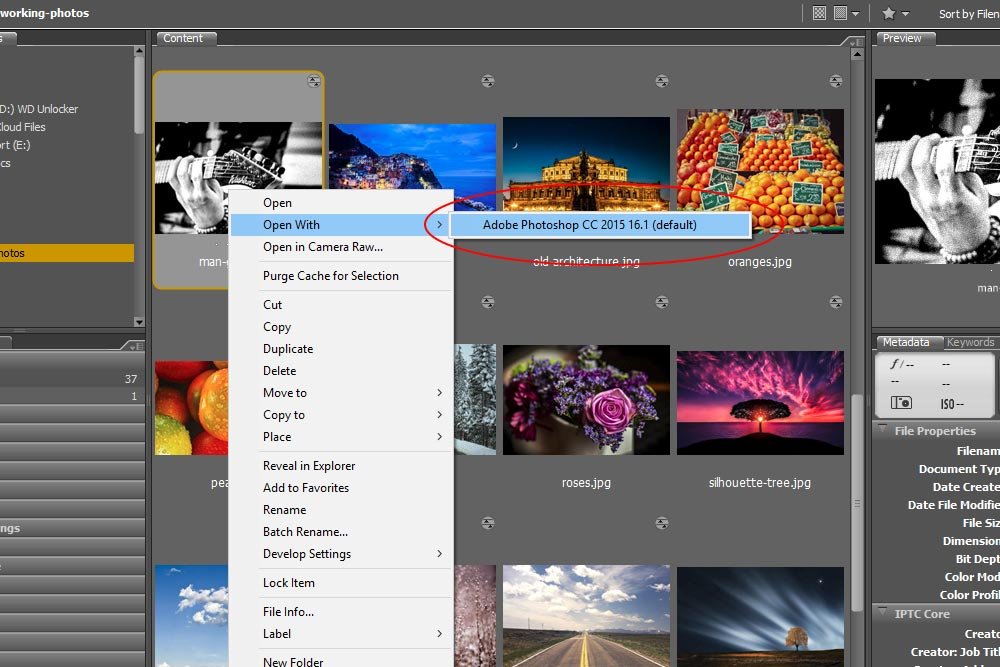
You have to remember, even though Camera Raw acts as a stand alone application, it needs to be tethered to something else, such as Bridge or Photoshop. The good news is, once a photo is launched into Camera Raw, all you need to do is click the Open Image button down in the lower right corner to move that photo into Photoshop. It’s really very painless.
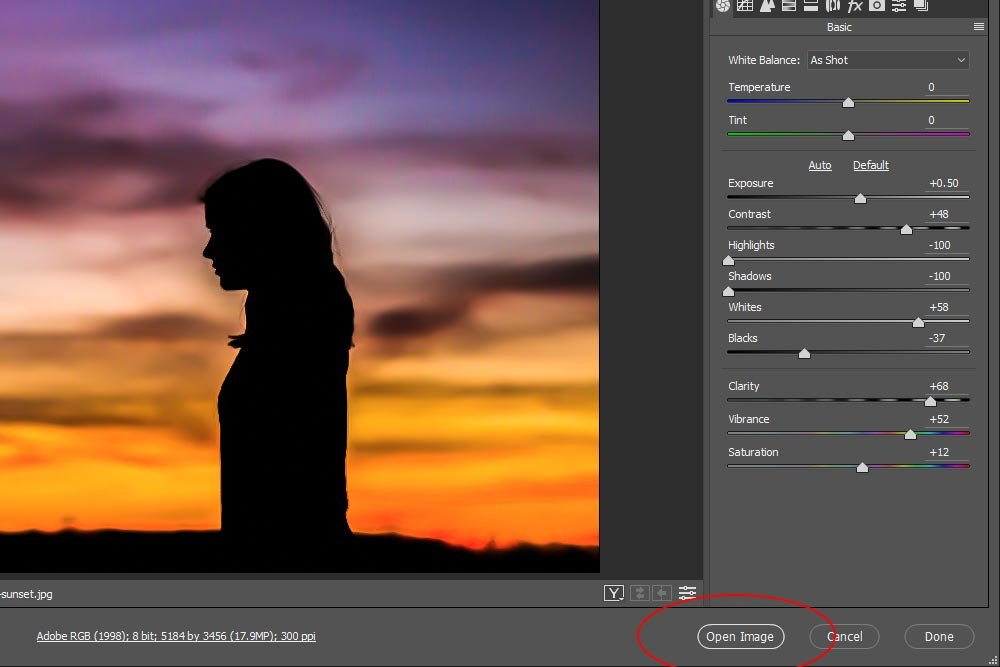
Of course, you can do what I do and edit inside Camera Raw before you click Open Image. That’s where all the fun stuff is.
Jumping Between Bridge & Photoshop
Whichever method you choose, you’ll eventually end up in Photoshop. Once you have a photo in Photoshop, you have the ability to use either a menu item or a keyboard shortcut to jump back and forth between Photoshop and Bridge.In Photoshop, if I head up to the File > Browse in Bridge menu item and click, Bridge will appear.
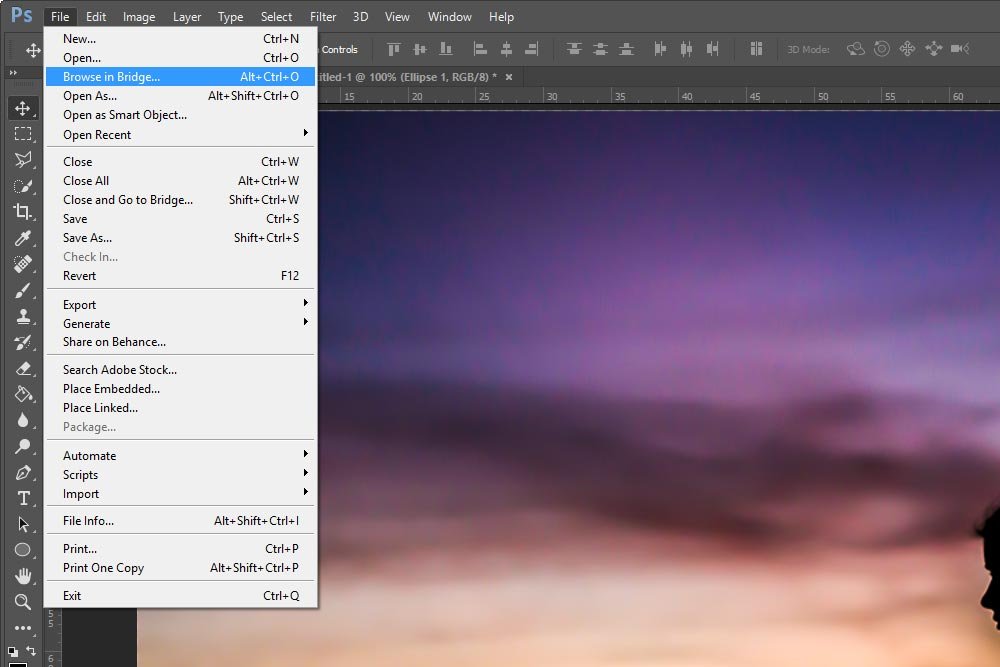
In Bridge, if I head up to the File > Return to Adobe Photoshop menu item and click, I’ll jump to Photoshop. It’s that simple.
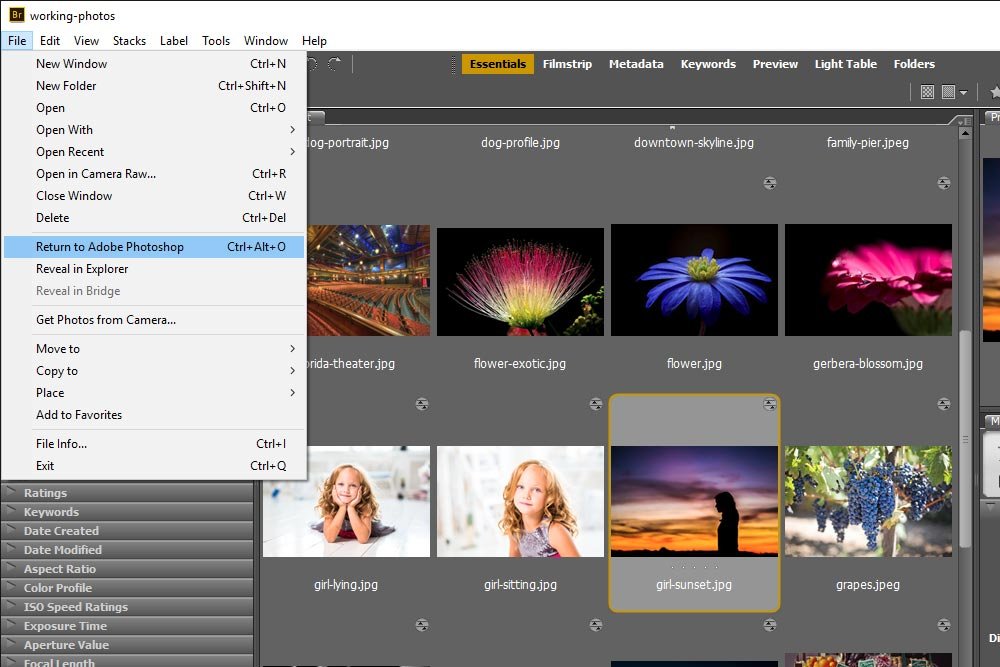
If I want to use a keyboard shortcut instead of the menu items, I can click Alt+Ctrl+O on Windows or Option+Command+O on Mac to move between the two applications. It’s the same shortcut for both, so it’s easy to remember.
I hope this post gave you a quick primer on how to open a photo from Bridge into Photoshop. As I said above, I’ll be writing many more posts that discuss workflow between Adobe products, so if you’re interested in these types of things, please keep on reading. Thanks!

