Newman
Member
- Joined
- May 11, 2021
- Messages
- 106
- Reaction Score
- 0
- Points
- 23
- #1
I usually reserve all my photo cropping for Adobe Photoshop, but I wanted to write a post to show that Camera Raw has many of the same capabilities. Actually, the crop features in both applications look strikingly similar. They’re even non-destructive, which is a huge bonus.
If you haven’t already, please take a look at the post on how to crop photos in Photoshop. It covered some really good information there and much of it applies to Camera Raw as well.
In today’s post, I’ll be covering the ins and outs of how to go about cropping a photo using Adobe Camera Raw, so if you’ve got some practice photos, now’s the time to open them up.
My Photo
For this post, I’ll be using an example photo of a butterfly that was taken way back in 2012. I think it’ll be perfect for this post because the subject of the photo, while clear and of good quality, is too small. Some cropping to enlarge it would do it well.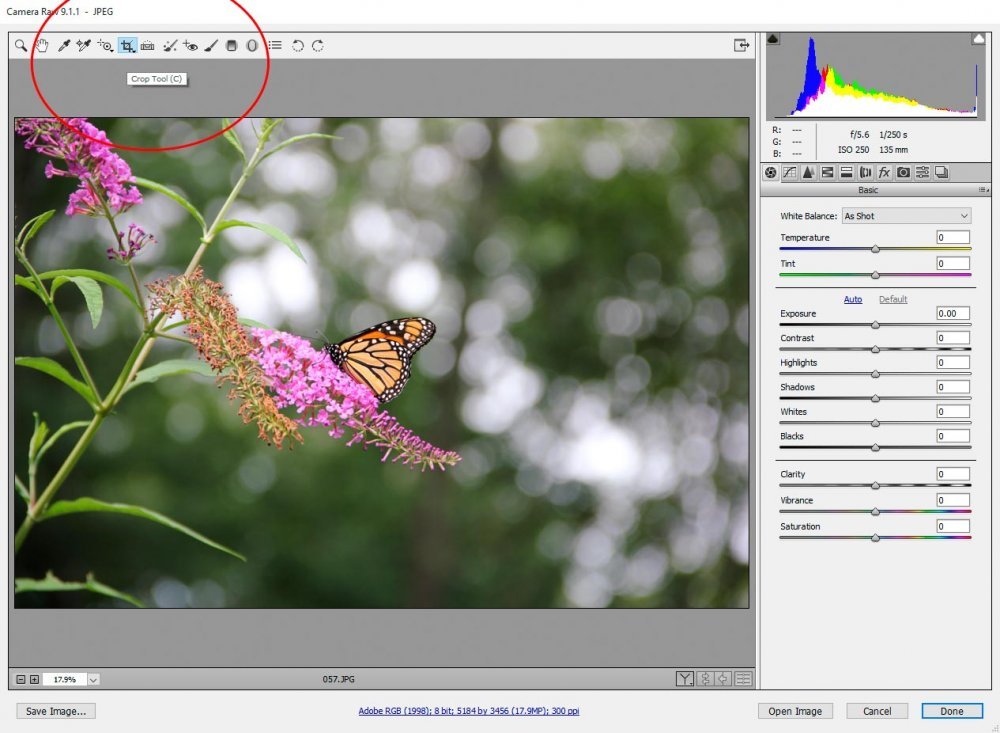
As you can see, I’ve opened the photo in Camera Raw and have selected the crop tool from the top toolbar.
Selecting an Area with the Crop Tool
Selecting an area to crop in Camera Raw is just like selecting an area in any other photo editing program. You merely use the crop tool to click and drag around the area you’d like to keep. In the case of my photo, I chose a small area just around the butterfly.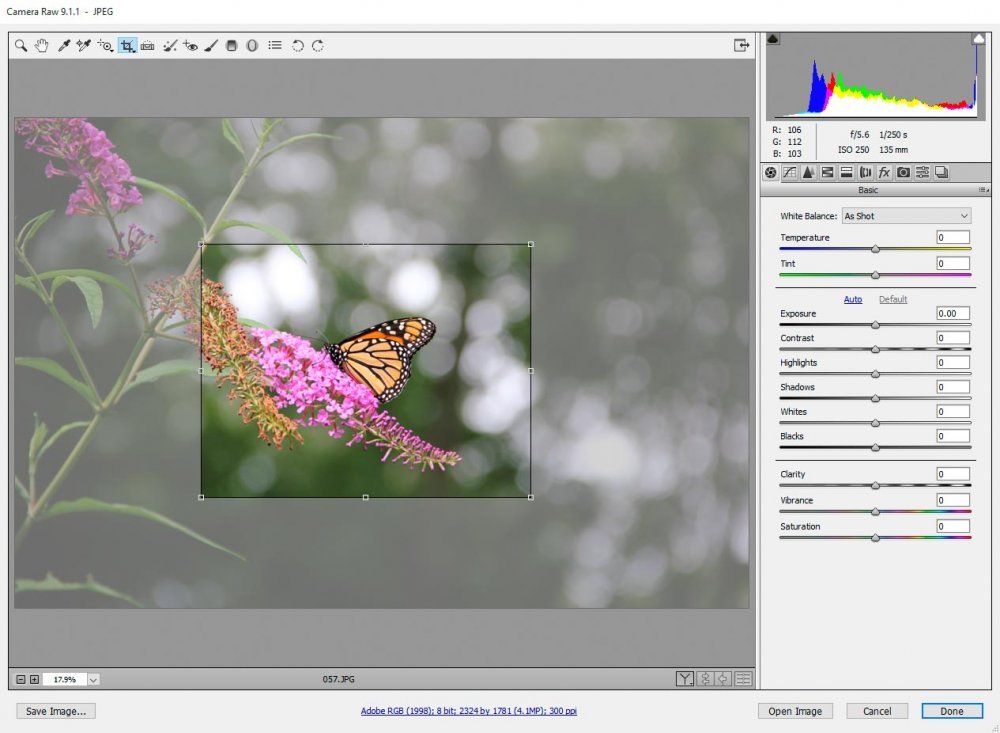
As you can see, the area that’s to remain is the clear one. The area that’s to be removed is cloudy.
Resizing the Crop Tool
Since the current crop I’m using for my photo isn’t bound to any sort of size or proportion, I can resize it any way I wish. To accomplish this, all I need to do is to click and drag any corner, side, top or bottom handle. In the screenshot below, I’ve circled the handles. I can drag these handles in to shrink the crop area or out to expand it.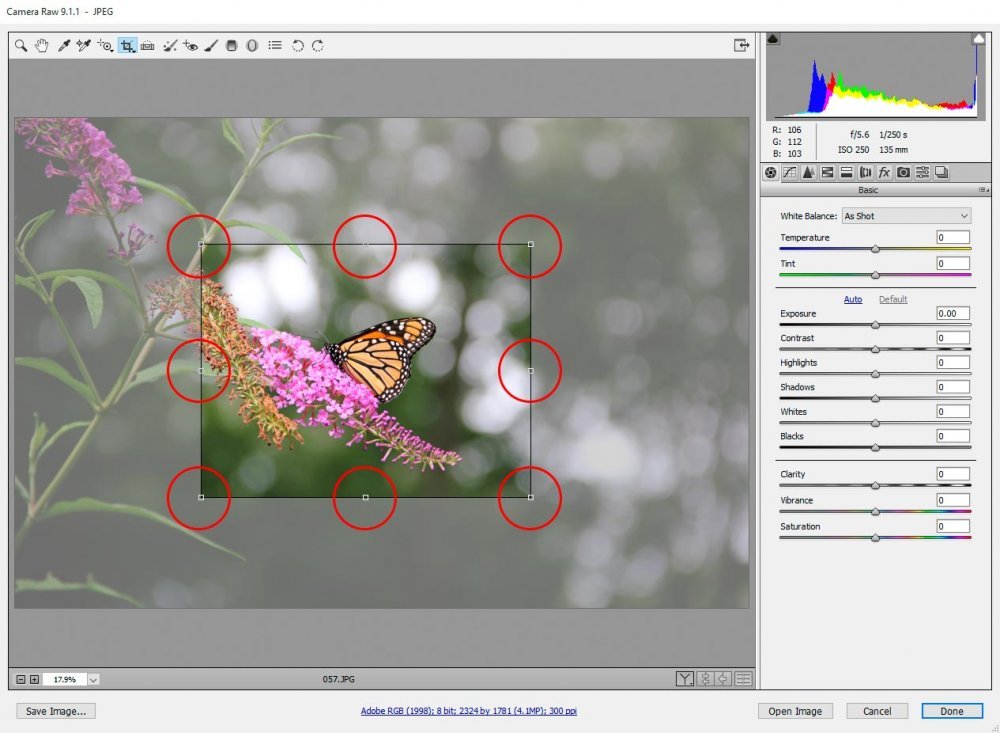
Using Crop Aspect Ratios
Again, if you’ve cropped in Photoshop, you most likely already know how to crop in Camera Raw. The only thing that you need to do differently to set a specific crop ratio is selecting it itself. The way to do it in Camera Raw is to simply click the crop tool and hold your finger down on the mouse button. Once it’s held down for a second or two, the extra menu will appear. Take a look below.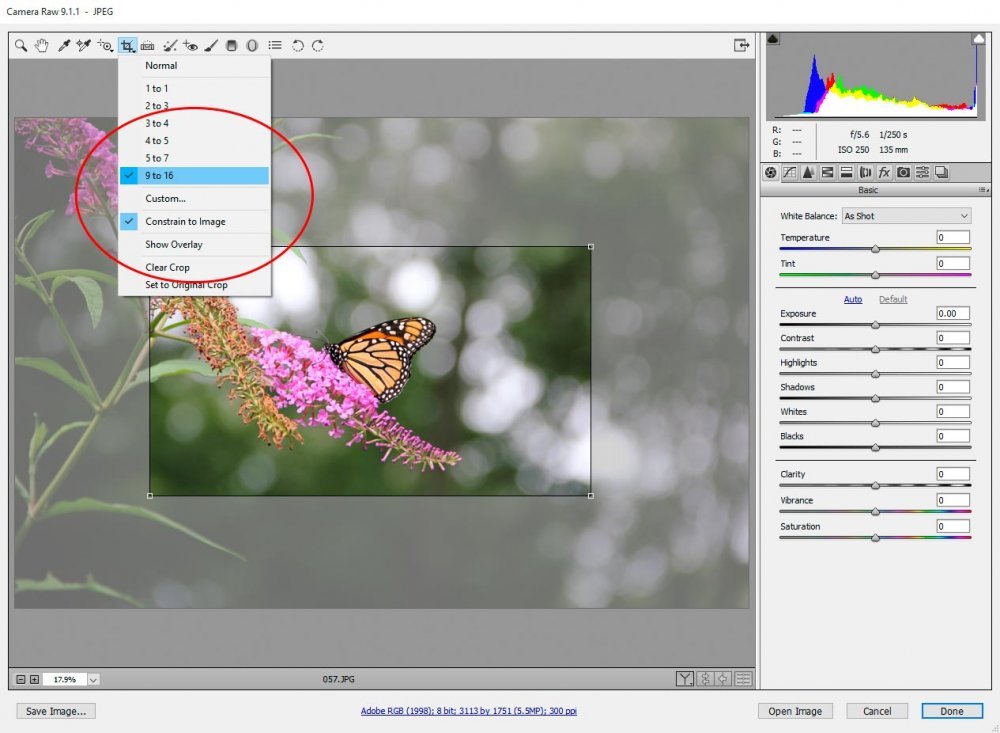
In my example, I chose the 9×16 crop ratio. All this means is that the area to be cropped will be 9 units high and 16 units wide. The moment I clicked on that ratio, my original crop area snapped to it. If I’d like to reverse the ratio, I would need to click on a corner and drag it towards the center of the crop area to make it smaller. If I go far enough, the ratio will reverse and become 9 wide by 16 high.
Using the Crop Overlay
While Photoshop has many more overlay options to choose from while cropping, at least Camera Raw has one. And I’d say it’s probably the most popular one at that. It’s the “Thirds” overlay, which is helpful if you’re into photographic composition.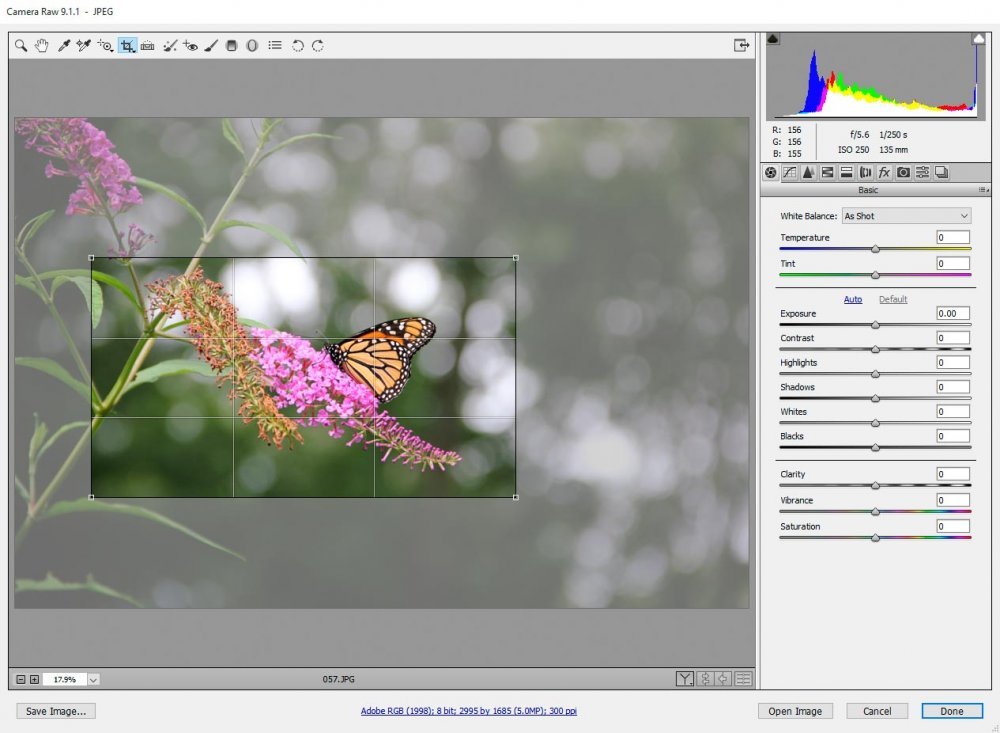
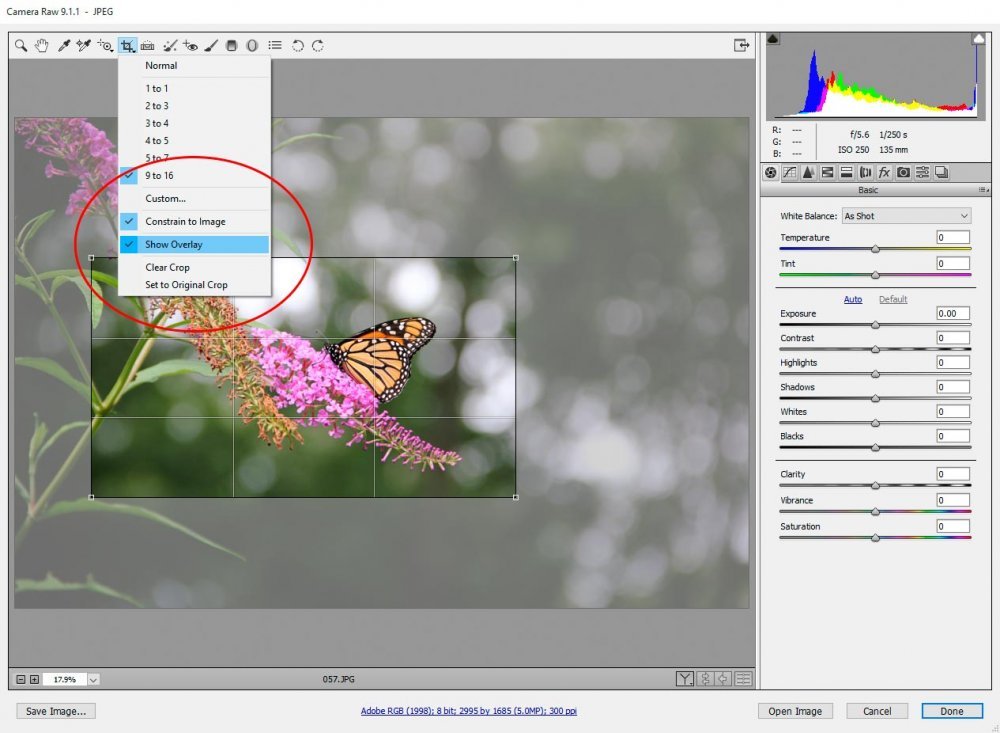
If you look at the above screenshot closely, you’ll see the light overlay lines. To use this feature, head back up to the crop tool and hold your mouse button down again. From there, you should see the “Show Overlay” option. Just click that.
Using a Custom Crop Ratio
While many of the more popular crop ratios are listed as presets, there may come a time when one of these choices won’t suite your needs. To set a custom crop ratio, head back up to the extra crop menu as per my previous instructions and click on “Custom.” From there, a small “Custom Crop” dialog box will appear that will allow you to fill in the ratio specifications that you’d like to crop your image to. Once you fill that data in, click “OK” and they’ll be set.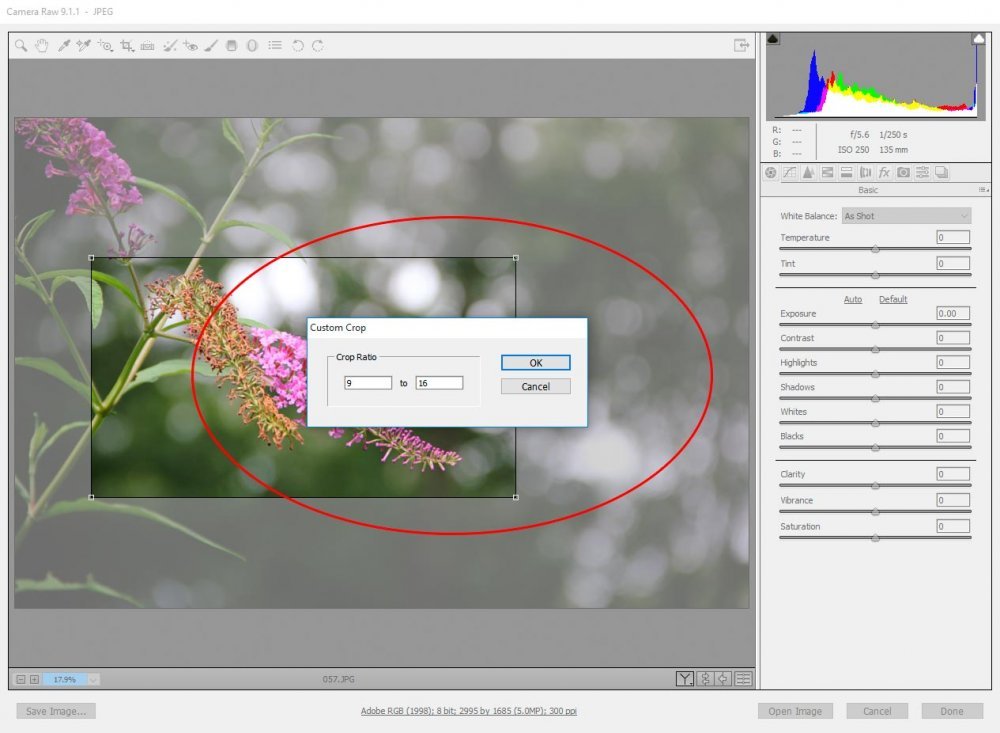
Applying the Crop
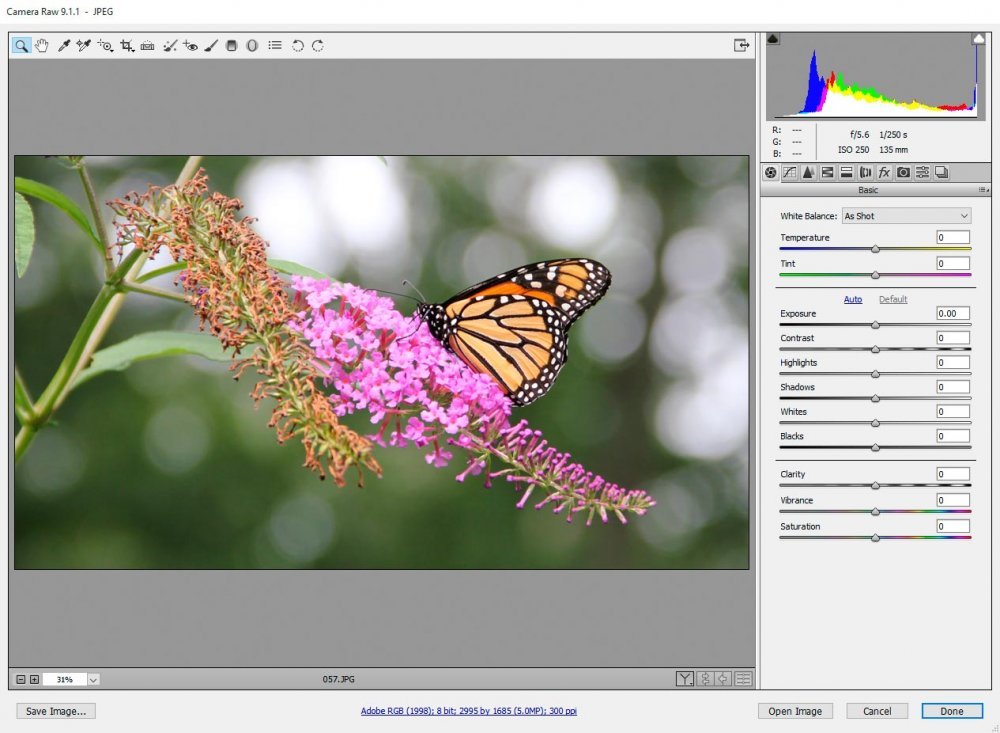
Just like Photoshop, to apply your crop, simply hit the “Enter” key on your keyboard or double-click your mouse pointer inside the crop area of your photo. That will apply the crop you’ve created. Here is what mine looks like: