WendyMay
Member
- Joined
- May 11, 2021
- Messages
- 142
- Reaction Score
- 0
- Points
- 21
- #1
There are a few sliders in Camera Raw that are sort of mislabeled. The “Clarity” slider is one of them. I think people most often confuse the Clarity feature in Camera Raw with the Sharpen feature in Photoshop. That’s okay because they sort of offer similar features.
What I’ve been reading and hearing about Camera Raw’s Clarity slider is this: it adds midtone contrast to your image. To understand that a bit better, think of all the midtones in a photograph and then think about lightening some of them and darkening others. By doing that, you’re going to take away that monotonous “blah” and add some real distinction.
Although there are many methods of adjusting the clarity in this application, in this post, I merely want to show off some examples of what this feature can do via the slider towards the bottom of the “Basic” panel. With that in mind, I’m going to go through a few before and after photos. One thing to note though, in my example photos, I may have adjusted some other areas to make things more visible. But even with these adjustments, you should see some dramatic changes due to the changes in clarity.
Example Photo #1
I think the best way to demonstrate the various ranges and how the Clarity slider can affect a particular photo is to give three screenshots of each photograph; the first showing the slider at neutral, or , the second with the slider pushed all the way to the left at -100 and the third with the slider pushed all the way to the right at +100. Even with the smaller screenshots, you should be able to distinguish the differences.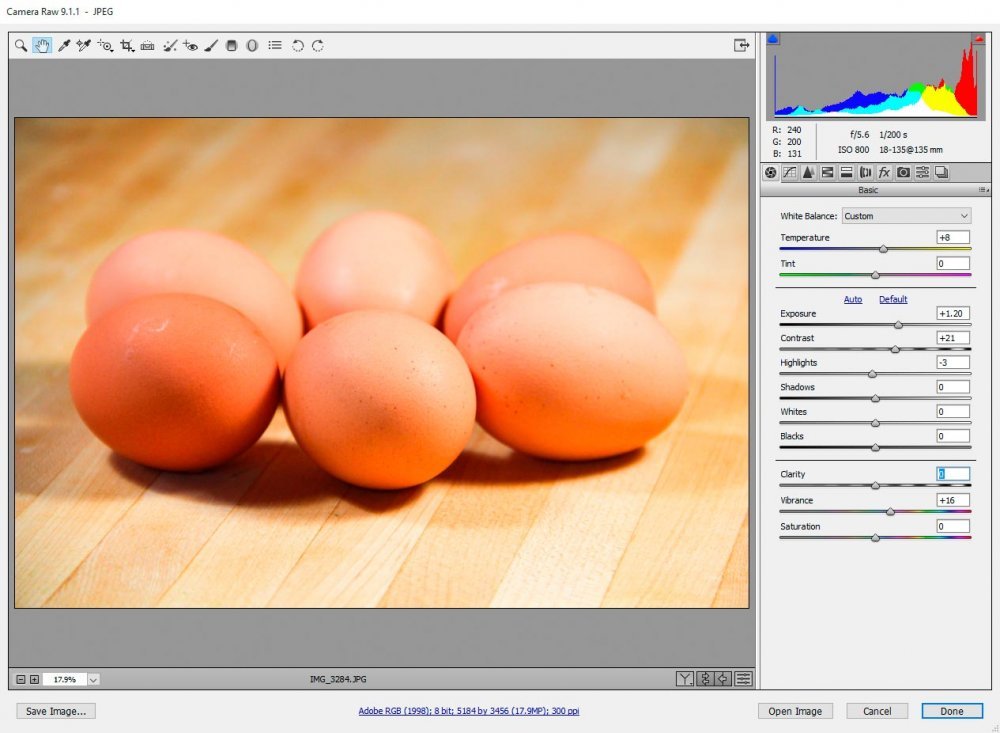
Clarity-wise, the screenshot above shows how this photo came out of the camera. It’s not bad. If I didn’t touch the Clarity adjustment at all, I think it would be fine. As you can see, the slider is centered at 0.
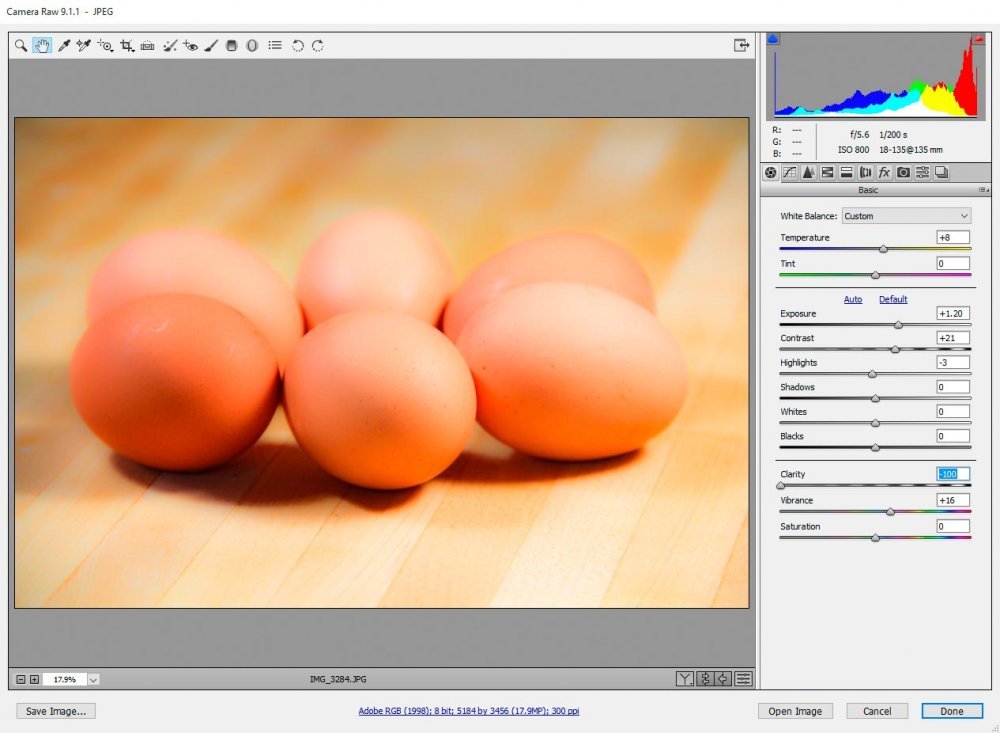
As you can see, I pushed the slider all the way to the left, which really softened the photo. The contrast among the midtones has been reduced and the photo has become more monotonous.
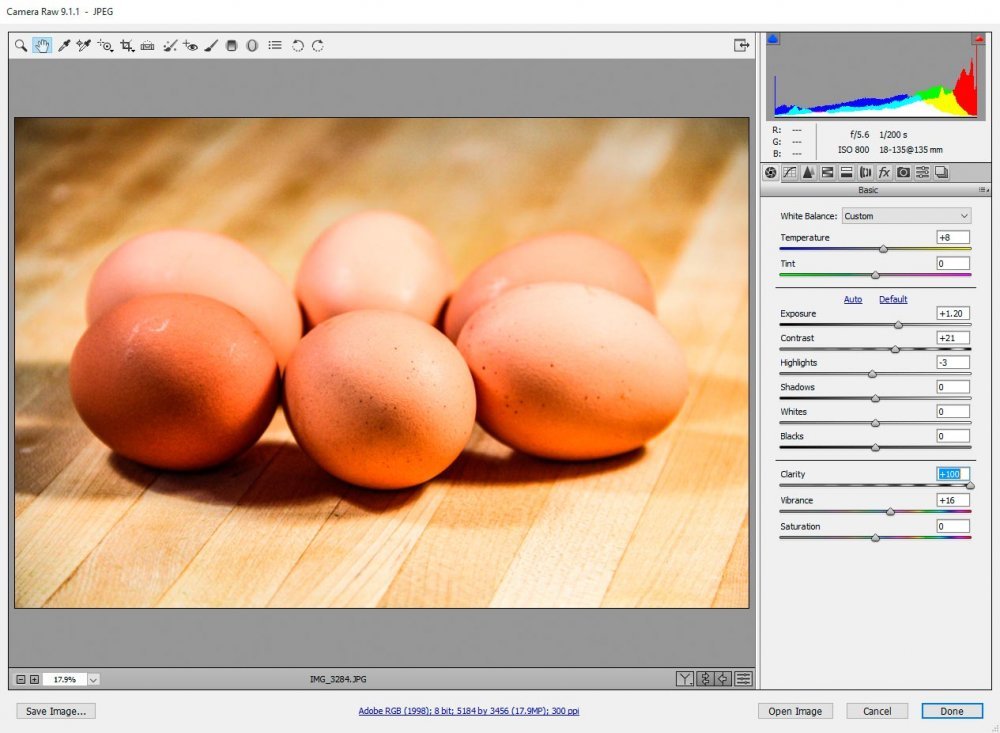
Finally, after pushing the slider all the way to the right and ending up at +100, we can see that the photo has been hardened, or in other words, the midtones have been contrasted.
So, after reviewing the first example photo, I think we would agree that this feature has some uses. If adjusting a photo with this feature makes it look worse, don’t use it. Just leave it be. If you have the type of photo that you may want to soften, such as a portrait or wedding shot, you may want to reduce the Clarity. If you have an action shot, such as skydiving or something you want to make look more adventurous, you might increase the Clarity. Personally, I wouldn’t go to the extreme one way or the other. I like to increase to around +20 with most of my photos.
Example Photo #2
This second photo is perfect to use as an example because even after editing a bit, I still think the dog blends in with the background too much. When I took this shot, I didn’t deepen my depth of field enough, resulting in a photo that has a somewhat noisy background. What I’d like to do is to separate the dog from the background by adding some clarity to him.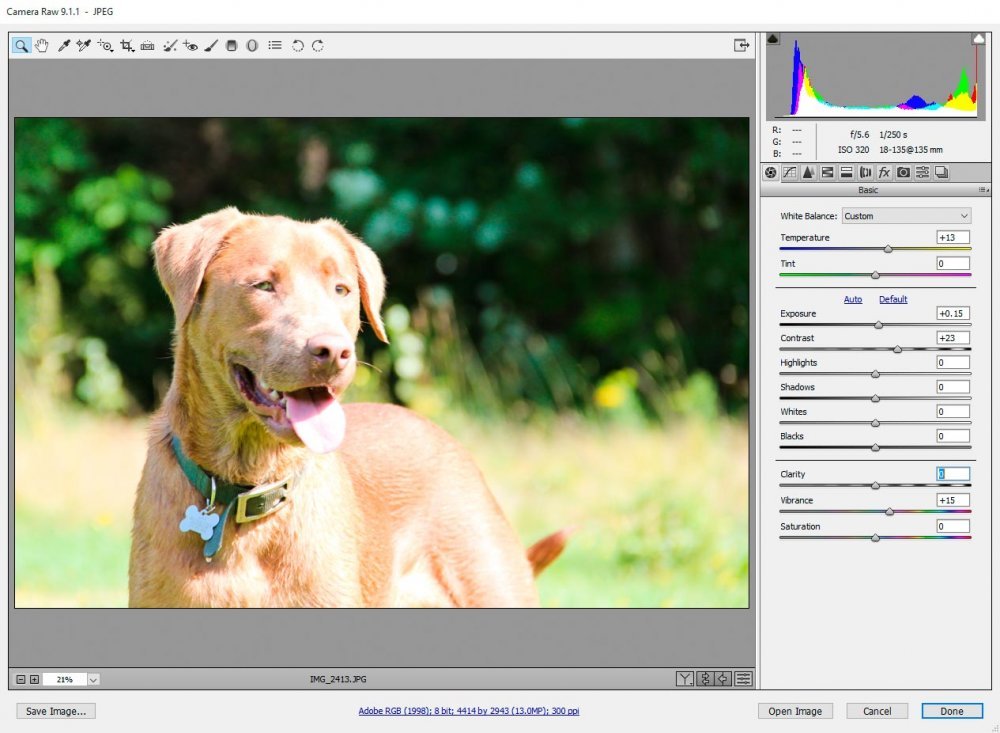
As you can see in the screenshot above, the dog doesn’t look terrible in this unaltered image. It’s just that he could look better.
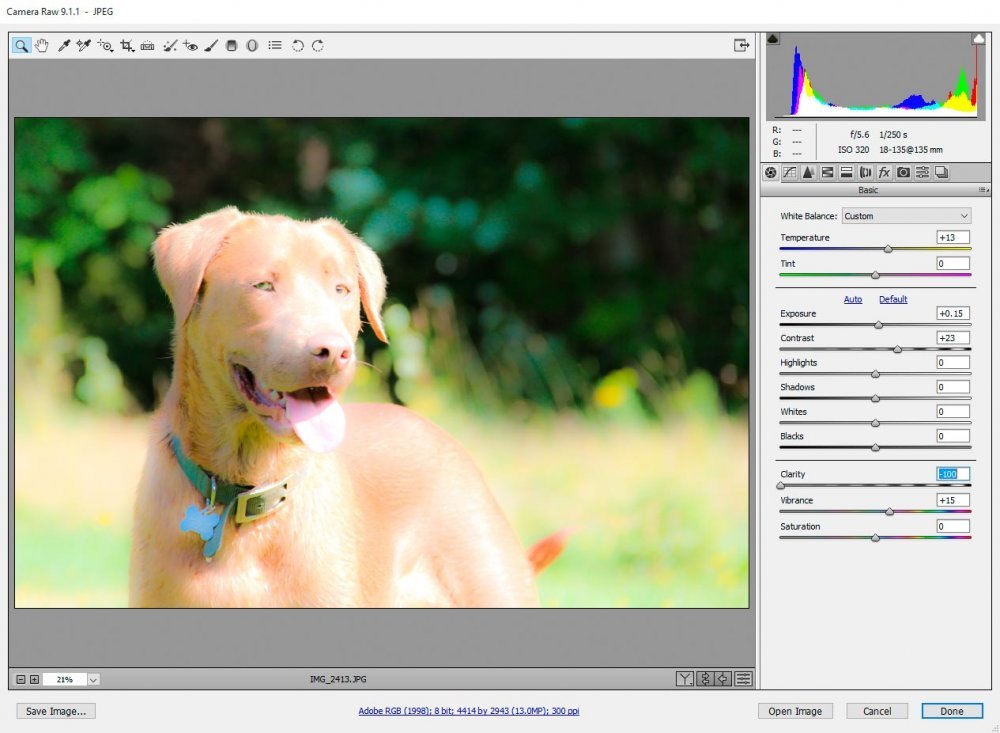
Like I said above, reducing clarity on a subject that doesn’t fit in the “angel” category doesn’t do it any favors. Now, the poor dog looks like he’s standing in some sort of fantasy land.
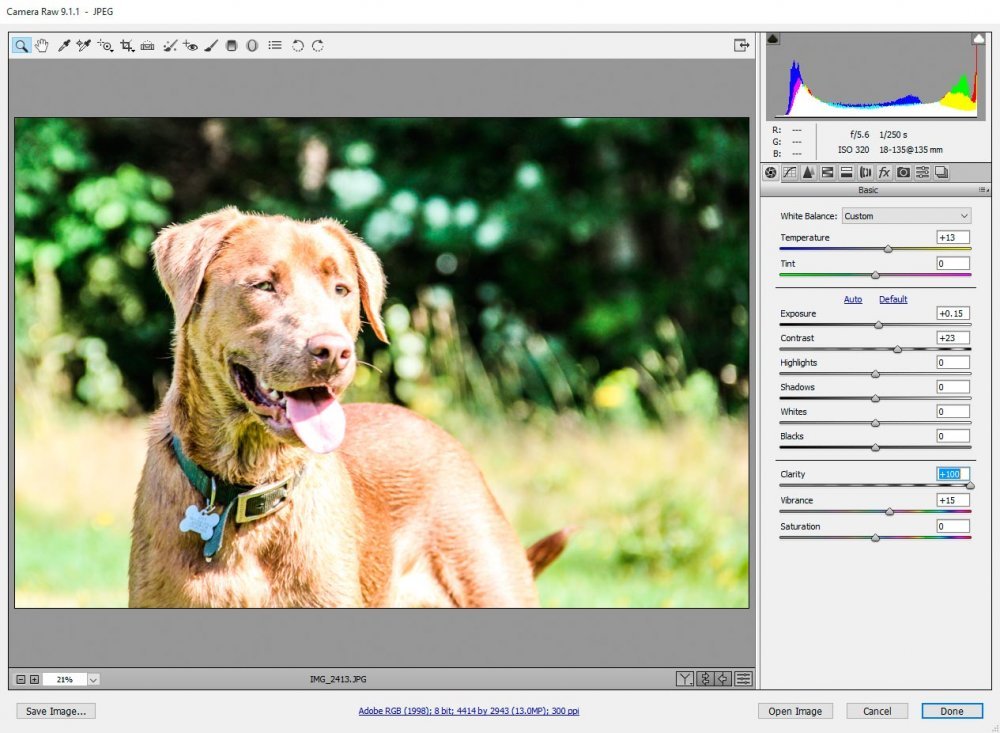
In the previous section, I mentioned that I usually don’t go all the way one way or the other, but in this case, I think maxing out the Clarity looks pretty cool. As you can see by taking a look at the slider in the screenshot above, it’s all the way to +100. It gives the dog sort of an artsy feel and certainly separates him from the background, like I wanted.
Example Photo #3
I took this photo during the past summer. I was messing around with some exposure settings and decided that “painting” would be a good way to pass the time as my shutter waited to close. Basically, to capture the photo below, I set my camera’s shutter speed to around 20 seconds and then ran around our pool waving a flashlight. This is what I ended up with. It was totally accidental and I was only fooling around, but I have to say, this is one of the coolest pictures I ever took. Sometimes that happens.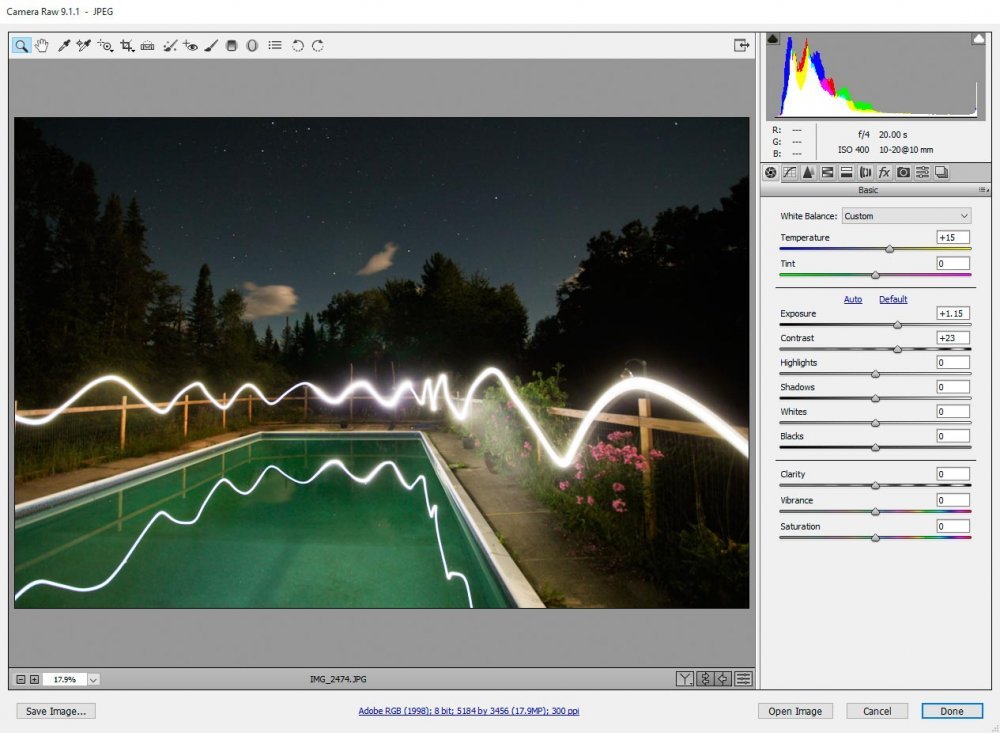
Again, as you can see in the screenshot, I haven’t moved the Clarity slider yet, so this is the original image with only minor adjustments.
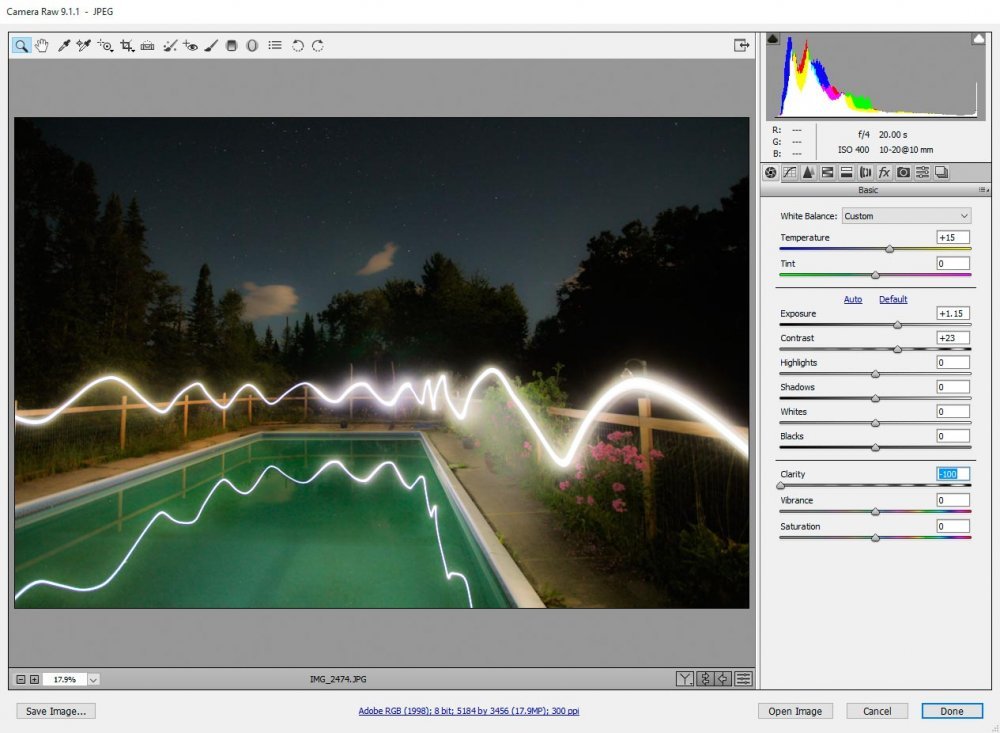
By moving the Clarity slider all the left (reducing clarity), I’ve removed virtually all of the detail in the sky. I also added some glow to the stream of light. I’m not sure that’s exactly what I wanted. Let’s see what happens if I do the opposite.
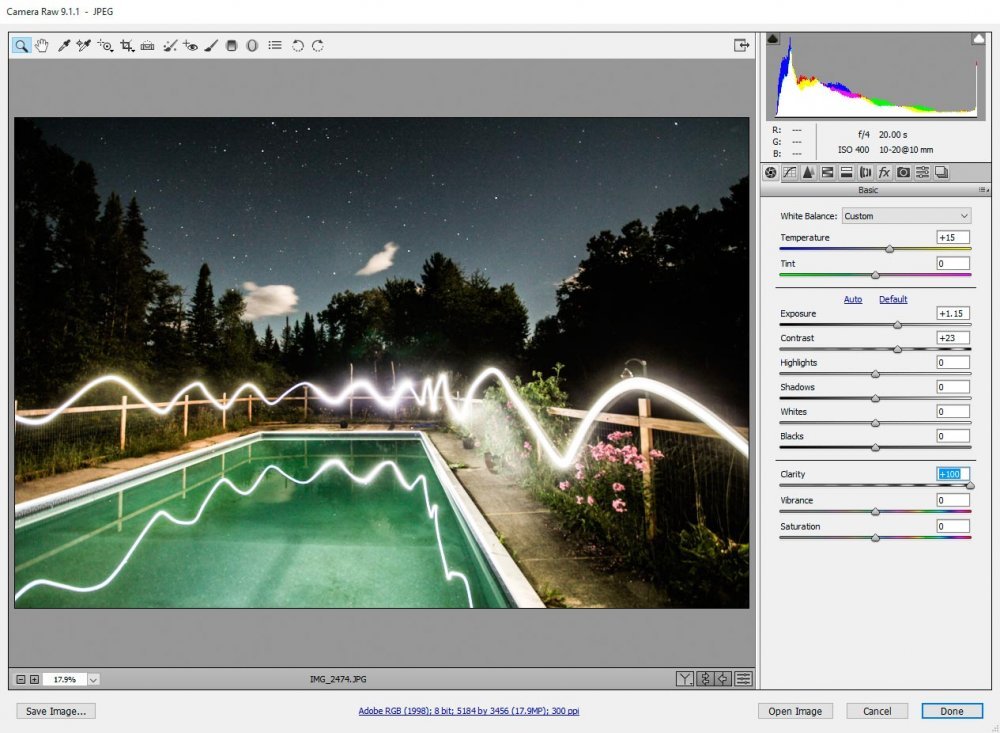
Now that’s what I’m talking about. Even though I wouldn’t advise printing this photo because of all the noise, it sure does make for a neat looking online image. As you can see, by maximizing the clarity in Camera Raw, I’ve really drawn out a lot of color. I also added more detail to the sky than I’ve ever had and the contrast is incredible. Again, I’d keep this photo with this setting.
