LukeLewis
Member
- Joined
- May 7, 2021
- Messages
- 134
- Reaction Score
- 0
- Points
- 21
- #1
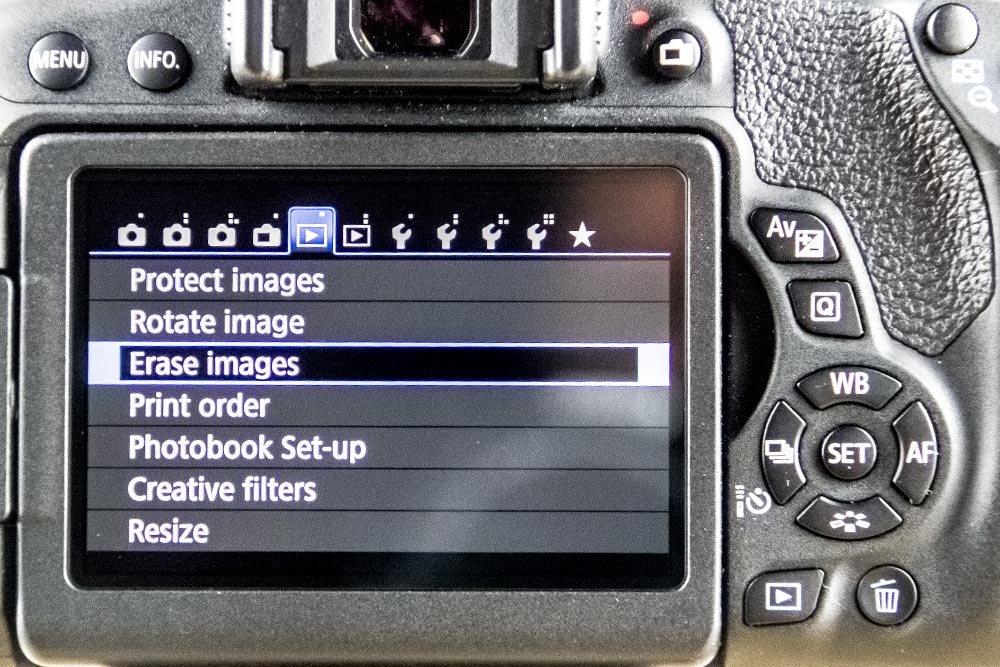
I have a word of warning for you. Don’t use the “Erase All Images” feature that’s found inside your Canon Rebel camera (T2i, T3i, T4i, T5i, T6i and the latest of the Rebel series at the time of this writing, the T7i). I’m talking about all popular Rebel models here, the T2i, T3i, T4i all the way up to the anticipated T7i, which is set to be released into the wild this coming April. The issue with erasing all of the images using the command I just shared above is that it can cause a series of errors inside the database. This is because erasing doesn’t reorganize the necessary image database structure and can eventually result in a fragmented storage device. When fragmented enough, the card will read and write much more slowly and cause errors.
Also, please resist the urge to use your computer to delete images on your card. Doing this is especially bad for the structure of the information found inside the card and can result in an ERR-99 error. The point is, take the advice of photographers all over the world and format your memory card instead. It’s a cleaner and safer alternative.
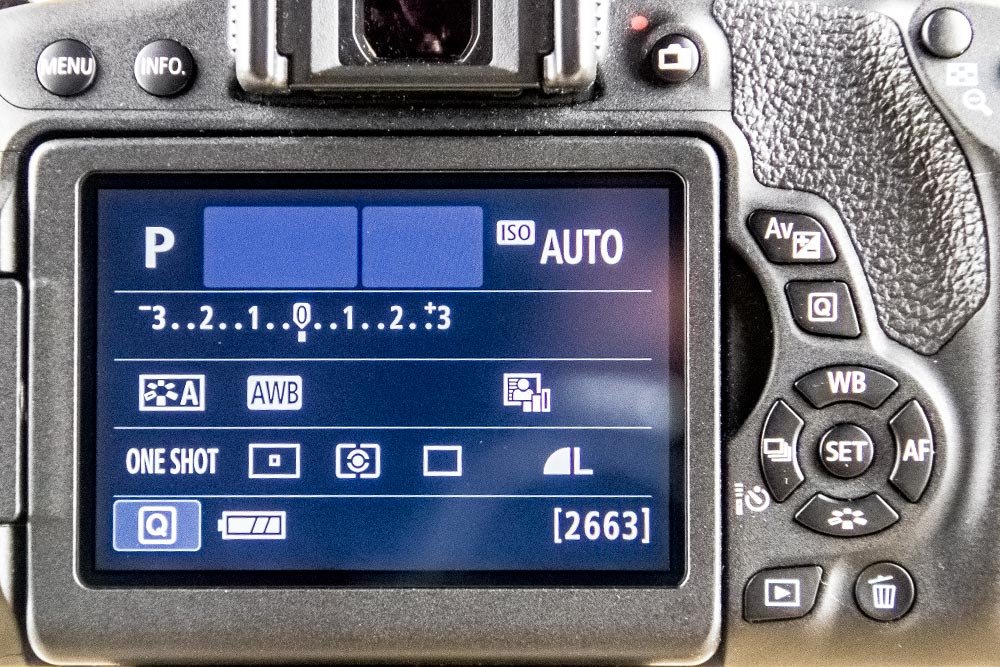
First, turn your camera on so you see the information on the LCD screen.

Then, press the Menu button that’s in the upper left corner of the above screenshot. Once you do this, you’ll see whatever tab you left off on the menu screen appear.

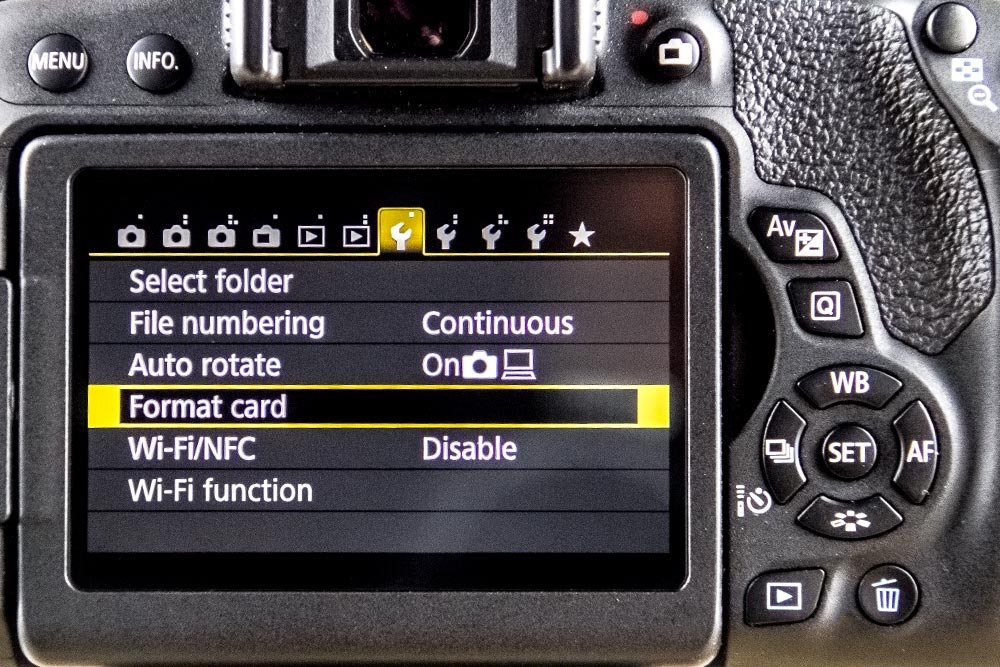
Next, use the left or right arrows to navigate to the first yellow screen. This is the one with the image of a wrench and one dot on the tab.

Use the down arrow to navigate to the area that says Format Card. Then, press the Set button that’s at the right side of the above screenshot. This will bring you into the Format Card menu area.

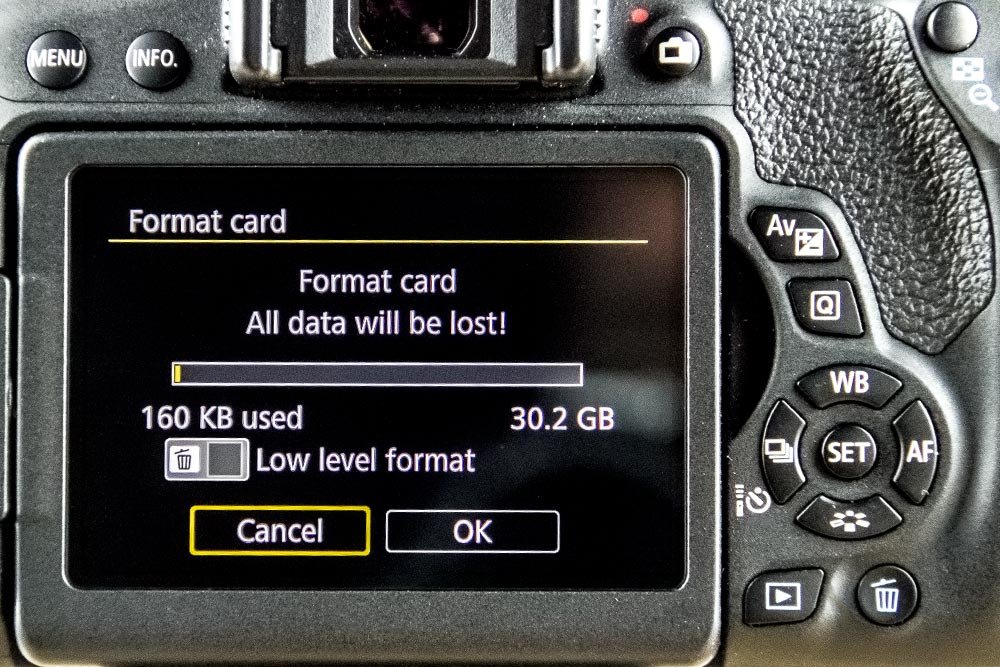
Finally, once on the last screen, use the right arrow key to highlight the OK button. Then, press Set again and the camera will format the card. When it’s finished, the menu will reappear.
Now, I want to mention one thing. If you want to really remove whatever it is that’s on the card, you can use what’s called Low-Level Formatting. To take advantage of this feature, simply continue to navigate down the screen until you highlight the Low level format option. When there, press the Set button to check the box off and then press Set. Finally, press the OK button. Canon says a few things about this option that I’ll share here:
1. Do low-level formatting if the card’s recording or reading speed seems slow.
2. Since low-level formatting will erase all recordable sectors in the card, the formatting will take slightly longer than normal formatting.
3. You can stop the low-level formatting by pressing the Cancel button. Even in this case, normal formatting will have been completed and you can use the card as usual.
That’s about it. Once you format the card, you can head back to whatever it is you’re taking photos of and continue on.
If you have any questions or concerns with this post, please let me know below. Thanks for reading!
Also, please resist the urge to use your computer to delete images on your card. Doing this is especially bad for the structure of the information found inside the card and can result in an ERR-99 error. The point is, take the advice of photographers all over the world and format your memory card instead. It’s a cleaner and safer alternative.
How to Format Media Card in Canon Rebel T6i DSLR Camera
So, what exactly does formatting do? Well, for one thing, it doesn’t delete the actual photographs that are stored on the card. If you were to format and realize you made a mistake later on, you could use a piece of recovery software to retrieve those images. Of course, you shouldn’t take more photos in the meantime. There’s always the risk of writing over the ones that currently reside there. Formatting merely changes the file management information so it appears that there’s nothing left on the card. This is why it’s critically important to be sure you fully format (low-level format) if you ever plan on selling your camera with the card inside of it or selling the card itself. It’s sort of like selling a computer. You better be sure everything is off it or you may receive an unexpected surprise one day. Who knows what that might be, but it’s better to not have to worry about that kind of thing.Formatting Your Media Card
Going through the actual format process is a snap. It only takes a few quick steps. I’ll list those steps below.First, turn your camera on so you see the information on the LCD screen.

Then, press the Menu button that’s in the upper left corner of the above screenshot. Once you do this, you’ll see whatever tab you left off on the menu screen appear.

Next, use the left or right arrows to navigate to the first yellow screen. This is the one with the image of a wrench and one dot on the tab.

Use the down arrow to navigate to the area that says Format Card. Then, press the Set button that’s at the right side of the above screenshot. This will bring you into the Format Card menu area.

Finally, once on the last screen, use the right arrow key to highlight the OK button. Then, press Set again and the camera will format the card. When it’s finished, the menu will reappear.
Now, I want to mention one thing. If you want to really remove whatever it is that’s on the card, you can use what’s called Low-Level Formatting. To take advantage of this feature, simply continue to navigate down the screen until you highlight the Low level format option. When there, press the Set button to check the box off and then press Set. Finally, press the OK button. Canon says a few things about this option that I’ll share here:
1. Do low-level formatting if the card’s recording or reading speed seems slow.
2. Since low-level formatting will erase all recordable sectors in the card, the formatting will take slightly longer than normal formatting.
3. You can stop the low-level formatting by pressing the Cancel button. Even in this case, normal formatting will have been completed and you can use the card as usual.
That’s about it. Once you format the card, you can head back to whatever it is you’re taking photos of and continue on.
If you have any questions or concerns with this post, please let me know below. Thanks for reading!
