Search

Camera Raw as a Filter in Photoshop

  • Thread starter CampFireJack
  • Start date
CampFireJack

CampFireJack

Member
Joined
May 9, 2021
Messages
118
Reaction Score
1
Points
16
  • #1
using-camera-raw-as-filter-inside-adobe-photoshop.jpg

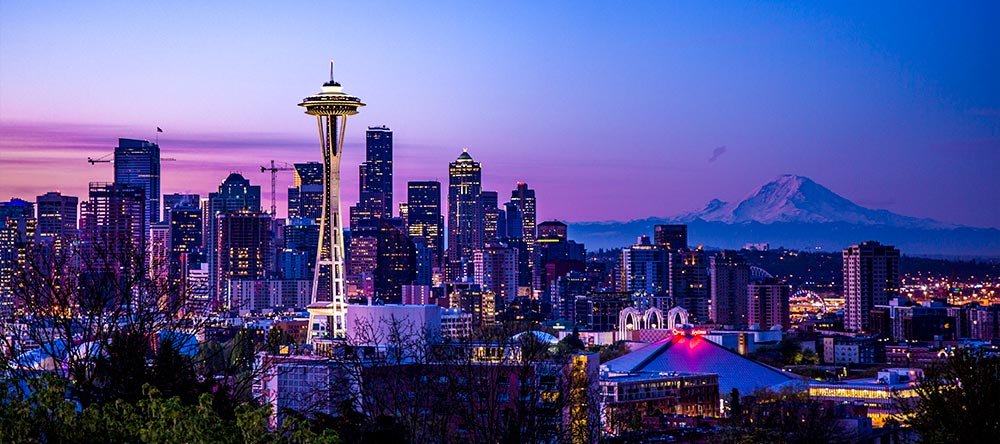
I’ll be honest with you – ever since I began using Camera Raw to adjust my photography, I’ve preferred using that over editing in Photoshop. Don’t get me wrong, Photoshop is awesome in so many ways. It’s just that when I want to color correct and things like that, I definitely prefer Camera Raw. I suspect there is a good majority of folks out there who agree with my sentiment as well. Just look at how the popularity of Camera Raw has grown in recent years. For some strange reason, I just feel like there’s more room in Camera Raw. I also feel as though Camera Raw was meant for this type of editing.

Do you want to know something really, really cool? Well, did you know that you have the ability to edit photos with Camera Raw right inside of Photoshop? You didn’t? In that case, you’re going to love this post. I’m going to show you exactly how you can launch Camera Raw as a filter inside of Photoshop. And the really awesome thing is that any edits you make will reside in a new layer, meaning, they’ll be non-destructive. If you make some alterations and then decide you don’t want them, you can simply delete the layer. And what’s even cooler is that you can edit with Camera Raw at any time. It’s so easy it’s stupid.

My Photo​

Let’s take a look at a sample photo that I already opened in Photoshop. By now, you’re aware of the many methods of opening photos in this application. If you aren’t, I suggest you read through this post:

The Various Methods of Opening Files in Adobe Photoshop

Okay, now that that’s out of the way, let’s take a look at my photo.
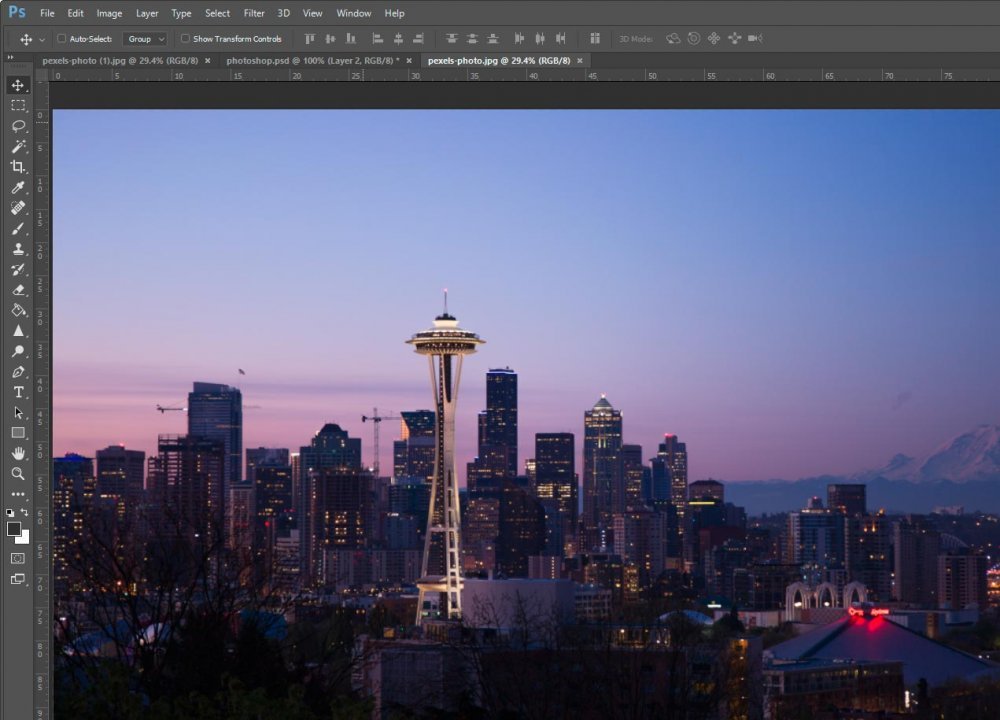
example-photo.jpg

I know you can’t see the entire photo, but I think you get the idea. I’m working on a 27″ monitor, so it’s sometimes tough to arrange things perfectly.

Now, you probably already know that Photoshop has many tools to color correct photos. When I use these tools though, I get the sense that my photos become muddy. It’s difficult to explain, but I like the way Camera Raw keeps everything crisp and clear. I also like Camera Raw’s power. It means business.

Duplicate Layer​

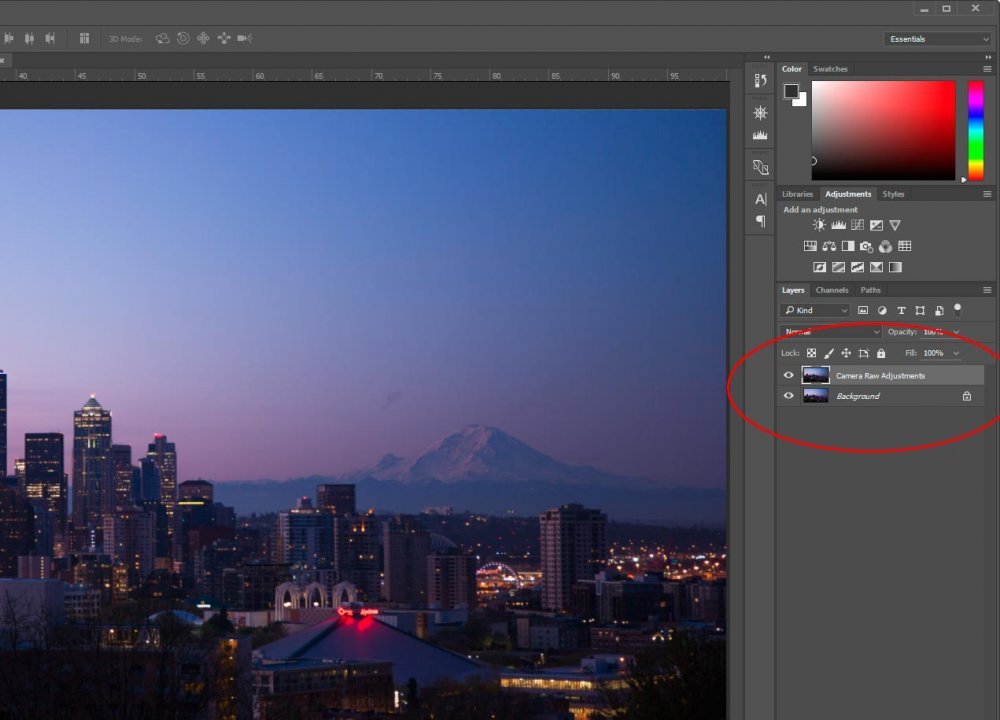
This step is extremely important. If you want to keep any edits that you make inside Camera Raw non-destructive, you need to duplicate the layer you wish to edit. In this case, I’ll go ahead and duplicate my background layer and rename it Camera Raw Adjustments. Want to learn how to duplicate a layer? If so, check this post out:

Working With Layers in Adobe Photoshop

creating-duplicate-layer-adobe-photoshop.jpg

Camera Raw as a Filter​

Next, I’m going to head up to the Filter > Camera Raw Filter menu item and select it. Important: Make sure the layer to want to edit is selected in Photoshop before you take this step. In my case, I have the duplicate layer I just created selected.
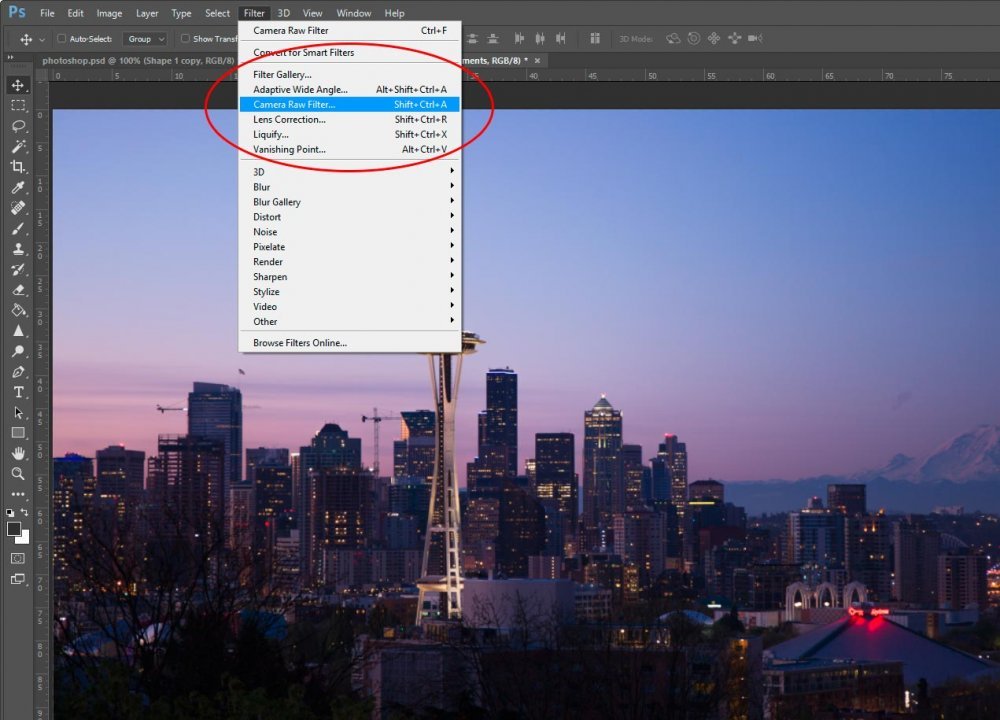
camera-raw-filter-menu-item-adobe-photoshop.jpg

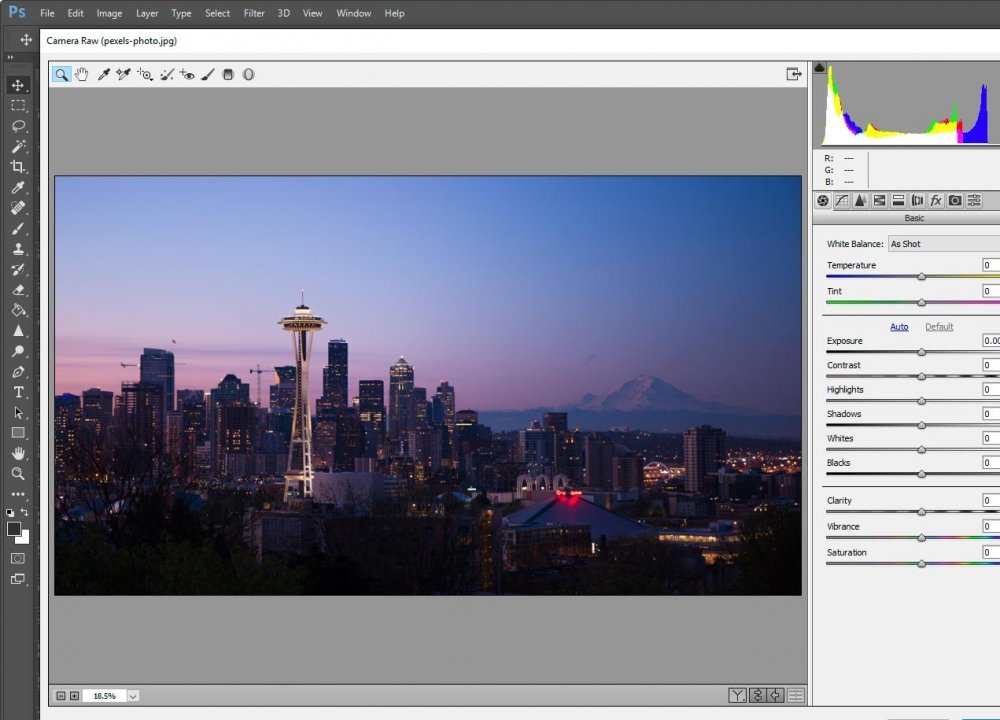
Once I do that, Adobe Camera Raw will launch on top of Photoshop.
camera-raw-inside-of-adobe-photoshop.jpg

Editing Inside Camera Raw​

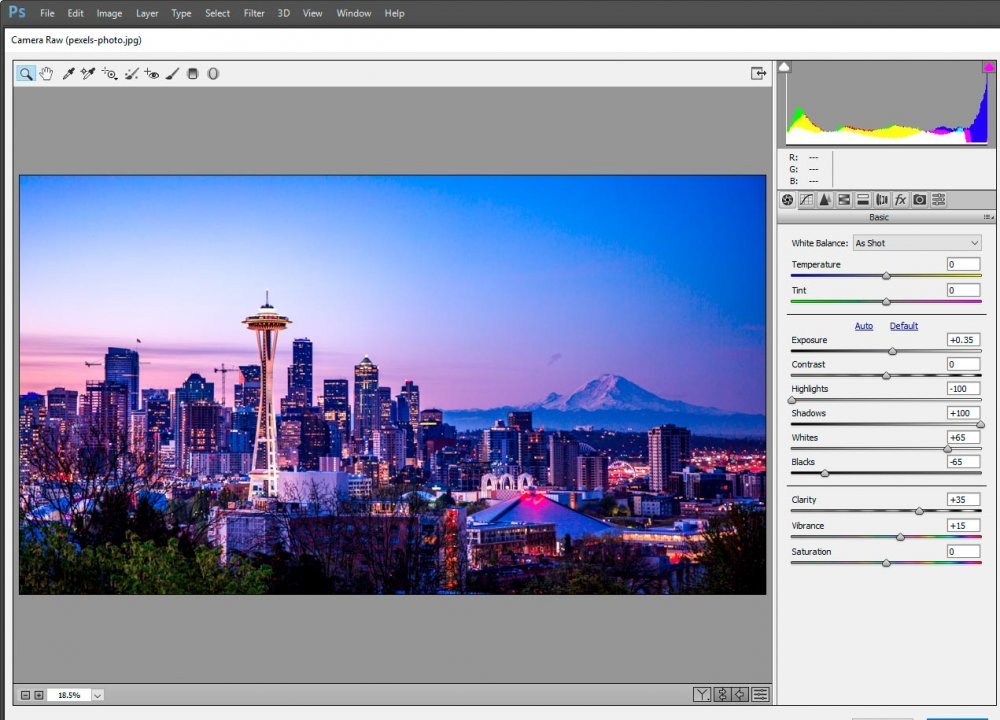
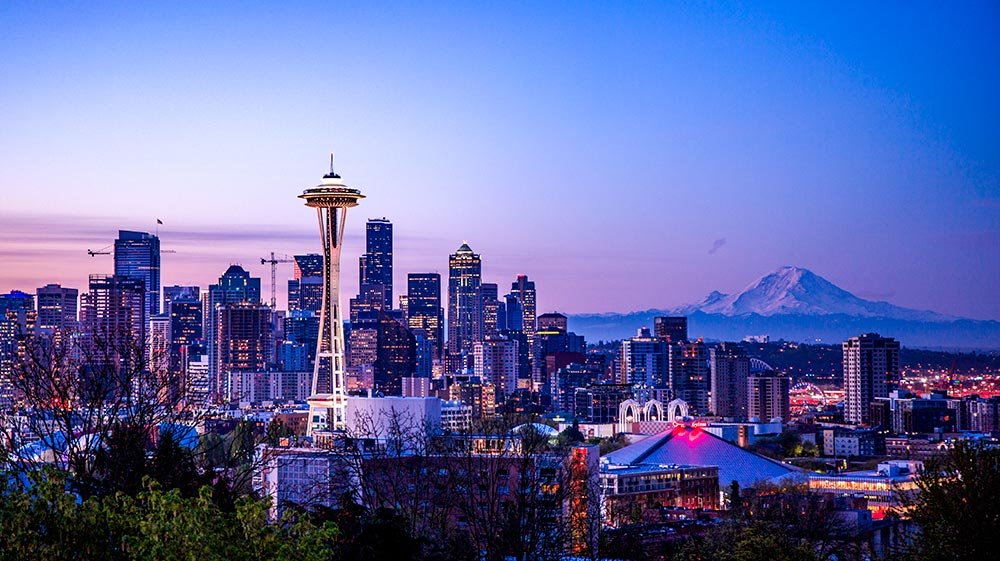
As you may have noticed, the photo I’m working on is dull. It looks nothing like the more saturated photo I used as the lead-in to this post. While I’m not going to get into editing with Camera Raw too much in this post (if you’re interested in this, please visit the Camera Raw forum), I will push some sliders around and tell you what I did.

Inside Camera Raw, in the Basic panel, I increased Exposure to +0.35, decreased Highlights to -100, increased Shadows to +100, increased Whites to +65, decreased Blacks to -65, increased Clarity to +35 and increased Vibrance to +15.

In the HSL/Grayscale panel, under Hue, I reduced Oranges to -100. This made some of the lighter yellows more red. In the same panel under Saturation, I increased Greens to +100 and increased Blues to +35. This gave the photo some additional richness.

Finally, in the Effects panel, I increased Dehaze to +10. This is sort of like Clarity, but it removes haze inside a photo. There wasn’t any here, but the effect still clarified the image.
editing-photo-inside-camera-raw.jpg

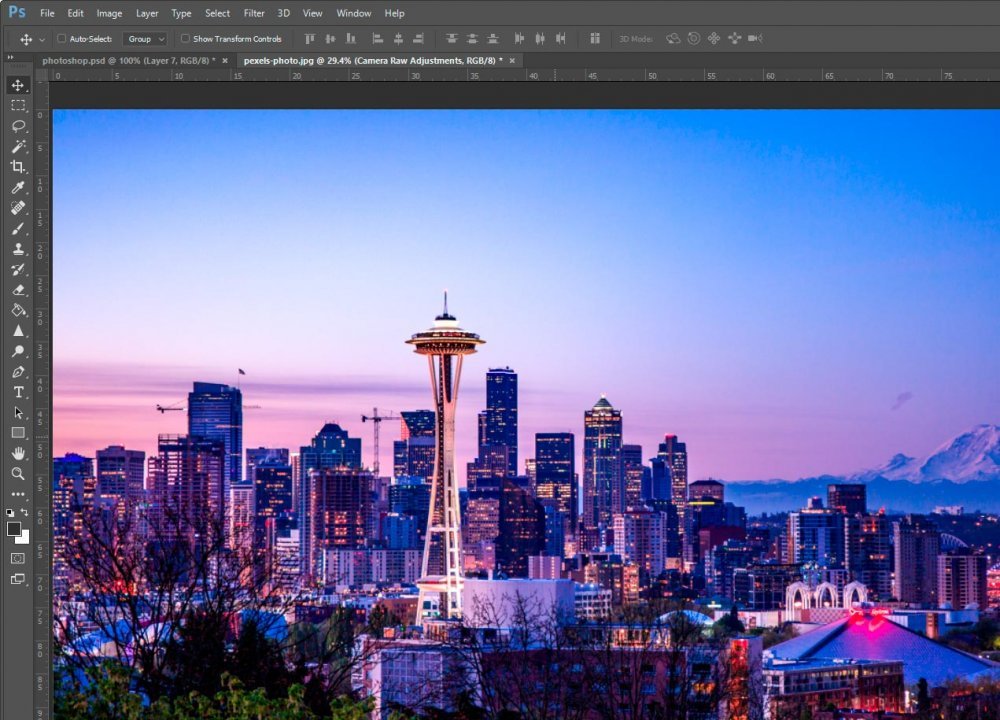
When I was finished, I clicked on Okay and Camera Raw closed out. I returned to Photoshop. My photo brightened substantially.
camera-raw-edited-photo-in-adobe-photoshop.jpg

Before & After​

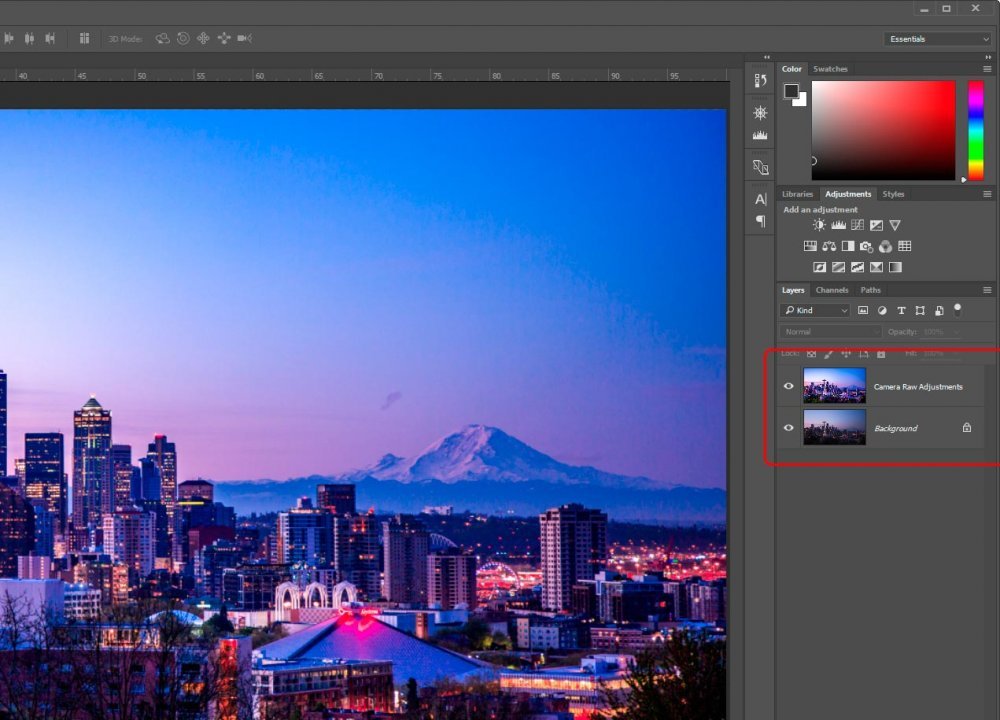
I’m not sure if you can see it here, but the two layer thumbnails are now quite different. I enlarged the thumbnails by right-clicking on them and choosing Large Thumbnails to make them more visible.
before-after-layers-adobe-photoshop.jpg

If I click the small eye icon that’s all the way to the left in the Camera Raw edited layer, all my adjustment will disappear and I’ll see the original photo once again. This is a very powerful feature and I hope you can see the possibilities.

It’s important to note that just because we can create a new layer in Photoshop and edit that layer in Camera Raw, there’s no reason in the world that we can’t continue editing in Photoshop. We can even edit the Camera Raw layer further with some tools in Photoshop. This is where your own creativity and experience will truly shine. It’s all about experimentation and practice.

I hope you enjoyed this post and got something out of it. If you have any questions, please ask below. Thanks!
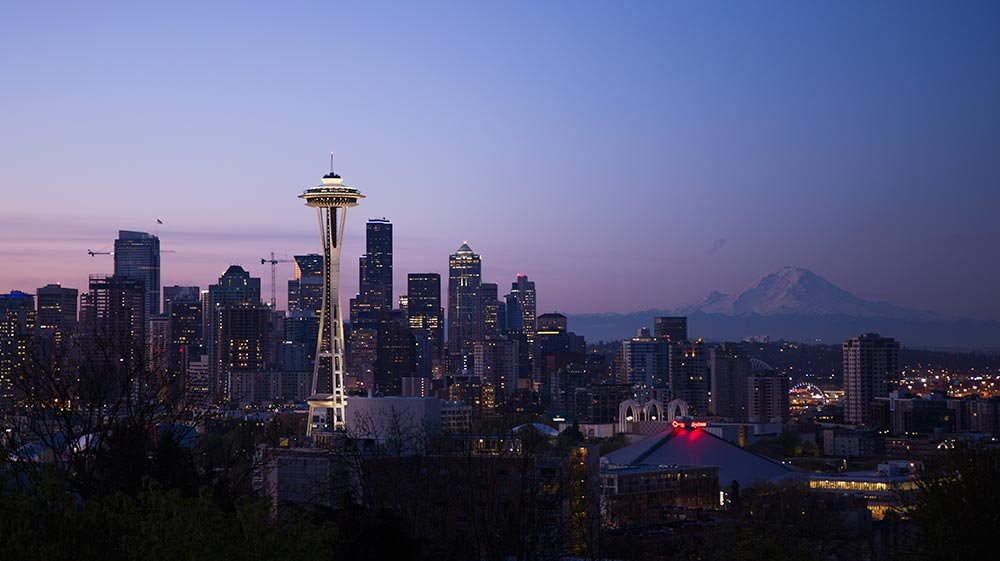
dull-city-skyline.jpg

colorful-city-skyline.jpg
 
CampFireJack

CampFireJack

Member
Joined
May 9, 2021
Messages
118
Reaction Score
1
Points
16
  • #2

Selections & Camera Raw as a Filter in Adobe Photoshop​

Every so often, I come across a tip that is so awesome that I can’t wait to share it with you. I recently discovered one of these tips and today is the day you’ll learn about it. That is, of course, if you aren’t already aware of its existence.

In previous posts, I wrote about how you can use Adobe Camera Raw as a filter while working in Photoshop. This is a huge feature that can truly come in handy on so many levels. If you’re interested in reading my earlier posts, please click through below.

Using Camera Raw as a Filter Inside Adobe Photoshop

How to Create Actions with Camera Raw Inside Adobe Photoshop

Combining a Smart Filter with a Camera Raw Action in Adobe Photoshop

In today’s post, I’m going to let you in on a little secret. While you can easily convert a layer to a Smart Object and then use the Camera Raw Filter feature in Photoshop to edit that entire layer in Camera Raw and, in return, create a Smart Filter, you’re not limited to that set of circumstances. What you may not already know is that while editing the whole Smart Object layer is the most common, you’re also able to edit just part of the layer with the Camera Raw Filter. That’s right; you can make a selection in a layer with any of the selection tools inside of Photoshop and use the Camera Raw Filter to edit just the contents inside of that selection. What’s outside of the selection won’t be altered in any way.

So, if you’ve gotten used to jumping back and forth between Photoshop and Camera Raw, you’ll be pleased to know that you can add an entirely new dimension to your workflow. You can now limit what you edit in Camera Raw, which makes life a lot easier.

Demo Photo​

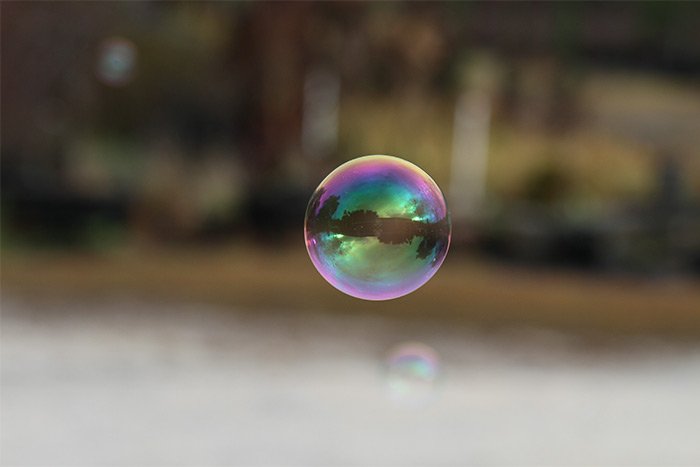
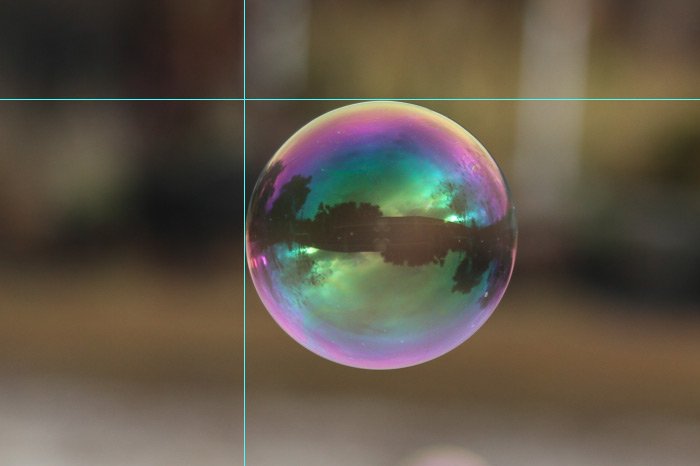
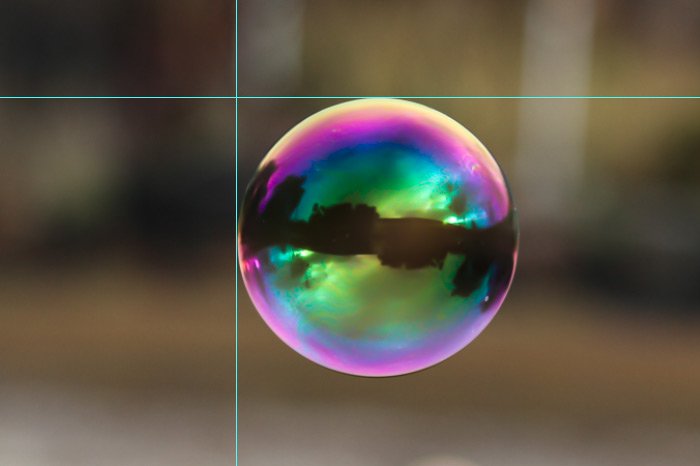
For this post, I’ll be using a photo of a bubble. This is the best photo I could locate that would offer a clear visual into what I’m trying to accomplish.

bubble.jpg

Converting to a Smart Object & Making a Selection​

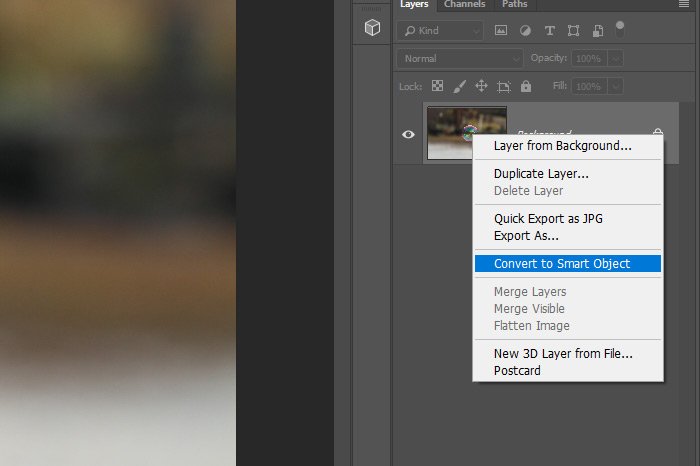
The photo is already opened up in Photoshop. I’ll go ahead and right-click on the layer and choose Convert to Smart Object from the menu that appears. Doing this will protect the layer and will offer non-destructive attributes to any changes I make.

convert-to-smart-object.jpg

Once that’s done, I’ll go ahead and pull some guides down from the rulers along the edges of the workspace. Since I’m working with a perfect circle that I’d like to select, I’ll place a guide along the top edge and the left side edge of the bubble.

guides.jpg

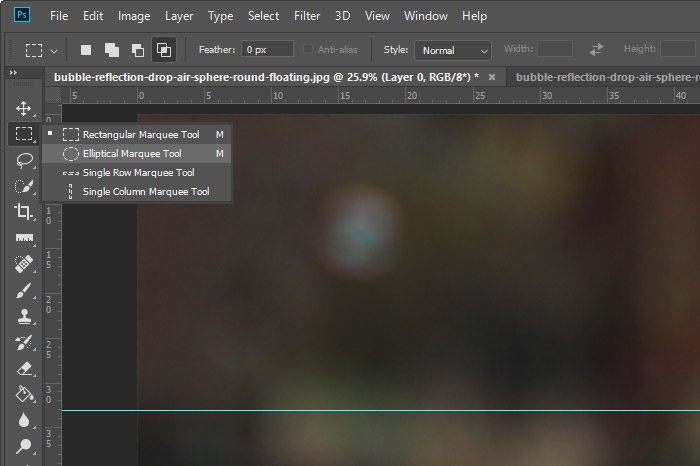
Next, I’ll use the Elliptical Marquee Tool to create my selection.

elliptical-marquee-tool.jpg

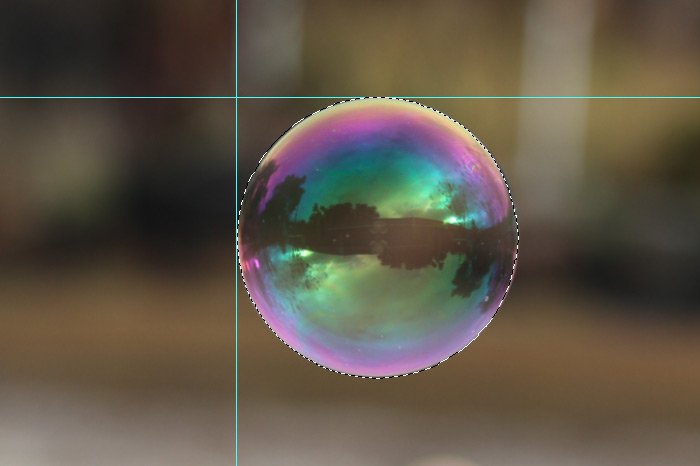
I’ll click on the top left corner of the guides (where they intersect), hold down the Shift key on my keyboard to lock in the circle shape and then I’ll drag down and across until the entire bubble is enclosed in the selection. After that, I’ll let go and the selection will be complete. Also, just to let you know, when dealing with perfectly symmetrical shapes such as circles and squares, the expanding and contracting features can help a lot. Please read my previous post for more information on that.

How to Expand & Contract Selections For Cool Effects in Adobe Photoshop

Anyway, here’s my result. The elliptical selection in all its glory.

elliptical-selection.jpg

Using the Camera Raw Filter to Edit the Selected Area​

Okay, now here’s the cool part. Under normal circumstances, after moving this layer into Camera Raw, the entire image would be affected by any edits I make in that application (plugin, to be more precise). Since I made a selection though, only the area inside of that selection will be affected. Let’s take a look.

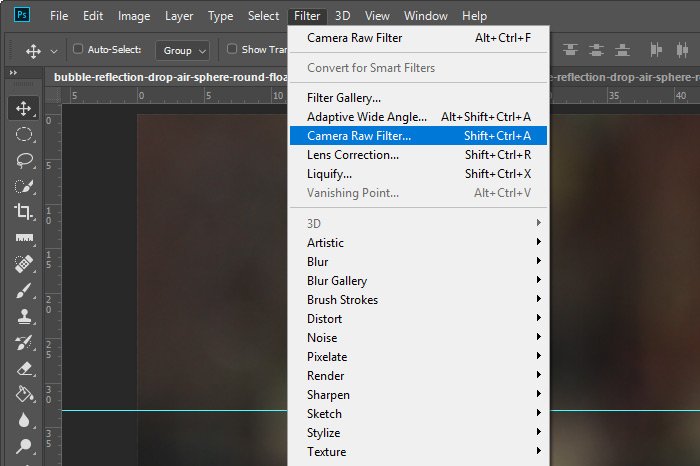
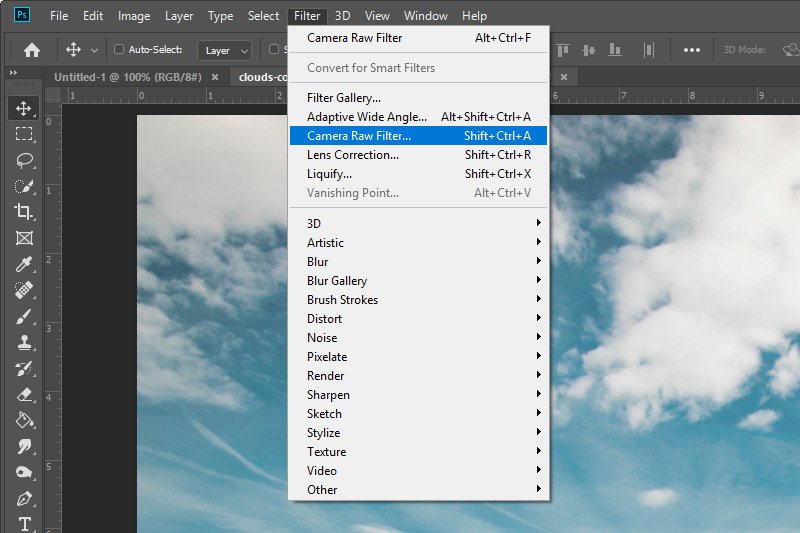
I’ll head up to the Filter > Camera Raw Filter and click.

camera-raw-filter.jpg

Once I do this, the Camera Raw plugin will open up, which is basically Camera Raw itself. Inside of Camera Raw, just for this example, I’ll adjust the Contrast, Clarity, Dehaze, and Noise Reduction. I’d like to make the bubble stand out more while being a bit more smooth looking. When I’m finished making those changes, I’ll click the OK button in Camera Raw and I’ll return to my workspace in Photoshop. Let’s check out the bubble now.

edited-bubble.jpg

That looks much more clear. And just as a reminder, I could have made just about any edit I wanted to inside of Camera Raw.

Now let’s take a look at the Layers panel in Photoshop to see what we’re dealing with.

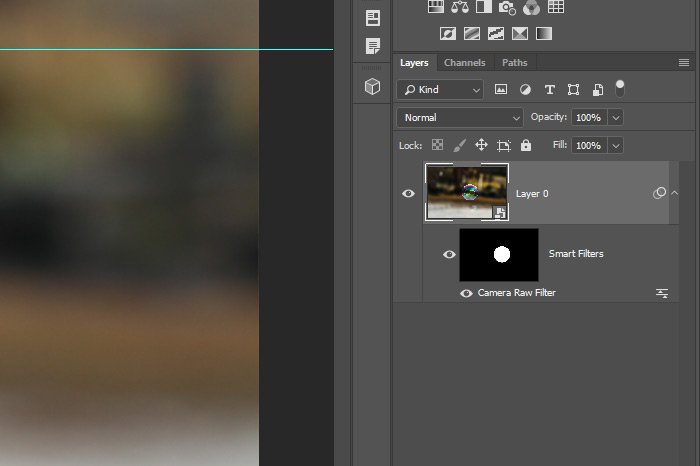
smart-filter-layer.jpg

I can see a Smart Filter layer, which was expected. Inside of that layer, I see a mask, which is a surprise. By making a selection in Photoshop before I jumped over to Camera Raw, I was essentially creating a masked area to edit. Working together, Camera Raw and Photoshop created that mask, which is completely editable at any time. If I made a mistake with my initial selection, I could adjust it after the fact by painting parts of the image either black or white (to either conceal or reveal). And that’s that. A new way to edit selected areas in Adobe Camera Raw via Photoshop. That’s totally cool.

——

I hope I clearly explained how to edit selections by using the Camera Raw Filter inside of Photoshop. If you have any questions or concerns regarding this post, please leave them in the comment section below. Thanks for reading!
 
CampFireJack

CampFireJack

Member
Joined
May 9, 2021
Messages
118
Reaction Score
1
Points
16
  • #3

Dehaze & Camera Raw as a Filter in Adobe Photoshop​

There are so many ways that I like to work on editing photographs and I am so glad that the Adobe applications I use have twenty different ways to do everything. Sometimes I prefer to start off in Camera Raw to do most of my photo editing. Once finished in that program, I’ll move into Photoshop to perform a few more tweaks. When I’m completely done, I’ll export the final image and use it however I wish. Other times, I’ll open the photos right into Photoshop and do some cropping and image size work and after that, I’ll jump into Camera Raw for things more related to “post-processing.” You know, exposure, contrast and that sort of stuff. Any way I look at it, I’ve got a whole bunch of workflows at my fingertips. All I need to do is decide which direction to take.

In today’s post, I’d like to work through a quick project using the aforementioned editing programs. I’ll begin with a photograph in Adobe Photoshop and then I’ll move into Camera Raw. Once inside Camera Raw, I’ll use the Dehaze tool to remove some softness and haziness that’s covering part of the demo image. After I complete that, I’ll jump back into Photoshop, just as if I had never left.

This type of workflow is extraordinarily helpful if you ever find yourself in Photoshop at the wrong time and you need to do some editing that only Camera Raw can do. I’ll show you can easy way to transition between both applications.

Demo Photo​

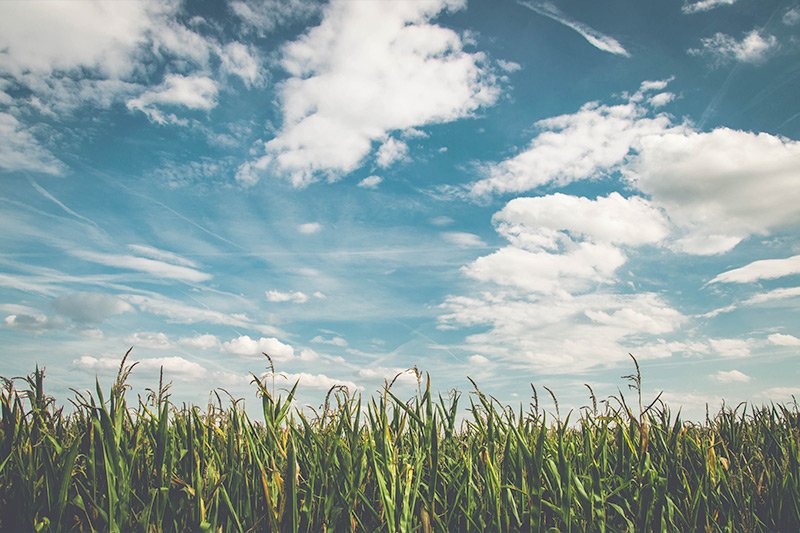
For this post, I’ll be using a great, but hazy, photo of some grass and the sky. While this picture is nice in its own right, I’d rather have the lower portion of it clear as opposed to sort of foggy.

hazy-photo.jpg

Using Camera Raw as a Filter​

Okay, I’ve already gone ahead and opened up the image is Photoshop. I haven’t done any editing to it, so it’s still fresh. What I’d like to do right now is move the image over to Adobe Camera Raw so I can get some of the haze out of there. To accomplish this, I’ll right-click on the photo layer in the Layers panel and then choose Convert to Smart Object from the menu that appears. From there, I’ll head up to the top of the application and choose the Filter > Camera Raw Filter menu option.

filter-camera-raw-filter.jpg

Once I do that, I’ll be inside of Camera Raw with the image.

Using the Graduated Filter​

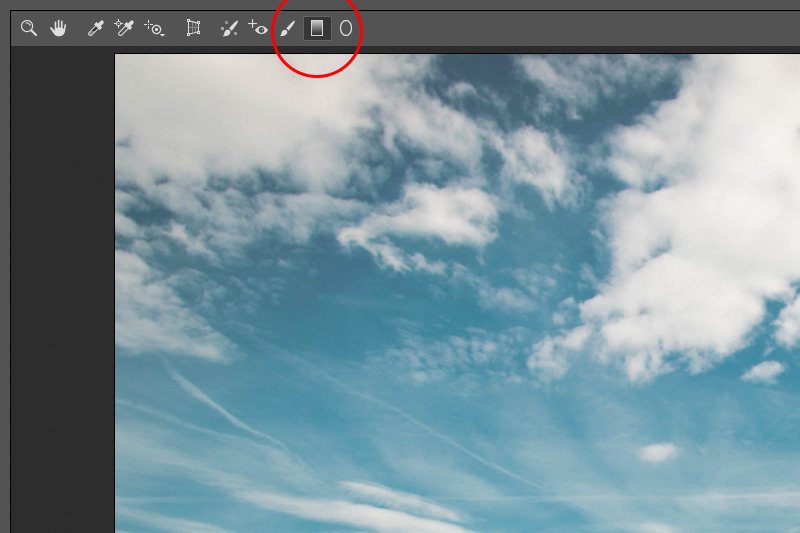
Since I only want the grass dehazed and not the entire image, I feel the best route to take is to use the Graduated Filter tool in Camera Raw. So, I’ll head up to the top toolbar and click on that option.

graduated-filter.jpg

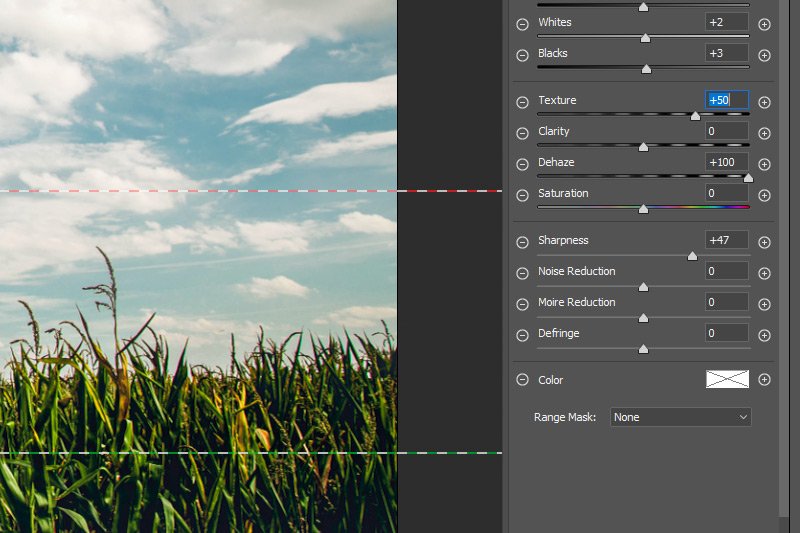
From here, I’ll draw my filter from the bottom of the picture to about a quarter of the way up the image, so the dashed red line is on top and the dashed green one is beneath that. I’ll then make sure all the sliders are set to zero and finally, I’ll push the Dehaze slider all the way to the right to +100 and the new Texture slider to the right to +50. Heck, I’ll even push the Sharpness slider to the right to +47.

texture-dehaze.jpg

When I like the way the grass appears, I’ll click on the OK button to return to Photoshop.

How To Use Multiple Graduated Filters in Adobe Camera Raw

Adobe Camera Raw Clarity vs. Dehaze: A Closer Look

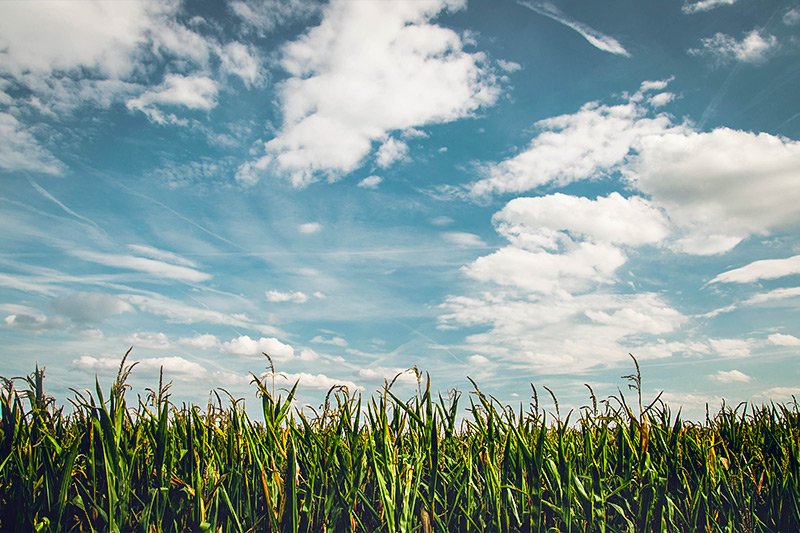
This is the final photo. Not bad, right? It only took about 30 seconds to complete.

dehazed-image.jpg

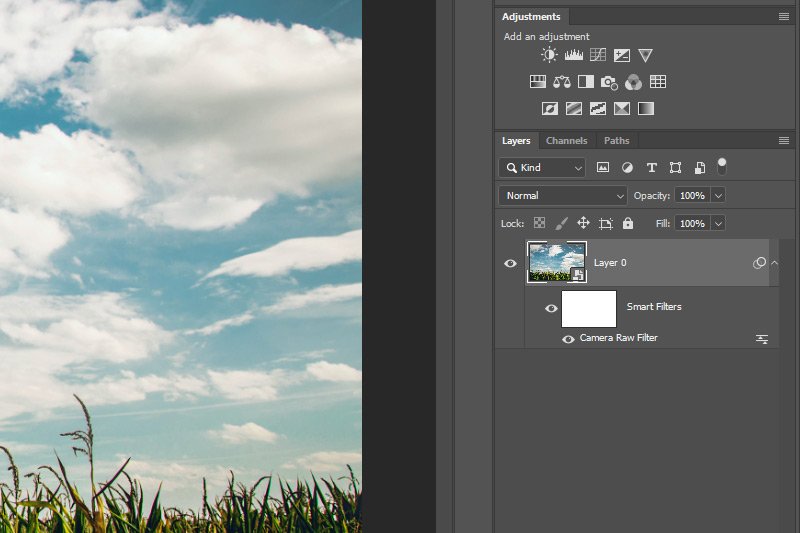
The point is that this file was edited non-destructively. Any time I want to return to Camera Raw to tweak what I just did, I can. All I need to do is double-click on the Camera Raw Filter mini-layer under the Smart Object in the Layers panel. That will bring me back to Camera Raw, where my edits will still be live and totally editable.

smart-object-layers-panel.jpg

And that’s it! If you have any questions, please ask down below. Thanks for reading! By the way, I’ve got some great stuff going on in the forum. There are tons of really great articles in the photography section, if you’re into that.
 
CampFireJack

CampFireJack

Member
Joined
May 9, 2021
Messages
118
Reaction Score
1
Points
16
  • #4

Problems When Using Camera Raw as a Filter in Adobe Photoshop​

I have used Camera Raw as a filter in Photoshop for a while now and everything has been progressing smoothly. As I work with more complex files that call for more than one filter though, I’ve been experiencing a few issues. For instance, let’s say I convert my image layer into a Smart Object in Photoshop and then apply the first filter. That’s fine. That’s what I’m used to. But let’s say that I go ahead and apply another filter and would like to mask away part of the effect of the second filter. The problem is that when I mask the effects of that second filter away, the first one gets masked away as well. That’s not what I want.

The problem here is that because I created a Smart Filter, all of the filters I add to the image are using the same mask, so any time I brush something away with in the mask, every single filter that falls under that mask is affected, and vice-versa. This is less than ideal.

I’m going to show you a workaround to this problem down below. It has to do with using a very long keyboard shortcut to duplicate a layer. Once that layer is duplicated, I’ll show you how you can apply different filters to it. I’ll work through an example to illustrate this.

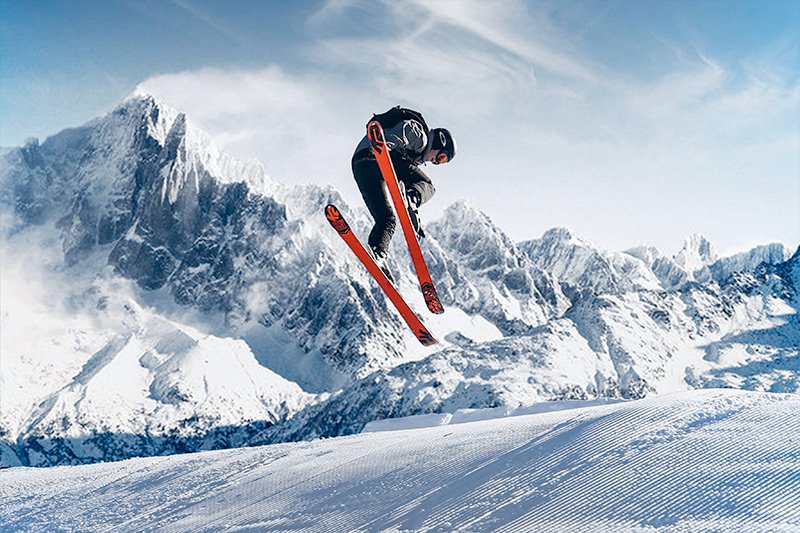
This is the photograph I’ll be starting out with. My goal is to apply two different layers to first add some sunlight and second to add some warmth. Right now, the image looks a bit sterile to me.

skier.jpg

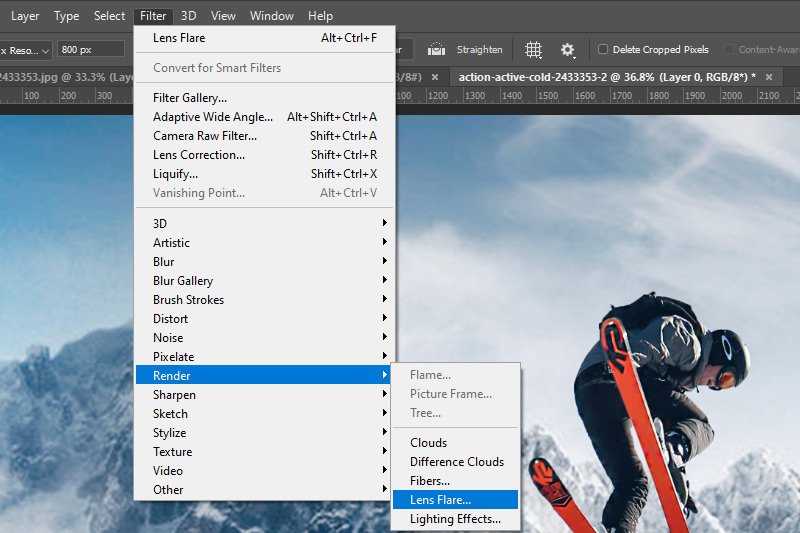
To start out with, I’ll open the photo in Photoshop. Then, I’ll right-click on the image layer in the Layers panel and choose the Convert to Smart Object option. Once the layer is a Smart Object, I’ll head up to the Filter > Render > Lens Flare menu item and click.

filter-render-lens-flare.jpg

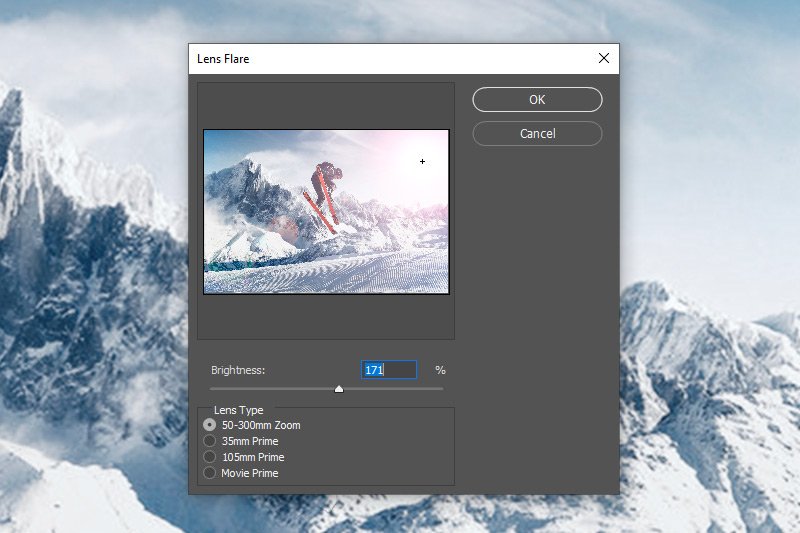
When the Lens Flare dialog box appears, I’ll make my adjustments so it looks like the sun is in the photo. Currently, we can see the glare from the sun and the shadows caused by the brightness, but no sun. I think having the sun in the shot will add drama. When I’m finished making my adjustments in the dialog box, I’ll click the OK button to apply the changes.

lens-flare-dialog.jpg

This is the resulting image. Boy, that’s a lot of sun.

sking-sun.jpg

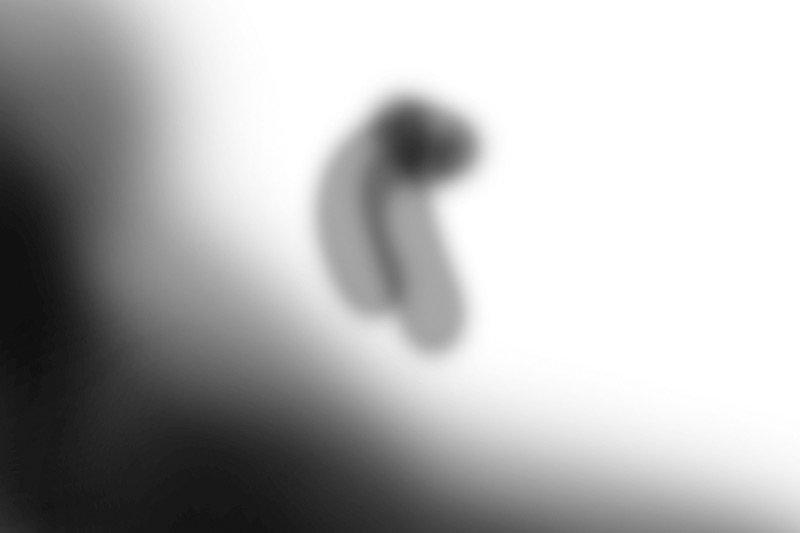
As a matter of fact, it’s too much sun for this photo. So, with that in mind, I’ll brush some of it away using the mask that’s supplied with the Smart Filter. I’ll click on the mask in the Layers panel to activate it and then I’ll use a soft brush of varying sizes and the color black to mask away where I don’t want to see so much brightness. This is how the photo has changed from my masking.

masked-filter.jpg

Can you see how the skier isn’t so washed out and how the bottom corner of the image is less affected by the sun? This is an enlarged version of the mask, so you can see where I painted. I set the brush to 50% so the effects weren’t so intense.

enlarged-mask.jpg

The filter is affecting anywhere it’s white and isn’t affecting anywhere it’s been painted black.

Now that I’ve added some sun to add drama, I’d like to add some overall edits by using the Camera Raw as a Filter option. The problem is, if I go ahead and use that filter now, everything in the image that’s not affected by my masking will enjoy the effect, but where I painted black in the mask won’t see any change. This isn’t what I want because I’d like to see these more overall changes applied to the entire image as a whole as opposed to just part of it. So what to do? This is where that long keyboard shortcut comes into play.

My ideal situation would be to copy what I currently have done to the image (almost flatten the image and then work on that flattened version) and then apply the new filter to that copy. Good thing there’s a way to accomplish something like this. The shortcut I’m about to show you actually creates a new layer first and then stamps what’s visible in the workspace into that new layer. It’s pretty cool.

Windows: Shift+Ctrl+Alt+n+e

Mac: Shift+Option+Command+n+e

I know, those are a lot of keys for a keyboard shortcut. They may as well call it a longcut. I’ll go ahead and make the copy now.

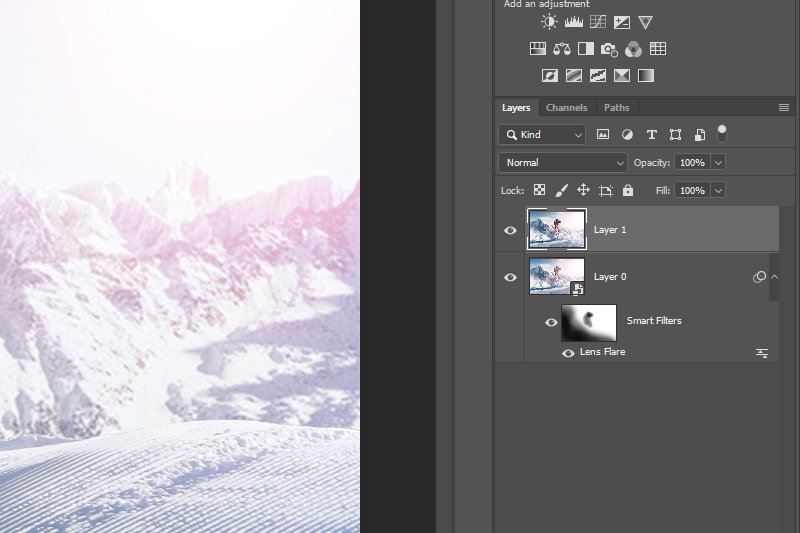
This is what the Layers panel looks like now.

layers-panel.jpg

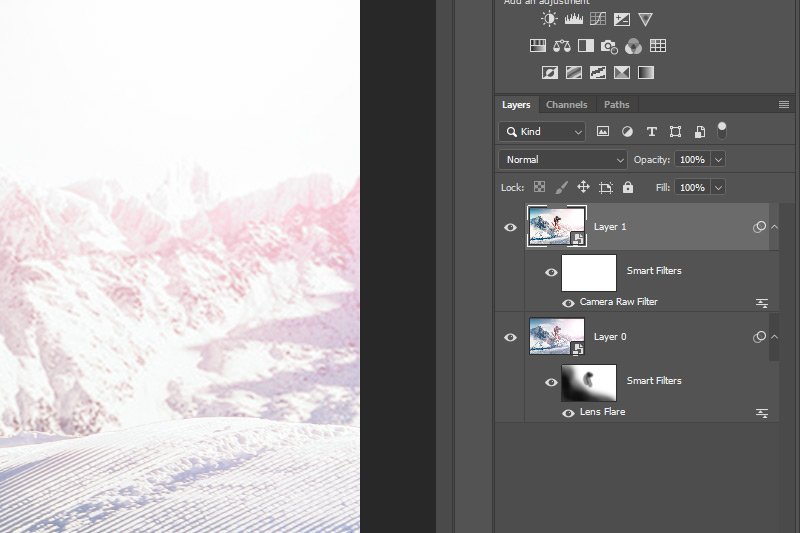
At this point, I’ll right-click on this new layer in the Layers panel and convert it to a Smart Object. Then, I’ll go to the Filter > Camera Raw Filter and make my changes in Camera Raw. When I’m finished, I’ll click the OK button in Camera Raw to return to Photoshop. This is what the Layers panel looks like now.

camera-raw-filter-layers-panel.jpg

This is the final image.

final-ski-photo.jpg

I think this version is so much more exciting than the original. That version appeared cold and uninteresting. This one makes it looks like the skier is jumping into the sun. So cool. The best part is that I’ve separated the two filters, while still taking the first one into account. This is a very handy trick to know when working with multiple filters inside a Smart Object in Photoshop. Let me know if you have any questions.
 
CampFireJack

CampFireJack

Member
Joined
May 9, 2021
Messages
118
Reaction Score
1
Points
16
  • #5

Going From Photoshop to Camera Raw as a Filter​

Question: Once I move from Adobe Camera Raw into Photoshop after I’ve edited a picture, can I ever go back to Camera Raw again to edit further? Or do I have to start all over again, and do all my edits in Camera Raw and then go into Photoshop? I heard there was a filter that would let me edit in Camera Raw after I’m already in Photoshop.

Answer: You can either start off in Camera Raw and then jump into Photoshop like you said or you can start in Camera Raw, go into Photoshop and then go back into Camera Raw. I have a word of warning though; if you’ve already made edits in Camera Raw and then move your file into Photoshop and think you’re going to go back into Camera Raw to adjust those active edits, you’re mistaken. Once those initial edits have been transferred to Photoshop, they’re akin to being flattened. They’re uneditable.

If you suspect that you’ll need to go back and forth between Camera Raw and Photoshop, you’re better off opening the file in Photoshop originally and then converting your layer to a Smart Object. Then, go to the Filter > Camera Raw Filter menu option and entering Camera Raw that way. You can make all the same edits as you would normally, but if you do it this way, you’ll be able to go back and forth between the two apps as many times as you want, and all of your changes in Camera Raw will stay live and you’ll be able to edit them forever. This is the way I would do it personally.
 
Top