CraigHardy
Member
- Joined
- May 11, 2021
- Messages
- 223
- Reaction Score
- 2
- Points
- 18
- #1
Every time I open a photo in Adobe Camera Raw for editing, I’m sure to follow a certain sequence of events to end up with the result I’m after. First, I want to make sure the contrasts are good. I work in the Basic panel for a while, adjusting the exposure, contrast, highlights, shadows, etc…to make the photo crisp to the eye. After that, for a regular photo that was originally taken well, I’ll begin to work on the color. I’ll adjust the vibrance, saturation and then head into the HSL panel to adjust specific colors. It’s remarkable how much better a photograph can look after only a bit of editing.
I oftentimes here of beginning editors having difficulty with which sliders to adjust and when to adjust them. The most basic task is the one I just described above. So, with that in mind, I’ll use today’s post to cover what you’ll need to know to transform a photo into something that’s worth putting online and sharing with the public.
Original Photo
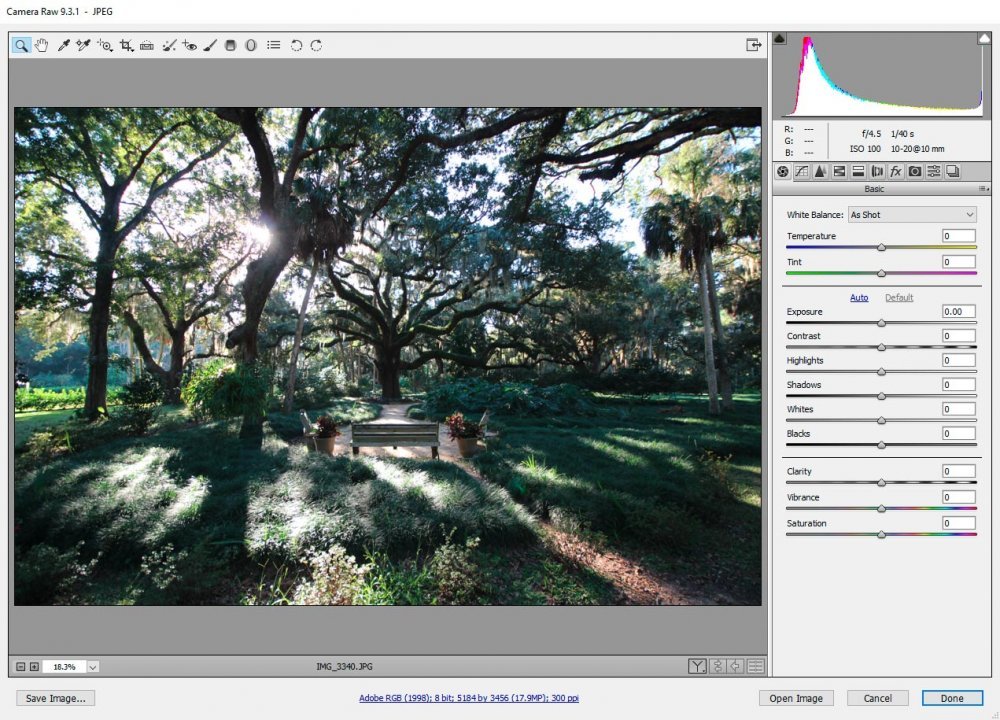
Let’s take a look at the photo I’ll be editing today. This was taken at Washington Oaks State Park in Palm Coast, Florida in 2013. It’s a good photo, but just a bit dull for my liking. I’ll be adding some life to it.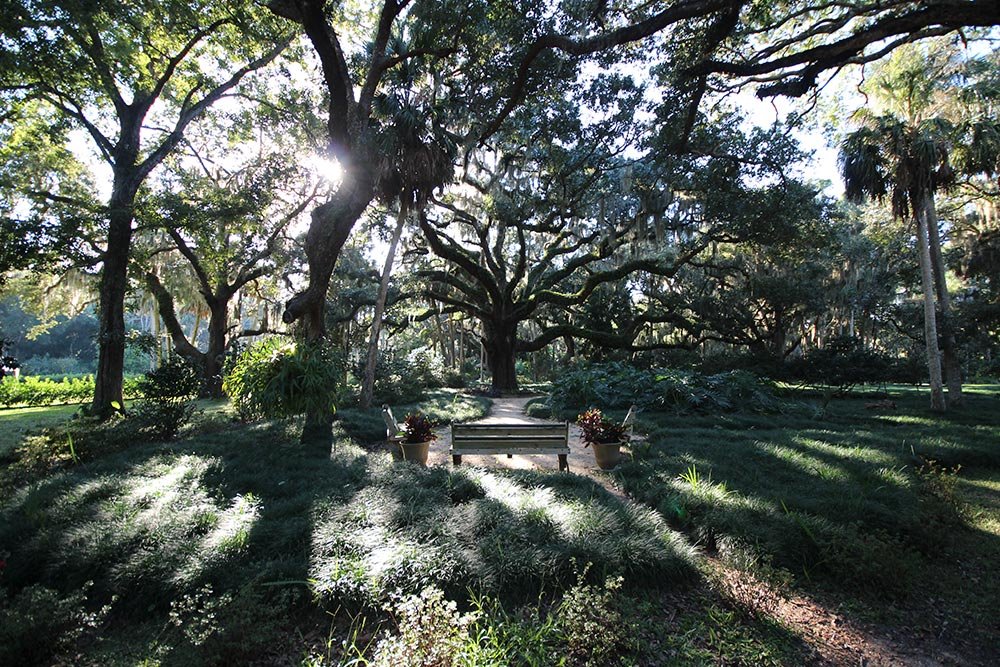
And this is the photo right after I opened it in Camera Raw. I haven’t done any editing to it yet.
Adjusting Highlights & Shadows
The first areas I like to edit are the Highlights and Shadows. I usually push the Highlights slider to the left to reduce them. The reason for this is simple – if a highlight, in this case, a sunburst or sun glare, is too overwhelming, it steals detail from whatever is directly around it. I want to reduce that theft. Conversely, oftentimes shadows are far too dark and create large seemingly black masses that the human eye can’t discern. Even though the actual photograph has the detail stored inside of it, it’s hidden from view. So I’ll go ahead and push the Shadows slider to the right to make those dark areas more visible.Now, just as a word of warning, when I begin pushing sliders around, the photo may actually look worse for a little while. This is because I’m in the correcting stage. I need to fix what’s wrong with the photo before I begin bringing out its beauty.
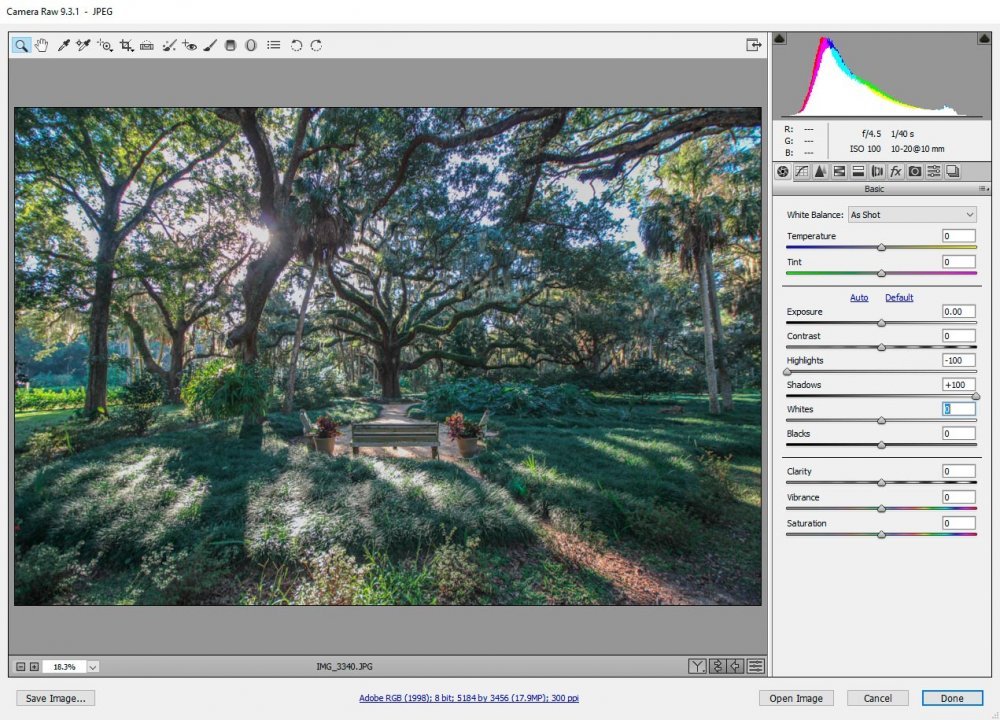
If you look at the screenshot above, you’ll notice that there is much more detail showing where there used to be shadows. Also, the highlights aren’t washing out what’s around them as much (look at the leaves in the trees). The thing is, now the entire photo looks as if there’s a reduction in contrast. That’s because there is. We need to now fix that.
Adjusting Whites & Blacks
In this step, my goal is to add some white to what’s actually white in the photo and to add some black to what’s actually black. These two sliders are different than the two above. I’ll go ahead and move the Whites slider to the right and the Blacks slider to the left. Watch for an increase in contrast with this step.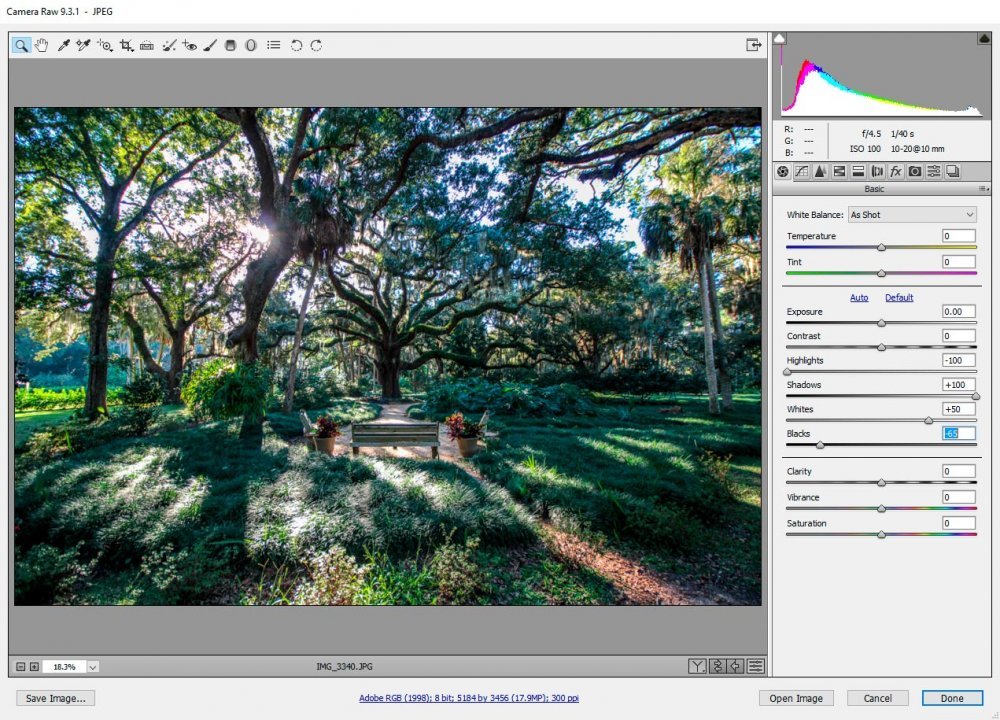
I’d say that’s a fairly large difference. Look at all the color that’s been released from the photo. And I haven’t even moved any sliders that adjust color yet. What you see above is simply what was being hidden by poor lighting.
Adjusting Clarity
The Clarity slider is very helpful in cases like what I’m facing in this photo. This slider is what’s called a bias slider. It looks for details in an image and makes one side of them lighter and the other darker. When you move this slider back and forth, you won’t see a huge difference, but you can definitely see one. And usually when you add clarity, the photo looks better. I’ll go ahead and push this slider to the right now to add a bit more detail and interest to the image.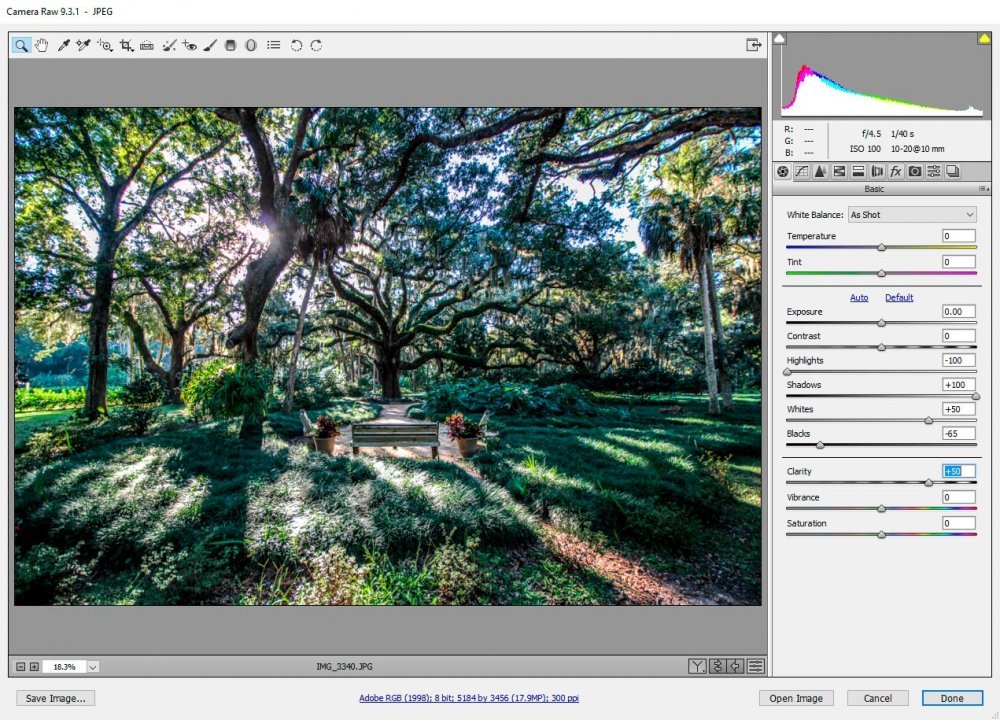
This slider really does add contrast and clarity to a photo. It makes things appear more crisp.
Adjusting Vibrance
The Vibrance slider is sort of like the Saturation slider. The difference between the two is that by adjusting vibrance, you aren’t adjusting all the colors in your photo. It’s meant to add vibrance to only some of them. When adjusting saturation, you’re saturating all the colors in the photo. Typically, I don’t move the Saturation slider. I find it too powerful. I usually only push the Vibrance slider to the right just a bit, depending on the photo. And sometimes, I don’t even do that. In this case, I’ll push it to the right just a tad to bring out some of the blues in the leaves of the trees.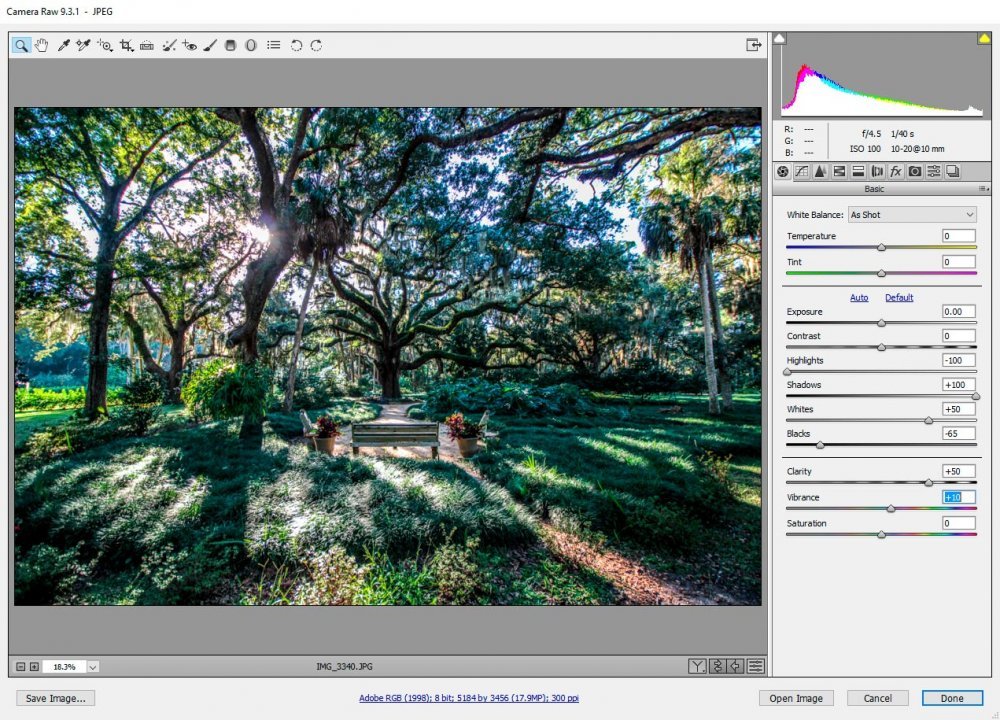
Saturation vs. Vibrance
I’ve heard it said that editors generally don’t use the Saturation slider to add colors at all, but only to take them away. I tend to agree with this notion. Have you ever looked at a photo and noticed that one or two colors were totally blown out. It’s usually the reds and greens. And if they are, it becomes painfully obvious that the photo was edited and that whoever did it, added saturation. You can get away with adding saturation if everything in the photo is dull. But if only some of the colors are dull, stay away. By adding saturation via the Saturation slider, you’re increasing the saturation of all the colors, no matter if they already are fully saturated. Camera Raw makes no distinction for this. It doesn’t think in this respect.Vibrance is another story. By using the Vibrance slider, you’re essentially telling Camera Raw to add saturation to only the colors that need it. See the difference here? Instead of saturating everything, you can saturate only what’s under-saturated. Camera Raw can tell the difference. I’d say that’s a fairly intelligent algorithm. It’s one that thinks. Also, Adobe created this feature with skin tones in mind. If you play around with this slider a bit with a photo that has humans in it, you’ll notice that by increasing the vibrance, you aren’t making people’s skin look oddly orange or pink. This is because the Vibrance slider doesn’t add saturation to those colors. Obviously, if you’re attempting to edit a photo that has those colors applied to something else, you’ll need to work around this limitation, but in general, it’s a valuable tool to have and I use it often.
Adjusting Color in the HSL Panel
If you’ve ever attempted to adjust independent colors by using the HSL panel, you may have found difficulty doing so. Much of the issue lies with the fact that you never really know what slider to use to increase or decrease certain colors in your image. When I first used this panel, I instantly saw the value of it, but since I couldn’t figure out how things worked and I couldn’t add value to my photos, I put it on the back shelf. Well, today I’m going to show you a tool to bring this panel back to the front. It’s really cool.For this example, I’m going to work inside the Saturation tab of the HSL panel. I think, beyond the issue I just talked about above, there’s another one. When adjusting the saturation of an area of a photo, oftentimes, it takes the movement of multiple sliders to accomplish your task. By eyeballing your photo, it’s nearly impossible to figure out which sliders it is that requires movement.
If you head up to the top menu, click and pull down the Targeted Adjustment Tool, you’ll see some choices.
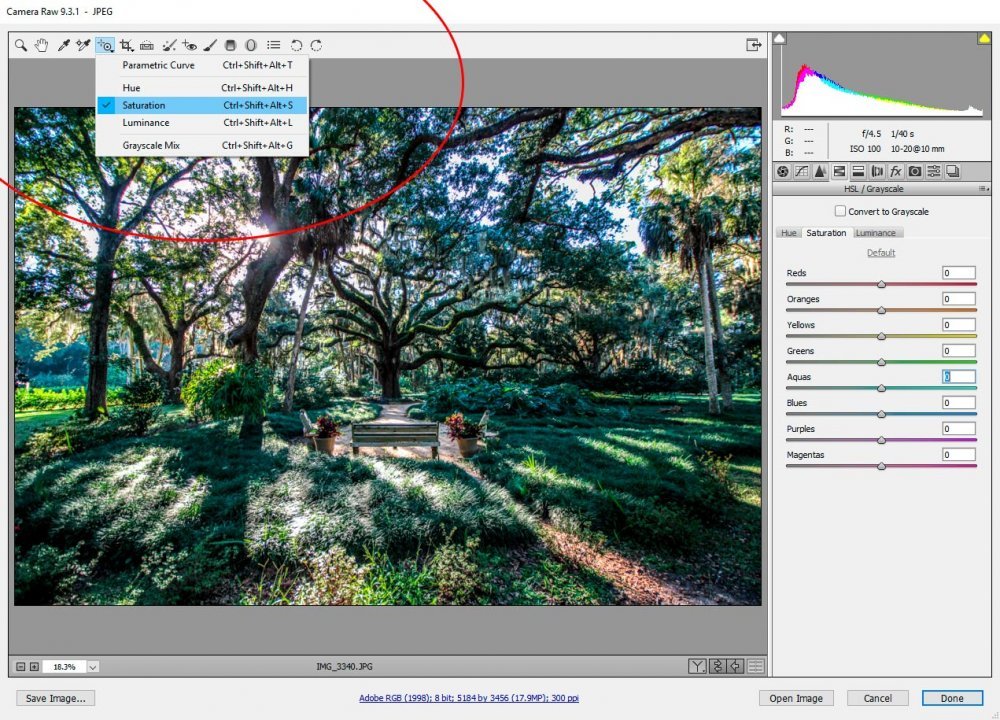
Typically, whichever panel you’re currently in will already be selected. Since this is the case (and it is for me right now), this doesn’t generally need to be touched.
The Targeted Adjustment Tool allows us to select any area of our image and by doing so, Camera Raw will decipher what color we clicked on. After that, if we hold down the mouse pointer and slide to the left or to the right, Camera Raw will either desaturate or saturate that particular color by moving independent sliders. If you practice this a few times, you’ll see that for most cases, multiple sliders will move at different rates. This is why I say accomplishing this task by eye is nearly impossible.
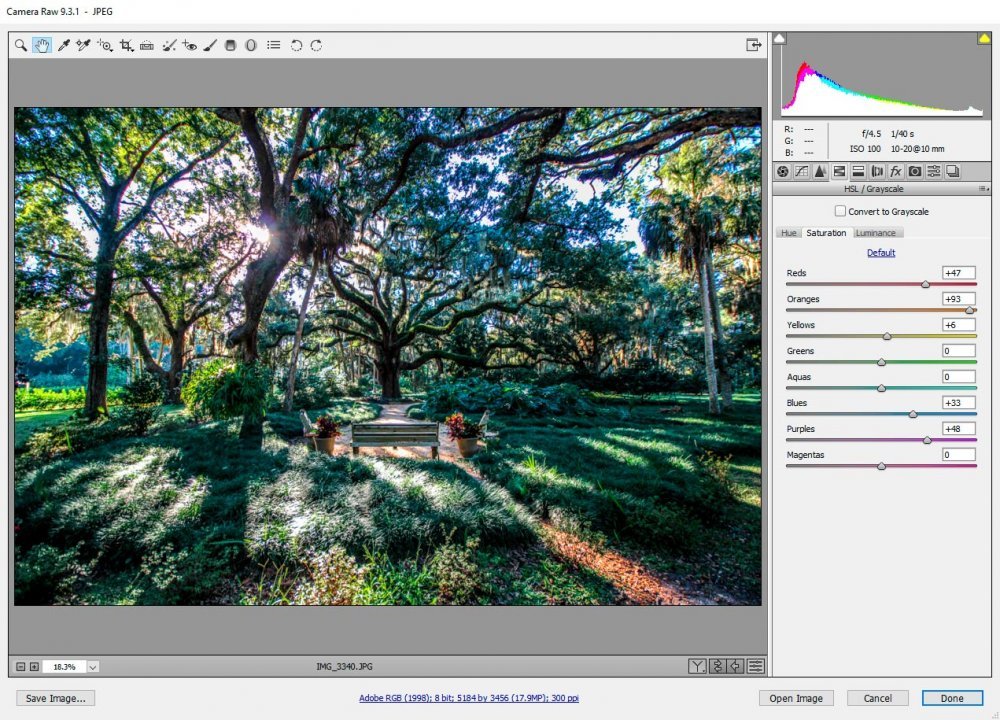
For my photo above, I wanted to bring out some of the oranges in the leaves in the foreground as well as some of the purples of the plants. To do this, I zoomed into the image and selected those specific colors with the Targeted Adjustment Tool. After that, I moved my mouse to the right to increase saturation and after I was happy with the results, I let go and moved on to the next area. It’s actually quite simple.
Final Edited Photo
As you can see, I didn’t go nuts editing this photo. I merely moved a few sliders and used a tool to enhance contrast and color. In my case, that’s all it took to bring the photo to life. Now, if you wanted to go further and edit this photo with different effects and all that, I’d use many more tools and eventually bring it into Photoshop for further enhancement. For today, this is good. I think the photo looks crisp, clean and bright.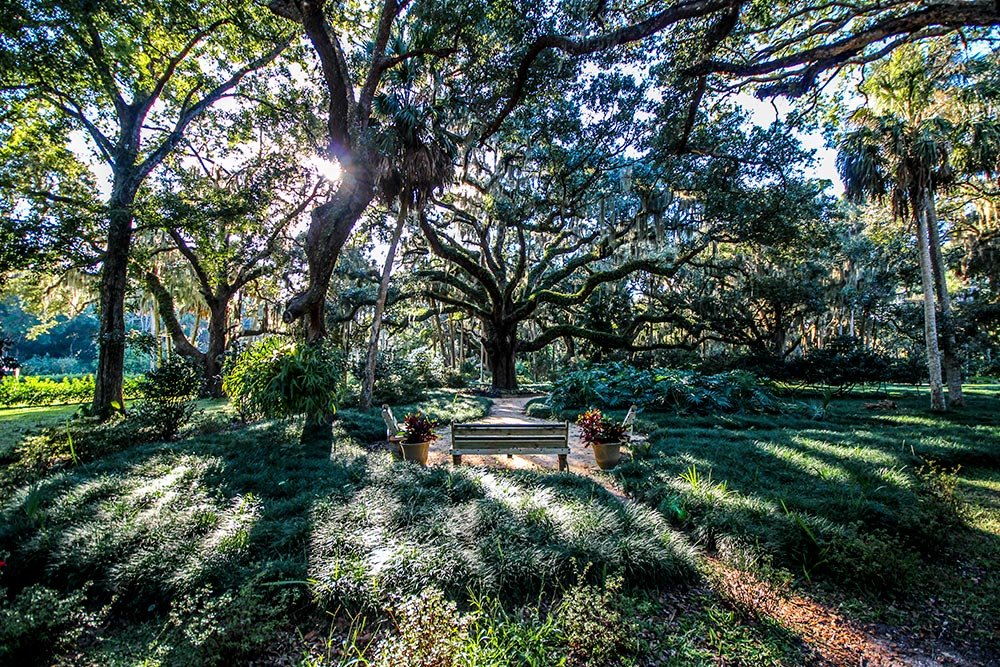
If you’ve enjoyed today’s post and found it helpful, please share it with a friend. Thanks!

