CraigHardy
Member
- Joined
- May 11, 2021
- Messages
- 223
- Reaction Score
- 2
- Points
- 18
- #1
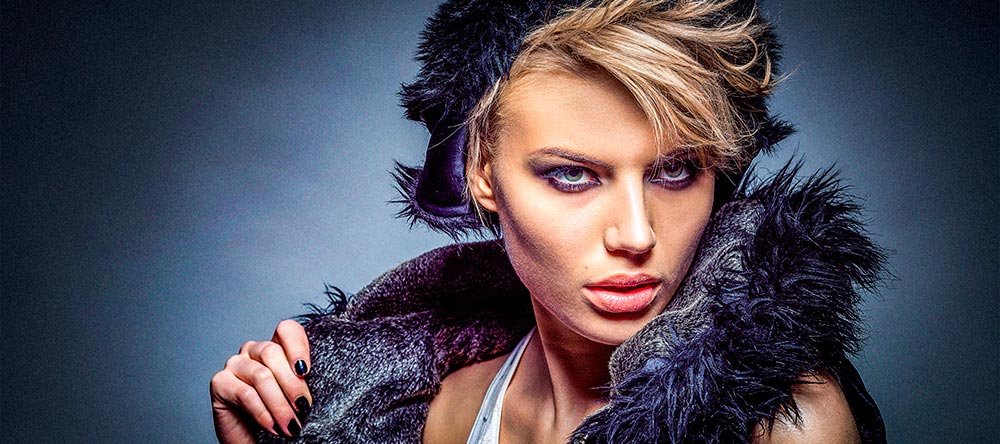
When changing portraits from color to black and white in Adobe Camera Raw, there are a few areas you need to concern yourself with. If you make an adjustment the wrong way, you can shed an, how shall we say, unfavorable light on the person in the photo. If you make an adjustment the right way, you can actually make someone look a lot better than they naturally would. It’s all about adjustments and choosing the correct colors to work with.
In this post, I’ll review some of the information I went over in my previous post that talked about black and white photos. After that, I’ll hone in on one area in particular. I think this is worth discussing because it’s such a small area that can have a dramatic effect.
Original Photo
This is the photo I’ll be working with today. As you can see, there hasn’t been much done to it yet.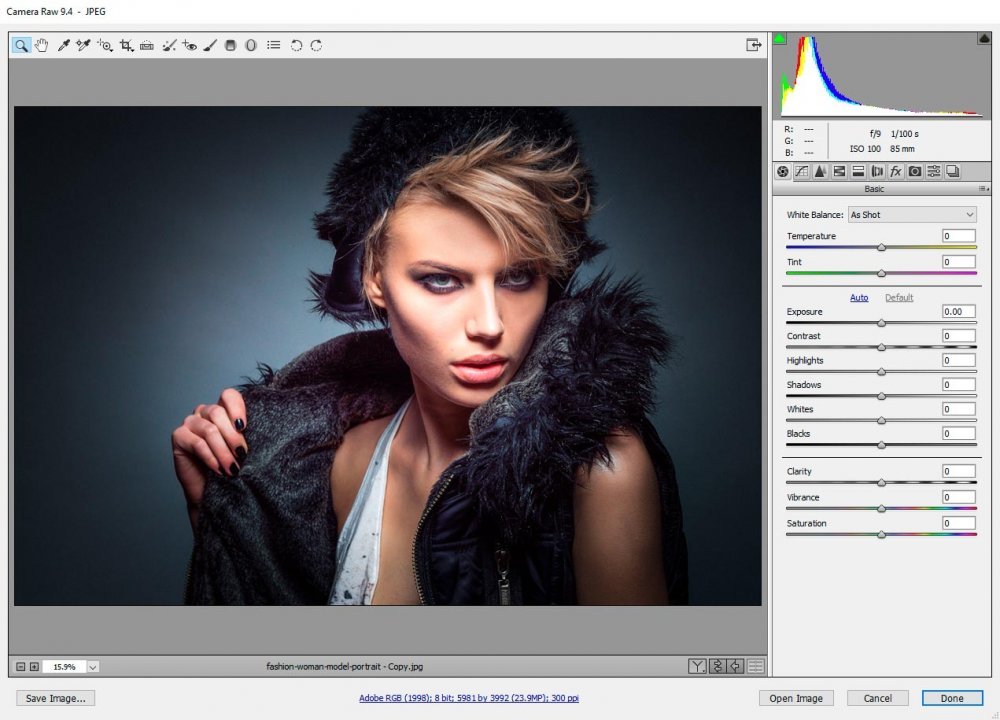
Make Adjustments in the Basic Panel
Before I change the photo to black and white, I want to make it look as good as possible when it’s color. Any sort of brightness and contrast I can add now will benefit the photo later by adding depth. After the photo has been altered to black and white, this task becomes more difficult.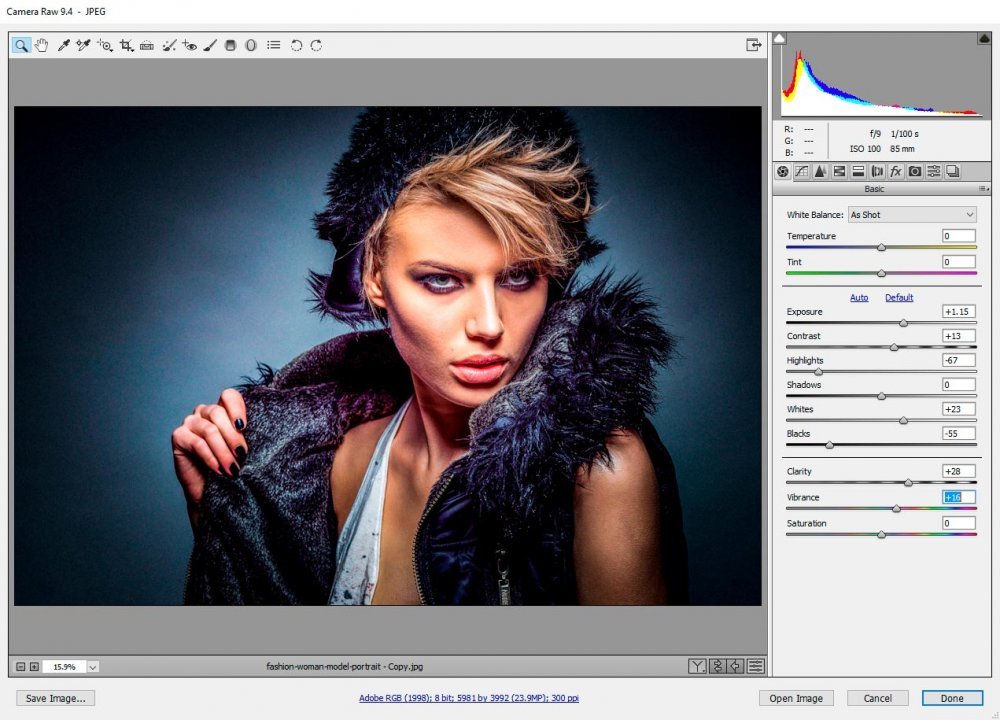
There – that’s better. I added contrast and brought out some color. While editing, I was careful not to add or remove too much skin tone. That’s what I’m going to be working on after I turn this portrait black and white. While editing, also pushed the Dehaze slider to the right, to remove any sort of fogginess in the photo. This feature has a clarifying effect and an increase in contrast all in one.
Converting to Grayscale
Now that the photo looks good in color, I can head into the HSL/Grayscale panel and click on the Convert to Grayscale check box. Once I do this, all color in the photo is stripped out and I’m left with the ability to adjust the sliders that control the original colors in the photo. Those colors still exist. They’re just hidden by Camera Raw. This is what gives us the ability to edit them now.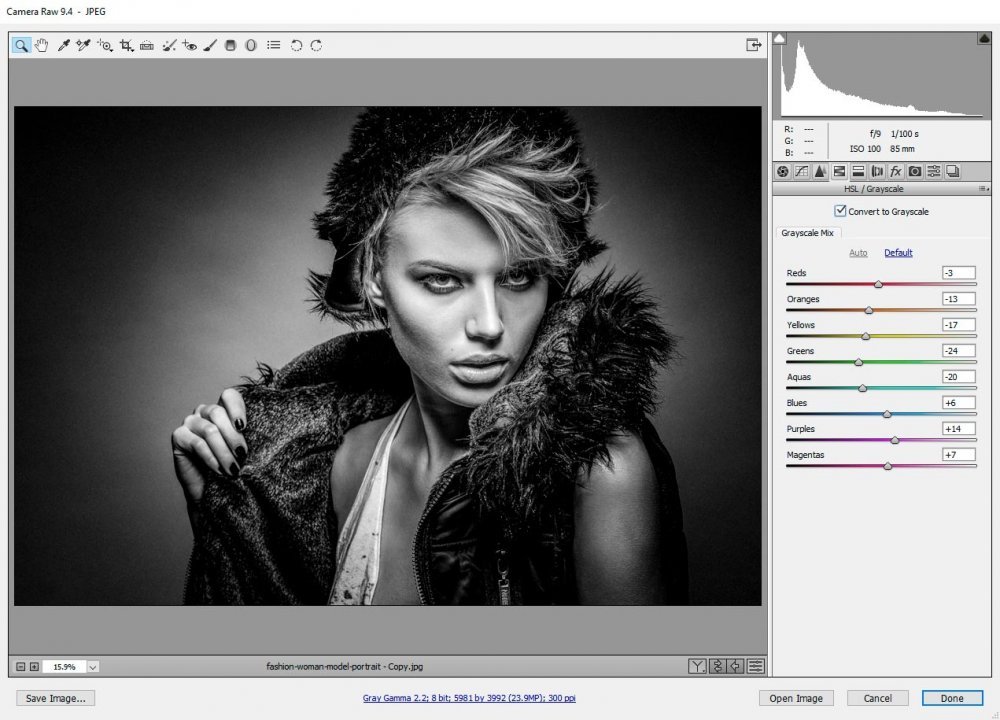
Editing the Black & White Photo
This is just a reminder – if I click the P key on my keyboard, I can jump back and forth from the original photo to my edited photo. This can help tremendously when editing black and white photos, because it’s nearly impossible to remember the colors that were once available.In this photo, I know I want to edit skin tone. To do this, I’ll need to focus primarily on the orange slider in the HSL/Grayscale panel. Before I edit though, I’m going to do a short experiment to show you how much better and how much worse this one slider can make someone look. First, I’ll push the orange slider to the left by 30 points. This will darken the orange in the photo. The original value for this slider is -13. I’ll push it to -43.
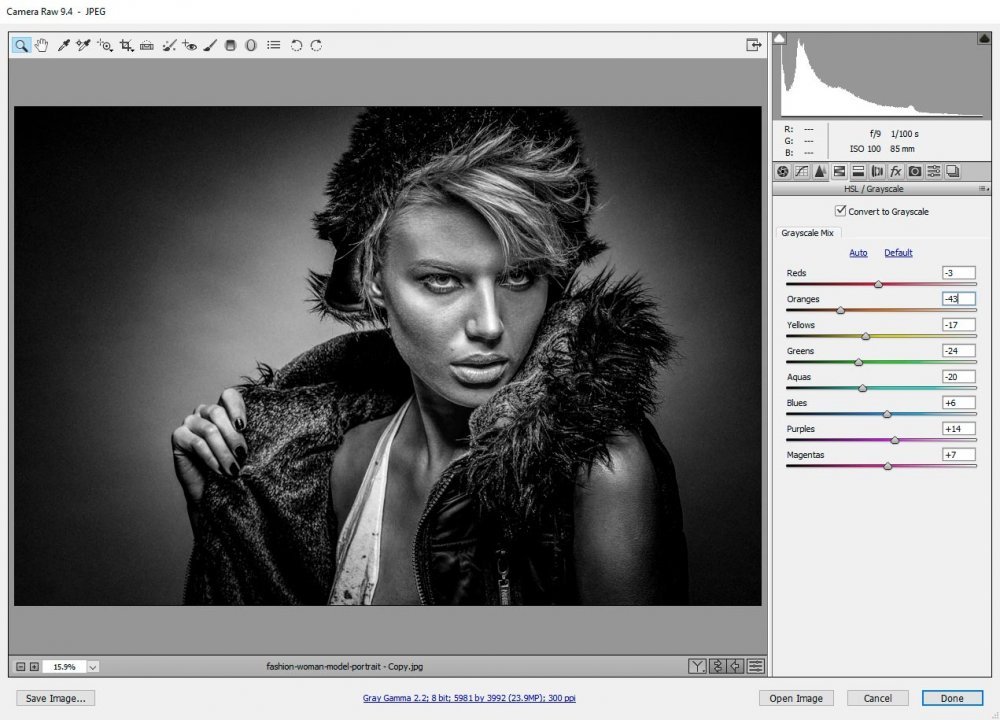
As you can see, by darkening the orange in the model’s face, we bought out some unflattering features. That wasn’t our goal. Now, let’s brighten the orange and move the slider up 30 points so it sits at +17.
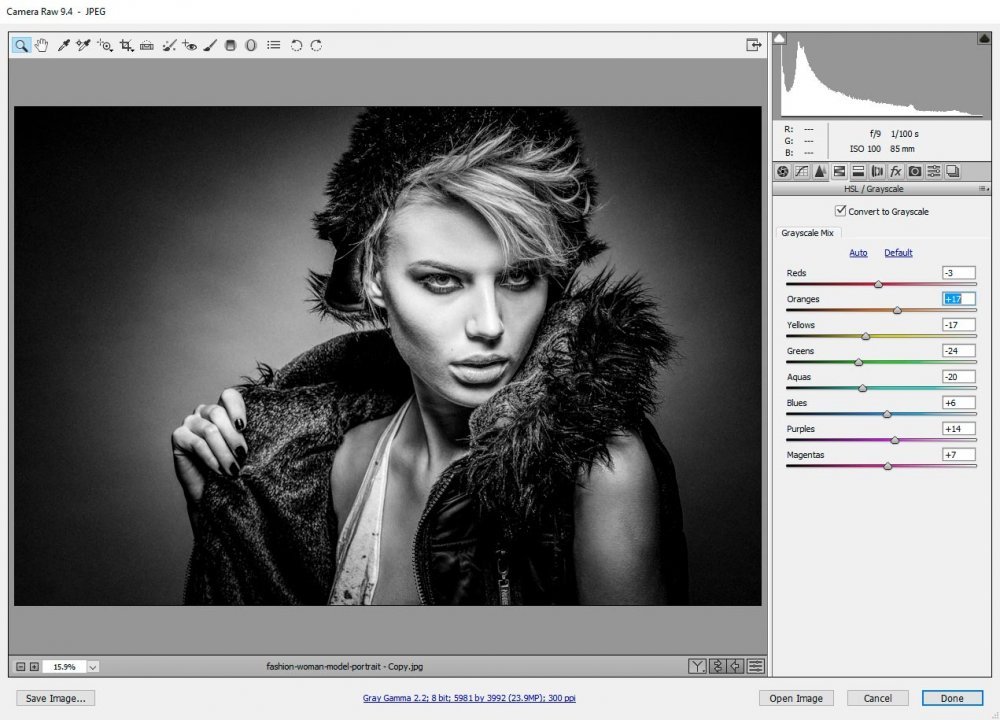
Now, I know there is some red on the person’s lips I’d like to edit as well as some blues in the background. Let me push those sliders a bit to see what happens.
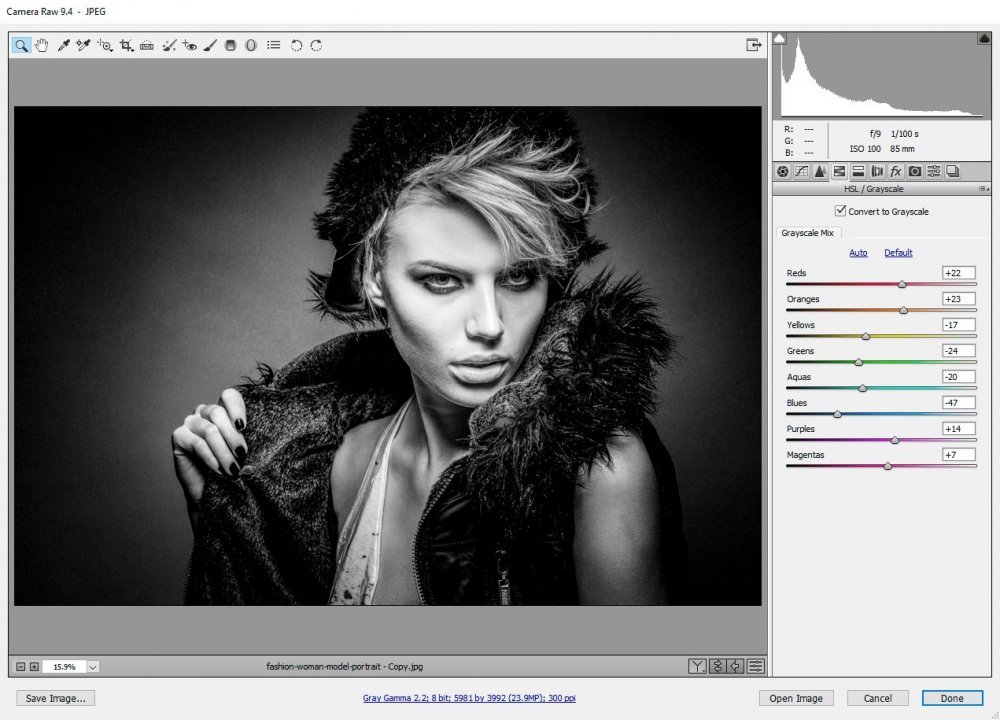
I’d say that looks good. I moved the orange slider up a bit more as well. This was on top of increasing the brightness of the reds and reducing the brightness of the blues.
Really, the moral of this story is that when editing skin tones for black and white portraits in Camera Raw, you should focus on the red, orange and yellow sliders in the HSL/Grayscale panel. This, of course, comes after making your edits in the Basic panel.
