JodyBuchanan
Member
- Joined
- May 10, 2021
- Messages
- 138
- Reaction Score
- 0
- Points
- 21
- #1
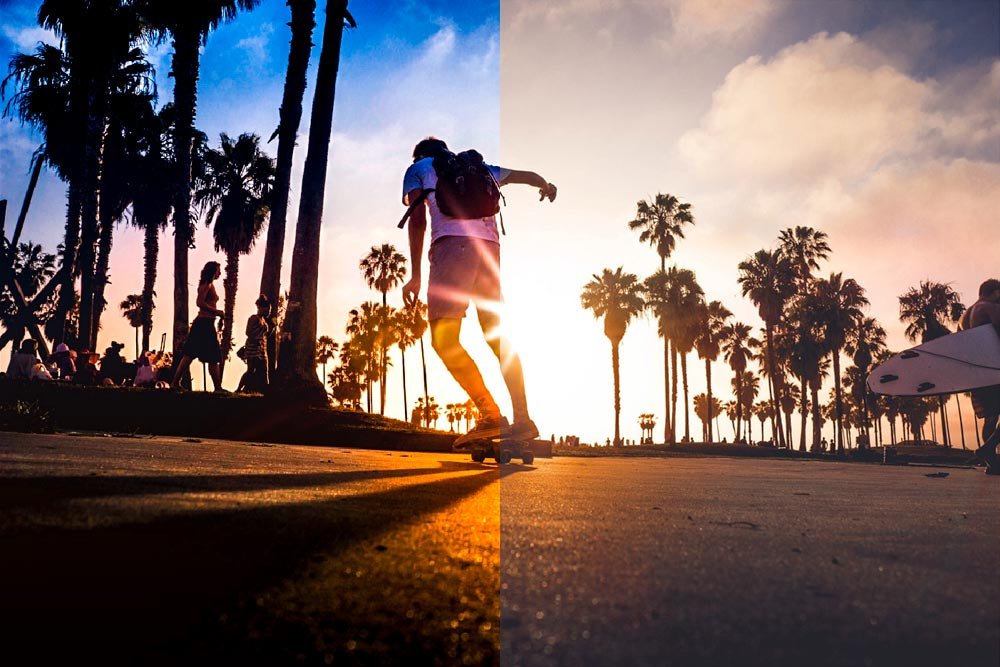
Have you ever wondered how some photographers make their photos look so annoyingly good? If you’ve ever picked up a camera, you’ve most likely been there. You’ve taken a few shots, reviewed them on your computer and wondered if you needed a new camera. A better one. You think this because, for some strange reason, your photos don’t look anything like the wonderful ones you’ve seen online through the years. It seems that a “good” photographer with a camera that costs thousands can make a photo of a blade of grass knock your socks off.
Well, I’m here to say that much of the talent you see online didn’t come from the photographer or the camera. It’s sort of like listening to a rock star sing in the shower. Without all the effects the studio has to offer, their voice sounds nothing like you thought it did. Not nearly as good. The studio to a rock star is equivalent to Camera Raw and Photoshop to a photographer. It’s all in the technology.
In today’s post, I’m going to introduce a tool that can take your photos up a notch. It’s called the Graduated Filter and it’s located in the top toolbar of Adobe Camera Raw. This is the tool photographers use to make their skies look blue and cool while their sunsets somehow manage to stay orange and warm. Something that’s virtually impossible to pull off with a camera alone.
By the end of this post, you’ll most likely be annoyed. I get this way because whenever I learn something new, I sit in frustration wondering how many of my photos could have looked a heck of a lot better if I had only applied the capabilities of a tool like this to them. Such is the life of a photographer, editor and blogger.
The Graduated Filter
The Graduated Filter is a tool that allows you to apply many of the adjustments Camera Raw has to offer – as a gradient. For example, instead of warming an entire image with the white balance tool, you can warm just half of it. The same it true for cooling, clarifying, saturating and many others. With the Graduated Filter, you can apply these changes horizontally, vertically or on any angle you wish. The tool is very versatile.Let’s quickly take a look at where the tool is located and how to go about activating it while editing a photo.
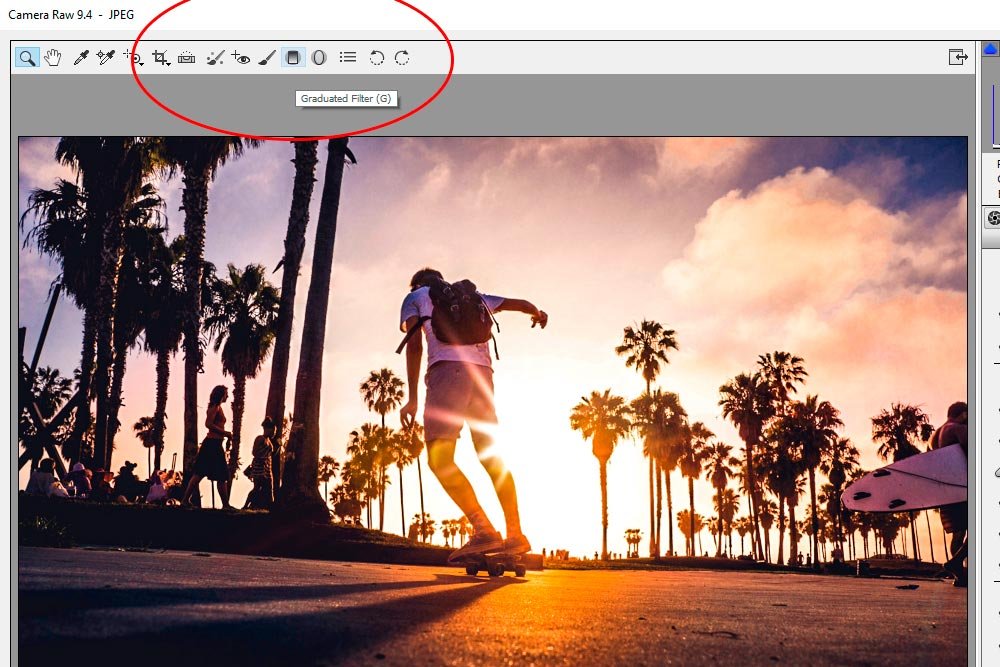
If you take a look at the screenshot above, you’ll see the button for the Graduated Filter tool. When you press it, your mouse pointer will change to a plus sign and you’ll have the ability to create some guide lines and drag them wherever you wish. In the screenshot below, I clicked at the bottom of the picture and dragged upwards about half way. The green dashed line is where the filter gradient begins and the red dashed line is where it ends.
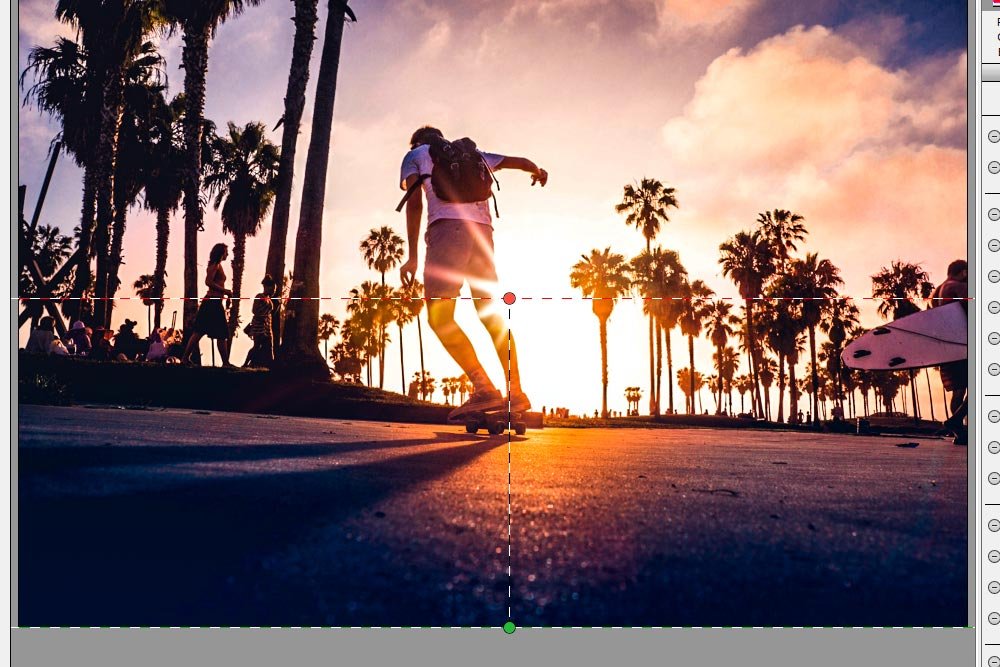
To tighten up the gradient, I can move the two guide lines closer to one another. To loosen, or spread, the gradient, I can move the lines further away from one another. In the case above, the gradient of whatever filters I apply will begin at the bottom of the photo and end in the middle. Also, if I wanted to move the entire Graduated Filter tool, I could click on the center vertical line and drag it around. To rotate the tool and change the angle of the gradient, all I need to do is hover my mouse pointer over the of the red dashed line and watch for my mouse pointer to change into a curved double arrow pointer. Once that happens, I can click and drag in any direction.
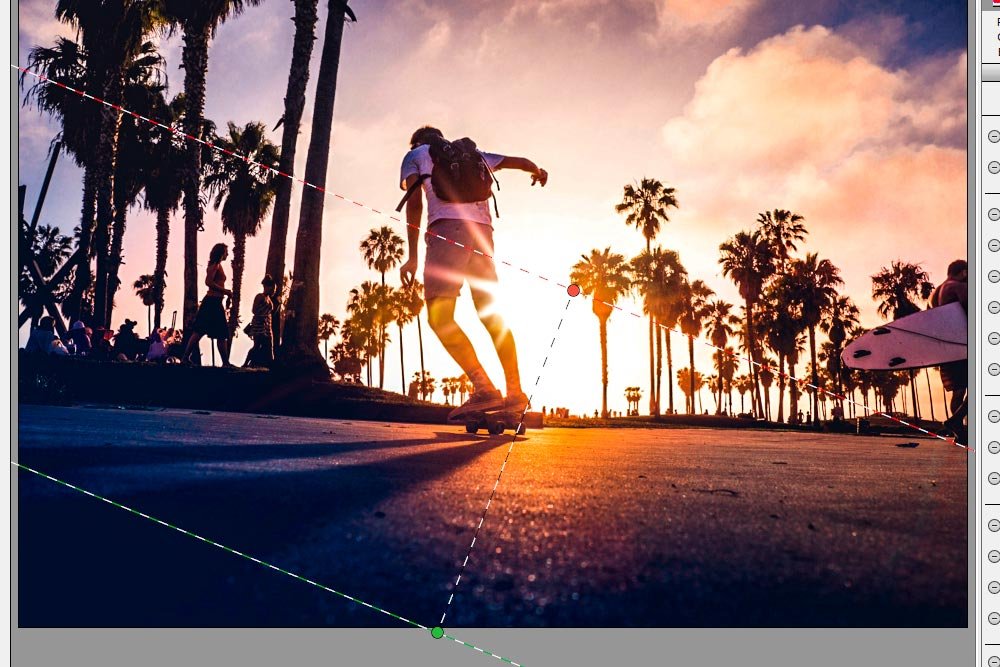
I do want to mention another tip. When dragging these guide lines out from an edge, many times they’ll wander off of a straight vertical or horizontal axis. To keep them fixed and straight, you can hold down the Shift key while you drag. That’ll guarantee that the guides don’t wander.
Finally, to see a foggy overlay of the actual area that will be effected by any changes we make, we can click the Mask check box located at the bottom of the Graduate Filter panel.
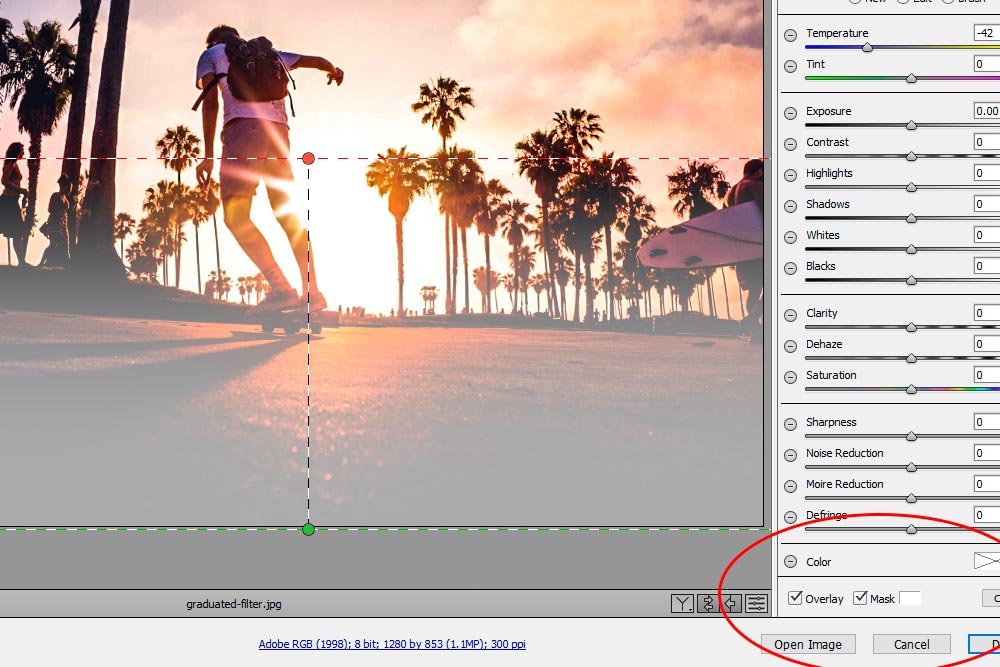
This is merely a visual tool to offer a better picture of what we’ll be editing in the photo.
Applying Some Changes
In my example photo, I’d like to create one graduated filter to warm up and adjust the lower portion and then another that will cool down and adjust the upper portion. I’m not going to get crazy and twist things around on different angles. I’ll keep it clean and stay horizontal. First though, I’ll uncheck the Mask box to remove the foggy overlay.With all the sliders set to zero in the Graduated Filter panel, I can begin editing. If the sliders weren’t set to zero, I could simply click the – button to the left of any slider to reset them all. Then, I could reset that one slider to zero manually.
Let’s see what happens when I make some adjustments to this first Graduated Filter area.
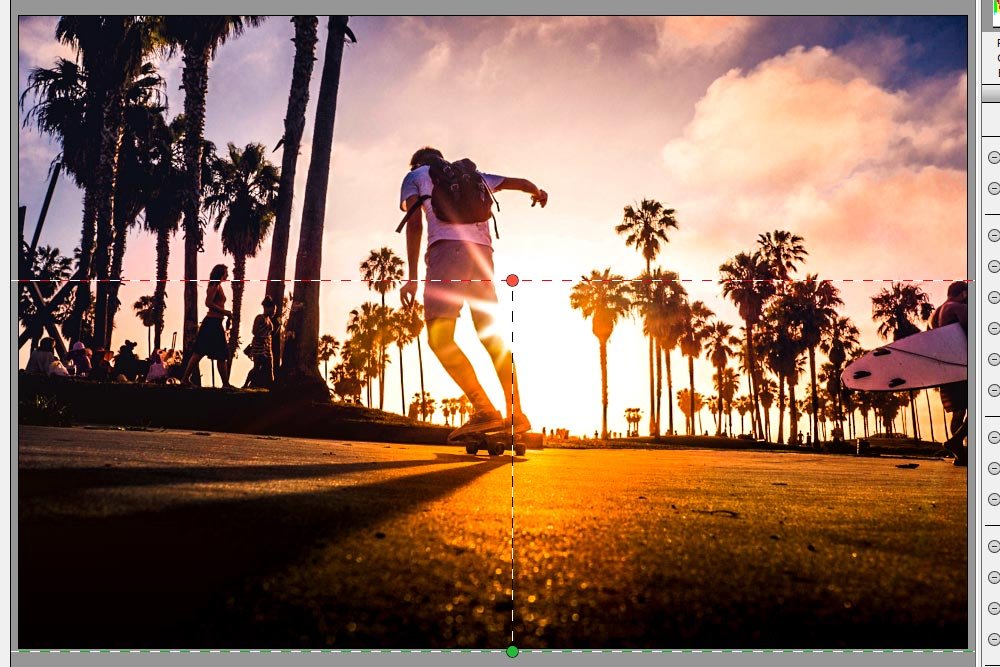
Let’s take a look at the sliders I adjusted.
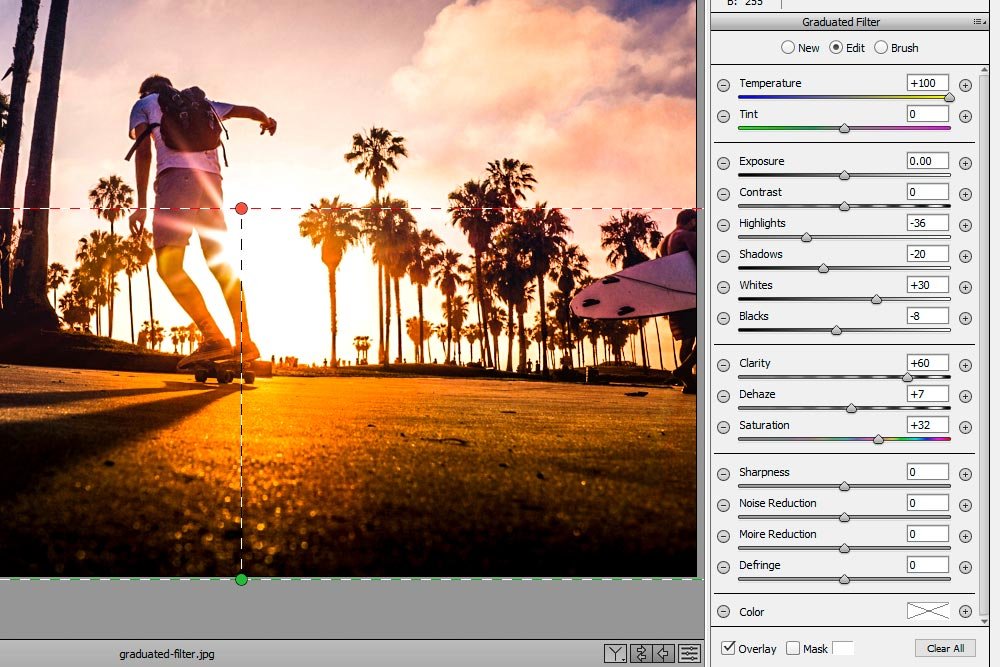
This is perfect. As you can see, I made the lower portion of the photo look very warm. To accomplish this, I pushed the White Balance slider all the way to the right and moved some other sliders as well.
That looks pretty good. The thing is, I want to cool down the sky to offer some contrast. To do this, I’m going to click on the New radio button towards the top of the Graduated Filter panel and click at the top of the photo and drag down towards the middle (while holding down the Shift key).
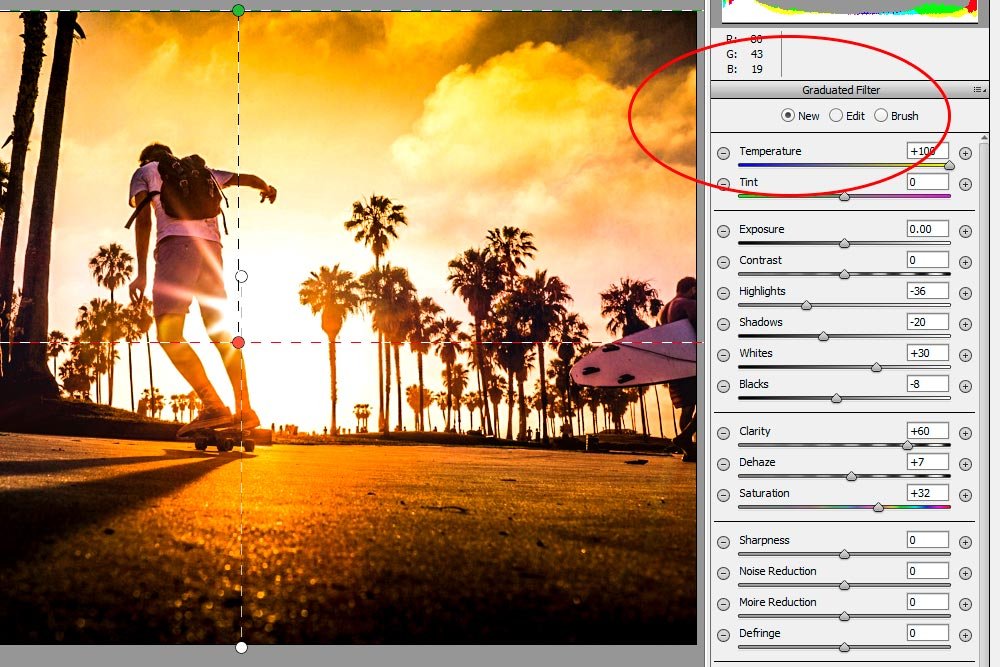
Uh oh. We’ve got a problem. When I clicked on the New radio button, the settings for my previous filter were copied over. To reset these, I’ll follow the instructions I just gave above (the ones where I clicked on a – button to the left of any slider).
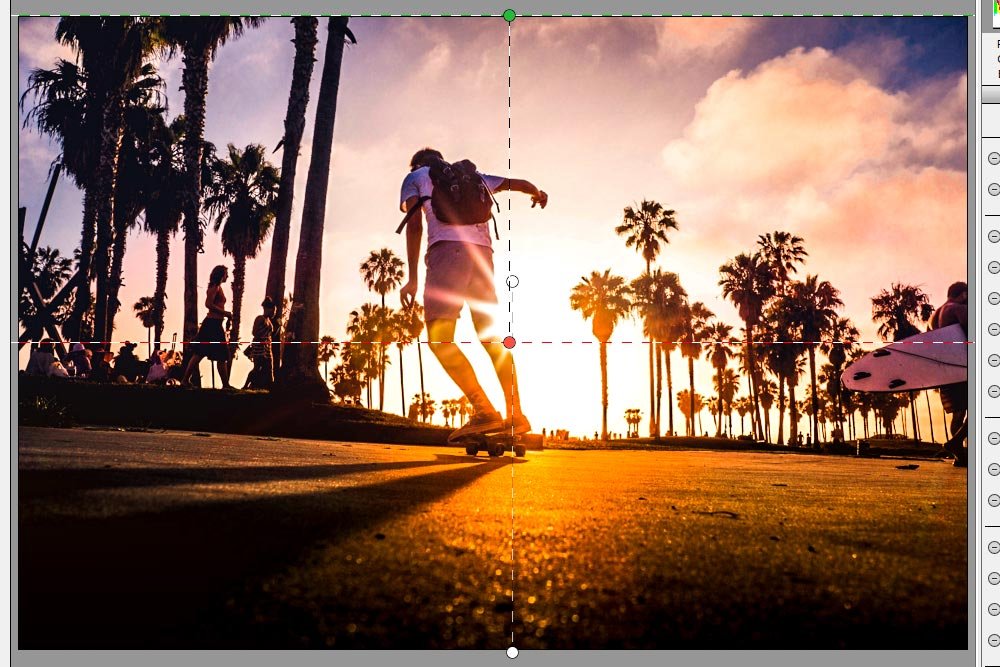
Now, I can go about my edits by pushing the sliders around. Let’s see what this looks like.
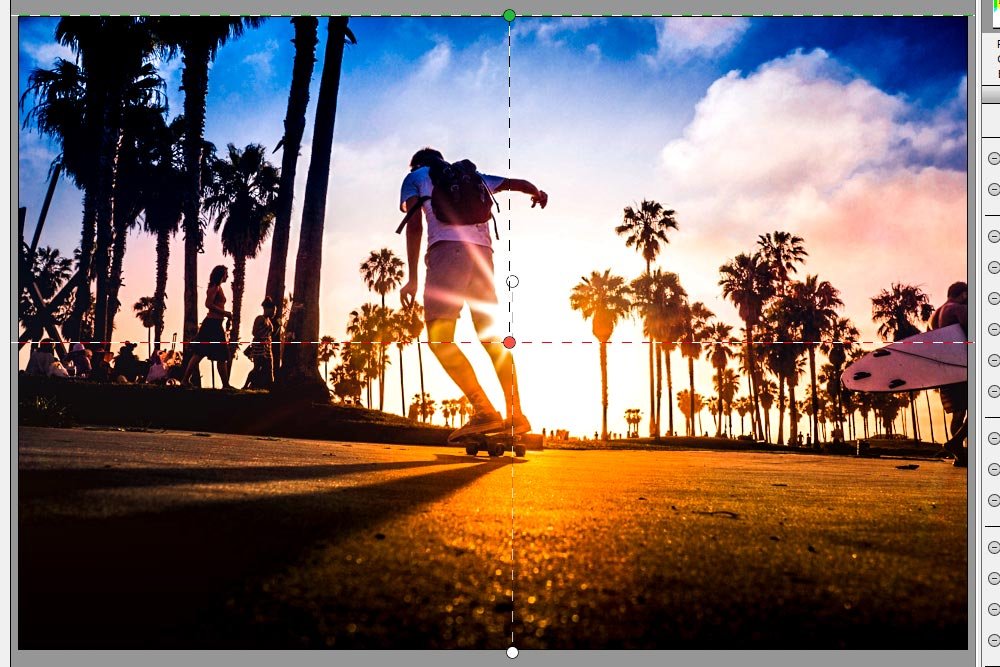
Let’s look at which sliders I moved.
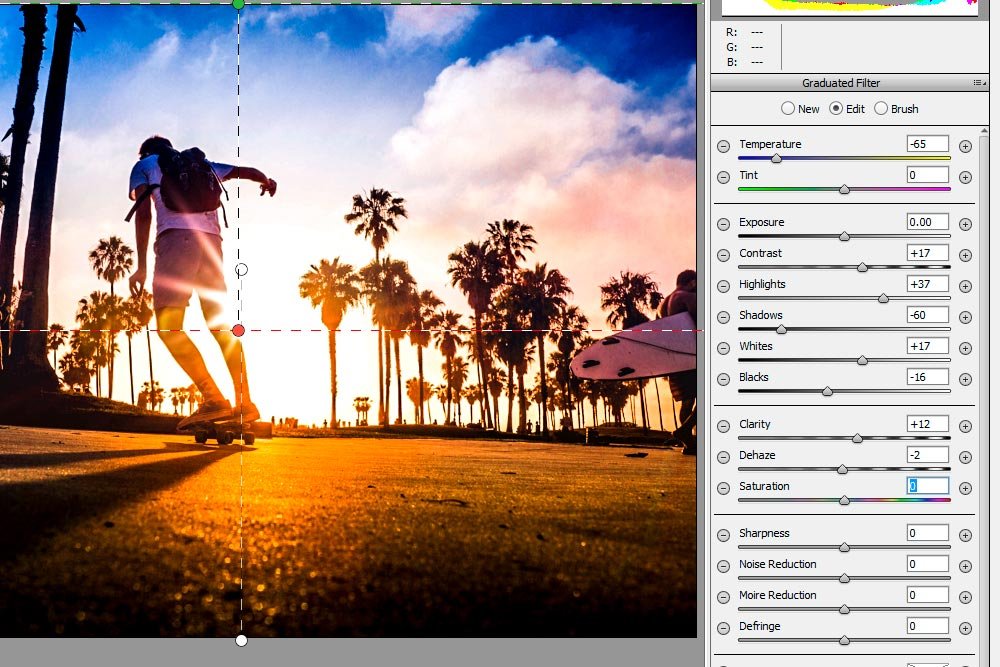
Pretty cool, huh? This just goes to show that all those crazy sunset shots you see online were heavily edited in Camera Raw or a similar application. Oh yeah – just to let you know, to exit out of this tool, all you need to do is click on another one in the top toolbar.
Adding & Removing Effects with the Brush
I want to show you one final area of the Graduate Filter panel. It’s the ability to add and remove some of the effects given by the gradient by using a brush tool. And for this example, I’m going to open a new photo. Here’s the original: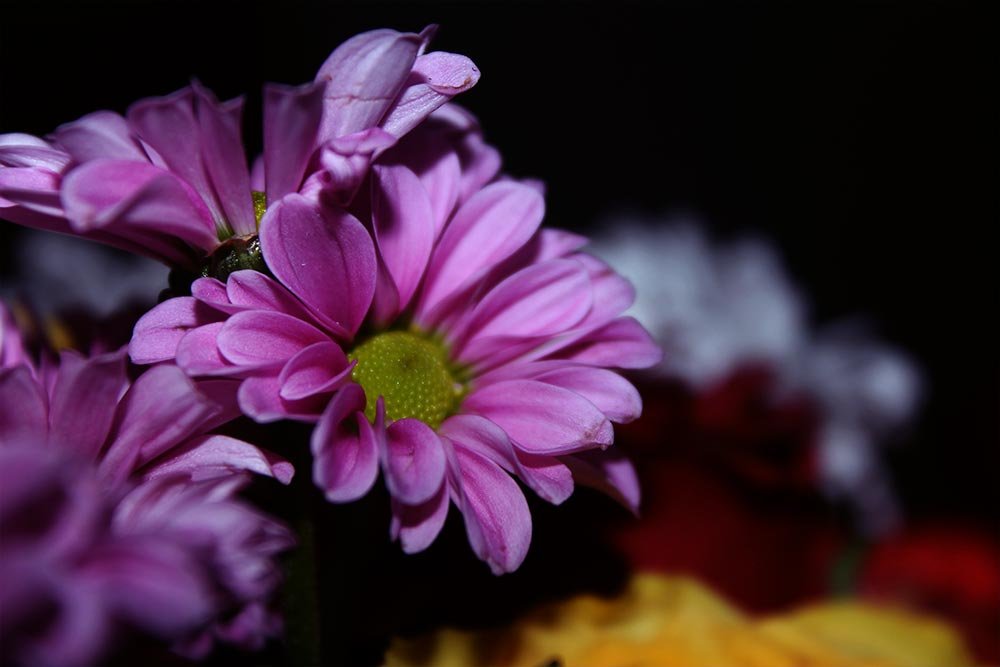
For this example, I’m going to create a vertical Gradient Filter that begins at the left side and crosses over the flower and ends past the center of the photo. By this point, we all know how to accomplish this.
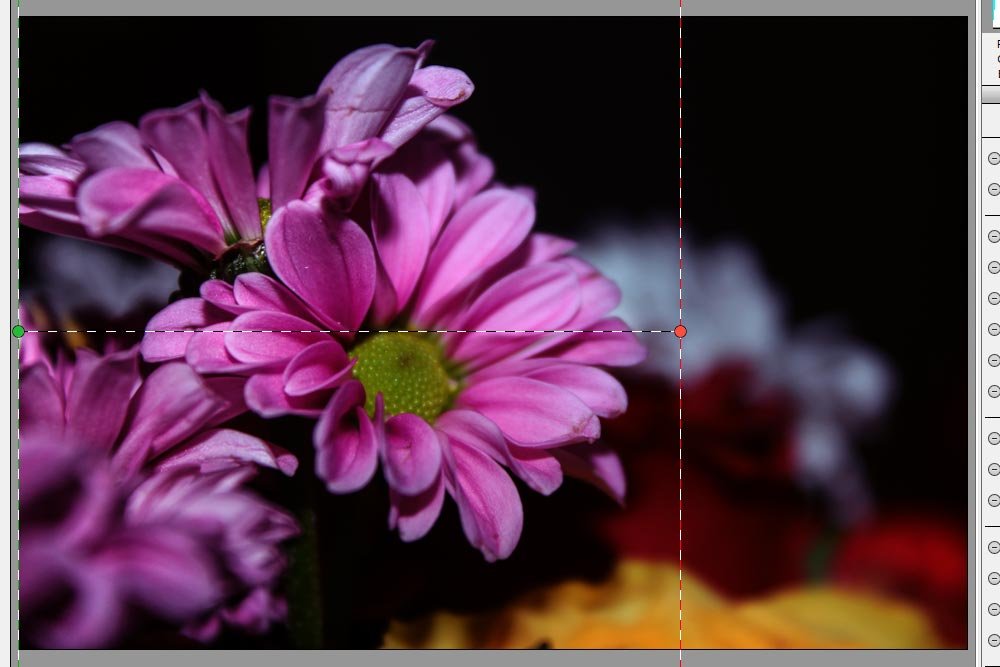
Next, I’m going to make some adjustments.
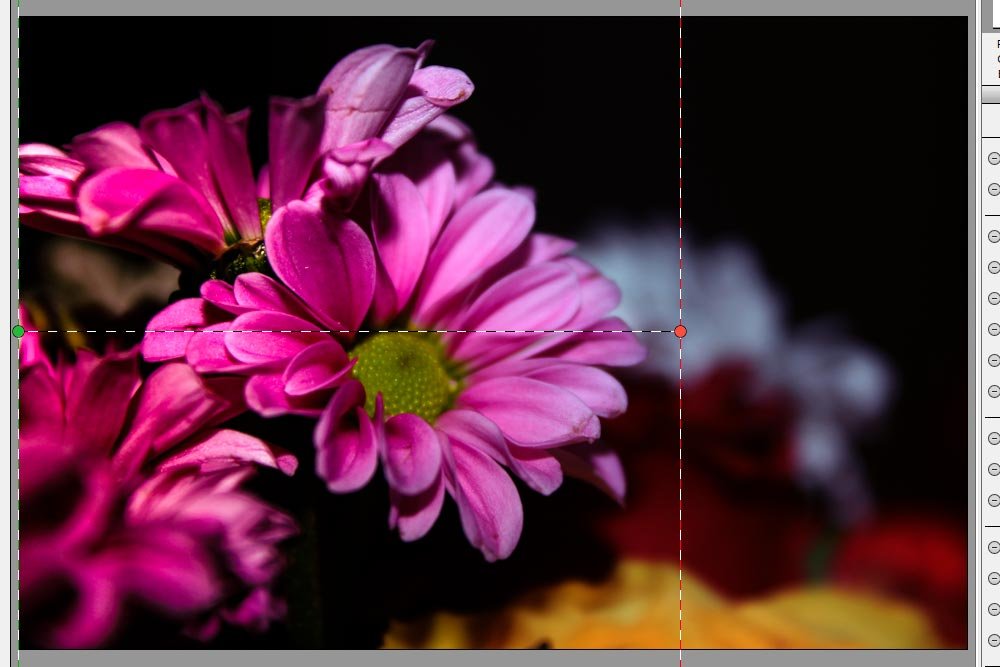
Now, just to be sure I’m adjusting the correct area of the photo, I’m going to click on the Mask check box at the bottom of the Graduated Filter panel. This will give me that foggy overlay.
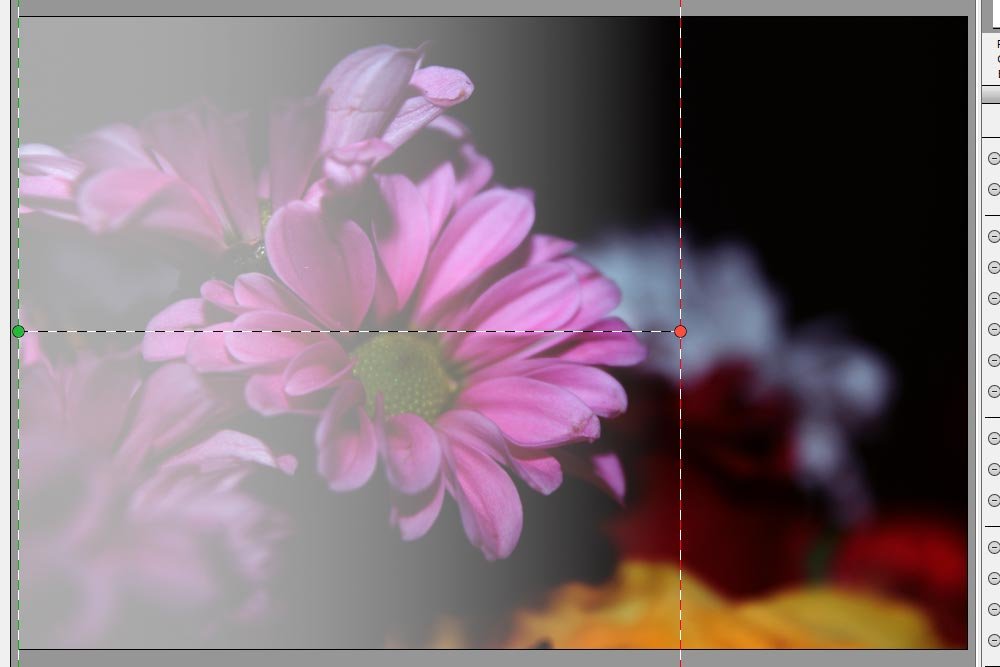
That’s definitely the area I want to adjust. But wait, there’s one thing I want to to. Even though the image looks better, in my opinion, I would like to remove some of the effect from the right side of the flowers. I want to keep them in their original state. To accomplish this, I can click on the Brush tool radio button at the top of the Graduated Filter panel.
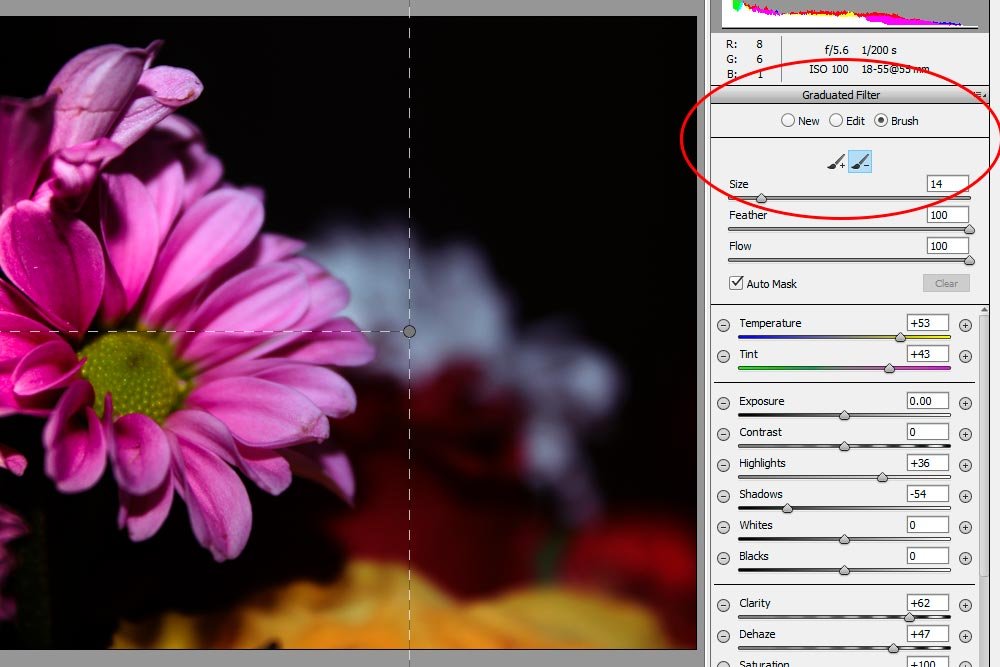
After I click that radio button, I can see that some new sliders appear. These control the size of the brush, the feather to the edges and the hardness of it. But above those sliders, there are two very important selections. One button adds more effect to the image and the other removes effect from it. In this case, we want to remove effect. So, I’ll go ahead and keep that option selected and move the Brush sliders around where I want. Finally, I’ll click on the Auto Mask option below the top three sliders. This acts as sort of a magnet that will keep the brush from wandering outside of the local edges. So, if I’m going to brush something with a defined edge, this Auto Mask option will keep me on the straight and narrow.
All I need to do from here is to apply the brush to the areas of the graduated filter that I don’t want to have any effect applied to them.
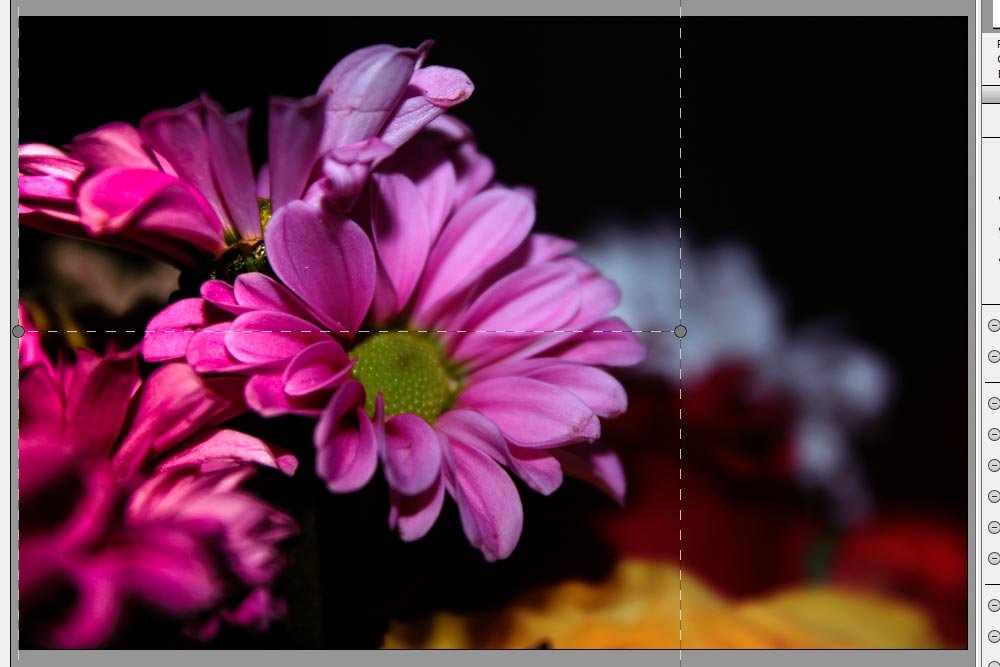
That looks good. I removed some of the additional saturation from the right side of the flowers. Just to me sure, I’m going to click on the Mask check box at the bottom of the panel again.
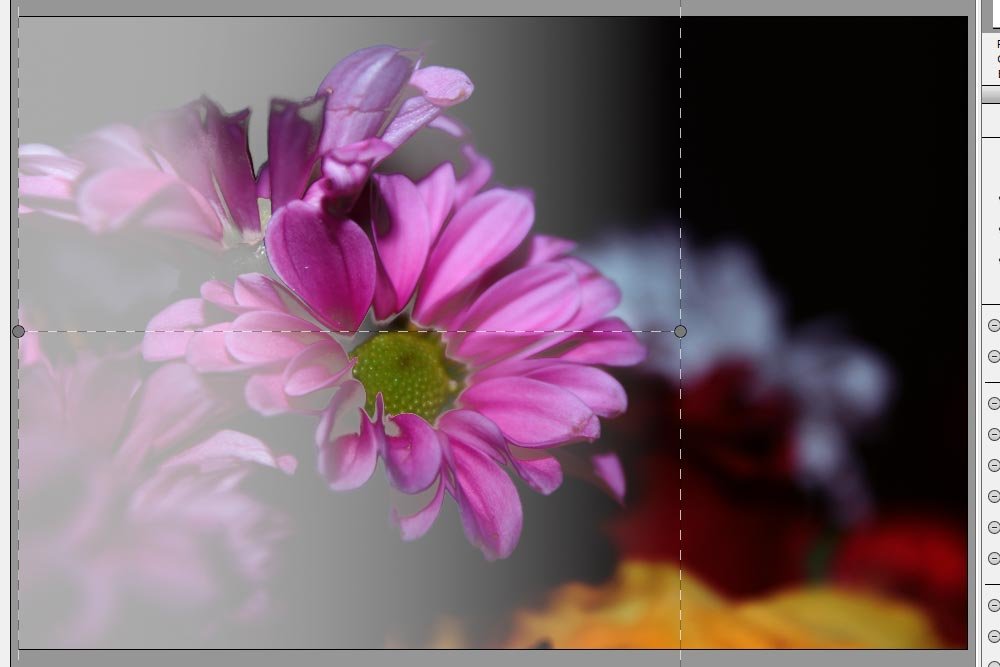
If you take a look at the above screenshot, you can see where I removed some of the effect. It appears as some removed foggy area in the mask.
I encourage you to start using this tool, if you haven’t already. There is a new world open to you once you do. After you give it a few tries, please leave a comment below to let me know how you made out.
