CraigHardy
Member
- Joined
- May 11, 2021
- Messages
- 223
- Reaction Score
- 2
- Points
- 18
- #1

If you’ve ever written on a WordPress blog and have taken advantage of “Tags,” you sort of already know how collections work in Adobe Lightroom. The same is true if you’ve used “Hashtags” in social media. Both of these examples use pretty much the same concept. Both of these ideas transcend categories and random posts to add a, sort of, topical organization. If what I’m writing here makes no sense, please continue reading. In just a few more sentences, you’ll have a better picture of what’s going on.
If you’re using Lightroom, you most likely understand how folders in either Windows or on a Mac operate. It’s actually quite simple – you create folders and fill those folders with files. If we use a photographer’s image collection as an example, we might see a top level folder named “My Pictures” and sub-folders based on date or event name. I wrote a post that deals with exactly this topic (how photographers store their photos) that you can read to better understand what I’m referring to.
So, for example, let’s say that you’re a photographer and you actually have a top level folder that will hold every single photo you’ve ever taken. That folder is named “My Pictures.” Inside that folder, you’ve got ten more folders, one per year for the past ten years. They go something like this – 2005, 2006, 2007, etc… Now, inside each of these year based folders, there are more folders, but this time, each sub-folder is named by event. Examples of these folders might be “Smith Wedding,” “Maine Hiking” and “Italy Vaction.” You get the idea.
As you might have already guessed, this type of photograph storage and organization is very popular. It just makes sense and is remarkably intuitive. And as we import our photos into Lightroom, things stay tidy and easy to navigate.
Here’s the thing. What if we import one of our folders full of wedding pictures into Lightroom and then, after that, we import another folder that holds vacation pictures? What if both of these folders contain some amazing photographs of trees and landscapes? It doesn’t matter if these shots were taken at someone’s wedding or on vacation, you’d like to organize all of these “topically” similar photos in their own collection. Ahh, now we’re beginning to see how all this is related to WordPress tags and social media hashtags. Both of these types of tags “transcend” their initial organizational structure with a more defined structure – one that’s based on item, rather than date or event. It’s simply more granular.
Now that we’ve got a handle on how we’d like to organize photos, let’s start calling this type of structure “Collections.” That’s what Lightroom calls them and it’s what I’m going to cover in this post. How to create collections in Adobe Lightroom.
Selecting Photos
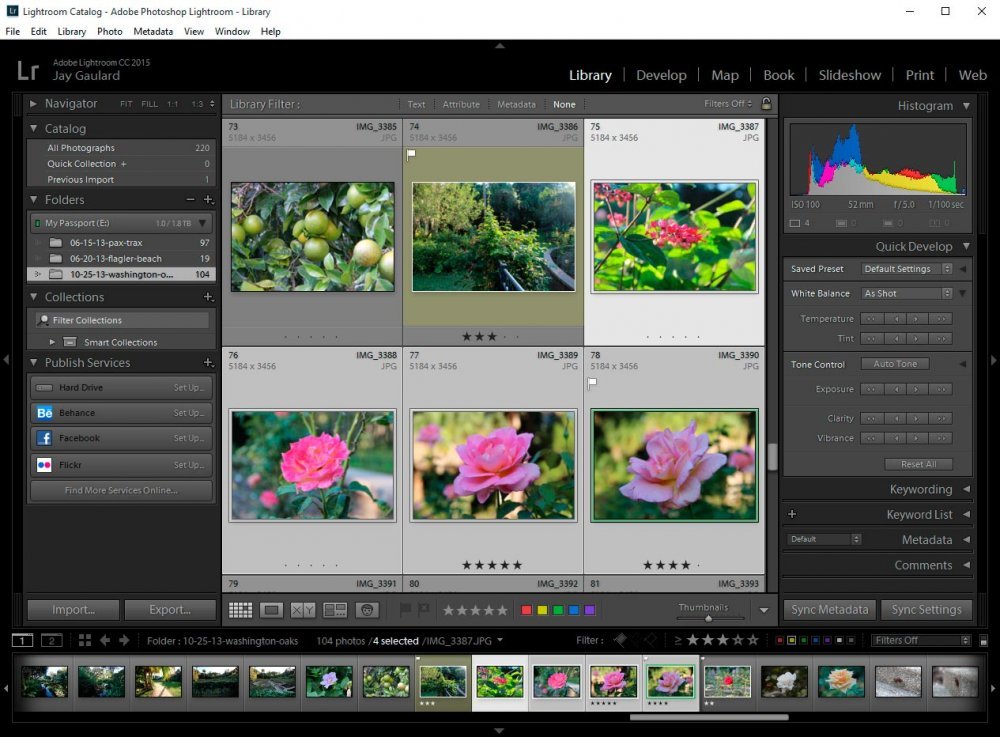
In this post, I’m going to be working with a few folders of photos that I’ve already imported. You may have seen some of these in my previous posts about Lightroom. The primary folder I’ll be working in will contain photos I shot while visiting “Washington Oaks State Park” in Palm Coast, Florida.In this folder, I’ve got a few photos of flowers. I’ve also got pictures of trees and of the water. Since all the pictures are very diverse, but were shot in the same park, I’d like to break things down a bit, simply for organization’s sake. In order to do this, I’ll first focus on my flower shots.
In order to add any photo to any collection, that photo needs to be selected. If it’s just one picture, you can click on its thumbnail. If it’s multiple photos that need to be selected, you can click on one of them and then hold down the “Ctrl” key on your keyboard and continue to click on the remaining photos you’d like to select. If all the photos you’re interested in are contained one right after another, you can click the first one and then hold down the “Shift” key, followed by clicking on the last photo in the series.
Creating a Collection
Now that I’ve got my flower photos selected, I can go about creating a collection a few different ways. The first method is to head up to the “Library > New Collection” menu and click.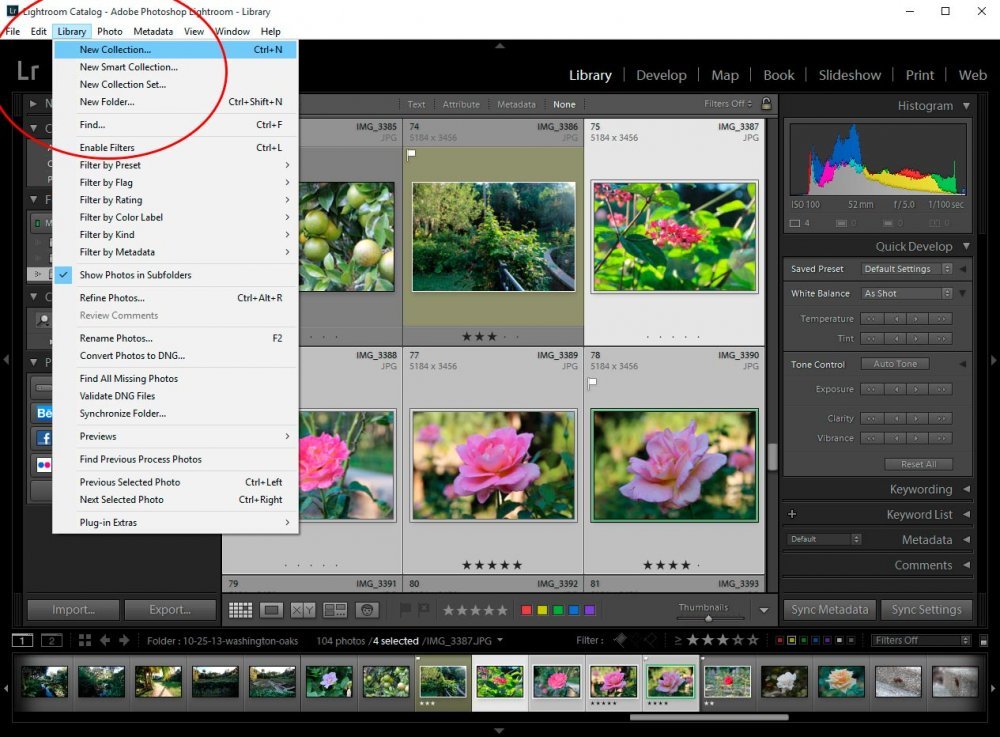
If I want to stay locally, I can just as easily click the “+” button that’s located on the right side of the “Collections” panel and click “Create Collection” from there. Both of these methods perform the same exact function.
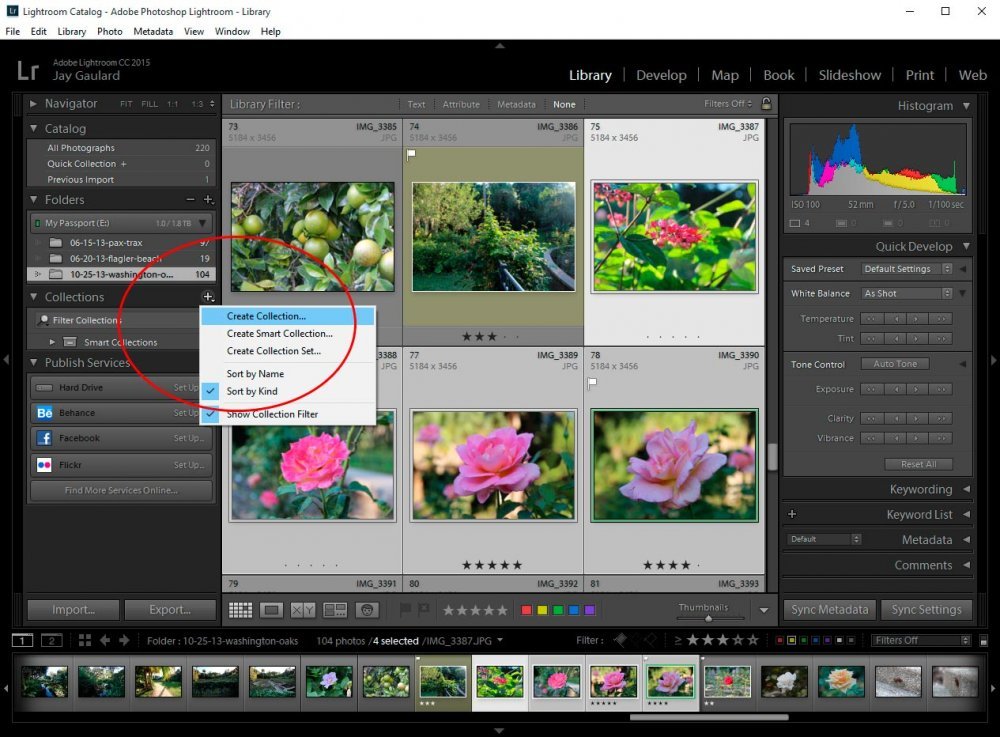
That function is to display the “Create Collection” dialog box.
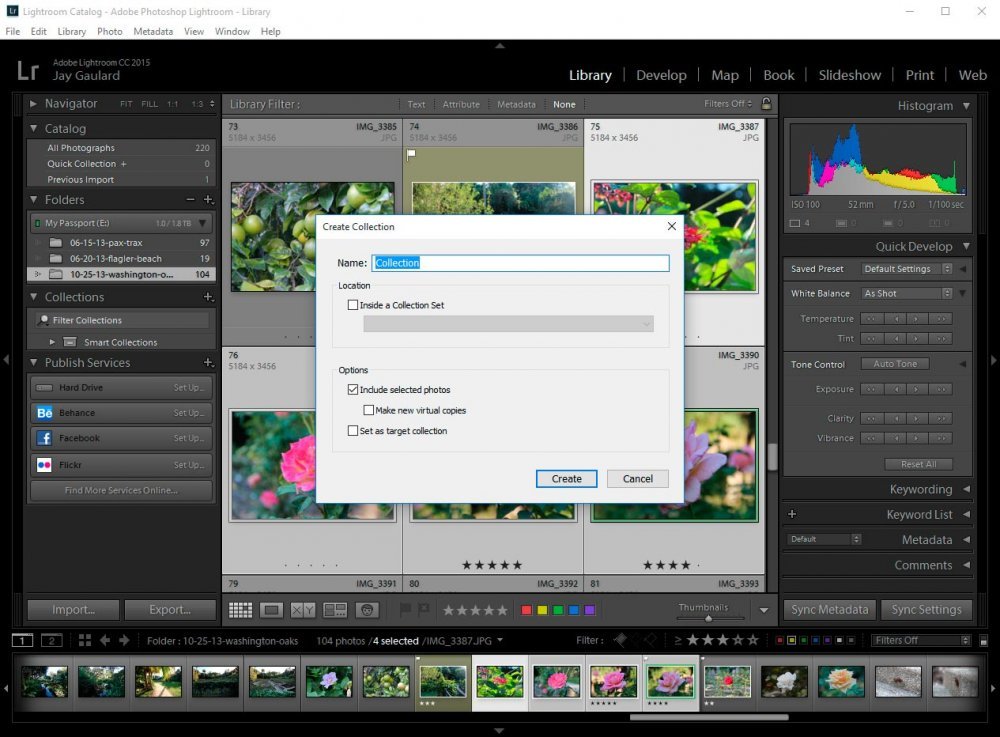
This dialog box is fairly self-explanatory. We can (and should) name our new collection, if we’ve got other collections, we can nest this new collection inside one of them, we can include the photos we’ve already selected (we can create collections without selecting photos first), we can make virtual copies of our selected photos and we can set this collection as a target. In our case, we’ll simply name our collection and leave everything else as-is. It all looks good. All we need to do is to click the “Create” button.
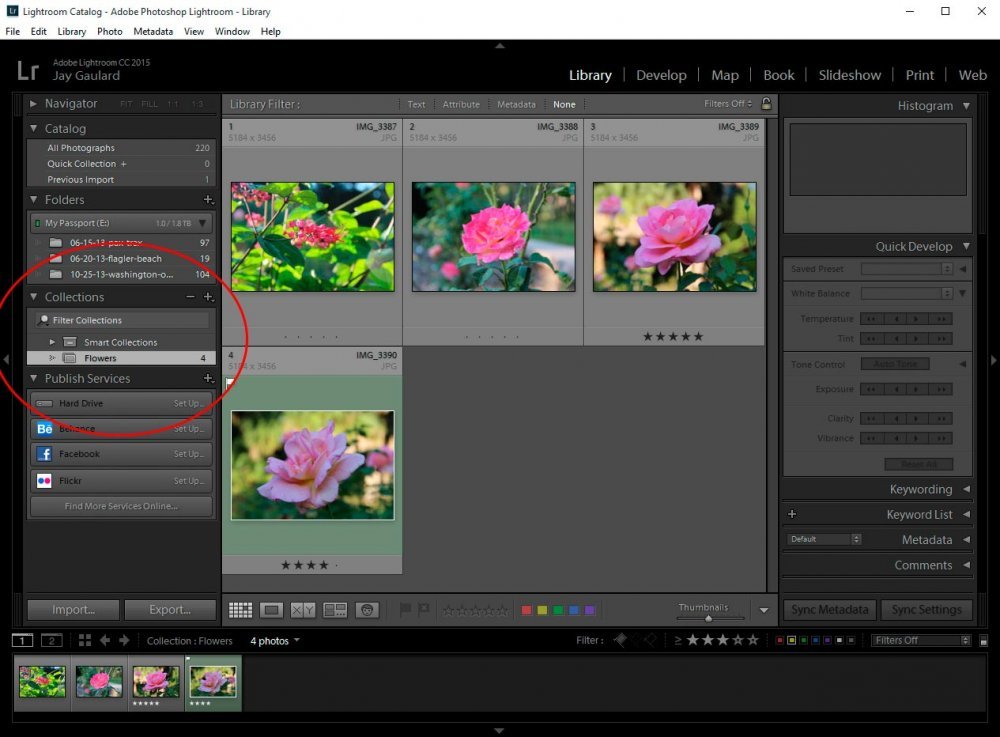
If we now look inside the “Collections” panel, we should see the collection we just created. And if we click on that collection, we should see the photos we added to it.
Now, I want to bring you behind the scenes for a moment and to let you know that by adding photos to a collection, all we’re doing is merely “tagging” those photos with the collection name. We’re not actually moving any files anywhere. When we select a photo and add it to a collection, we’re sort of indicating to Lightroom that it should display that particular photo in the center content panel if anyone ever clicks the collection name. If you look for a new folder on your computer that has the same name as your collection, you won’t find it. Also, if you look in your existing folder for any missing photos, you’ll see that the photos you moved into the new collection are still where they always were. All we did was to create a command in Lightroom that takes form as a collection.
Deleting a Collection
To go further in this post, I’m going to have to delete the collection I just made. I have plans that don’t include the Flowers collection. To remove this collection, I can head over to the “Collections” panel again and right-click on “Flowers.” From the menu that appears, all I need to do is click on “Delete.” This will remove this particular collection from Lightroom.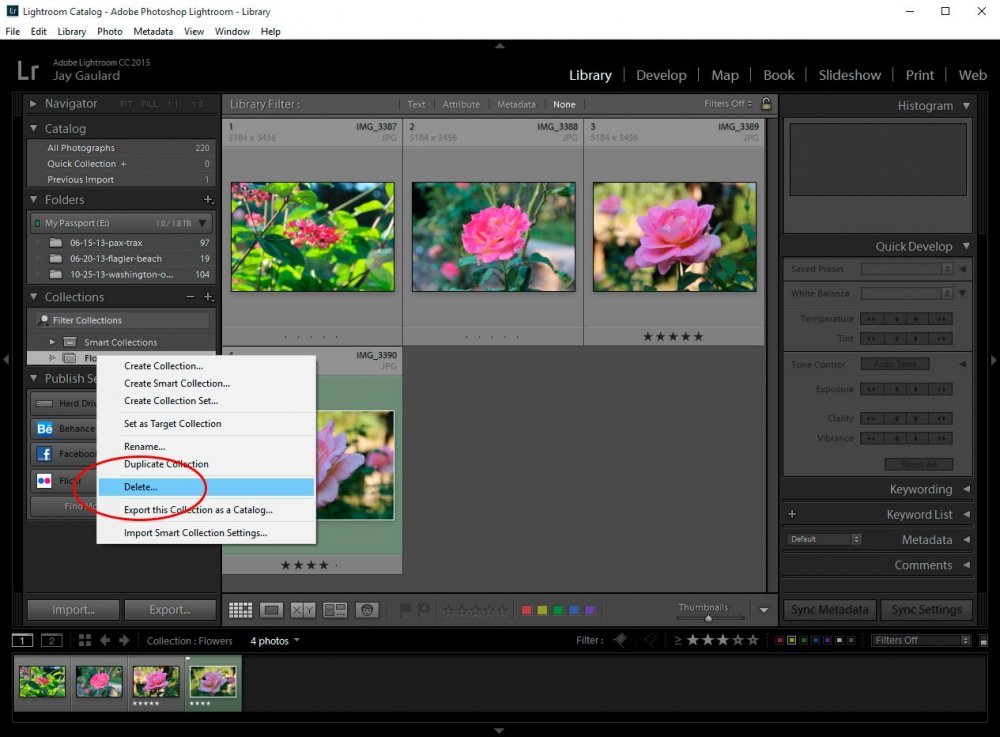
Creating a Collection Using Photos From Multiple Folders
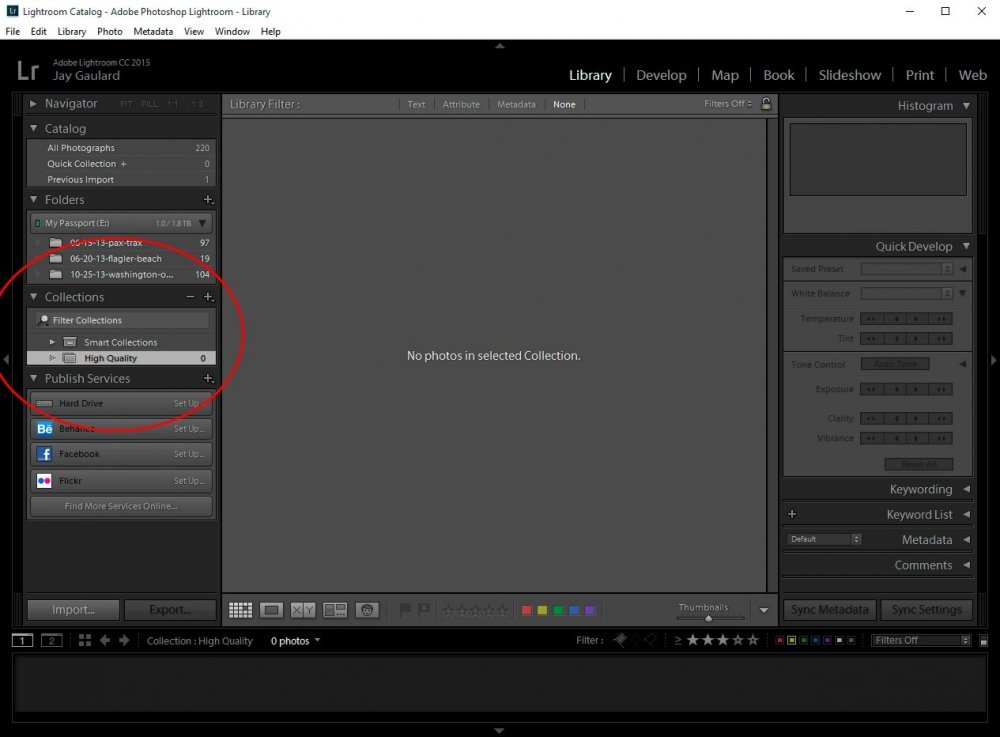
Creating a collection that consists of photos from only one folder doesn’t really harness the power of collections in Lightroom. The fun begins when we flip through multiple folders and select various shots and add those shots to one collection. This is the “transcending” I referred to previously.Let’s take a look at what we’ve got to work with. If we browse through the “Folders” panel, we can see that I have already imported three folders. They are “Pax Trax,” “Flagler Beach” and “Washington Oaks.” I’d like to create a collection that consists of photos from each of these folders.
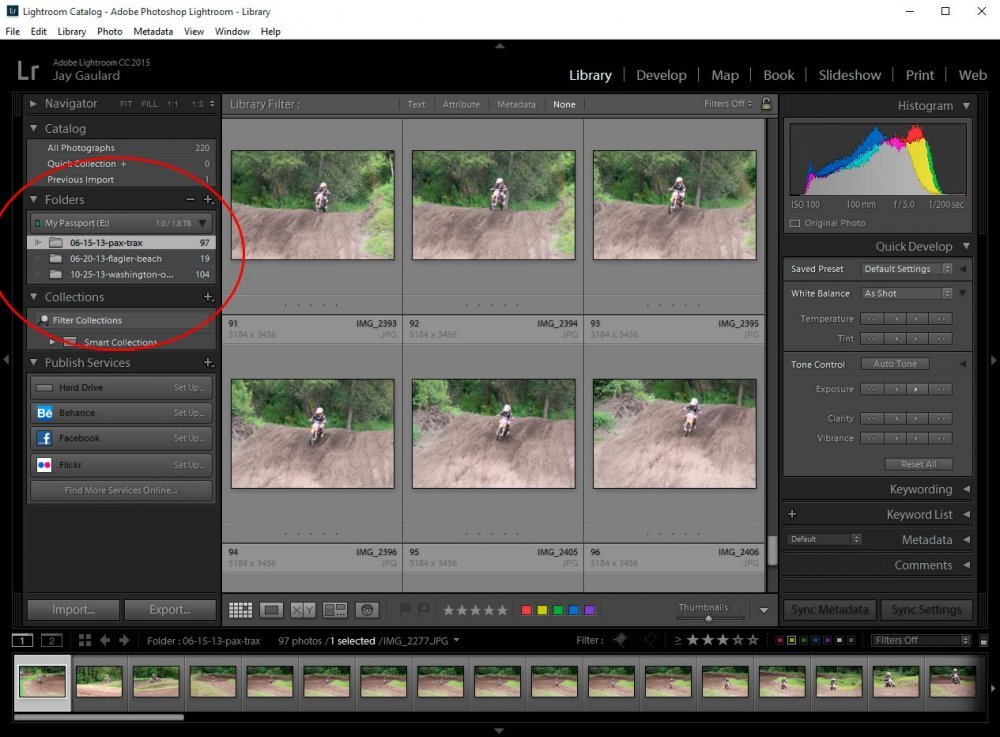
Now, to be honest, none of these folders truly contain any photos that are related to each other. They were very diverse events and because of this, I’m merely going to create a collection that’s named “High Quality,” where I single out photos that I believe are good enough to edit and eventually print. This is a workaround to my little issue.
To do this, I’m going to go back and click the small “+” icon that’s located on the right side of the “Collections” panel (I have’t selected any photos). From there, I’ll name my new collection “High Quality” in the “Create Collection” dialog box and finally, I’ll look over in the Collections panel and find the new, yet empty, collection as indicated in the next screenshot.
Dragging the Images
I think we’re ready to begin adding images to our new collection. To do this, we’re going to go back up to our folders and choose the one we’d like to begin with. From there, all we need to do is click on an image and drag it over to the new collection. Once it’s over there, we can let go and drop it into the collection. After we do this, if we go back into the original folder we dragged from, we’ll notice that the chosen image has a small, black square at the bottom of it, indicating that it’s now part of a collection (roll over the black box).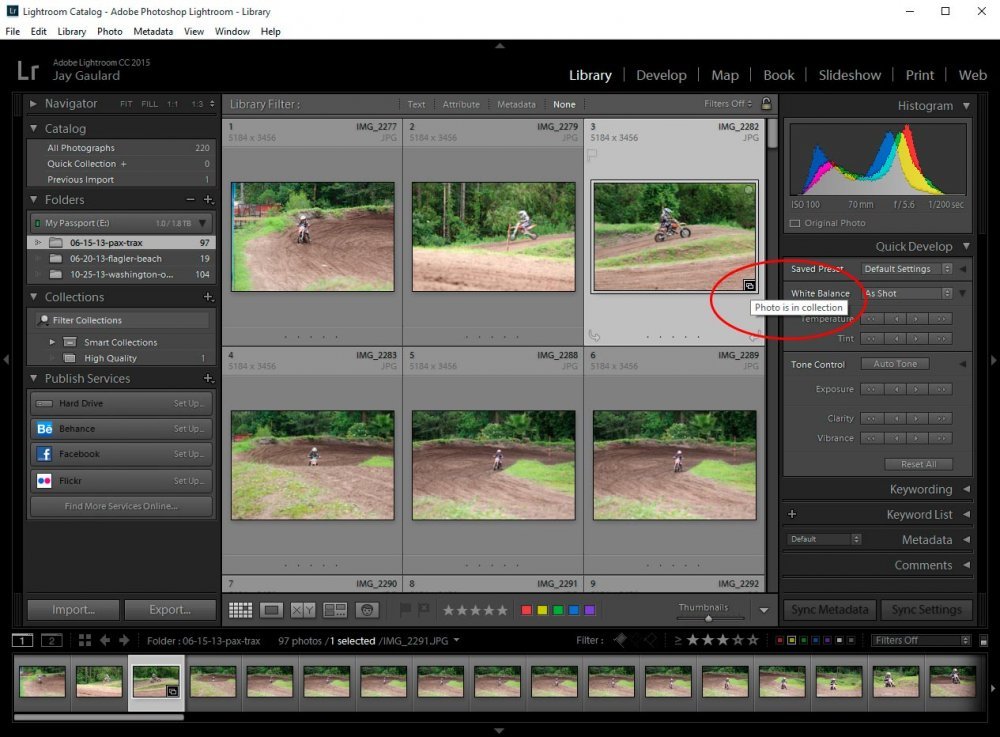
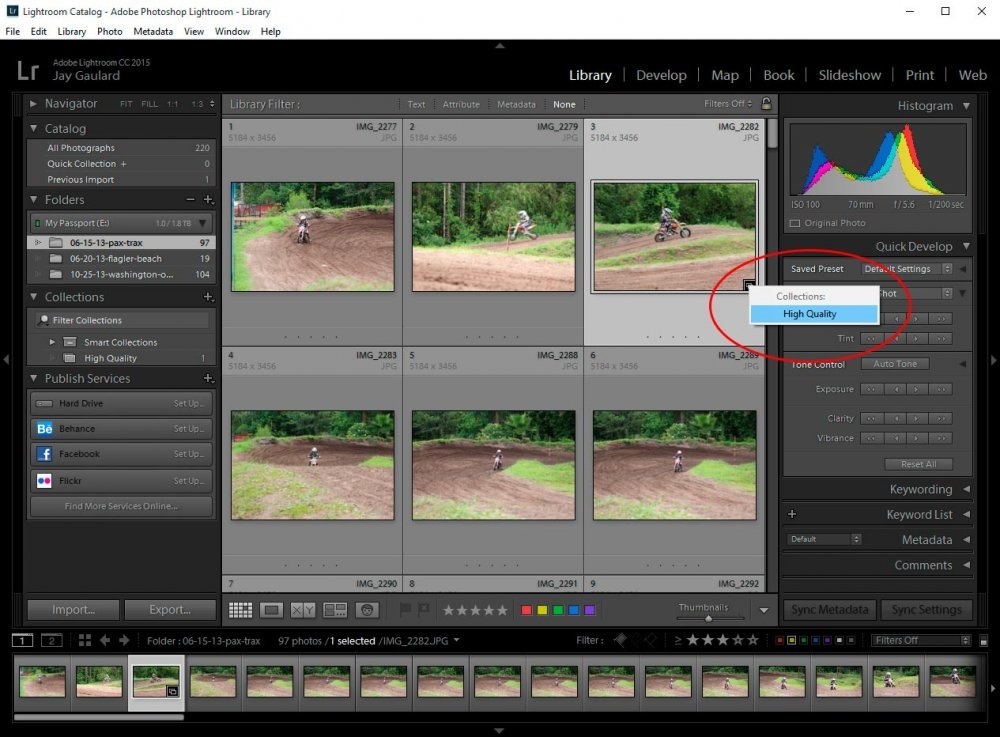
If we click the black box, we’ll see the collection the image is included in and if we click that collection, we’ll be brought to it, displaying our chosen photographs. It’s a pretty neat way to navigate.
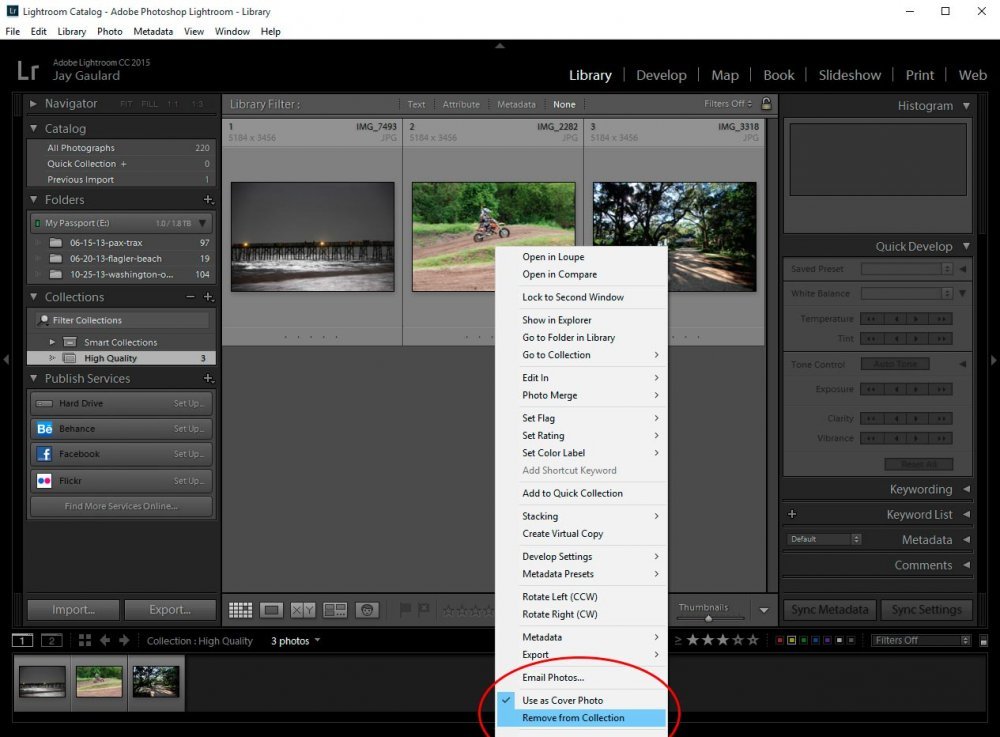
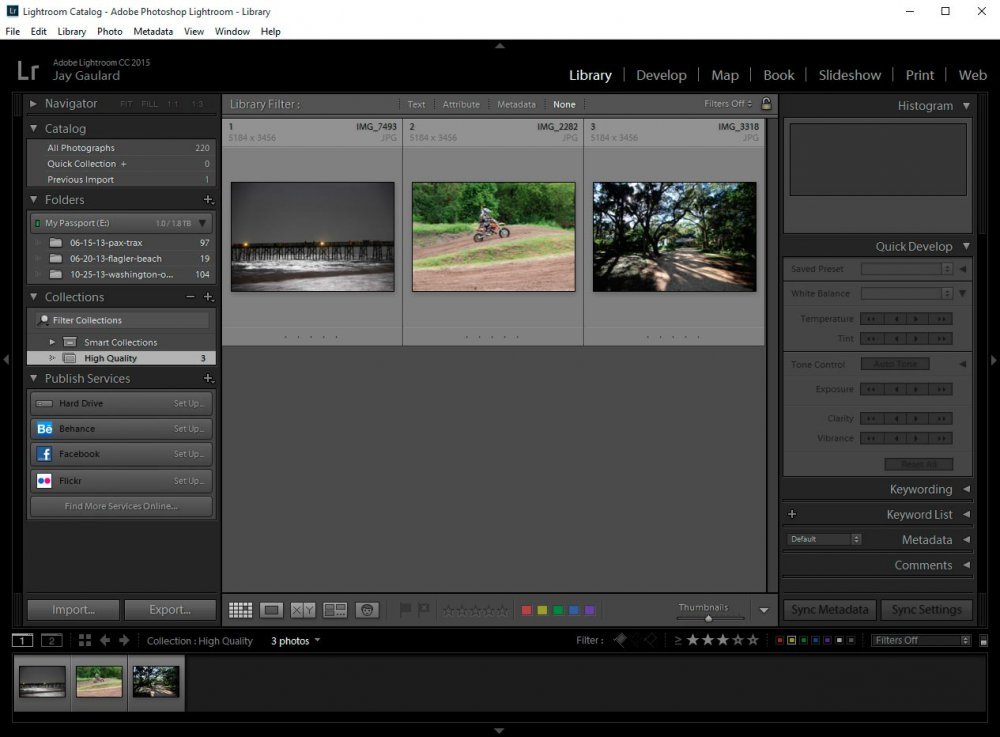
To add more photos from the other two folders, I’m going to click those folder names in the “Folders” panel and do the same clicking and dragging to the “High Quality” collection. Once that’s done, I’ll click into the collection and find my chosen photographs. As you’ll discover in the screenshot below, I have three photos in the new collection – one from each of my imported folders.
Removing Photos From a Collection
Ya know, after looking through the photos in my new “High Quality” collection, I’ve decided that one of them really doesn’t make the grade and I’d like to remove it. This is an easy feat to accomplish. All I need to do is to right-click on the thumbnail in question and click on “Remove From Collection.” This will keep my photo in its original folder, but will delete it from the collection I added it to. Alternatively, I could have just as easily hit the “Delete” key on my keyboard to accomplish the same task.