Cameron
Member
- Joined
- May 10, 2021
- Messages
- 108
- Reaction Score
- 3
- Points
- 23
- #1
This is just about the coolest thing ever. Well, maybe not ever, but it’s pretty cool. If you’re into using Program mode, like I am, while operating your camera, you’ll surely want to learn how to take advantage of something called Program Shift. It adds a level of flexibility where you’d otherwise not find it.
Here’s the problem. The settings I just spoke of are a result of the light the camera measures for the scene. In cases like this, the camera doesn’t know or care about how you’d like to see the actual output. It doesn’t know if you want a shallow depth of field or a deep one, a fast shutter speed or a slow one or how much grain you’re willing to put up with in your shot. The camera merely measures the light and creates a balance among the three settings I just mentioned. In order for you to get some specifically creative looking photos, you’ll need to use Program Shift. It’s sort of an automatic alternative to Manual mode. The best part is, it’s super simple to use and you can learn how to get things done in a matter of minutes.
In today’s post, I’d like to walk you through the process of using Program Shift. It’s really only one or two steps, but some explanation and photos would certainly help. I’ll show you what the rear LCD screen on my Canon T6i looks like after I meter a shot and how I can go about altering the automatic result the camera suggested. I’ll do this while maintaining the same photo quality the camera initially suggested for the particular lighting scenario.
Understanding Exposure Compensation in Photography
How to Manage Exposure Compensation with a Canon Rebel T6i DSLR Camera
The reason I bring up exposure compensation is because program shift operates very similarly. When you go to adjust exposure compensation, you hold down one button, turn a dial and then check out the resulting settings on the LCD screen of the camera. When you want to use program shift, you meter your camera, turn a dial and read the results, the same way as you did when you changed the exposure compensation settings. It’s that easy.

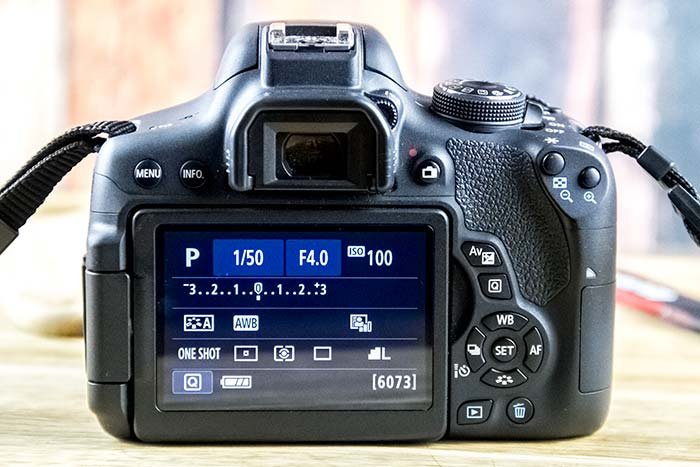
As you can see, we’ve got some results on the camera’s rear screen. The shutter speed is set to 1/50, the aperture is set to F4.0 and the ISO is set to 100.
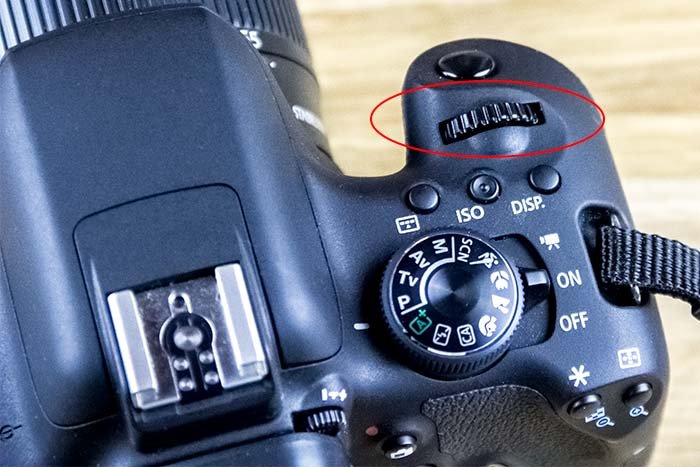
Now, if I meter the camera once more, just to make sure those same results appear for this particular scene, and then turn the dial at the top of the camera to the left or two the right, I’ll see those settings on the LCD screen change.

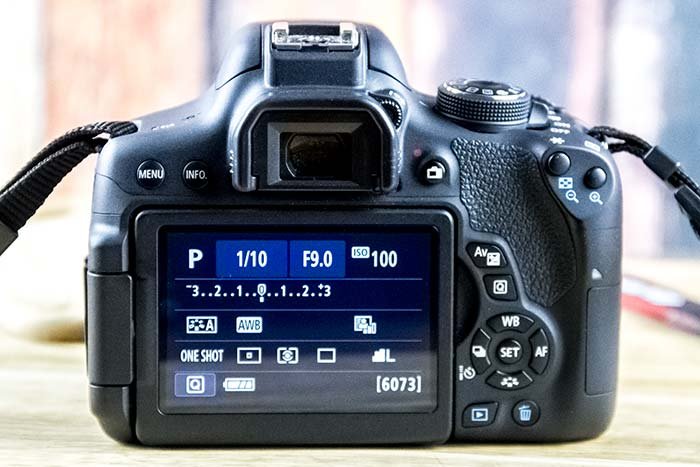
I just turned the dial to the left and now the shutter speed is 1/10, the aperture is F9.0 and the ISO is 100.

If I continue on and push the shutter button all the way down so the photo is captured, I’ll see the photo and the settings used to capture it on the rear screen. They should match those I just adjusted the camera to.
What is Program Shift?
Okay, if you’ve ever pushed the shutter button down half way on your camera while in Program mode, you’ve, what they call, metered it. You’ve metered your camera. Metering a camera is a fancy way of saying that you have allowed your camera to assess the scene the lens is pointing at and choose which settings are the most appropriate for that scene. The aperture gets set, the shutter speed gets set and the ISO gets set, among other things.Here’s the problem. The settings I just spoke of are a result of the light the camera measures for the scene. In cases like this, the camera doesn’t know or care about how you’d like to see the actual output. It doesn’t know if you want a shallow depth of field or a deep one, a fast shutter speed or a slow one or how much grain you’re willing to put up with in your shot. The camera merely measures the light and creates a balance among the three settings I just mentioned. In order for you to get some specifically creative looking photos, you’ll need to use Program Shift. It’s sort of an automatic alternative to Manual mode. The best part is, it’s super simple to use and you can learn how to get things done in a matter of minutes.
In today’s post, I’d like to walk you through the process of using Program Shift. It’s really only one or two steps, but some explanation and photos would certainly help. I’ll show you what the rear LCD screen on my Canon T6i looks like after I meter a shot and how I can go about altering the automatic result the camera suggested. I’ll do this while maintaining the same photo quality the camera initially suggested for the particular lighting scenario.
Please Read About Exposure Compensation
Before I continue, I’d like to suggest that you read up on a concept called Exposure Compensation. If you aren’t familiar with the fact that you can tell your camera that it should allow either more or less light into any given shot, you’ll be a master after reading through these two post. I wrote them a while ago and they’re very simple to understand and get through.Understanding Exposure Compensation in Photography
How to Manage Exposure Compensation with a Canon Rebel T6i DSLR Camera
The reason I bring up exposure compensation is because program shift operates very similarly. When you go to adjust exposure compensation, you hold down one button, turn a dial and then check out the resulting settings on the LCD screen of the camera. When you want to use program shift, you meter your camera, turn a dial and read the results, the same way as you did when you changed the exposure compensation settings. It’s that easy.
Using Program Shift
I’m going to sit my camera down and meter it by pushing the shutter button down half way. Let’s check out the result of my doing this.
As you can see, we’ve got some results on the camera’s rear screen. The shutter speed is set to 1/50, the aperture is set to F4.0 and the ISO is set to 100.
Now, if I meter the camera once more, just to make sure those same results appear for this particular scene, and then turn the dial at the top of the camera to the left or two the right, I’ll see those settings on the LCD screen change.

I just turned the dial to the left and now the shutter speed is 1/10, the aperture is F9.0 and the ISO is 100.

If I continue on and push the shutter button all the way down so the photo is captured, I’ll see the photo and the settings used to capture it on the rear screen. They should match those I just adjusted the camera to.
