Search

Night Photography Tips

  • Thread starter Phoenix1
  • Start date
Phoenix1

Phoenix1

Member
Joined
May 7, 2021
Messages
135
Reaction Score
0
Points
23
  • #1
This thread is all about how to take better photographs at night. Dark scenes can pose a number of challenges for amateurs and pros alike, but most of those challenges can be overcome to produce satisfactory results. As a matter of fact, nighttime can offer unique opportunities that other times of day simply can't. Below, you'll find a collection of posts that cover this topic. If you've got anything to add, please don't hesitate to do just that. We're all looking to learn and the more input we have, the better.
 
Phoenix1

Phoenix1

Member
Joined
May 7, 2021
Messages
135
Reaction Score
0
Points
23
  • #2

3 Incredibly Easy Tips For Better Night Photography​

I absolutely love night photography. I can remember the first time I took some night time photos and I was blown away by what I saw through the screen on the back of my camera. Apparently, digital cameras completely transform whatever it is you’re taking a picture of into something totally different. Brighter, more visible, more interesting and more creative looking are just a few ways I can describe what cameras can do to a scene.

In today’s post, I’d like to quickly talk about three ways you can take better night time photography in so many situations. I’ll be writing a lot about this topic in future posts that have to do with a much wider array of instances, but for today, I’ll keep things geared towards subjects and backgrounds that stay still. Of course, there can be moving objects in the scene and there probably will be, but most of what’s being photographed won’t be moving. The goal of this post is to let you in on a few secrets that photographers have been using for years. Small tricks that will help give you the most clear photos possible, because as you may well know, even the smallest camera shake or vibration can introduce blur. Especially when you’re photographing something that’s far away.

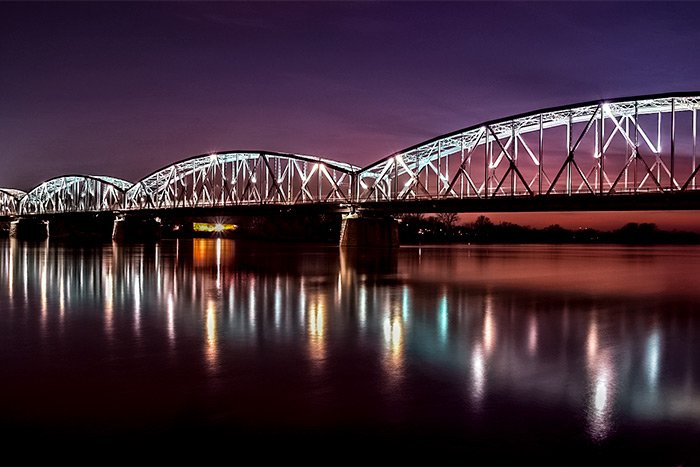
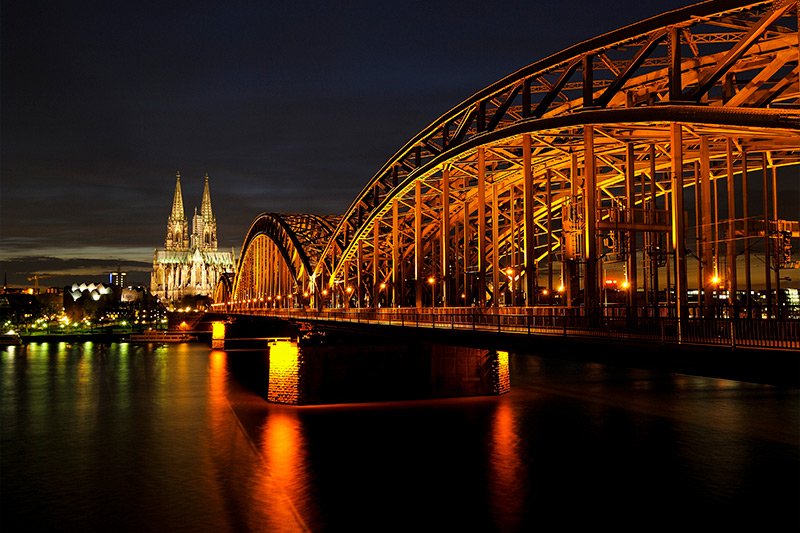
bridge.jpg

Tip #1 – The Problem With Mirror Slap​

You may not have ever heard of mirror slap before, but it’s a real thing. Basically, when you set up a photo and use the optical viewfinder (the little window you look through on the back of your camera) to do so, a small mirror inside your camera is used to give you visibility of your scene through that viewfinder. When you press the shutter button to take the photo, the mirror moves from the down position to the up position very quickly. When the mirror is up, the shutter moves to expose the camera’s sensor. Once the scene is captured on the sensor for the specified amount of time necessary for a good photograph, the shutter moves back into its original position and so does the mirror. The issue here is the very slight vibration that’s caused by both the mirror movement as well as the shutter movement. Since the mirror is a tiny bit more bulky than the shutter, the mirror creates more vibration. That vibration can cause blur during some types of shoots. Namely ones that use shutter speeds between 1/100th of a second to 1/4 of a second. While the blur may be slight and many of us won’t notice it at all, it’s there and it can make a difference in the quality of a photo if it’s enlarged enough.

So, how can you deal with the detrimental effects of mirror slap? Well, most photographers simply use Live View mode at night. That is, they use the rear view screen when taking a photo as opposed to looking through the little window. When using Live View, the camera positions the mirror so it stays in the up position because it’s no longer necessary to view the scene. If there’s no mirror movement, there’s no vibration caused by it.

There are also some cameras out there that offer a feature called “mirror lock-up.” This feature moves the mirror to the up position with one press of the shutter button and then takes the photo by moving the shutter with another press of the shutter button. This essentially negates any vibration caused by the mirror’s movement.

Tip #2 – The Problem With Camera Shake​

I’m sure you’ve heard of camera shake before. If you’ve ever taken a photo inside or at night, you’ve most likely experienced a longer shutter speed duration than you usually do. With a slower shutter speed, blur almost always rears its ugly head. It’s for this reason the tripod was invented (I just made that up). If you have a slow enough shutter speed, it’s nearly impossible to hand-hold a camera and get a clear photo. As you may already know, slow shutter speeds can offer remarkably creative photos, so it’s important to figure out a way to deal with shake and blur.

First, when taking photos at night, you’ll likely want to use a tripod. That’s a given. I don’t know anyone who wouldn’t use one at night. Also, since your camera will be sitting on top of the tripod, it would be a terrible thing for the finger that’s pressing the shutter button to introduce shake. Yes, it’s true, just the push of a button can shake the camera to a degree where it blurs a photo. As slight as it might be, it can be annoying and even costly.

What do do about camera shake caused by your shutter button pressing finger? For one thing, you can use a remote shutter release. All this does it separate you from the camera via a wire. You plug the release into the side of the camera and then press the button with your fingers. Since the plug side of the release and the button side of it are separated by a wire, there’s no way for your shake to be transferred to the camera. It’s that simple.

Some cameras also come with a shutter delay feature. You’ll need to check to see if yours does. A shutter delay delays the actual taking of the photo for a few seconds after you push the shutter button, thereby again separating the vibration caused by your body and the camera. Both are great remedies for this problem, but I would guess most people use the remote shutter release because it’s a relatively inexpensive solution and cameras that offer the shutter delay feature are likely higher end, therefore costing more.

Tip #3 – The Problem With Grain & Dynamic Range​

Okay, this is a big one and it has to do with ISO. If you aren’t aware of what ISO is, please read through this post written a while ago. It explains it in pretty good detail. Basically, ISO has to do with the sensitivity of your camera’s sensor. The higher the ISO setting, the more amplified that sensitivity is. Most people use higher ISO settings in darker scenarios because they need either their shutter speeds to be fast or their apertures to be small. High ISO adjustments are a great workaround for difficult situations.

The only problem is, the higher you push the ISO setting on your camera, in general, the lower the quality of photo you’ll get because of something that’s called “grain” or “noise.” You know, the little specks you see all over a photo that was taken in the dark. Grain is usually not wanted, so it’s a good idea to avoid it when you can.

A side effect of introducing grain into a photo is the reduction of dynamic range. Because the grain that’s present takes up so many pixels in the photograph, there can actually be a noticeable loss of dark blacks and light whites. Take a look at a photo that was taken in very dark circumstances for instance. You’ll quickly notice the blandness of the picture. Again, you won’t likely get the wide dynamic range we all look for in photography with a very high ISO setting.

When taking still photos at night, it’s a good idea to set your ISO to the lowest setting possible on your camera. On mine and many others, that would be ISO 100. Since you’ll be using a tripod and since you’re primary subject won’t be moving, the low ISO is fine. It’s actually more than fine; it’s preferred. Just remember, since your ISO will be set so low, your shutter speed will be markedly slower. For instance, with an aperture set to 4.5 and an ISO set to 100, it wouldn’t be surprising for the camera to automatically choose a shutter speed of eight to ten seconds. That’s actually perfect because the sensor will have all that time to soak up its environment and your resulting photo will have very little grain. If you’ll notice the photo at the top of this post, the aperture was set to 8.0, the ISO was set to 100 and the shutter speed was set to 30 seconds. This is quite common for this type of photography. Notice the water though. Do you see how silky smooth it is? And if you look very closely at the bridge, you can see the trails from the lights on the passing cars. I simply love this type of photography.

——

I hope I clearly explained some quick tips for better night photography. If you have any questions regarding this post, please leave them below. Thanks for reading!
 
Phoenix1

Phoenix1

Member
Joined
May 7, 2021
Messages
135
Reaction Score
0
Points
23
  • #3

Some Tips For Setting Camera Exposure For Night Photography​

One of the biggest issues for someone to deal with after they purchase a new DSLR camera is trying to figure out how photography works. I mean, let’s be honest here, there are a ton of buttons and levers to contend with on most cameras out there. On my Canon Rebel T7i, there are 15 buttons on the back alone. On the top, there are four more and that doesn’t include the dial or mode selector. What’s worse is that these buttons aren’t that well explained; they use small symbols and letters, which leaves someone who’s new at the sport doing a lot of guessing and trial and error.

Obviously, the best way to deal with all of this is to learn how your camera operates and how the fundamentals of photography work. It really doesn’t take that long to do. Give me a few hours and I could have you outside shooting away. The knowledge gained today would help you far into the future and with this new knowledge, you would have the ability to get as creative as you wanted to. No more guessing and hoping that a shot would come out perfectly. If you know what you’re doing, you’d set a goal and manipulate your camera to meet that goal. You can’t do that if you’re guessing.

The reality of it is that many folks don’t want to get all that deep into things. The questions most of us ask are, “How do I take photos at night?” Or, “How do I take pictures of star trails?” Or, “How do I get a good picture of the moon?” These are some of the most popular questions out there. And don’t get me wrong, I admit that I do this too. I ask questions like this all the time and then hunt around the internet in an effort to find the answer. Sometimes I simply don’t have the time to work through an entire lesson. I just want to know how to take a decent picture of the moon already. It’s 9pm, I have my camera in my hand, so what do I do? I get it.

I think I’m going to structure today’s post a bit differently than I normally do. What I’m going to do is show you a photo and then I’ll work through the considerations I would take if I wanted to take the same exact photo. I’ll set some goals for the type of photography that was used, based on what I see in the picture. Then, I’ll offer some suggestions that are based on the principles of photography. It’s easier than you think. Trust me.

Today’s Photo​

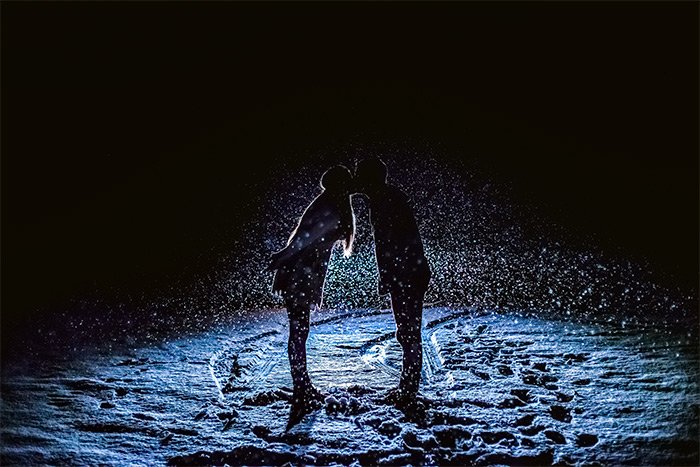
This is the image I’ll be working from today. It’s of two young people kissing in front of some car headlights. This can be a tricky photo to capture, so hopefully we’ll all learn something.

kissing-snow.jpg

Setting to Consider While Taking This Photo​

Let’s get into the settings now. I already know that you all have DSLR cameras, so that’s not a concern. You have Auto, Shutter Priority, Aperture Priority and full Manual mode at your fingertips. For this photo, you’ll likely need manual mode the most.

Now let me ask you a question. What jumps out at you when you look at the above photo? If you wanted to take a picture that resembles this one, what one setting do you think is an absolute must? If you had this image in mind before heading out into a snow storm, what one thing would you look up on the internet to help you capture this occasion?

Shutter Speed​

Shutter speed. That’s the answer. Do you see the snowflakes suspended in mid-air? I certainly do. If you’ve ever taken photos of the falling snow before, you know that even though it looks like it’s lazily falling to the ground, it’s actually coming down pretty fast. If this photo were taken using auto mode, the camera may have gotten the lighting right, but it’s almost guaranteed that the shutter speed would be so slow that it would look like spaghetti is hanging from above. And honestly, this photo wouldn’t be nearly good if there were snow flake trails as opposed to independent flakes. So shutter speed truly is a priority. Hmmm…did I just say shutter priority?

This photo was actually take with a 1/400 of a second shutter speed. In my opinion, that’s the slowest you can go with snow like this if you wanted to see the individual flakes. Of course, it depends on what type of snow it is and how fast it’s really coming down, but around 1/400 of a second is good. If this were a daytime shot, I would make the speed even faster at 1/500 of a second because more light would be coming through the lens, but we’re not dealing with daylight here, so forget I said that.

Okay, so far, I could set my camera to use shutter priority and I could set a 1/400 of a second shutter speed. Would that be all I need to do? Probably not.

I just wrote a post the other day that talked about using a slower shutter speed and a lower ISO for night photography. The reason for these settings was because I wasn’t dealing with movement. In a case such as the one in today’s photo, movement is the true priority. That’s why I led with this first shutter speed setting. Now it’s time to deal with two other areas; blur and lighting.

Aperture​

So here’s a little trick you can use to take good photos in any priority mode. If you’re using shutter priority (Tv), go ahead and set up the shot with the shutter speed you’d like to use. Then, push the shutter button half way down to meter the shot. Be sure you can see the settings through either the view finder or on the rear live view screen. See what the camera likes and sets the aperture size to. I, as well as many photographers out there, think this is a great place to start. The camera has sensors built into it that will offer a pretty good indication of what type of light it needs to get a healthy photograph. After a few test shots, you can either open or close the aperture to meet your needs.

You can also reverse this and start off with aperture priority. Meter the shot to see what shutter speed the camera likes and then go from there. It’s the same concept for either priority. One more thing – you can also set up a shot using auto mode and record the settings the camera likes. Then, to get creative with your shot, you can jump to full manual mode and plug in the setting you just recorded. To get creative, move each setting until you get what you’re after. You’re going to need a starting spot, so the easiest thing to do is to let the camera choose if for you.

Just to let you know, even though there are headlights shining in this photo, it still doesn’t compare to daylight. If I took this photo in shutter priority, the camera would likely want a fairly decently sized aperture to compensate for the lack of light that fast shutter speed would cause. In this case, the aperture used was f1.8, which is rather large. If the camera chose that and the test photos made you happy, then stick with shutter priority. If you were getting way too much blur because of the shallow depth of field caused by this large aperture, then you’d have to switch over to full manual mode and then play with the ISO. Because of the way the headlights hit the snow in this scene, it appears that this aperture size worked well.

ISO​

ISO can work wonders with night photography like this. I’ll tell you, in this shot, that large aperture size saved the day. The ISO used for this photo was only 800, which is pretty low, relatively speaking. It could have been a lot higher if a different lens was used. I have an 18-135mm lens that will only open to f5.6 when zoomed in. If I used that lens for a shot like this, the ISO would have shot through the roof. The camera needs to get light from somewhere and if it’s not getting it through the shutter or the aperture, it’s going to look for it in the ISO (sensor sensitivity to light). This is fine, but the issue we deal with when using high ISO values is noise. The higher the ISO, the more noisy the photo. Even though camera manufacturers have made great strides in reducing high ISO noise, it still exists and it still needs to be considered. When engaging in photography, you’ll need to make compromises here and there. Luckily, we’re in a day and age that offers cameras of such high quality at such little cost. As long as we have a general sense of what we’re doing, we all can take really great photos.

A Few Caveats​

I want to remind you that there is no perfect photo. There is only a perfect photo for you. No one can tell you that you captured a scene incorrectly. If you’re happy taking every single picture in auto mode with your DSLR camera, then so be it. Enjoy. There may be times though where you’ll need to step out into a priority mode to acquire a special look you’re after. In these cases, you’ll need to formulate what your goal is. Take that mental image and then translate it into your camera settings. In the case of the photo above, the mental image was very still independent snowflakes, not much blur caused by the shallow depth of field (the odd lighting helped with this) and good enough lighting to make the photo look presentable.

Also, you’ll likely need to experiment with your settings in the field. It’s tough to do this on your couch at home because you can’t replicate what you’re going to experience outside. If you’re doing studio work, then sure, you can replicate that setting every time. If you’re taking pictures of elephants though, you’re going to need to work those settings like it’s nobody’s business. I hope you play around in your back yard before you go on safari though. You don’t want to miss out on those elephants.

Finally, please remember that you can really help out an image in post-processing. Applications such as Adobe Camera Raw, Lightroom and Photoshop can work wonders on otherwise marginal images. In today’s photo, as long as those snowflakes were captured properly, there’s an area of correction that could take place. Not a huge area, but an area.

If you’d like to learn more about photography in general, I encourage you to browse through the posts I’ve written on the subject. In all honesty, there really isn’t that much to learn. Some people are intimidated by what seems like a lot, but if you can get the general concept of how the camera works, you’ll pick this stuff up very quickly. I promise.

——

I hope I clearly explained how to set up camera exposure for a night time falling snow photo shoot. If you have any questions regarding this post, please leave them down below. Thanks for reading!
 
Phoenix1

Phoenix1

Member
Joined
May 7, 2021
Messages
135
Reaction Score
0
Points
23
  • #4

Photography Composition Ideas For Dark Night Scenes​

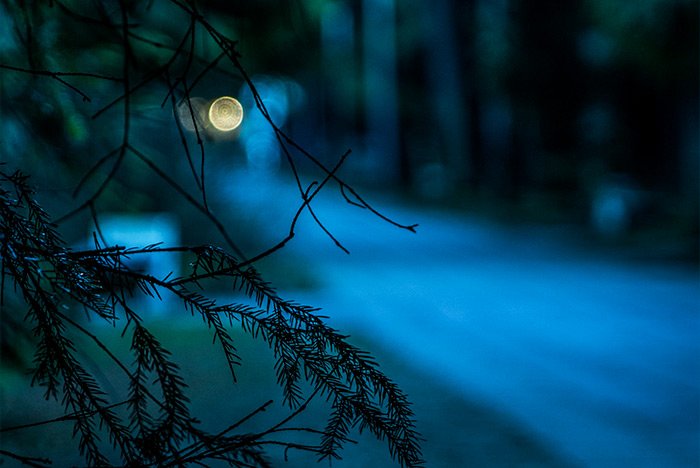
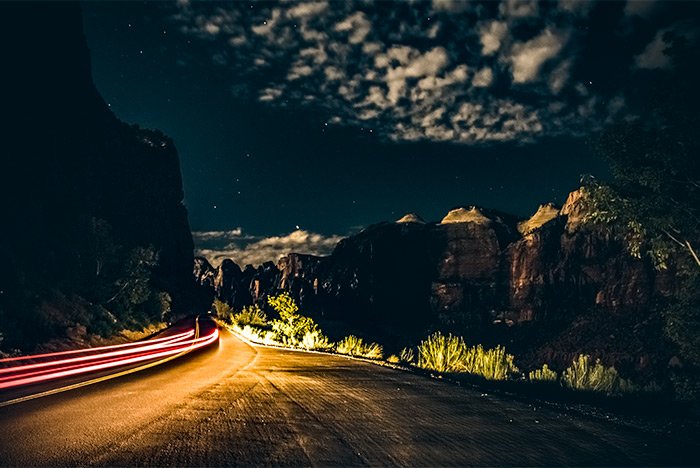
low-light-brnaches.jpg

I’ve been thinking lately about how I shoot at night and I figured it would be a good idea to share some of those thoughts here for you. Night photography isn’t the easiest of all types of photography and if you can learn a few tried and true methods for obtaining the best results, you’ll be much better off. I can remember when I first began messing with the shutter speed and aperture settings on my camera to take some low light photos – boy was that a disaster. One of my primary issues wasn’t the camera settings at all. It had more to do with composition. So once you get the settings down, you’ll need to know how to actually compose your images. And believe it or not, it’s pretty easy to do that.

I know this is obvious, but we have to remember that things are so much easier when it comes to photographing in the daylight. Composition is almost an afterthought. When you see something that should be captured, it’s not like you have to think hard about what to do. If you have even a small amount of experience, it’s almost an autonomic reaction. Get where you need to be, point and shoot. Of course, if you’re going for something much more creative than regular eye level shots, you’ll need to consider composition a bit more than that. In the daylight though, it’s still pretty easy, once you get used to things.

During low light situations (nighttime) though, the experience become a lot more complicated. The reason for this is simple. You can’t see. Even if you can pick a target with a flashlight and manage to focus on that target, the rest of the scene still needs to make sense. Below, I’ll offer a few tips to deal with these types of situations.

1. Try to choose times when there’s at least a little bit of light. If you’re shooting during one of those nights where your environment is absolutely pitch black, it simply may not be worth it. You’ll need to see at least some contrast and pitch black nights with no moon, stars or lingering light in the atmosphere from the sun don’t offer that.

2. Box off your scenes. Just like with daytime photography, you’ll need to separate the elements of your scene from one another so your brain can make sense of them. The sky is a big part of things at night, so keep that in mind. Are there mountains? Can you see the contrast between those mountains and the sky? Is there an interesting foreground? Are there objects in that foreground? Remember, even though you’ll likely be using a tripod because of your longer shutter times, you’re still mobile. Pick up your tripod/camera combination and move it around until you’re happy with what you’ll be photographing. Also, move your body around to take all the elements of the scene into account and think about what the camera will see. It’s the “boxes” that will guide you down the right path.

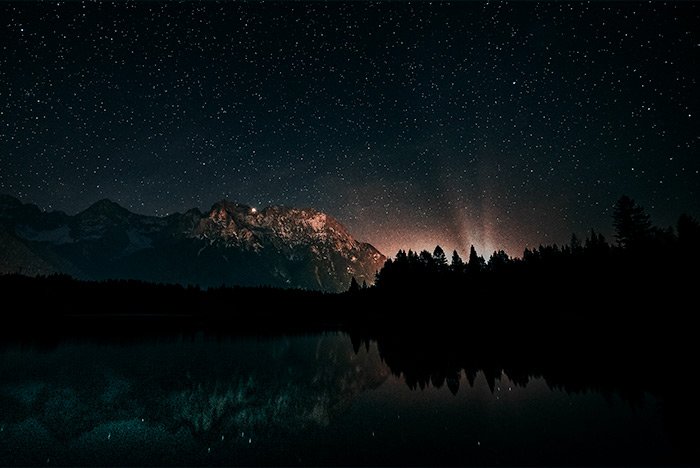
3. Remember your contrast. One of the most important aspects to consider when it comes to night photography is the difference between elements in your composition. Think about mountains against the sky. The mountains will likely come out pure black in your shot, but the sky above it is what people are going to be moved by. That and the edge of the mountains themselves. Also, think about trees in the foreground against the sky. Since there’s bound to be light left above from the moon and stars, that nice long shutter speed is going to give you such interesting results if you incorporate some darker shapes, such as trees, buildings, plants, branches, etc. Basically, a lot of night photography depends on how elements in your scenes relate to one another as opposed to the elements themselves.

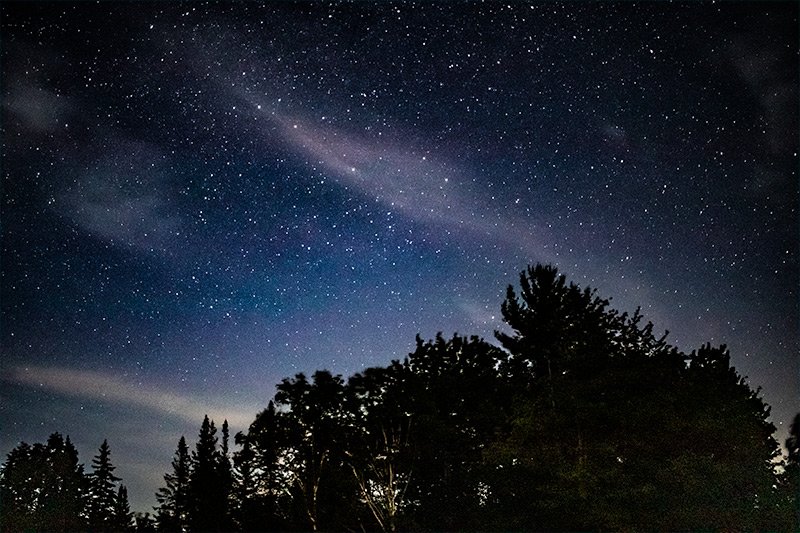
night-sky-stars.jpg

4. Change your position. This tip relates to the previous one. Again, since you’re shots will look so much better if you situate your elements against a backdrop, such as the sky, you’ll need to position yourself to take advantage of things you may not have considered initially. Think about smaller plants and bushes that you may have passed right by previously. How would photos of these things look if you lowered your tripod all the way down or got down on your belly to take the shot? If you’ve got the sky in the background, you may be surprised with the results. I love these kinds of interesting night photos. It’s all about angle.

5. Consider previously considered elements. If you initially wanted to capture a standing landscape image, don’t forget about that just because you’re now determined to get down low to capture something smaller, such as what I just mentioned in the previous tip. Keep your original landscape idea, then get down low to place the smaller element in the shot. Take the picture so it captures both the smaller element and the landscape behind it. It can be the best of both worlds.

6. Remember your long shutter speeds. I don’t want to get technical in this post, but I just wanted to remind you that you’re going to need to take advantage of some pretty long shutter speeds. When you keep your aperture at something like f/5.6 for depth of field and your ISO at 100, 200 or 400 to keep the noise low, you’ll likely need shutter speeds of at least 90 seconds. For this, you’ll probably need to set your camera to bulb mode. More on that in later posts.

I think that about sums it up. I just wanted to give you some simple ideas I had about how to compose better photography at night. If you have any questions or comments about this post or if you have anything to add, please let me know below or in the low light/night photography forum thread. Thanks for reading!
 
Phoenix1

Phoenix1

Member
Joined
May 7, 2021
Messages
135
Reaction Score
0
Points
23
  • #5

Tips For Setting Camera White Balance for Night Photography​

One of the trickier parts of night photography is having to deal with white balance. If you aren’t well versed in this topic, you can read about it here below. I’ll link to a previous post.

What Is White Balance In Photography?

When taking photos in Live View mode and looking at the scene through your camera’s rear LCD screen, if you camera is set to AWB (auto white balance), you can sometimes see the camera filter through its white balance different options. I see this all the time when I engage in food photography. The rear screen gets whitish, then yellowish and then it usually settles on something that looks somewhat normal.

The issue when it comes to night photography is that the camera sometimes has difficulty determining what type of light it’s actually dealing with. Oftentimes at night, there’s light from the moon and stars, which would require a Daylight white balance setting. If you’re walking around a city street though, or if you’re in an area where there are incandescent lights, you’re camera has to deal with what’s referred to as “mixed lighting.” This type of situation can make it tough for a camera to choose the best setting. It might want to go with the Tungsten setting. It may not get it right though and your photos might look terrible as a result. That’s why it’s important for you to constantly monitor the situation and review your photos as they’re taken.

In today’s post, I’d like to offer you a few tips on how to best set your camera when dealing with mixed lighting at night. There are some things you can do to minimize the risk of taking lousy photos and once you get the hang of things, your photography can be set on cruise control. It’ll be effortless.

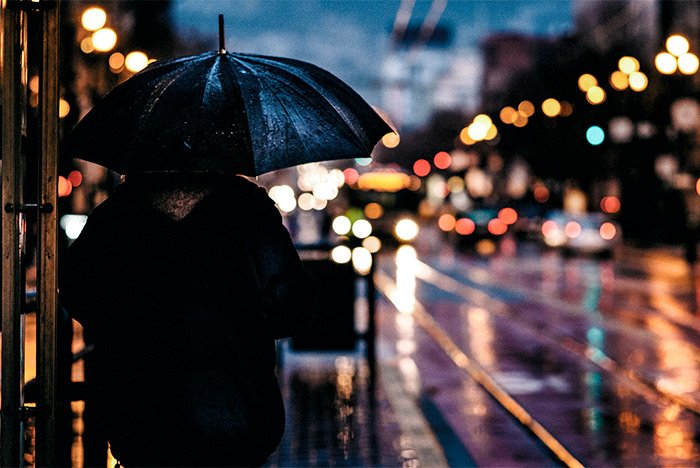
city-night.jpg

Here are some tips for you.

Shoot in RAW​

If you set your camera to take photos in RAW, you can always alter what the white balance is for those photos in an image editing application such as Adobe Camera Raw or Lightroom. I, along with so many others out there, have done this about a zillion times. While white balance is adjustable with JPEG images, the depth of data that’s being worked with isn’t nearly as extensive, so RAW really is the way to go when the situation calls for it. It’s important to note that white balance ins’t tattooed into an image, which is to say it’s not a permanent aspect. It can always be moved around and altered in post processing. If you have a photo that’s blurry beyond repair, that’s permanent. White balance isn’t permanent, so don’t freak out if you’re shooting at night and the color of your photos looks strange at the time. Those colors can always be corrected, as long as you’re shooting in RAW.

Use Auto White Balance​

The Auto white balance setting does an incredible job of picking up on and choosing the correct color temperature for any given scene, especially with the newer cameras. Tons of photographers work with the Auto setting because of this and only adjust the setting if need be. That’s if they see an image that’s out of whack while reviewing them on their rear LCD screen.

Use the Daylight White Balance Setting​

While color temperatures change throughout the day, from the temperatures at high noon being around 5780 Kelvin to the color temperature during a warm sunset being 3200 kelvin, day time color temperatures are relatively cool. The interesting thing is that night time color temperatures fall into this range as well. When you consider that any light that emits from the moon is simply the same light that’s being reflected from the sun, you can easily wrap your head around the idea of what white balance settings your camera might call for in these types of situations. Moon light has a color temperature of around 4100 kelvin, so setting your camera to take advantage of the Daylight white balance setting would be a good move. Again, you can always edit the temperature later on in post processing if you shot in RAW mode.

Use a Custom White Balance​

Sometimes you just can’t get away from mixed color temperatures. At night, there are usually many sources of light and oftentimes, the light from the moon and stars gets washed away by man-made lights. During times like these, your camera can’t decide which white balance setting to use. Even if you change the mode to something like Tungsten, things might not look right. It’s for this reason that the Custom white balance setting is available.

When dealing with mixed lighting, it’s helpful to set your white balance to a kelvin temperature that’s specific to your scene. From what I’ve seen and worked with, these temperatures usually fall between 2600 kelvin to 3700 kelvin. It’s the yellow/orange that generally needs to be cleaned up, but again, the final arbiter will be what you see in Adobe Camera Raw or something like it. If you want to be really accurate, you could always use a white balance grey card to assist in post processing. Those cards are discussed here.

As you can see, setting the proper white balance in photography can be a moving target. Even under perfect conditions, you’ll likely have to make adjustments in an editor later on. If I had to give you only one suggestion, it would be to shoot in RAW. Doing so will offer the most flexibility for you moving forward.

I hope I clearly gave you tips on how to handle and set your camera’s white balance for night photography. If you have any questions regarding this post, please let me know down below. Thanks for reading!
 
Phoenix1

Phoenix1

Member
Joined
May 7, 2021
Messages
135
Reaction Score
0
Points
23
  • #6

Has Anyone Ever Done Light Painting Night Photography?​

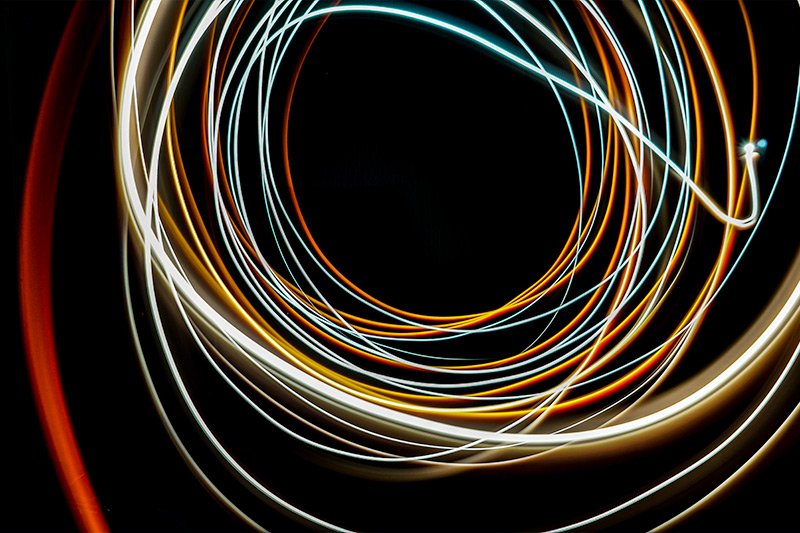
I was camping a few nights ago when my friends and I began experimenting with my camera. We set it up so it was steady and set the shutter speed to something like ten seconds. Then, we clicked the shutter button and began running around in front of the camera with a flashlight in hand. We managed to take some very interesting photos. This isn’t one of them, but this is sort of what it looked like.

light-painting.jpg

Have you ever seen something like this before? It is so cool and I’d love to learn more about it.

I did a bit of searching online and have discovered that there are a few different types of light painting as it pertains to photography. Here is what I’ve learned.

Light painting is obviously done at night. It’s used to make scenes either visible in some way or to make the scene much more interesting by adding certain types of light to it. You can use different types of lights to perform this type of thing. Be it a flashlight, drop light, flood light or whatever. As long as you paint the scene and achieve your goals, I don’t think anyone is going to tell you that you did it incorrectly.

There are a few basic methods for going about light painting a scene at night for photography. First, you can go about it subtly. Use a flashlight or something slightly larger to illuminate the scene by painting circles over the objects in your scene as non-intrusively as possible. This first method is primarily used when the photographer actually wants to take a photo of something and have it illuminated as much as possible. By circling the light on the subject during a long exposure shot, you can essentially light it up so it’s visible.

The next route to take is the creative one. This is what you’d use if you wanted the viewer of your photos to know that you did long exposure photography at night and that you used different color filters or gels over a light to paint the scene. What you’re going for here is a really cool look. You don’t necessarily want things to look professional; you want them to show random highlights and darker areas in a more artistic manner.

The last most typical type of light painting is when a photographer uses the camera’s (or, a camera’s) flash to flash an object in a scene repeatedly to illuminate it. While this may seem like a strange thing to do, you can get some very nice looking results. It’s all about the long exposure. While the shutter is open on the camera, it’s recording what’s happening in the scene and all those flashes are going to be recorded in the photo.

Please let me know if you have experience with light painting at night. I’d definitely like to get into something like this more. Thanks!
 
Phoenix1

Phoenix1

Member
Joined
May 7, 2021
Messages
135
Reaction Score
0
Points
23
  • #7

How to Take Pictures of the Stars – Astrophotography​

Last night, I went outside to take a few photos of my pool. It was dark out there and the pool filter was making ripples in the water. I thought it would look cool if I captured the ripples over a few seconds, sort of like those silky waterfall shots you see so prevalently on the internet. Well, I took a couple of photos that turned out lousy and then, since I was already outside with my camera, I decided to grab a couple of images of the stars. They were out in all their glory and I had the camera, the tripod and everything else I needed.

I snapped a few photos. This is the best one.

stars-night.jpg

Camera: Canon Rebel T7i
Shutter Speed: 30s
Aperture: f/2.8
ISO: 200
Focal Length: 24mm

Pretty bad, right? Hey, at least I got the stars. Consider this: I didn’t focus the camera, I used only aperture priority, I used a random shutter speed of 30 seconds and an ISO value of 200. It was like I was basically taking photos with my eyes closed. So, here’s what I’m thinking – if I can take this shot and have it look bad but viewable, anyone with the right gear can take one that’s a hundred times better. That is, if they follow the instructions I’m going to offer down below.

As you may or may not know, taking good photos of the stars (astro photography) isn’t the easiest of tasks. I can take dozens of these awful pictures and never get it right. It’s not until I set the camera properly that I’ll get the winner I’m after.

Down below, I’m going to give you explicit instructions that should help you take these kinds of night shots. After you read through them, you’ll see that producing wonderful looking photographs isn’t out of your reach. And I suspect that after you get the hang of it, you’ll be carrying your camera with you at night, no matter where you go. Well, you’ll need to carry a tripod too. Don’t forget that.

I’ll try to make things easier to read by breaking them down into groups. Here goes.

Gear: You’ll need a tripod, a DSLR camera, a head lamp to see what you’re doing and a fast, wide-angle lens. Lenses are generally considered fast when they have a maximum aperture that’s between f/2.8 and f/1.2 or larger. Basically, you need as much light as possible to reach the camera’s sensor so that’s why you need a huge aperture. For the lens above, I was using a 24mm f/2.8 Canon lens. I was also using a Canon T7i, which has a cropped sensor, so the 24mm was really a 38mm. I think it was still wide enough for some decent photos though.

500 Rule: This is a shutter speed rule you’ll need to follow for the best star shots. Take the number 500 and then divide that by your lens’s focal length. So in my case, if I divide 500 by 24, I’ll get a rounded number of 20 (500/24 = 20). That should be my maximum shutter speed. But, since I was using a camera with a cropped sensor, the focal length was really 38mm. So, if I do that calculation again, I’ll get the proper shutter speed of 13 seconds.

Settings: Use full Manual mode on your camera and also set your focus to manual as well. This way, if you find your focus and lock it in, you’ll be good for the rest of the night. To focus, find the brightest star in the sky and focus in on that. Use your magnification feature if necessary. Then, once you have found your focus, use some tape to tape your lens so the focus ring doesn’t move anymore.

Regarding ISO, keep this setting between 800 and 6400. Start with 800 and then move it around depending on the shots you’re getting. There’s a certain type of noise that can creep into your photos if the shutter speed is too slow and the ISO value is too low, so you’ll need to experiment with this.

Always shoot in RAW mode, so you can adjust your white balance later on in Adobe Camera Raw or Lightroom. If I had to give you a specific white balance setting to go with, it would be Incandescent.

When taking your photo, be sure to use your camera’s 2-second delay feature or a remote shutter. This will minimize camera shake.

When it comes to aperture, be sure to set it to its widest value. So if you’re using a 24mm f/2.8 lens like I did last night, set that aperture to f/2.8 to open it up as much as it will go.

Post-Processing: After you take tons of great shots, use Camera Raw or Lightroom to edit them. I think you’ll find that the Dehaze and Clarity sliders are your friends. Use them liberally.

If you’re going to practice in your backyard, you can make your life easier by setting your camera up inside. Do as much as you can and then go set yourself up with your head lamp out on your lawn or driveway. Take your time, use patience and enjoy yourself.

Please reply to this post with any shots you managed to get so we can discuss them. Also, reply with any trouble or successes you experiences. Thanks!

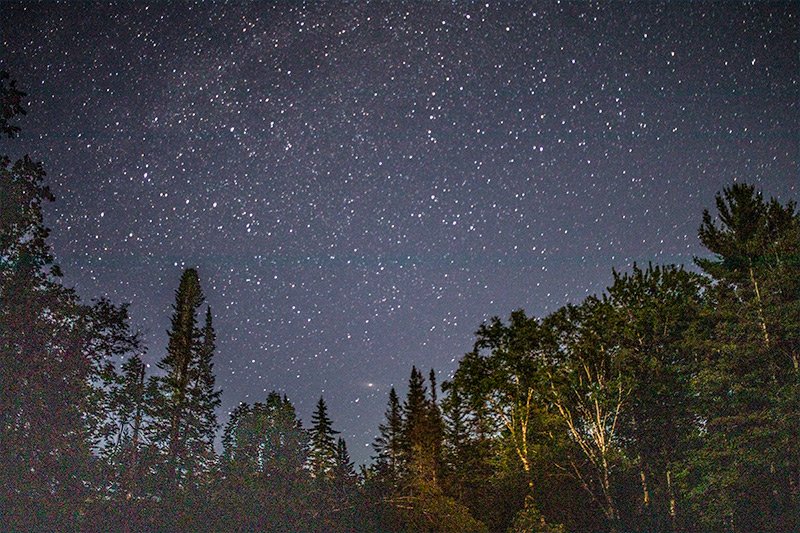
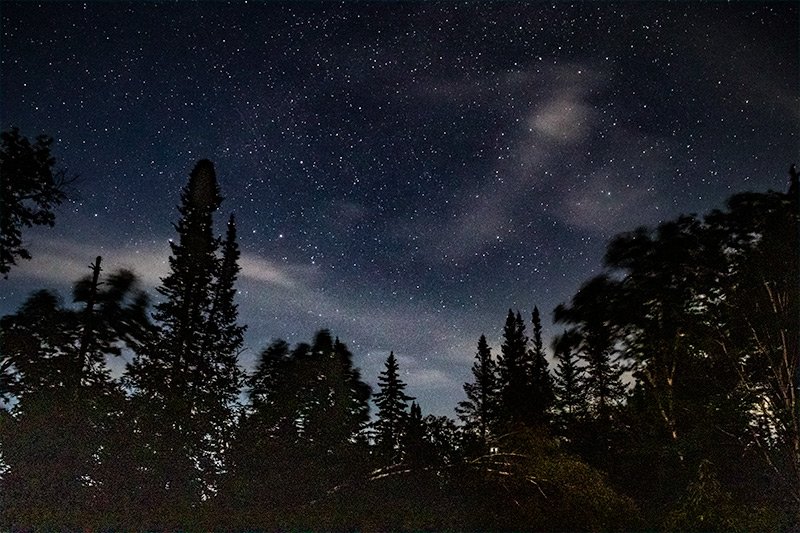
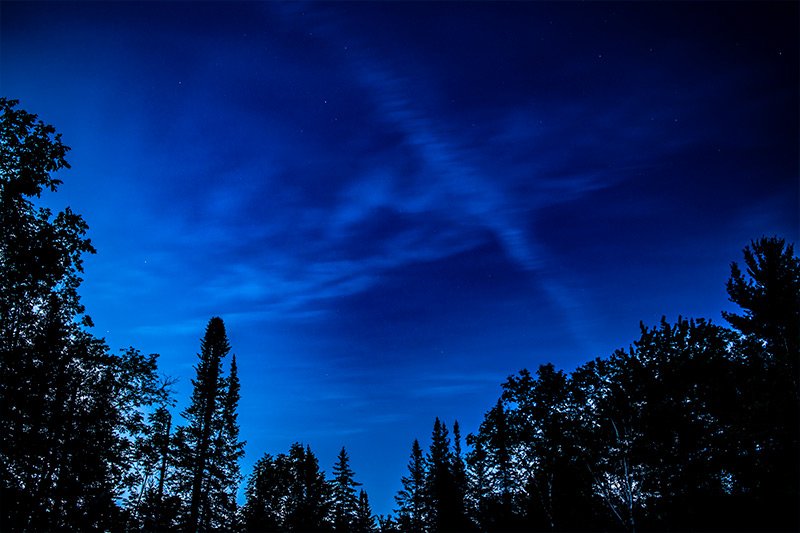
UPDATE: I went back out last night to capture some better photos. I wanted to take a few nice shots to post here, but after about 15 minutes of snapping away, my battery light began blinking, so I had to stop. These two photos below are an improvement from the one above, but still aren’t very good. I kept the ISO at 800 and before I had a chance to experiment with raising it, well, the battery began dying. I’d like to try again the next time the sky is clear. Possibly tonight. By the way, yes, there was a breeze and that’s why the trees are all blurry.

One thing I’m running up against is exposure. The images are underexposed. While they look great on the rear LCD screen on the camera, they look pretty bad on my computer. The shots simply aren’t exposed enough and that’s why I wanted to see what raising the ISO to, say, 1600 and beyond would do. I was also using my 24mm f/2.8 lens. I’d love to pick up something faster, such as a 12mm f/1.8 or larger. That would be the best. Also, having a full frame camera would be even better.

nighttime-stars.jpg

Camera: Canon Rebel T7i
Shutter Speed: 13s
Aperture: f/2.8
ISO: 800
Focal Length: 24mm

stars-sky-night.jpg

Camera: Canon Rebel T7i
Shutter Speed: 13s
Aperture: f/2.8
ISO: 800
Focal Length: 24mm

UPDATE: Last night, I went out during the blue hour for a few photos. I was being eaten by mosquitoes, so I had my experimentation quick. I wanted to see how ISO values would affect my photography while there was still some light in the atmosphere.

I used the same specs as I did for the photos above, but this time, I began with an ISO value of 1600. The result of that was completely overexposed. Then, I reduced the ISO to 800 and then 400 and finally settled on 100, where things went well.

Here’s the photo:

blue-hour.jpg

Camera: Canon Rebel T7i
Shutter Speed: 13s
Aperture: f/2.8
ISO: 100
Focal Length: 24mm

So my thinking is that I will have much better luck for my star shots the next time I go out if I raise the ISO to something like 1600 or even higher. I think that will remove some of the black clipping and give me some wiggle room when it comes to editing during post-processing.

By the way, I have another tip for you. If you know where you’re going to be photographing earlier on in the day, go out and focus on something during the daylight. That way, you won’t have to hunt around in the dark in an effort to get your camera to focus. Once it’s focused, you can simply return later on to take your pictures.
 
Phoenix1

Phoenix1

Member
Joined
May 7, 2021
Messages
135
Reaction Score
0
Points
23
  • #8

How to Photograph Car Tail Light Trails at Night​

After shooting portrait, landscape and wildlife photography, I would say that one of the most popular types of photography budding amateurs are interested in is night photography. Whether it be taking pictures of the moon, stars or cityscapes, night photography is downright cool. It’s interesting and it virtually doubles the number of things you can photograph. For example, taking a photo of a building during the day is one thing, but taking a photo of that same building at night is quite another. Night photography is right up there with long exposure and HDR photography in my book. I absolutely love it.

One type of night photography I see a lot of out there has to do with tail light trails of moving automobiles. I’m sure you’ve seen this. Let me give you an example.
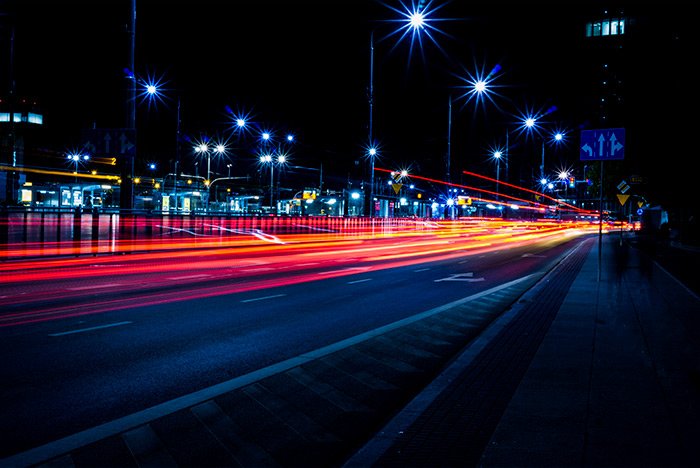
tail-light-trails-at-night-photography.jpg

You may not know it by quickly glancing at this photo, but there’s actually quite a bit going on. Look at those trails. That’s shutter speed talking right there. Look at those street light bursts. That’s aperture. Look at the very deep depth of field. That’s aperture as well. Notice the absence of grain. That’s ISO. To capture quality night photographs like this, you’ll need to become comfortable with full Manual mode and you’ll need to work with a few different tips that I’ll share with you down below.

This is going to be an exciting post because, if you’re new to photography, it’ll test you as well as your camera. I think you’re going to learn a lot. Consider this an all-in-one primer in photography itself.

What Type of Equipment Will You Need?​

To take high quality photos in the dark, you’ll surely need a camera that offers different modes, such as aperture priority mode, shutter priority mode and manual mode. You’ll also need to be able to manually set your ISO values. Most modern DSLR cameras can do all of these things. You’ll also need a lens that’s wide enough to capture what you would like to capture. While you can certainly take advantage of lenses with longer focal lengths for specific types of shots, I recommend using a lens that’s between the 10mm and 20mm range. That’s just my personal preference because I love wide angle lenses. Again, depending of what you’re going for, feel free to use the lens of your choosing. I can think of a million different reasons to use all types of lenses.

While it’s obvious that you’ll need a camera and lens, it’s even more obvious that you’ll need a tripod. Since your night shots will require relatively long exposure times, it’s important to keep the camera as steady as possible. Hand holding the camera simply isn’t going to cut it. I suppose you could take advantage of a short wall or a steady object to rest your camera on while taking these types of pictures, but a tripod is definitely the most popular way to go.

Some other equipment that’s helpful, but not absolutely necessary would be a remote shutter and a lens hood. Regarding the remote shutter, the more you keep your hands off the camera the better and regarding the lens hood, lights in the city at night can be unpredictable. It’s better to be safe than sorry and having a piece of gear that can reduce lens flares would certainly be a plus.

The Truth of the Matter​

I’m going to tell you the truth right now. If you were to go stand next to a busy street at night, situate your camera on a tripod, set your camera to shutter priority with a shutter speed of three seconds and snap a photo with your camera pointed towards the cars driving by, you’d take a pretty cool photo. If this was the first photo of this kind you ever took, you’d be thrilled with yourself. You’d have trails and glows and you’d be showing off to everyone nearby. The fact of the matter is that you should be thrilled because you went out there and did it. You photographed some moving vehicles and got the trails you were after. That’s awesome.

As you reviewed the multiple photos I’m sure you would take, you’d begin to ask yourself questions. “What if the trails weren’t so long?” “What if the trails were even longer?” “How do I get a darker or a lighter scene?” “How do I add sharpness or blur to the foreground and background of the shots?” “What if I wanted sharpness and long trails?” “How do I get rid of all this grain in my shots?” So while your initial images would appear to be stellar, you may evolve into someone who has specific requirements in the future and that’s what I’d like to discuss in this post.

Where Are You Going to Photograph From?​

The first thing you want to do is find your spot. All places aren’t created equally and you’ll need to locate the perfect area for you to settle into and snap away. Bridges are great because they not only funnel vehicles into straight narrow routes, they also frame the scene nicely. As in any other type of photography, framing is important here. Also, which perspective you take your photos from is important as well. What would be super cool is if you placed your camera down on the ground and shot from there. Or from on top of a ladder or from the top of a bridge, photographing the cars driving underneath it. Think of neat angles, just as you would in regular daylight photography.

Another important consideration is how inherently bright your scene is. Is it dusk? Did the vehicles just begin turning their lights on? Is it a daylight shot where you’re photographing tail lights heading towards a stop light? Or is it very dark outside and you’d like to capture not only tail lights and headlights, but the lights of a city as well? There are so many options, such as shooting during the blue hour, the golden hour or straight up at night.

Experiment with Your Settings​

Okay, let’s get into the meat of things. In this section, I’d like to talk about some of the settings you might use while photographing car trails at night. I’d like you to sit down with your camera as you read this and turn it on. Then, flip it to full Manual mode. What Manual mode does is it gives you full control over both your aperture and shutter speed. Believe it or not, using Manual mode isn’t as intimidating as you’d think. If you switch your viewing mode from your viewfinder to live view on the rear screen, you’ll see the effects of any changes you make to your settings right on that back screen.

Here’s what I’d like you to do. Set your ISO value to 100. That’s where you’ll keep things, so once set, you can forget about it. While there’s a lot that goes into the ISO discussion, we’ll just leave this here for now. Once that’s set, start by changing your shutter speed from something slower to something faster and then back again. Notice how your changes affect the scene on the rear screen of your camera. Next, change your aperture size from something small to something large and then back again. Do you see how your scene gets brighter and then darker? The difference between Manual mode and the other modes, such as Shutter Priority and Aperture priority is that there’s no compensation that’s offered by the camera. Your settings are pretty much locked in so you can capture exactly the scene you would like to capture.

If you were to set your camera to either Shutter Priority or Aperture priority and make the same changes as I just suggested you make above, you’d see your camera compensate by setting other areas of your camera all by itself. The nature of your camera is that it wants you to capture a correctly exposed image. It has no idea that you actually want a long exposure that includes tail light and headlight trails. You’ll have to force the issue with Manual mode.

Now let’s pretend that you’ve set your camera up on a tripod out on the street. You’ve got your camera pointed at your scene and everything is perfect. Let’s talk about some of the settings you might choose.

White Balance: If you shoot in RAW mode, you really don’t need to concern yourself with white balance too much. You can always adjust that pretty easily with any of the white balance correction tools available to you in Adobe Camera Raw or comparable applications. I suggest you leave your camera set to Auto White Balance.

Shoot in Live View: Viewing your scene through the large screen on the back of your camera is going to give you the best idea of what’s going on with things. Live View also doesn’t force the camera to use its mirror, so there’s not going to be any blur caused by what’s referred to as “mirror slap.” Although, since you’ll be taking such long exposure photographs, I don’t think such a tiny vibration is going to give you much trouble.

Depth of Field: Since you’ll likely want to focus on not only the cars and trucks passing by, but buildings and nature that are in the scene as well, you’ll need to set your aperture to something like f/11. This aperture setting will give you a nice deep depth of field. Just be sure not to go too much smaller than f/11 because the smaller you go, the more you’re prone to softening your images. This softening, or slight blur, is referred to as “lens diffraction.” Essentially, lens diffraction occurs as your aperture size shrinks because the light waves in your scene spread out to the degree that they interfere with one another. The result is blur and no one wants that.

Another benefit of having a small-ish aperture is the twinkles of the lights in your scene. If you look at the demo photo I’m using in this post, you’ll see the bursts in the street lights. That’s a very cool plus.

And finally, because you’ll be using longer exposure times for these images, a small aperture size is almost mandatory. If you didn’t, your images would end up being too bright, especially in cities with lots of lights.

Where to Focus: Because your aperture setting isn’t going to be something extremely high, such as f/22 or f/32, there will be some blur from the inherent depth of field in your shot. Because of this, you’ll need to focus on something. Because depth of field falls 2/3 behind your focal point and 1/3 in front of it, be sure to focus on the specific area that’s 1/3 of the distance away from your camera in the scene.

Shutter Speed: This is where you’ll need to start working your controls. When taking photos like this, start off by setting your shutter speed to something like five seconds. If that works out and if the light trails are as you want them to be, calibrate the rest of your camera to go along with that. If your images happen to look perfect, that’s great. If they are too dark, perhaps raise your ISO value by one stop to 200. Or perhaps open your aperture by one stop to f/9 or something like that. Basically, if the images are too dark, you’ll need to either let more light in or increase the sensitivity of your sensor. If your images are too bright, try reducing your shutter speed to four seconds or increasing your aperture value by one stop to f/13. It’s a balance and I wish I had the magic combination for you. Really, all you can do is experiment with some decently long shutter speeds and then alter the remaining settings on your camera to obtain the correct exposure.

Shutter Delay: To reduce camera shake (and the resulting blur) as much as possible, you’ll want to use either a remote shutter button or set the shutter delay feature on your camera to two seconds or something similar. Essentially, you’ll want your hands off the camera as the shutter moves inside of it.

Use Long Exposure Noise Reduction: Since you’ll be using longer shutter speeds, you may want to turn on the Long Exposure Noise Reduction feature on your camera, if it’s available. This feature reduces the amount of noise that arises in images due to the heat generated by the sensor during these types of shots.

Capture Multiple Photos: If you were to mix up your shots so you have very clear backgrounds because you specifically focused on them and sharp foregrounds because, again, you focused on them specifically, you could always keep your camera pointed at exactly the same spot, change your focal point and take multiple shots. Masking in Adobe Photoshop is an extremely helpful process during times like this. Consider aligning your photos in Photoshop and then masking out the parts you don’t want in each one. You’ll basically be building the perfect photograph this way. And don’t worry about cheating; this is what everyone does. No one is a purist anymore.

There you have it. The bottom line is to set your shutter speed and then experiment. Capturing light trails is really just long exposure photography. Every other setting you change is to compensate for that exposure. If you have any questions regarding this post or this type of photography, please ask in the comment section below or in the photography question and answer forum. Thanks for reading!
 
Phoenix1

Phoenix1

Member
Joined
May 7, 2021
Messages
135
Reaction Score
0
Points
23
  • #9

Capturing Light Trails with Your Camera​

I guess this falls under high speed photography, since the cars that will be going by will be traveling rather fast. The thing is, the photography itself isn’t high speed at all. In fact, it’s as slow as slow can be. So while you’ll be taking photos of high speed (or moving) objects, you’ll be stationary and your camera will be moving at a snail’s pace.

I’m sure you’ve seen photos of light trails before. Have you ever wondered how the photographers captured the photos you’ve seen? I’m here today to tell you that the process isn’t difficult in the least. If you’ve got a fairly modern DSLR camera and a tripod, you’re all set. Well, you’ll also need a good spot to set your equipment up. One preferably that’s got cars driving by it.

By the way, before I begin, I thought I’d mention that I wrote an entire post on this topic just yesterday that’s quite thorough, so if you’d like to learn about photographing light trails in its entirety, please feel free to take a peek.

Okay, let’s get going. To capture images of trails, any type of trails, you’ll need to slow your shutter speed down. So while your typical shutter speed is set anywhere from 1/80 to 1/500 of a second, you’ll need to slow yours down to 1, 2 or even 6 or 7 seconds to grab those light trails you want. While the shutter is open and the camera is dead still, the cars will drive by at night and the camera will record the trails created by the car’s head and tail lights. This is somewhat the same process as slowing the shutter speed down and pressing the shutter button on your camera as you spin around in circles. Since the shutter is kept open and the sensor is recording the scene for multiple seconds, you’ll end up with a photograph that’s full of trails as well. Odd looking ones, but trails nonetheless.

When taking these types of photos at night, you’ve got to be cognizant of a few things. First, since you don’t want grain in your photos and since you don’t want the long exposure time to which you’ll set your camera to overexpose your shots, you’ll need to set your ISO as low as it can go. On most cameras, this is going to be ISO 100. Also, since your camera is going to want to open your aperture as wide as it can go, you’ll need to set your camera to full Manual mode to control that setting yourself. Along the same line that has to do with aperture size, you’ll likely want to have as sharp a shot as possible each and every time, from front to back (depth of field). So, with this in mind, set your aperture to f/8 to f/11. Don’t go too small with the aperture size or else you’ll subject your photos to a very slight blur that’s highly annoying to look at. This blur is caused by what’s known as “diffraction.” Diffraction simply means that as the hole through which the light travels in a lens gets smaller, the light waves become jumbled up to cause confusion. This confusion is translated as blur and we don’t want that. So stick with anything between f/8 and f/11. These smaller aperture sizes will also do a good job of keeping the exposure near normal as well.

Now, here’s the fun part. Mount your camera on the tripod, set your mode to Manual, set your ISO value and your aperture size and then begin experimenting. Start off with a 5 second exposure (shutter speed). Take the photo and then look at your results on the rear of your camera. How’s the exposure? Too bright? If so, increase the shutter speed by a second. Too dark? Slow the shutter speed down by a second. You can also adjust the aperture size some to control the light as well.

Next, look at the light trails. How do they look? Are they long enough? If not, slow the shutter speed down. You get the idea. Basically, you’ll have the perfect photo in your mind and your job is to make adjustments on your camera to get you to the place you need to be. Mostly, you’ll need to configure the shutter speed and the aperture size, but you can also experiment with the ISO values as well. Just be sure to follow the general guidelines I explained above.

Have you ever taken photographs of light trails? If so, why not share them below? Did you use any special tricks to capture the perfect photo? If so, please share them below as well. And finally, if you have any questions regarding this very exciting style of photography, this is the place to ask. We’re always here to help. Thanks!
 
Phoenix1

Phoenix1

Member
Joined
May 7, 2021
Messages
135
Reaction Score
0
Points
23
  • #10

Tips for Photographing Water Reflections at Night​

When I head out for my usual photography excursions, I’ve noticed that I primarily think about what I’d like to take photos of. What I mean is, I pretty much have a basic idea of the object I’d like to photograph. For instance, if I’d like to take some pictures of a car, all my mental energy is targeted at the car itself. Not where the car is located or its immediate setting. Not the weather or the lighting. All of these different aspects are just as important as the car, but so often, I get tunnel vision and think just car, car, car. I really need to get away from that because if you look at high quality photography, you’ll see that the “car” is just one piece of a much larger puzzle. Everything comes into play and that’s what separates the amateurs from the pros.

I live in a very small town in Maine. When I arrived here a few years ago, I was absolutely floored by the beauty of the lakes in the area. I’ve never seen anything like them and was blown away by how “Maine” they looked, if that makes any sense. With so many of them, there are houses on the shores and mountains as the backdrops. They’re stunning and clean and just all around beautiful.

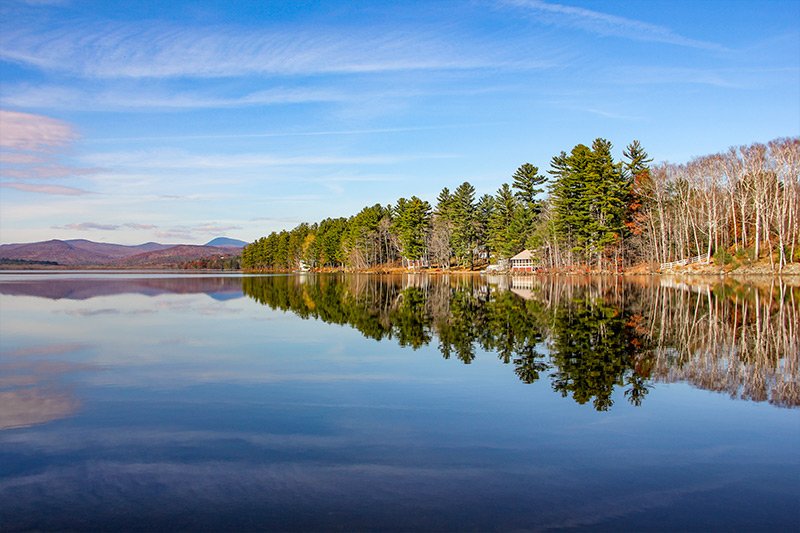
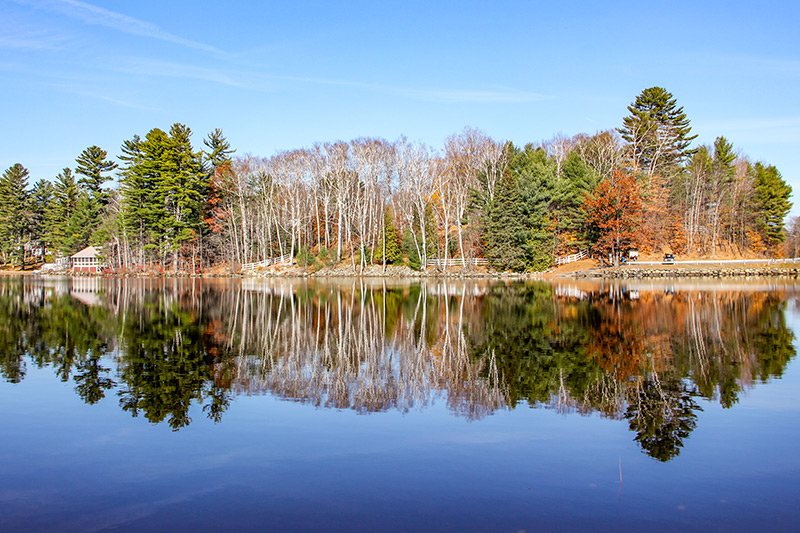
You know what? Let me just show you a few photos that my lady and I captured about three years ago as we were driving by Wilson Lake in Wilton, Maine. You tell me if I’m correct in my assessment.

wilson-lake-wilton-maine.jpg

wilson-lake-shore.jpg

Photos courtesy of Glaszart.com.

Now, let me ask you something. What is it in these two photos that makes them so special? Is it the land or the backdrop? Probably not. We’ve all seen those things far too many times for them to even be noticeable. Is it the weather or the lighting? Probably not. While those two aspects of the images are nearly perfect, they’re still not special enough to remember. Is it the reflections in the water? Bingo. That’s what it is. If it weren’t for those reflections, these photos wouldn’t be nearly what they are. The reflections double the size and orientation of the land, they double the beautiful weather and the sky and they certainly exhibit the creativity that was coursing through the photographer’s mind while they were taking the shot. Simply put, reflections take a ho-hum photograph and make it outstanding, if captured correctly. They add space to an image.

In today’s post, I’d like to talk about reflections on water when it comes to photography, but I’d like to go one step further and discuss those reflections on water at night. After all, night photography offers many more dimensions than daylight photography does and the longer exposures that are necessary can truly aid in the interest in the image.

When Should We Use Reflections in Our Photography?​

There’s a common issue when it comes to photography and that’s what to do with dead or empty space. In the photos I shared above, would things have looked nearly as good if it had been windy that day? Probably not. The water would have been choppy and there wouldn’t have been any sort of reflection. That water would have been considered empty space and the images would have suffered because of that. The mirror-like surface was just perfect and we were lucky to have seen something like that.

Here’s a tip: use reflections to fill in empty space. And just so you know, reflections aren’t only found on water; they’re also found on anything shiny, from buildings to vehicles to any sort of man-made object. Use those reflections to add to your creativity.

Here’s another tip: be aware of where you’re standing and the height of your camera when it comes to shooting reflections on water. Let’s say you’re standing on the shore of a lake or a very still stream and you’d like to capture some very nice reflections that are stemming from across the shore. Did you know that the lower you place your camera; the closer to the water you place your camera, the more content you’ll capture in the image? That’s right. The closer the camera is to the water, the more the reflection will show. To test this out, simply stand on the edge of a still stream and look across toward the shore. Then, kneel down and look across. I’m sure you’ll see what I’m talking about here.

Capturing Water Reflections at Night​

I’ve written about taking photographs at night before on this website and the good news is that nothing really changes when you want to add reflections to the mix. The primary considerations are camera placement, as I alluded to above, as well as shutter speed. When dealing with reflections on water that’s not completely still and mirror-like, you’ll need to set the camera’s shutter speed to something long enough to smooth out the choppiness. Take a look at this next image.

bridge-reflection.jpg

If you take a look at the water, you’ll notice that it’s very smooth, but that the reflection of the bridge and the city isn’t clear. This is because the water was choppy and the slow shutter speed compensated by taking an average of all water movement as the camera’s sensor was exposed to its environment. Personally, I love this kind of look and this is what I primarily go for at night. Remember though, the shutter speed has to be fairly long. I can imagine this one being at least five seconds. If it’s extremely dark though, it’s normal to set a shutter speed to four minutes. In a dark scene with only a few lights showing on a distant shore, I’d probably go with anything between two and four minutes for the shutter speed. If I was photographing during the blue hour, I’d likely set the shutter speed to a value of anything between 15 and 30 seconds.

Regarding ISO, I always keep that low at night. So for photographs such as these, I would generally never go above 800. In the above bridge scene, since there’s available light, I would keep the ISO down at 100 and work with the shutter speed and the aperture until I captured the image I was after.

Remember, the higher the number for the aperture (f/22), the smaller the hole that let’s the light through. Also, the higher the number, the deeper the depth of field. Don’t go smaller than f/11 though if you want your images to be sharp. Small aperture holes blur images because of diffraction. The bridge image above was taken with a small aperture. You can tell because the foreground and background are clear. Unless, of course, there were multiple images taken with different focal points and some masking was performed in Photoshop. That’s always a possibility.

What’s the moral of this story? When capturing reflections in your photography at night, get down close to the water. That way, you’ll include much more reflection in your photos. Also, be sure to follow the rules of taking photographs at night. If there’s light in the scene, use a low ISO value. Stick with a smaller aperture and work with a slow shutter speed. Experiment a lot and you’ll quickly pick up what you need to know. Use a remote shutter button or set the timer on your camera to avoid camera shake. Use the live view mode as opposed to the viewfinder because the mirror inside isn’t used with live view. You’ll virtually eliminate mirror slap this way. Use full Manual mode. You’ll need all the flexibility that this mode offers. You’ll be hamstrung in any other mode.

I hope I clearly explained how to capture reflections on water during night photography. If you have any questions regarding this post, please ask down in the comment section below or in the photography forum. I’m always here to help. Thanks for reading!
 
Phoenix1

Phoenix1

Member
Joined
May 7, 2021
Messages
135
Reaction Score
0
Points
23
  • #11

How to Focus Your Camera at Night or in the Dark​

Night photography is a lot of fun, but it does pose a few challenges. It requires that you know how to operate your camera on a much higher level than you would normally need to know. It also requires that you become much more aware of your surroundings. When shooting at night, one vital sense is all but removed – vision.

In order for a camera to correctly focus on an object, it needs to see the object. Cameras focus on things by measuring the levels of contrast among the edges of those things. In low-light situations, edges are difficult to discern, making that contrast nearly impossible to see. This begs the question, if cameras need to see things to focus and those cameras can’t see things at night, how do they focus at all? Well, it’s not easy, but there are some tried and true tricks a photographer can employ to capture the sharpest shots possible.

In today’s post, I’d like to run through some of these tricks. If you’re into shooting in low-light situations, in the dark, at night or any other less than ideal scenario, please take the time to read what I have to offer below. I’ll talk about some methods I’ve had luck with in the past as well as some hints I’ve picked up along the way. The goal is to take tremendous photographs at night and in order to do that, we need to have sharp focus. Hopefully what I share below will help.

cliff-night.jpg

The Flashlight​

Now that we know cameras need to see things in order to focus on them, one of the best and easiest options we have a pretty good amount of control over is to use a flashlight. This option obviously depends on how close you are to your subject. If you’re in walking distance, there are no obstacles impeding your path and your flashlight is powerful enough, there’s a good chance the light you’ll shine on the object will be bright enough for the camera to pick up on some of those elusive edges. If you’re a beginner, a cheap flashlight will do, but if you’re really into taking wonderful night photography, you’ll want to pick up a powerful flashlight. Remember though, after shining the light on the subject, push your shutter button down half way so your camera can focus. Then, turn the light off and continue pushing the button down to take the shot. An alternative to that would be to shine the light, meter your camera by pushing the shutter down half way and then letting go of the shutter button. At this point, the camera will be focused and you can turn off auto-focus on the lens and shoot away.

The Flashlight – Again​

If you think about how focusing works, you’ll find that it’s really not all the difficult of a concept to grasp. The camera is simply choosing a plane of focus to capture. Think about it this way; picture two people holding a huge plate of glass. The face of the glass is facing you and the two people are walking either closer to you or further away from you. Consider the glass the plane. That plane is what the camera focuses on. It’s flat and it moves either closer or further away, depending on how you turn the focus ring on your lens. With that in mind, all you need to do is to let the camera find the correct plane or you can even do is yourself in manual focus mode.

If you’re close enough to your subject and nothing is in the way, just like in the example I gave above, another option to get a good focus is to walk over to the object, place a flashlight down facing the camera, walk back to the camera and then focus on the flashlight. Since the flashlight will in the proper plane, you’ll have good focus. Of course, after focusing, you’ll need to remove the flashlight from the scene. If you have a helper, that’s all the better. Remember though, you’ll need to place the flashlight in just the right spot, depending on your aperture setting. The larger the aperture, the shallower the depth of field, so be careful.

Dimly Lit Distance Shots​

If you’re taking photos of something that’s far away and there’s something else that’s relatively the same distance away, but that’s lit up, try focusing on that lit up area first and then move to the darker object and take your photo. By focusing on the lit up area, you’ll be setting your camera. Once you do that, you can employ one of the tricks I shared above; you can either meter the camera in order to focus, keep the shutter button held and then snap away or you can meter the camera and then switch your lens from auto-focus to manual focus to capture your shots.

Use Live View Mode​

On my Canon Rebel T7i, I have these awesome magnifying buttons that bring a subject wicked close to me via the rear LCD screen. I can really pseudo zoom into something to make sure I’m focused as good as possible. In low light situations, it might be helpful to magnify the live view scene to get the best focus and then take the photo. Of course, this won’t work in totally dark situations, but if there’s some light out there to hook onto, you can get a pretty good idea of how crisp your focus is. You’ll likely want to stay in manual focus for this option as well because you’ll have the ability to dial in slowly and as you see fit.

PSWith all of these options, you’re obviously going to be using a tripod because your shutter speed is going to be very slow.

Test, Test, Test​

Again, if you’re using live view mode, you can try taking a photo and then analyzing its focal characteristics on the rear LCD screen. Leave the lens in manual focus mode and continue taking photos every time you turn the focus dial slightly. Because cameras capture darker scenes rather brightly, you shouldn’t have an issue getting a good idea of the quality of your shots. Once you find that sweet spot (the correct plane), stick with it and keep shooting.

Use the Distance Markers on Your Lens​

If you have a lens that offers those little distance markers and you know the general distance of your subject, use the markers. While they aren’t perfect, they could definitely offer some guidance. If you’re taking photos of something that’s far away, you’ll most likely want to set your infinity symbol with the indicator line on the lens. Again, these markers are there to assist, so I wouldn’t completely bank on them. Get the lens set and then revisit the section above this one; test, test, test.

Visit Your Scene During the Daytime​

This suggestion goes hand in hand with the previous one. Let’s say you visit your scene during the day, focus on the object you’d like to photograph and then record the distance markers on the lens. If you did this, you could return to the scene at night and easily take your photos without having to concern yourself with focusing at all. All you would need to do is set your focal distance to what you recorded earlier and you’ll be all set.

Focus On a Bright Spot​

This suggestion is sort of like the second one, where I indicated that focusing on a flashlight would help. What if you can’t place a flashlight in the scene? Well, if you’re taking a photo of a scene that has any sort of a bright spot, such as street lights or lit windows in buildings, focus on them. This suggestion is perfect for when using auto-focus because that auto-focus will love focusing on something bright in a lower-light situation.

Edges Matter​

Remember when I told you about how cameras need edges to set their focus? Well, if you try focusing on a bright object with very few edges, your camera will still have trouble focusing. Depending on how your focus is set up in your camera (I use a center focus), you can try focusing on the edge of the bright area. For me, this would mean shifting the little box in the view finder or on the live view screen just to the side of the bright area. That way, I can get what I’m after.

This topic is rather deep and there are a few more tricks that can help, but I think these will get you off to a good start if you’re interested in taking photos at night. There are even a few different camera settings that can help out in these situations, such as different aperture sizes, a more involved discussion about the lens scale, back button focus and focus lock. We’ll get to those soon, but again, this is a good start.

——

I hope I clearly offered some guidance on how to enjoy night photography by getting the best focus out of your camera as possible. If you have any questions regarding this post, please let me know below. Thanks for reading!
 
Phoenix1

Phoenix1

Member
Joined
May 7, 2021
Messages
135
Reaction Score
0
Points
23
  • #12

Tips For Better Photography – Taking Action Shots at Night​

There’s something about the photography exposure triangle that I just love. I can talk about it for hours if anyone cared to listen. It’s just technical enough to keep me interested and its concepts can be continuously applied to all types of photography. Actually, it has to be applied for decent photographs to be captured. In short, even if you use the auto modes of your DSLR camera, understanding the exposure triangle can be a huge factor in improving the photos you take.

A while ago, I wrote a few posts that have to do with taking great night photography. If you’re interested, you can read those posts here:

Some Tips For Setting Camera Exposure For Night Photography

3 Incredibly Easy Tips For Better Night Photography

The three posts I just linked to primarily have to do with taking still photography at night, meaning, the photos were taken in shutter priority (a long exposure), an average sized aperture and a low ISO. Also, a tripod is used for these types of long exposure photographs. I’m sure you’ll get the idea of what I’m talking about if you browse the three posts I linked to above. Essentially, I’m referring to those types of pictures that have very little movement in them.

In today’s post, I’d like to talk about how you can best capture night photographs of moving objects. Really, this is simply going to be a post about a different combination of camera settings. The exposure triangle is one thing for night time still photography and quite another for night time photography that contains action. Or movement; whatever you want to call it.

I got the idea to write about this topic last night after flipping through a whole bunch of these types of photos. I’m not sure if I’ve tackled this specific type of situation yet, so I think it would be worthwhile to do so now. Plus, I just can’t seem to shut up about all of this, so I’ll treat this blog as my avenue of relief.

The Problem with Night Photography​

There’s a real problem with night photography out there. The problem is, we need to actually know how to take good photos under low light conditions. While it’s not terribly difficult to take a regular picture of an object that’s just sitting there, it’s much more challenging to capture something in a defined way. Let’s say you wanted to see night time car tail light trails in your photos. Would your camera just take those kinds of photos without you telling it your goal? Probably not. Let’s say you wanted to capture the very defined and very focused sweat falling from a soccer player’s face during a night game. Would your camera know what to do all by itself? Again, probably not. With everyday situations, you can get away with taking ordinary night shots. In very specific situations though, you’re most likely not going to get away with things if you don’t give your camera very specific instructions.

A Definition of Movement​

If you plan on taking photographs during a night time sports game that offers very low light, you’re going to have to take some very specific precautions. Both your camera and lens are going to have to be up to snuff and you’re going to need to know what you’re doing. This isn’t an easy situation to be in and you’ll likely need a lot of practice. When I think about these types of low light situations, rock concerts come to mind. Hardly and light, people jumping around, clarity is a primary concern.

For the purposes of today, I’d like to focus on situations where extreme movement isn’t in play. I’m going to imagine a situation where you’re simply walking around town, taking interesting photos of people and things. Because of the relaxed nature, you’ll need to concern yourself with having a shutter speed that’s fast enough to avoid blur, but not so fast that it’s the most primary of considerations. The goal is clarity, but there’s not excessive movement or action.

group-people-eiffel-tower.jpg

Considerations​

With any type of photography, there are three primary considerations. They are movement, light and blur (depth of field). In my previous posts, the greatest concern was light, so the shutter speed was decreased to a point of letting enough of it in to make a fine photograph. In those posts, I discussed the fact that since the shutter speed was slowed to such a degree, the aperture size could be reduced for a clearer photo and the ISO value could be reduced as well, to minimize noise. The slower shutter speed would compensate for both of these things.

In today’s post, movement is important, so I’d like to emphasize that shutter speed will be critical. The thing is, the lack of light is also something to contend with, so aperture size is equally important. Finally, since a higher ISO’s impact on the quality of photograph has been remarkably reduced through the years, I’ll say that we can leave that for the camera to decide.

Good Settings For Night Photography​

I’m going to give you some round-about camera settings for some decent night photography, depending on how much ambient light you have available. If you’ve never tried night photography, you really should go out and experience it. There’s nothing like it and scenes are truly woken up when captured by a camera.

I have a few goals. I’d like my low light photos to be clear in the sense that I don’t want any movement to show. I’d like the camera to capture enough light for the photos to be relatively bright. I don’t mind bokeh (out of focus blur); I actually prefer it and really, I can’t avoid it with the settings I’ll need to choose for a situation like this. Finally, I don’t want a crazy amount of grain in my photo. I know what my camera can handle and I don’t want to push its limits.

Aperture​

As I mentioned above, one of my primary considerations is light. To capture as much light as possible, I’m going to need a fast lens. I’d preferably like it to be either f1.2 or f1.4, depending on how much out of focus range I can put up with. Remember, the larger the aperture, the shallower the depth of field (more blur). F1.4 is a really great aperture size with work with while walking around town taking low light photos, however, an f1.2 setting can produce incredible results as well.

Shutter Speed​

Because of the large aperture size inside the lens, I’ll have some liberty when it comes to shutter speed. Depending on the movement in the scene, I can get away with a 1/400th of a second shutter speed. Ideally, I’d like it to be slower than that, in order to let more light in (which can result in a lower ISO value), so I’d much prefer something as slow as 1/200th of a second, but I could go up to 1/640 if there was still a glow in the sky from a fallen sun. This setting would be scene dependent.

ISO​

As I mentioned earlier, modern cameras have come such a long way in terms of reducing grain caused by high ISO values. Because of this, I’d likely let my camera decide which value it would use during this type of photography. I would set the upper limit to 6400 though because that’s what I’m comfortable with. You should test your own camera to see where photos begin to degrade in relation to ISO values. My older camera I bought way back in 2011 began to degrade at ISO 800, but my new Canon Rebel T7i does a much better job at keeping noise out of the picture.

In Conclusion​

Here’s what I’d like to say. If you want to walk around with a camera at night without a tripod, you’re going to need to set your camera shutter speed to a value that allows you to avoid camera shake and excessive movement of the subjects in the frame. Also, because of the low light in the scene, you’re going to need a big hole in the lens to allow what available light there is, in. Finally, you’ll need to set your sensor to be sensitive enough to allow your lens and shutter to do what they do best, which is control movement and let light in. As always, testing and experimentation is key, so do lots and lots of that. It’ll be worth it in the end.

——

I know I sort of rambled in this post, but I wanted to get some thoughts out that I had floating around my head. I hope I clearly explained some of the ins and outs of hand-held night time photography. If you have any questions regarding this post, please let me know below. Thanks for reading!
 
Phoenix1

Phoenix1

Member
Joined
May 7, 2021
Messages
135
Reaction Score
0
Points
23
  • #13

Remote Shutter Releases are the BEST For Bulb Mode!​

I’ve been toying with some very long exposure shots for night time photography and I thought I’d report back here to tell you what I’ve been learning. I absolutely love long exposure photography and I think that everyone who has a DSLR or mirrorless camera should try it out. It can definitely expand your repertoire.

Okay, the key to it all (among other things) is to purchase and use a remote shutter release or just remote control. These little pieces of gear are the best things ever. When it comes to regular photography, they can help out in so many ways. They reduce or eliminate camera shake for those long exposure shots and when it comes to capturing portraits, remote shutter buttons allow you to remove yourself from behind your camera so you can guide your subject to your liking. It’ll also help out tremendously if you’re attempting to take a self portrait. All you have to do is sit there, smile and push the shutter button that’s in your hand. If you have a wired remote, you’re somewhat limited in your movement, but if you buy a wireless one, you’ll be able to place your camera virtually anywhere and use the remote shutter release to take the picture when you’re ready.

If you’ve ever taken really long exposure photos at night, you know that you’ll need to switch your camera to what’s referred to as bulb mode. Usually, your camera allows you to set a maximum of 30 seconds for an exposure time, but in bulb mode, you can keep the shutter wide open for as long as you’d like, as long as you keep the button pressed. Well, let’s say I’m taking a night long exposure shot and I need the shutter button pressed for five minutes. Do you think I want to stand behind the camera with my finger on the button for all that time? Of course not. The best feature of remote shutter releases is that they come with button locks, meaning, when you press the shutter button down, you can slide it upward into a locked position. This locked position will keep the button pressed until you unlock it. How neat is that?

To set your (Canon) camera to bulb mode, you’ll need to switch to full manual mode. Then, increase the shutter speed past the 30 second mark until you reach the word BULB. That’s it. It’s set. You can take night shots with shutter speeds for as long as you’d like.

Obviously, there’s a lot more that goes into night photography and long exposure photography, but I wanted to share this piece of invaluable information with you. Happy shooting!
 
Phoenix1

Phoenix1

Member
Joined
May 7, 2021
Messages
135
Reaction Score
0
Points
23
  • #14

How to Take Photos of the Milky Way Galaxy​

I personally prefer Milky Way photography as opposed to general star photography or astrophotography. Basically, I like taking photos of the Milky Way galaxy when it’s in view, which many people might not know that it isn’t all the time.

Timing is everything when it comes to taking photos of the Milky Way galaxy. It’s important to find out when it’s going to be visible in your sky at night. To discover this information, you can use two different apps for your phone or tablet. One is called Sun Surveyer and the other is called PhotoPills. Both of these apps are excellent at telling you when the moon will be in your sky. The reason this is important is because the brightness of the moon almost completely washes out the stars. You need no moon and a completely black sky for the best photos. The apps will also tell you when the galactic center will be visible. They’re really awesome apps in that they indicate the rise and set times of both of these important entities. So yes, it’s not as easy as grabbing your camera and going outside to take some pictures. There is planning involved.

Another critical aspect of astrophotography or galactic photography has to do with choosing the right location in which to photograph. If you’re located in an area that puts out a lot of light pollution, you’ll need to hop in a car and get out to a remote area that’s very dark. The darker, the better. Get out to the countryside where it’s pitch black, because if you try to stay in the city, you won’t see nearly as many stars as possible.

Finally, I find that while the camera is important (DSLR), the lens is much more important. In order to capture a lot of the sky, you’ll need a wide angle lens. Something like 16-35mm if you’re using a full frame sensor. Also, you’ll need a big aperture. You should be using an f/2.8 aperture or larger. If your aperture is too small, you’re going to have a tough time taking these types of photos. A 24mm f/2.8 lens on a full frame camera is perfect.

If you’ve got a cropped sensor camera, all is not lost. While the larger sensors on full frame cameras absorb a lot more light and can handle higher ISO settings, I’ve taken a lot of very nice sky and star pictures with cropped sensors. You just need to pay attention to the settings a little more with the cropped sensor.

With any camera, of course, use a tripod, open your aperture up all the way, put your camera on a timer or use a remote shutter button and experiment with your ISO. For cropped sensors, you’ll probably need between 1600 and 3200 and on full frame, you might need 6400. Experimentation is the best and it’s necessary.

Regarding your shutter speed, the 500 rule is great. Just make sure to do the math if you’re using a cropped sensor camera.

Here’s how it’s going to go for you. You’re going to read blog posts like this one and then go out and try to take some Milky Way or star photos. You’ll come back and realize they’re not that great. Then, you’ll read some more and watch a few videos on the topic. You’ll go out again and realize that your photos are about twice as good as the first time. You’ll repeat this process until you’re taking spectacular images. This is the process of learning, so expect it and good luck.
 
Top