KodyWallice
Member
- Joined
- May 7, 2021
- Messages
- 123
- Reaction Score
- 1
- Points
- 23
- #1
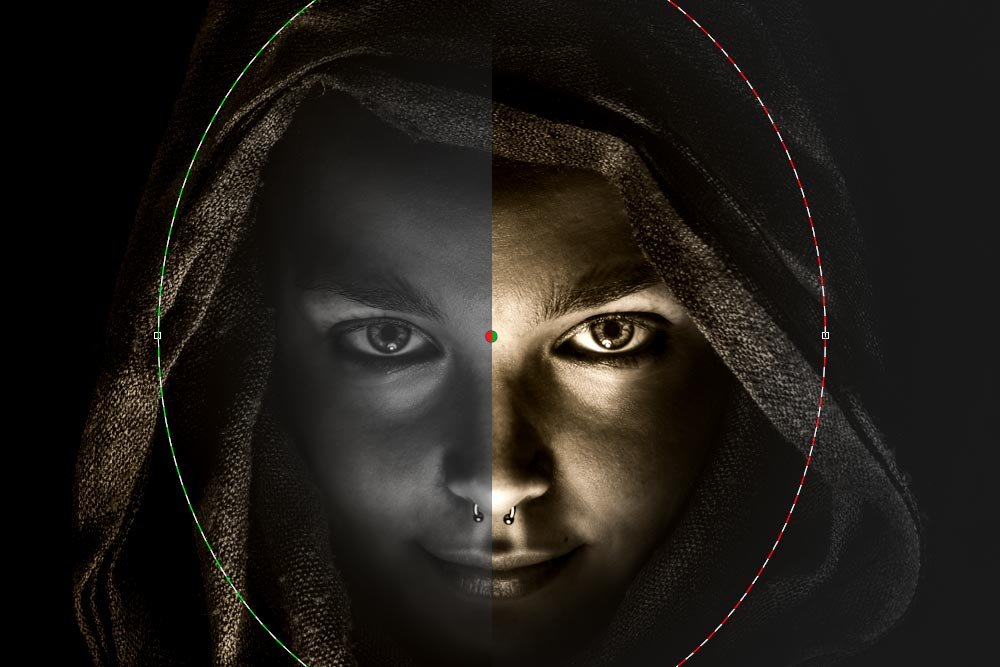
If you’d like to highlight something (or more than one something) in one of your photos, the Radial Filter in Adobe Camera Raw may be just the tool for you. This tool is perfect for portraits, wedding photography – even some landscape or still life photography. Actually, any time you want something to shine or not to shine, take a stab at working the object with this tool. It’s remarkable what can be accomplished.
Using the Radial Filter is much like the using the Graduated Filter. They’re almost identical. The primary difference is that the Radial Filter is round, or oval – depends on how you want to shape it. The Radial Filter also has the ability to affect the inside or the outside of the shape you draw, which is pretty cool. Don’y worry, I’ll go over all this below. Which brings me to the next paragraph.
In this post, I’ll talk about using the Radial Filter tool in Adobe Camera Raw. I discuss where it can be found and how to access it. I’ll then demonstrate some of its capabilities on a sample photo. From this, you’ll have the opportunity to determine if this is a tool you’d be interested in including in your own workflow.
What is the Radial Filter?
Simply put, a radial is a shape that is drawn over an image in Camera Raw. When the radial is drawn, a new panel appears at the right side of the application. Once the panel appears, you’ll have the ability to alter the appearance of either inside or outside of the radial via sliders. More than one radial is allowed. That’s the short and sweet version. Let’s talk more about what this feature is and how it works below.Original Photo
I thought I’d show you the original photo I’ll be working on today. It’s a great subject, but the lighting is all off. I’d like to bring it to life.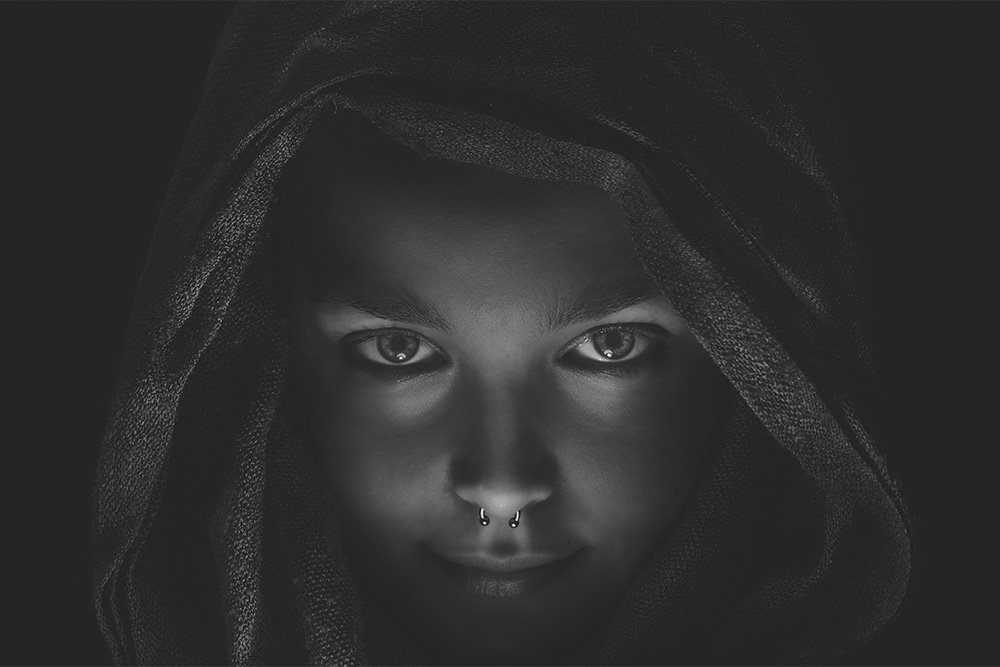
I think you’d agree that this needs some work.
The Radial Filter
To activate the Radial Filter, head up to the top toolbar and press the button that looks like an O. If you roll over the button without pressing it, a tool tip will appear that says Radial Filter.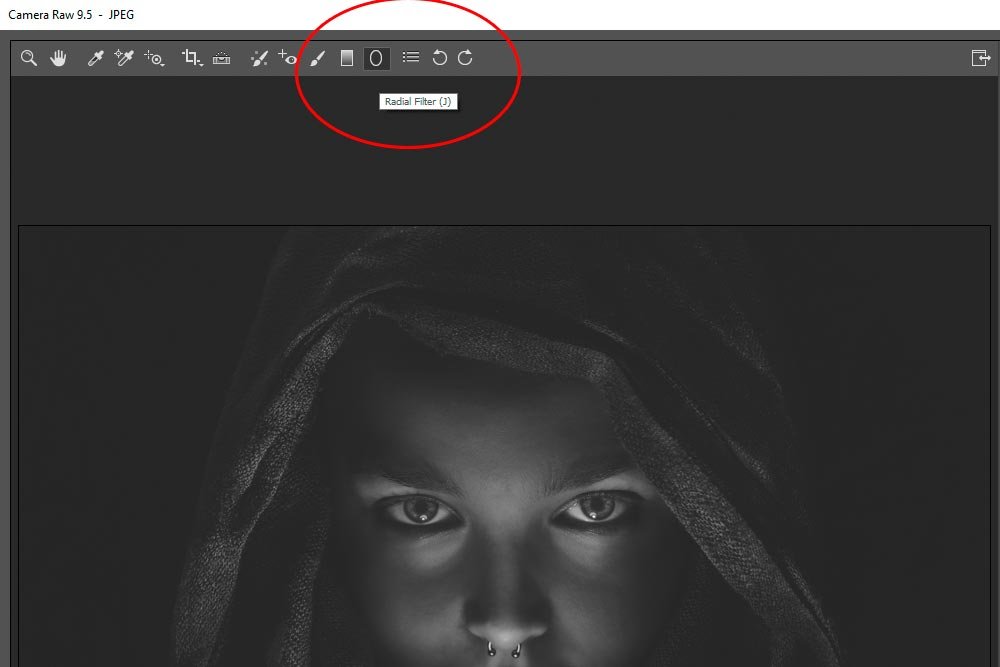
Once the button is pushed, I have the ability to draw my circle. In this case, I’ll draw one that encapsulates the model’s face because that’s what I’d like to highlight. Also, the Radial Filter panel will appear at the right side of the screen. I’ve already made some adjustments.
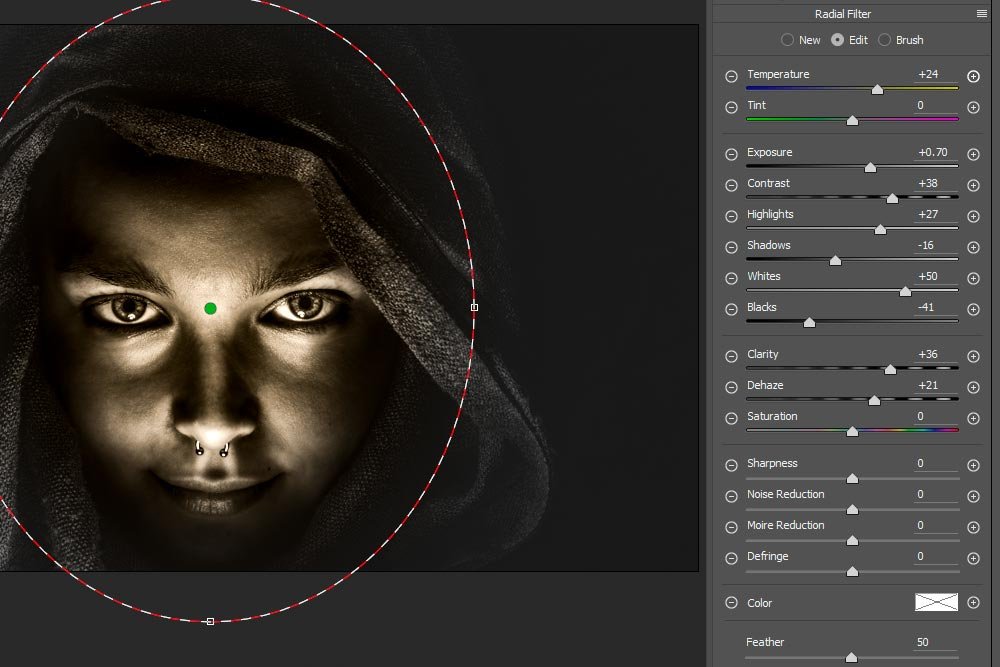
Now, if you look back to my Graduated Filter post, you’ll notice that the sliders for this tool look pretty much the same as the ones for that tool. This is a good thing because it means we have familiarity with them. Also, the sliders mimic the ones used throughout Camera Raw.
The two primary areas I’d like to point out are the Inside/Outside options and the ability to create multiple radials.
Inside/Outside
After drawing a circle around an object, take a look down at the bottom of the Radial Filter panel. You should see two circles that can be clicked. The first circle says Outside and the second says Inside. Right now, I’ve got the Inside circle selected.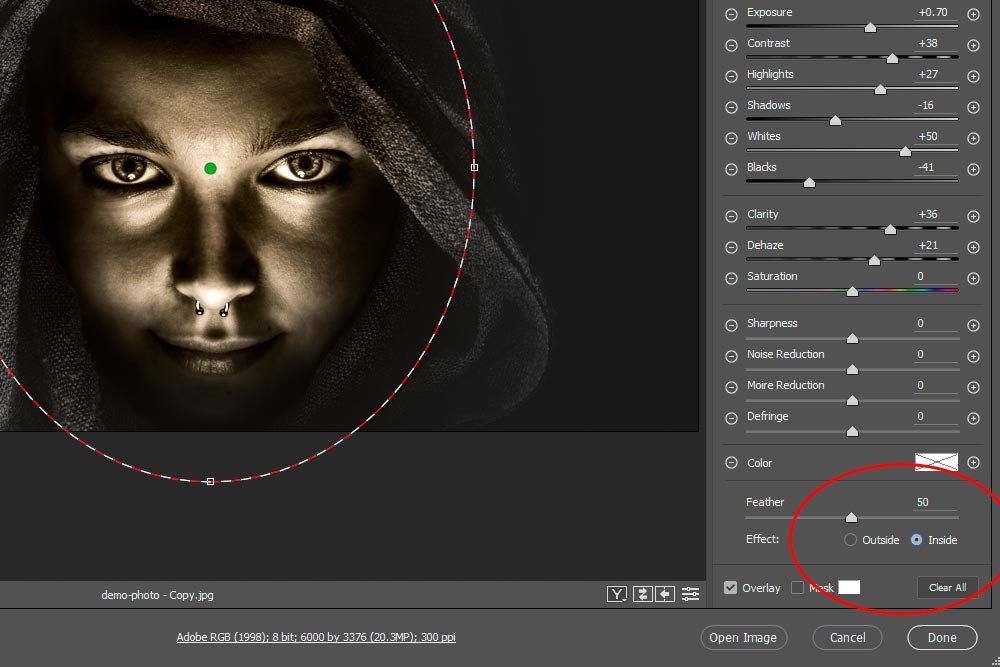
What this means is that any changes I make to the photo’s appearance via the sliders in the panel will be applied to the inside of the radial. As you already know, I moved the sliders earlier. Let’s take a look at the final image with the Inside option selected.
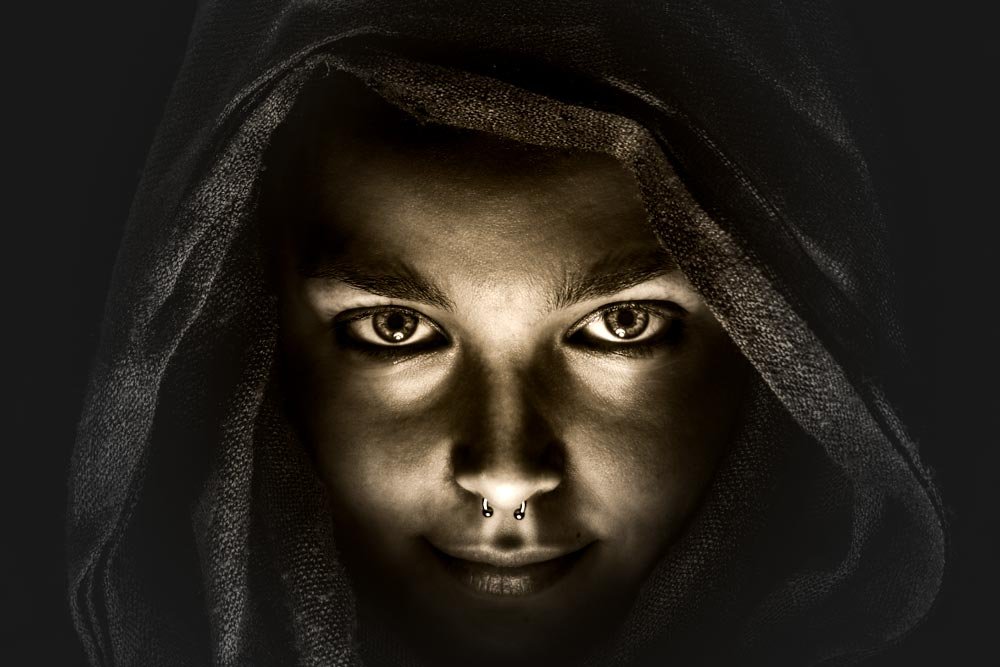
And now I’ll click on the Outside option. Let’s see what the final image look like here.
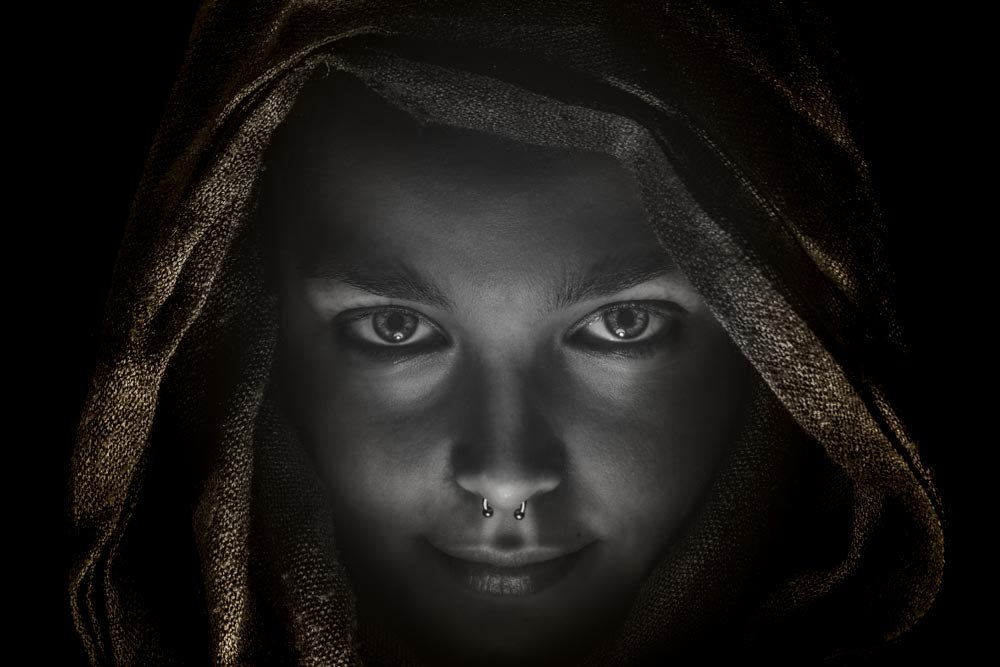
They both look pretty cool, but the Inside option definitely looks better because it wakes the photo up.
Creating More Radials
As I mentioned earlier in this post, we have the ability to create more than one radial, or highlighted area. To accomplish this, all we need to do is head up to the top of the Radial Filter panel and click New.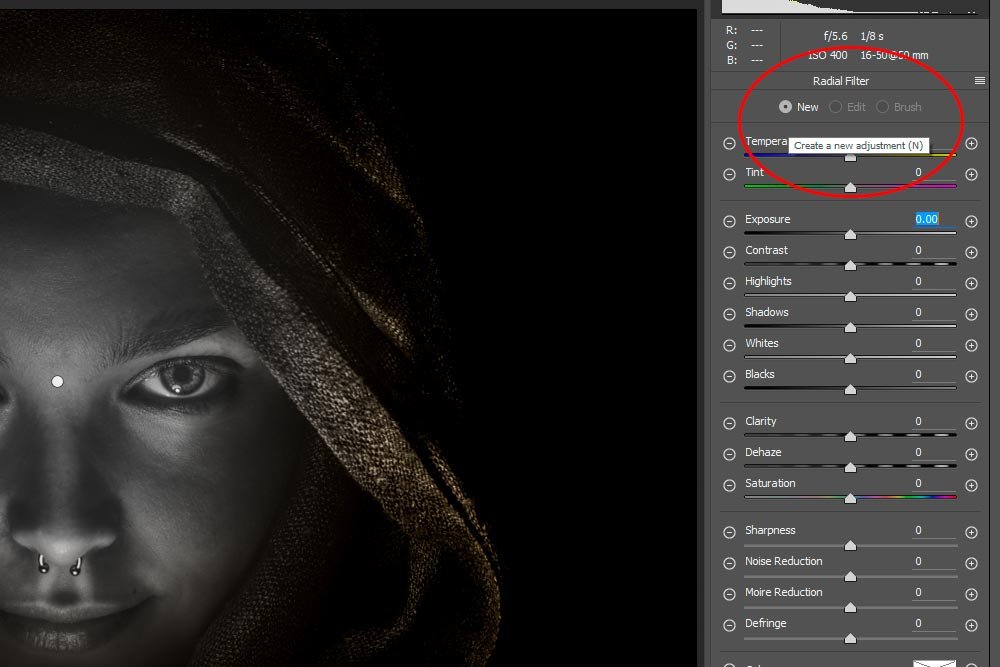
When that option is selected, the center dot of the previous selection will remain in the photo because the overall tool is still in use, but we’ll have the ability to draw a new filter area. I drew one and increased the Exposure, simply to make a point. As you can see, both filter areas are in effect.
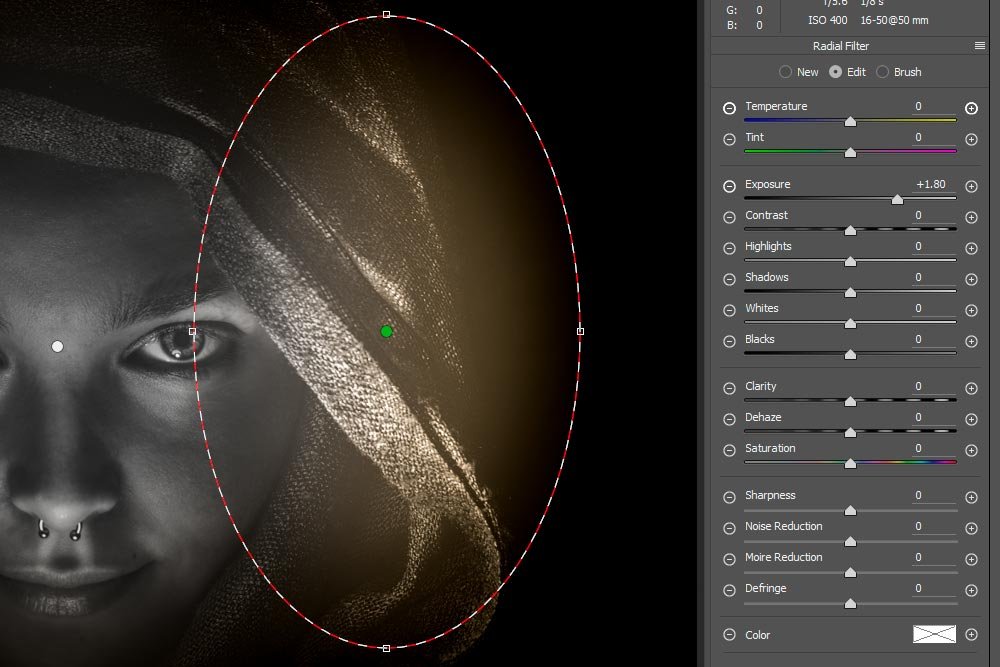
Since the sides of this particular photo are so dark, there isn’t much more to do to it. If I had a photo that I wanted multiple objects or areas highlighted, this option would be perfect.
