EmeraldHike
Member
- Joined
- May 10, 2021
- Messages
- 133
- Reaction Score
- 0
- Points
- 21
- #1
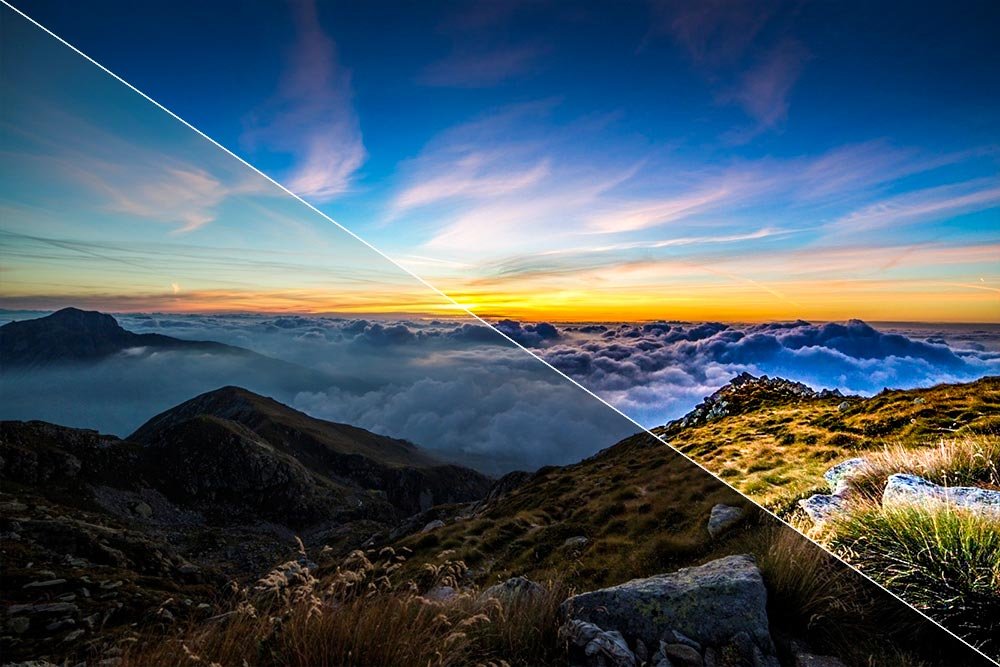
Adobe Camera Raw has a number of great tools that really do a great job with assisting to enhance photos. I’ve already discussed two of these tools on this site. They are:
How to Use the Radial Filter in Adobe Camera Raw
Enhancing Photos with Graduated Filters in Adobe Camera Raw
To continue on with this style of enhancement, I’d like to introduce the third tool of this type; the Adjustment Brush. The Adjustment Brush is very similar to both the Radial Filter and the Graduated Filter. All three tools select an area to alter. The Radial Filter does it one way, the Graduated Filter does it another way and the Adjustment Brush does it yet another. In my opinion, the Adjustment Brush is the most versatile, but honestly, each tool has its own strength.
In today’s post, I’m going to edit a sample photo with the Adjustment Brush. I’ll cover each step I take to lighten, darken, saturate and all the other sliders I move. There are a few specific areas I’m going to touch, so those will be discussed as well.
Original Photo
Below, I’ll show you the original version of the photo I’ll be working with. While it’s an extraordinary picture, it can use some work. Perhaps not as much work as I’ll do to it in my demonstration, but work nonetheless.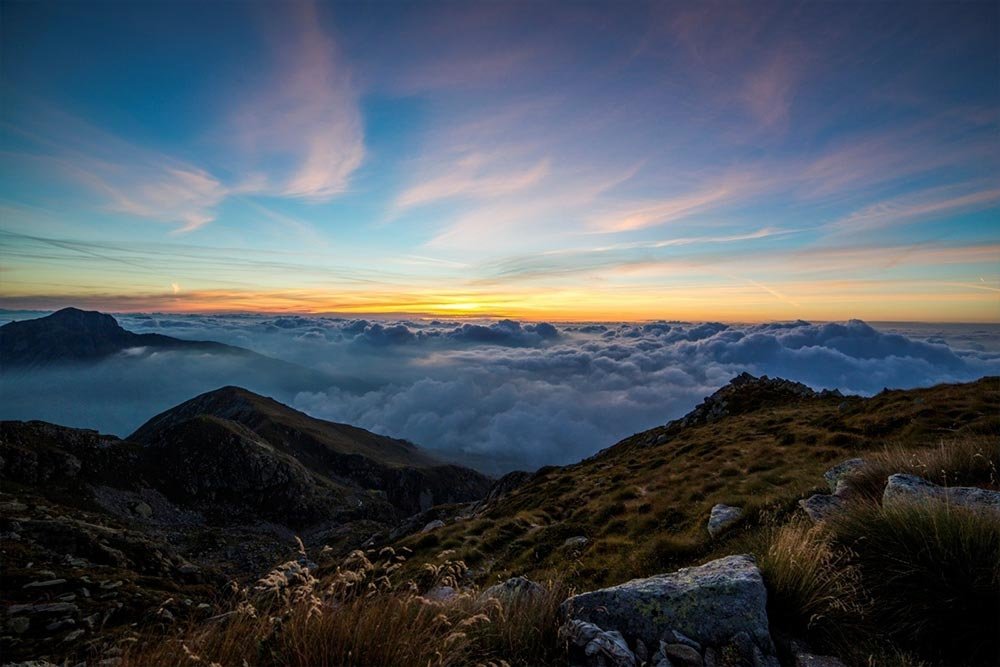
Activating the Adjustment Brush
To activate the Adjustment Brush, I’ll head up to the top bar and push the icon that looks like a little paint brush.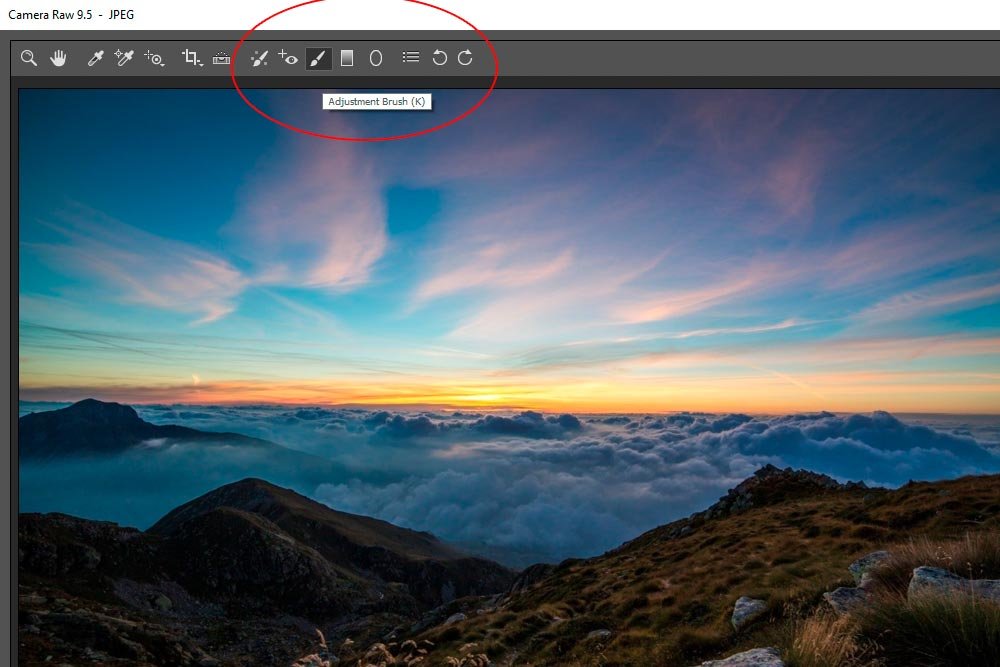
When I do that, a circle appears on the screen that looks just like the Spot Removal tool. Basically, it’s a dashed outer circle with a solid inner circle. The solid inner circle is the actual Adjustment Brush tool edge and the dashed outer circle is the edge of the feathering, whatever that may be set to. Also, the right panel changes to the Adjustment Brush tool panel, which looks just like the tool panel in my two previous posts. It contains the sliders we’ll use to adjust this photo, such as White Balance, Exposure, Clarity, Highlights, Shadows, etc…
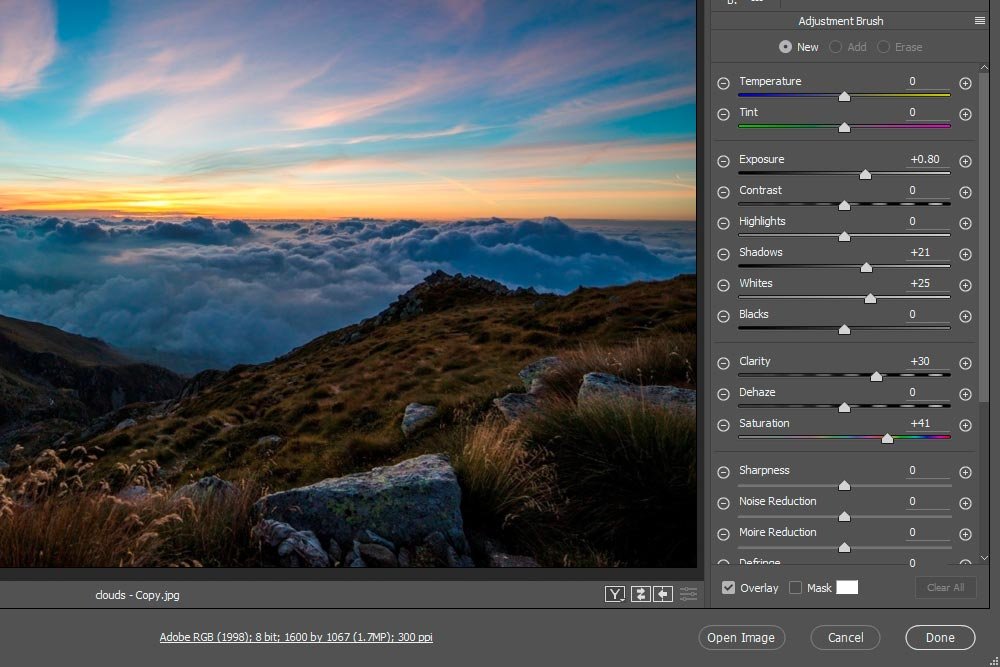
Making Initial Adjustments
Before I begin working with the Adjustment Tool, I want to make the photo look as good as possible. After I make my usual adjustments in the Basic panel, I’ll have a better feel for what needs to be changed. So, I’ll now move some sliders.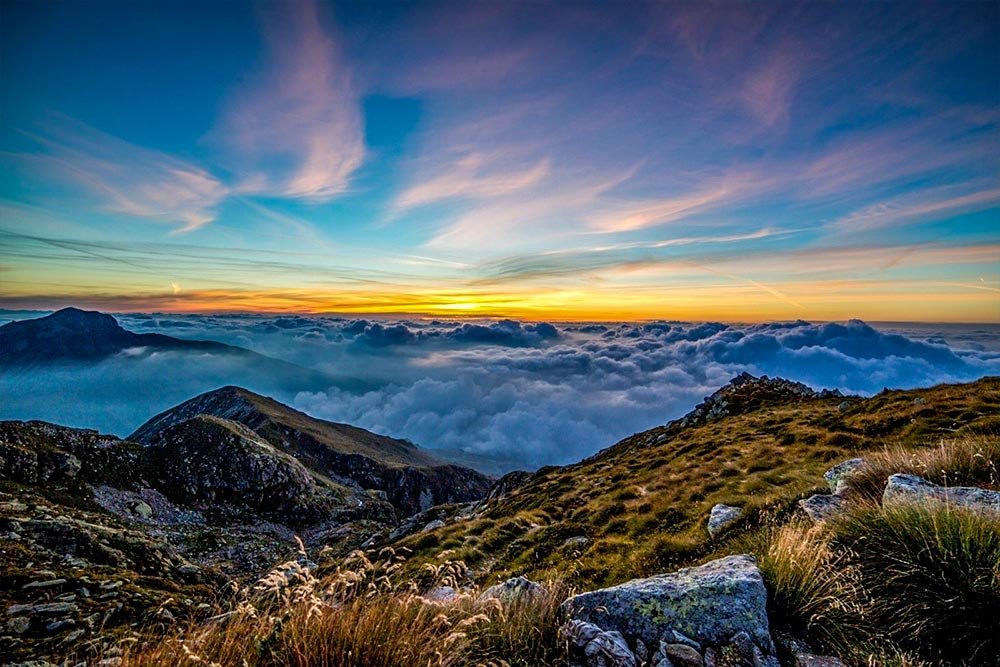
Here’s a screenshot of the sliders I moved.
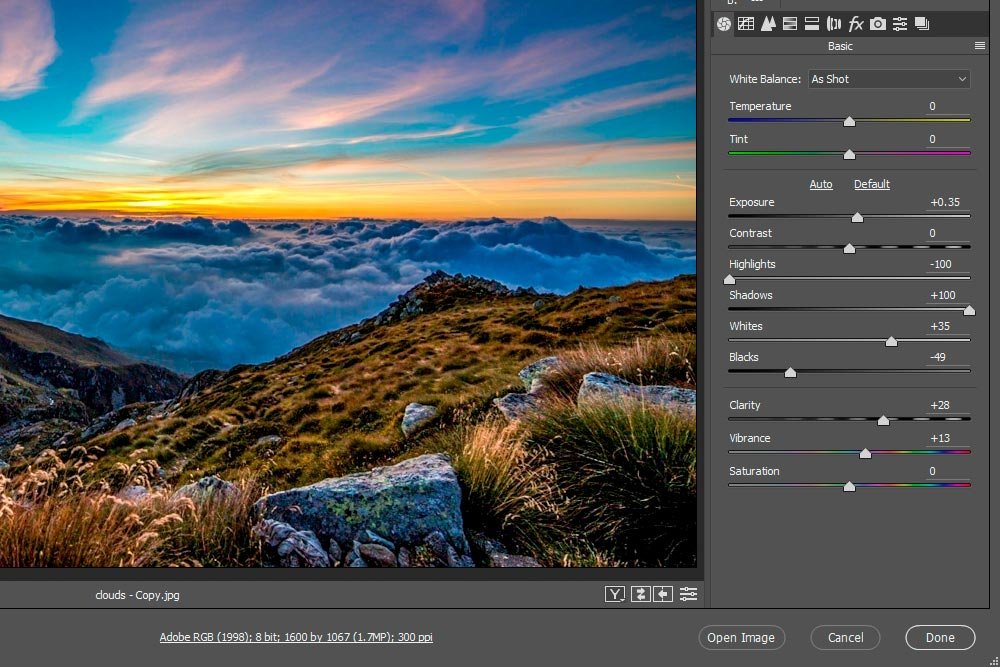
As you can see, the photo is looking better already. I haven’t even used the Adjustment Brush yet.
Cleaning Up the Sky
Now, I’ll begin making my edits. First, I’m going to adjust some of the sky. I think the very top of the photo needs to be darkened and cooled. So, I’ll activate the Adjustment Brush, click the – (minus) button that’s located to the left side of any slider to reset all the sliders and then push the White Balance Temperature and Exposure sliders to the left a bit. After that, I’ll click at the right side of the top of the sky and drag the Adjustment Brush straight across to the other side.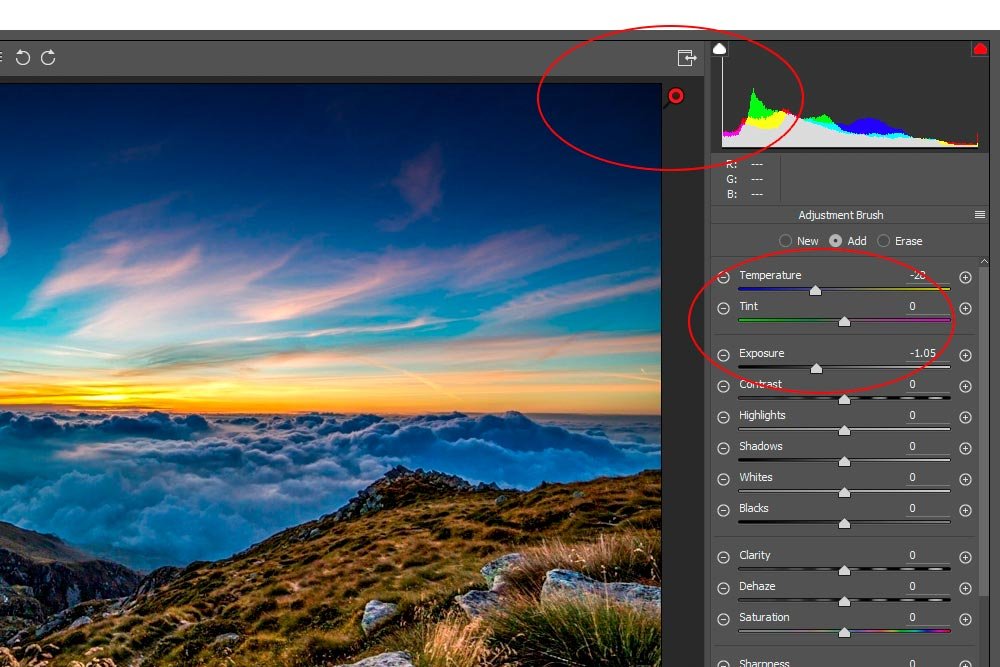
In the screenshot above, I circled two areas. The top circle is around the pin that was created from my first adjustment. Camera Raw allows you to go back and edit any adjustment you make and these pins define where the start point of the adjustments are. At any time, if I want to go back for an edit or update, all I need to do is click on the pin and that specific adjustment area will become live again and the associated panel will become active.
The second area I circled contains the two sliders I moved. As you can see, the very top horizontal section of the photo has been darkened and is more blue.
For the sky to be complete, I need to make adjustments to two more areas. First, I’d like to lighten up the mid-section and then I’d like to saturate the sunset.
So, to create a new adjustment area, I’ll need to click the New radio button at the top of the Adjustment Brush panel.
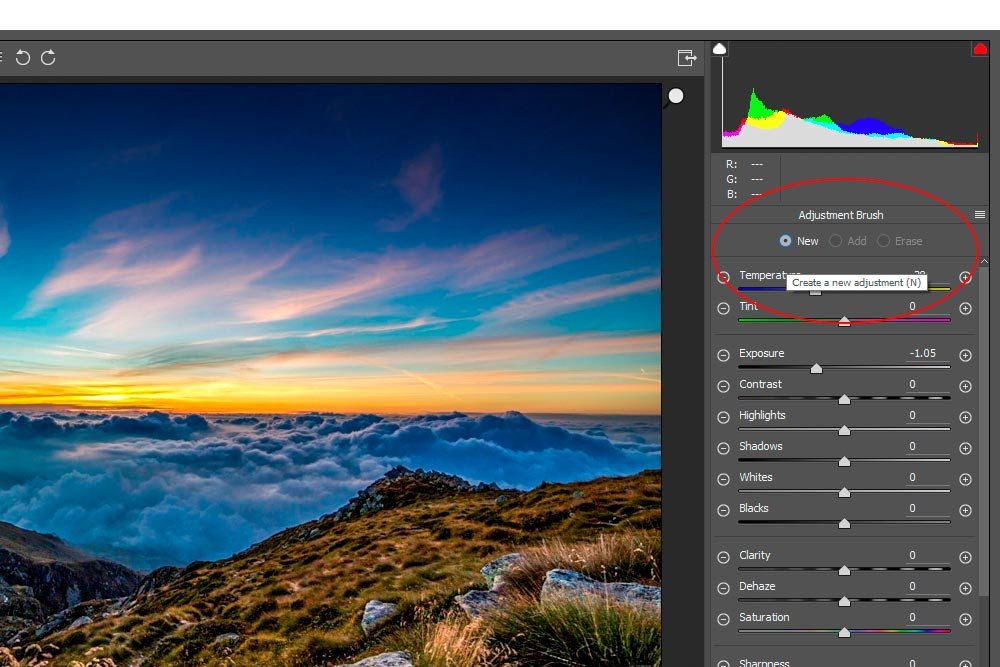
Once I do that, the pin that belongs to the previous adjustment changes from being red with a black dot in it to solid white. That means that area is dormant. Red is active, white is not. For each new adjustment I’d like to make, I need to click the New radio button. Also, as a reminder, when I click the New radio button, the settings in the Adjustment Brush panel will remain set to whatever they were from the previous adjustment. I’ll have to reset them every time by clicking the – button that’s located to the left of any slider. I’ll go ahead and make my two additional changes to the sky now.
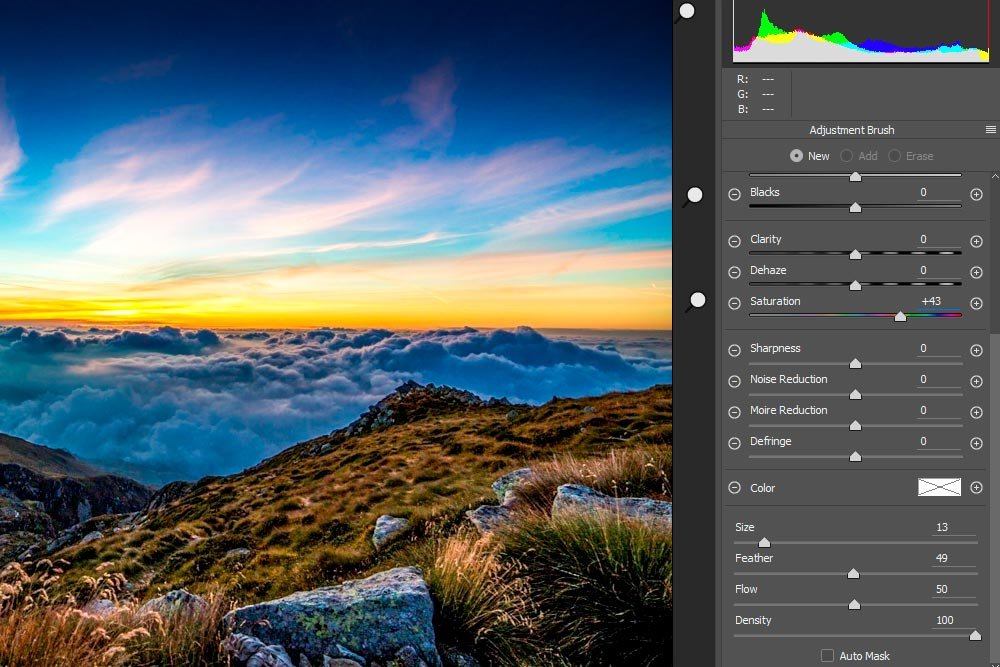
If you look at the above screenshot, you’ll see two additional white pins to the right of the photo. The 3 pins represent the 3 areas that have been adjusted. For the second area, I simply increased the exposure and for the third, the one across the orange area, I increased the temperature and the saturation.
There is also another slider I adjusted while making these changes. To more accurately fit inside the orange sunset area, I had to reduce the size of the brush. To increase or decrease brush size, I can click the [ or the ] keys on my keyboard. I could also just as easily move the Size slider back and forth. This one is located at the bottom of the Adjustment Brush panel. You can see it in the screenshot above.
Defining the Clouds
When I see photos like this, I love it when the clouds are really defined. I’m not sure what it is. I think I’ve seen so many pictures with crazy looking clouds, it just grew on me. Because of this, I’m going to see what I can do to the ones in this photo.Because this area is well defined with some fairly tight edges, I need to reduce the feathering of my brush down to zero. I’ll do this by pushing the Feather slider all the way to the left. Also, to accurately fit inside the area, I’ll have to increase and decrease the size of the brush as I work.
Since I don’t know what sliders need to be moved to create the look I’m after yet, I’m just going to leave the default slider settings alone and color the area in like I’m in a coloring book. If I check off the Mask check box at the bottom of the Adjustment Brush panel, I can view a whitish overlay of the area that I’ve filled in. This makes life easier in areas like this.
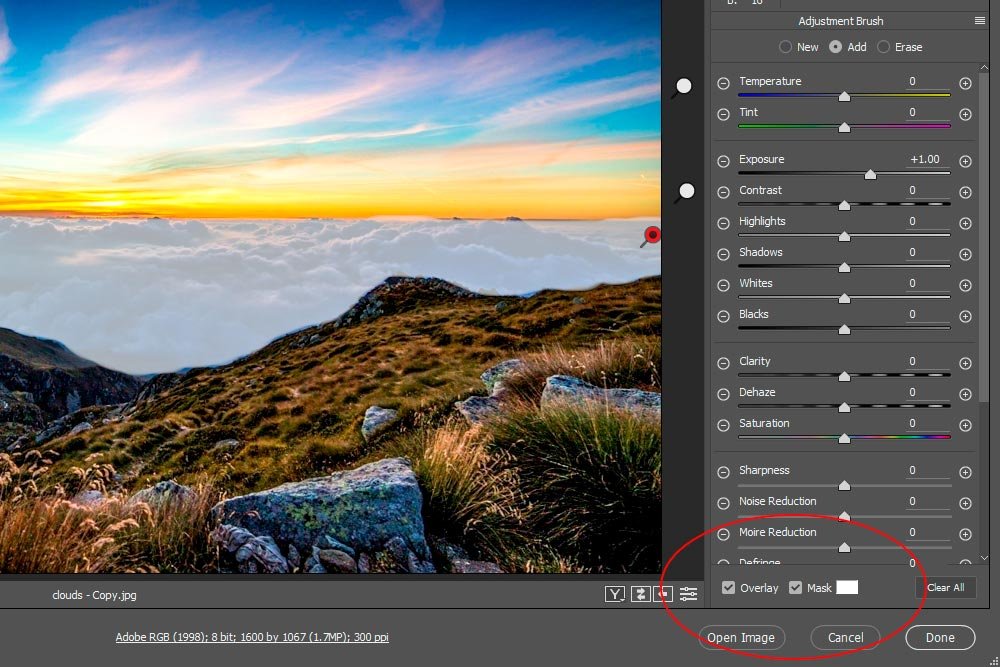
In the above screenshot, there are two things to look at. First, I want to show you the Mask check box and second, I want to show you the area with the clouds in it. Since it’s currently masked, it’s very foggy. I’ll go ahead and remove the mask and make some adjustment to accentuate the clouds.
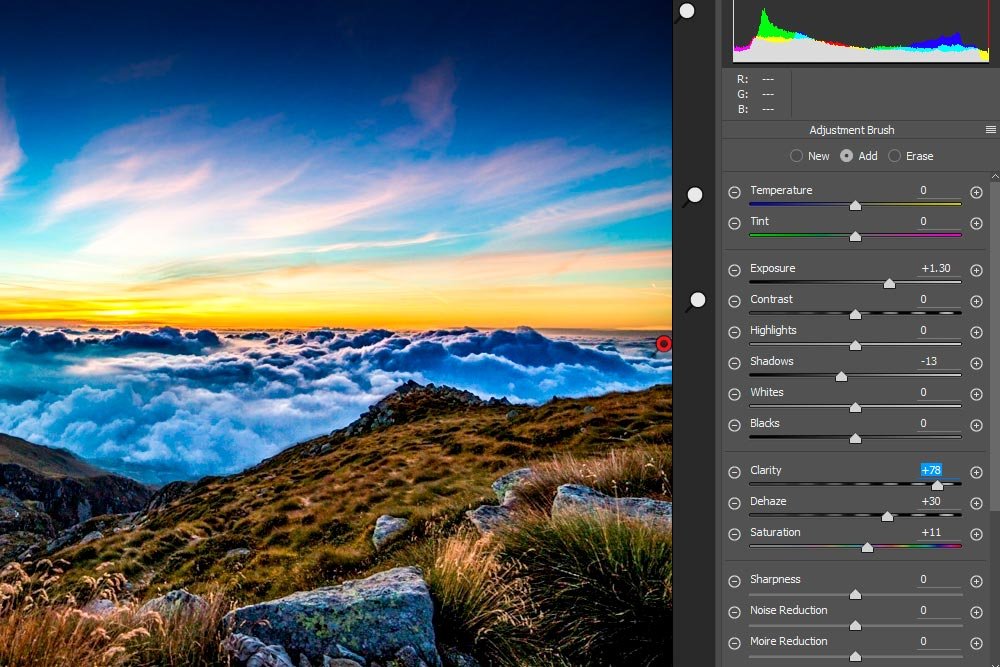
Ah, now that’s what I’m talking about. Some more exposure, clarity and dehaze did the trick.
Brightening the Foreground
The last area I’d like to adjust is the foreground. I want to brighten it up by adding exposure, warm it up by increasing the temperature and add some color by saturating it. Again, I’ll click inside the New radio button up top, create my mask and start coloring like I’m in third grade.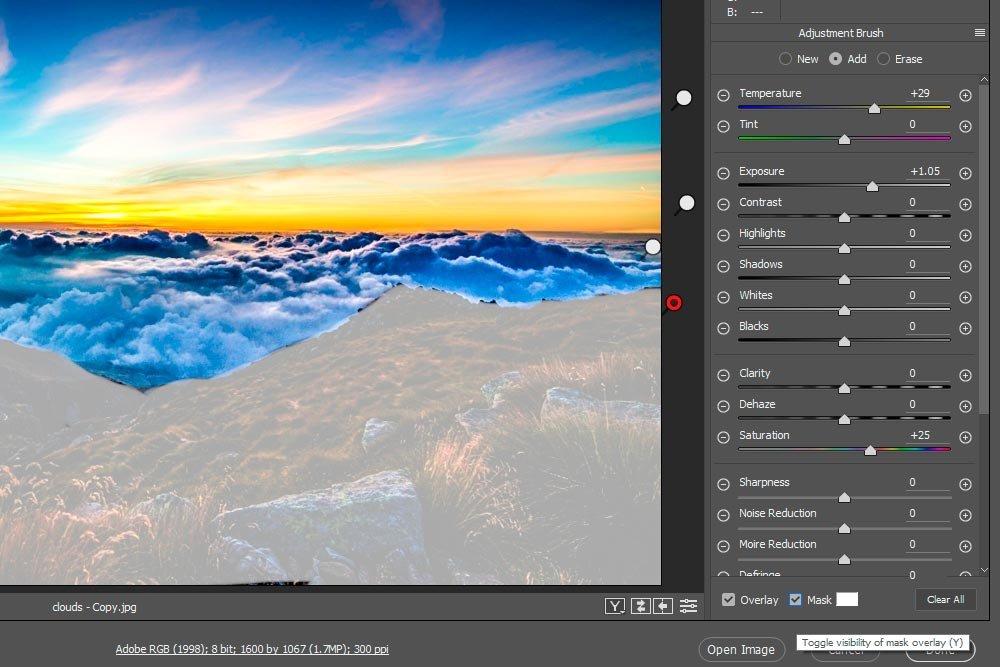
I do want to mention one thing. In areas like this, there is a tendency to make mistakes and draw outside the lines. If this happens, simply head up to the top of the Adjustment Brush panel and click inside the Erase radio button. Then, use the brush as an eraser. When finished, you can simply click the Add radio button once again to continue.
The Final Image
Let’s take a look at the final image.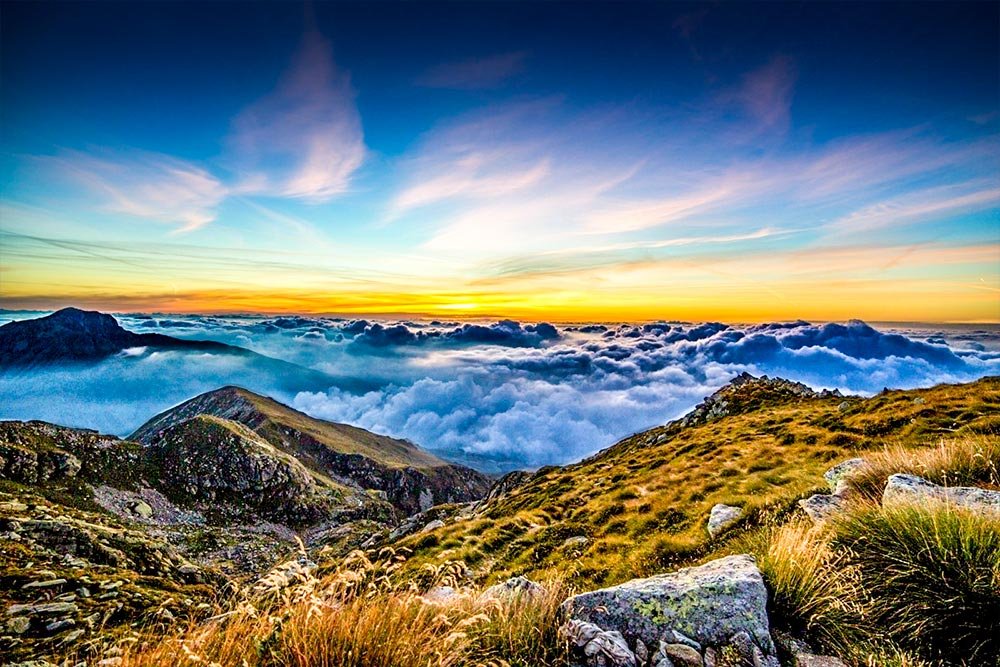
No matter your thoughts on the image, it served my intended purpose in this post. I demonstrated how you can go about using the Adjustment Brush to selectively edit areas of a photo. This is a very powerful tool, so I recommend getting your hands dirty and practicing with it a bit. You’d be surprised how often you may need this tool, once you become familiar with it.
