Cameron
Member
- Joined
- May 10, 2021
- Messages
- 108
- Reaction Score
- 3
- Points
- 23
- #1
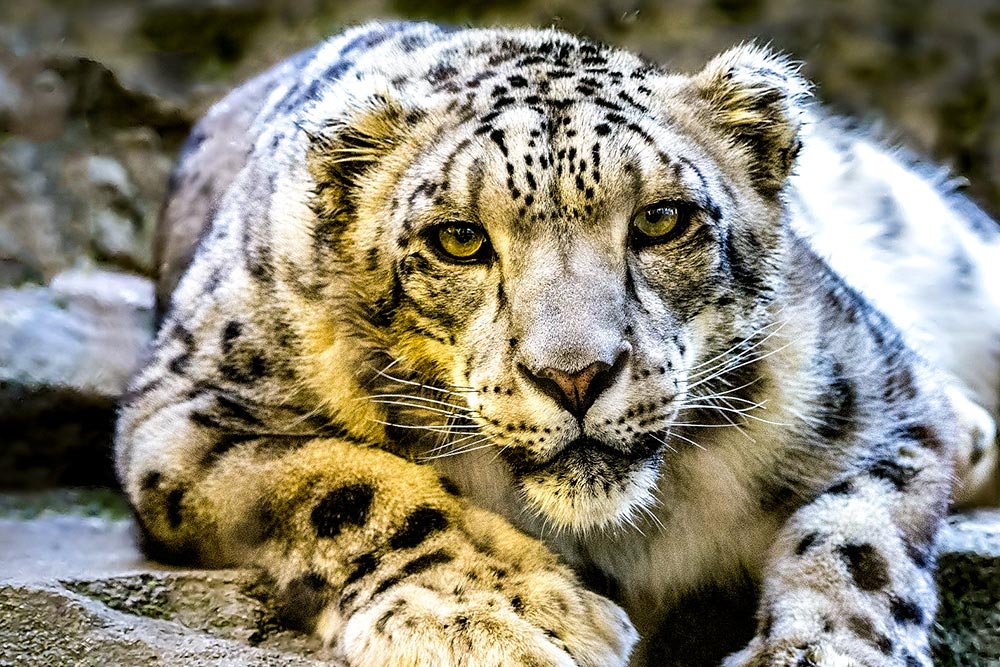
If you work with the Adjustment Brush, the Graduated Filter or the Radial Filter a lot in Adobe Camera Raw, you’ll want to read this post. And if you find yourself using any of these tools with the same or similar settings time and time again, you’ll really want to read this post. What I’m about to share with you can save not only tons of time, but your memory as well.
Almost every single time I open a photo to edit in Camera Raw, I adjust the sliders in the Basic panel exactly the same way. I reduce the highlights, increase the whites, reduce the blacks and so forth. That’s in the basic panel. When I use the Adjustment Brush, I oftentimes want to make an object “pop.” With this tool, I increase the contrast, the shadows and whites as well as the clarity. Then, I decrease the blacks and give the temperature a slight nudge to the right. Over the years, I’ve found that this combination works very well for me. The problem I have is remembering all those things. Sure, if I’m on an editing spree and working for hours and hours on a multi-day stretch, I don’t have an issue. But if I walk outside to see the sunshine once in a while, I seem to forget what those perfect settings were. Well, the good news is, there’s a solution.
In this post, I’m going to quickly share the steps necessary to save your common settings as a preset in Camera Raw. The tools I’ll be referring to are the ones I mentioned earlier in this post. I’ll demonstrate how to activate the tools, how to change some settings and how and where to save the preset.
Original Photo
Below is the original photo that I’ll be working with in this post. I already edited it in the Basic panel, but now I’d like to move on to one of the adjustment tools to enhance it a bit more.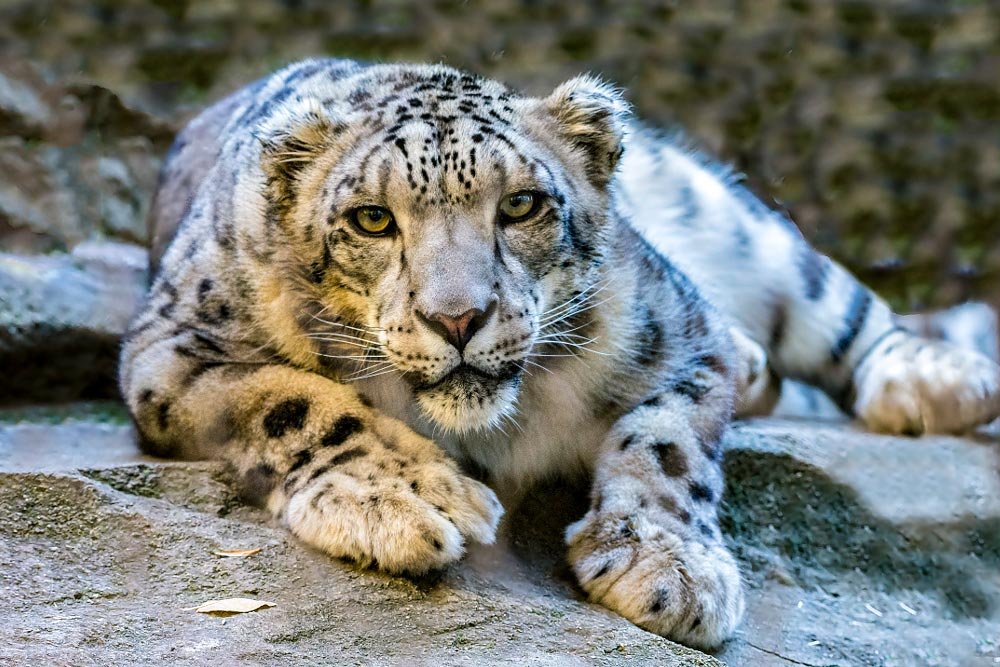
Adjusting the Photo
There are two areas I’d like to adjust in this photo. The first is the area around the leopard and the second is the leopard itself. For the area around, I want to reduce the clarity and saturation and for the leopard, I want to make it stand out. First, I’ll tackle the leopard.To accomplish what I’m setting out to do, I’m going to use the Adjustment Brush. I’ll head up to the top of the application and click the proper icon.
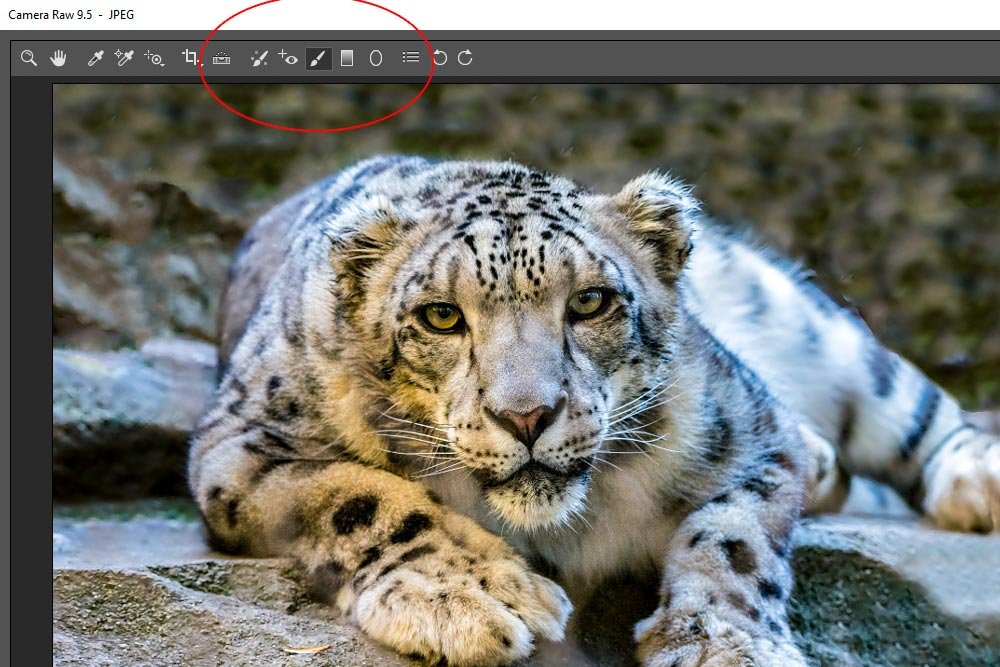
Once I do that, the Adjustment Brush panel will appear on the right side of Camera Raw. Since I want to start with fresh settings, I’ll reset all the sliders by going to the upper right corner of the panel and clicking on Reset Local Correction Settings. This will center all the sliders.
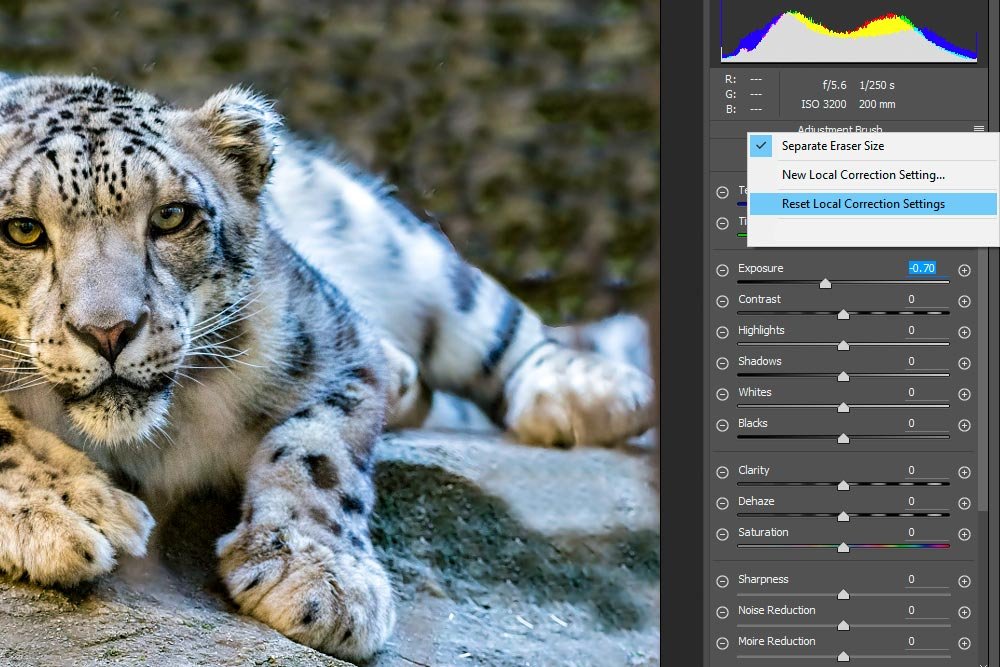
Next, I’ll go to the bottom of the panel and set the size, feather, flow and density that I’d like to use for this part of the project.
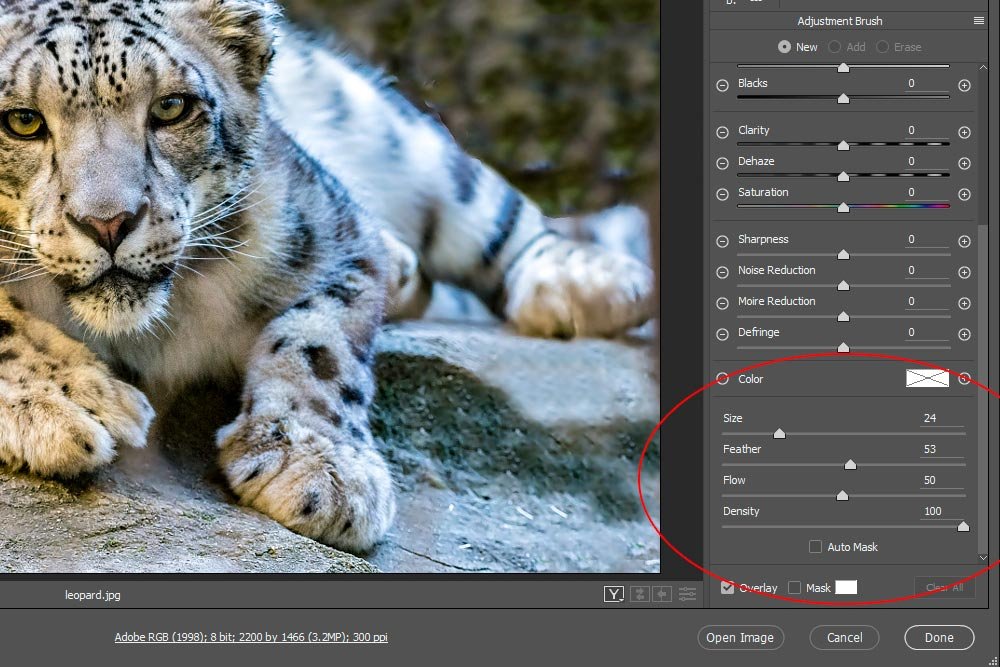
FYI – resetting all the sliders using the menu at the top of the panel doesn’t affect these size settings down below. They will remain constant throughout. You have to manually change them.
Okay, now I’m going to move some sliders around until I find exactly what I want. I’ll also paint the cat with the Adjustment Brush.
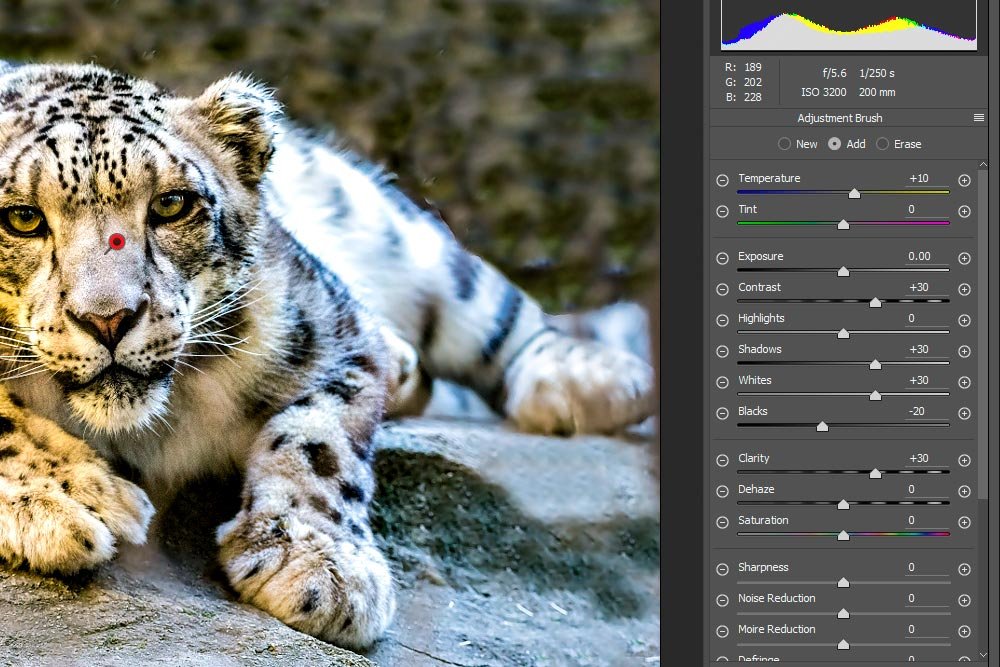
If you take a look at the sliders, you can see that I moved quite a few of them. I certainly wouldn’t want to do this every single time I needed to, if I could avoid it. As I mentioned above, there’s a way to save these settings.
Saving Presets
To save these current slider settings as a preset, all I need to do is head back up to the menu in the upper right corner of the panel and click New Local Correction Setting. Once I do that, the New Local Correction Preset dialog box will appear.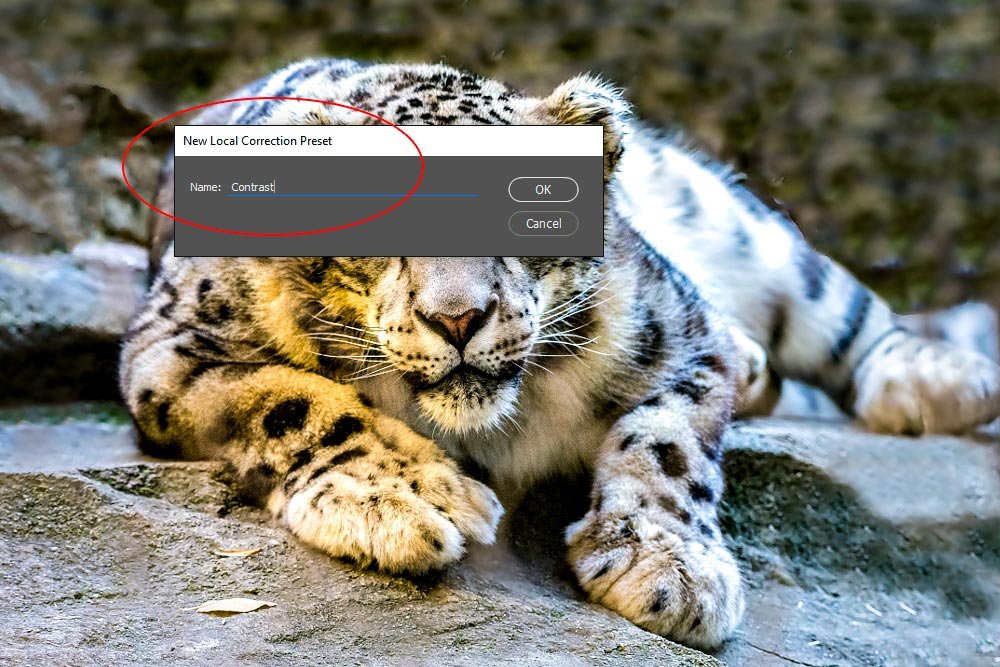
I’ll type in the name Contrast and click OK. The reason I chose Contrast is because it describes the effect the brush will have. You can choose any name you want. From here on out, the slider settings I used to adjust this part of the photo will be stored up in the menu I just used. If I want to use these settings again, all I need to do is choose a tool and click Contrast from the menu.
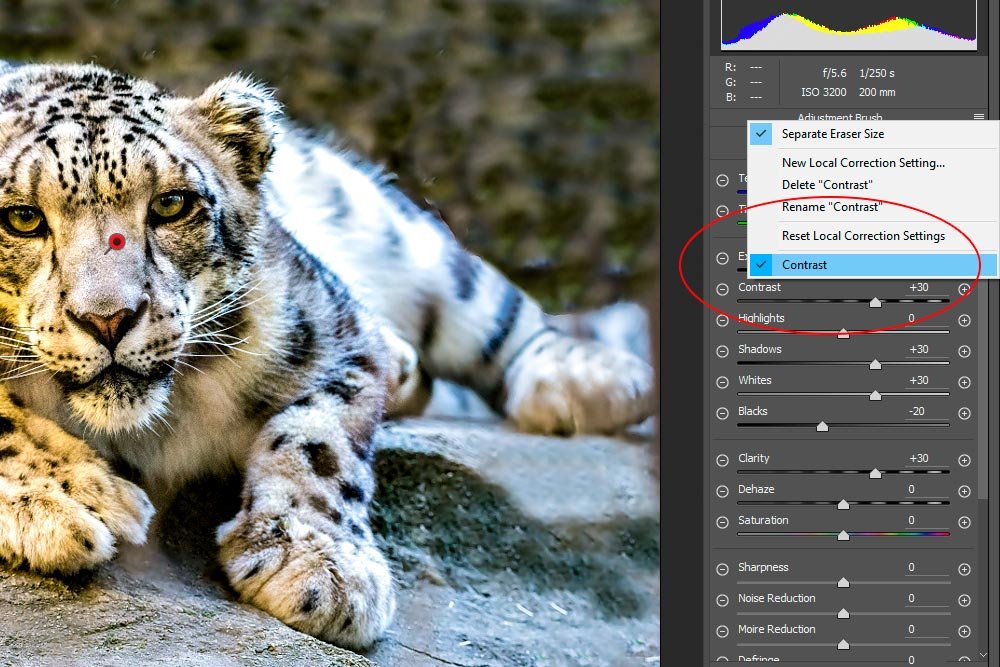
Now, I’ll do the same thing, but move the sliders around so they’ll have a dulling effect for the background area around the cat. Before I begin, I’ll click the New radio button at the top of the panel to activate a new Adjustment Brush tool instance and then reset the sliders again. After that, I’ll move the Clarity and Saturation sliders all the way to the left. Once they’re moved, I’ll paint around the cat, over the background area.
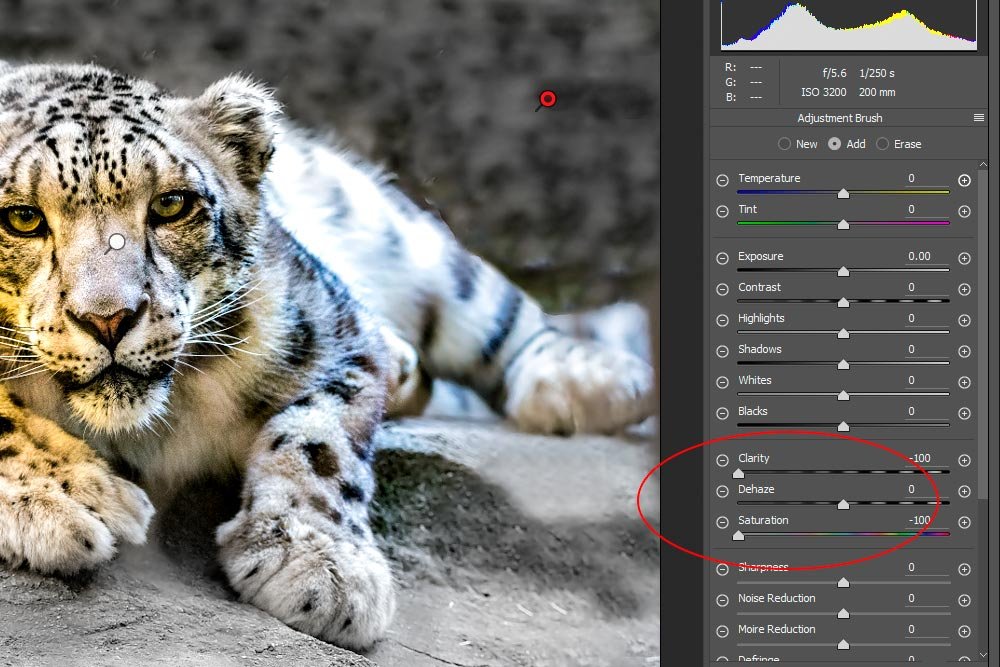
In the above screenshot, you can see the red dot for the new Adjustment Brush instance as well as the two sliders that I moved. I circled them in red.
To save these sliders as a preset, I’ll head back up to the same menu as before, click New Local Correction Setting, name the preset (Desaturate) and then click OK. Once I finish this, I’ll have another preset to choose from.
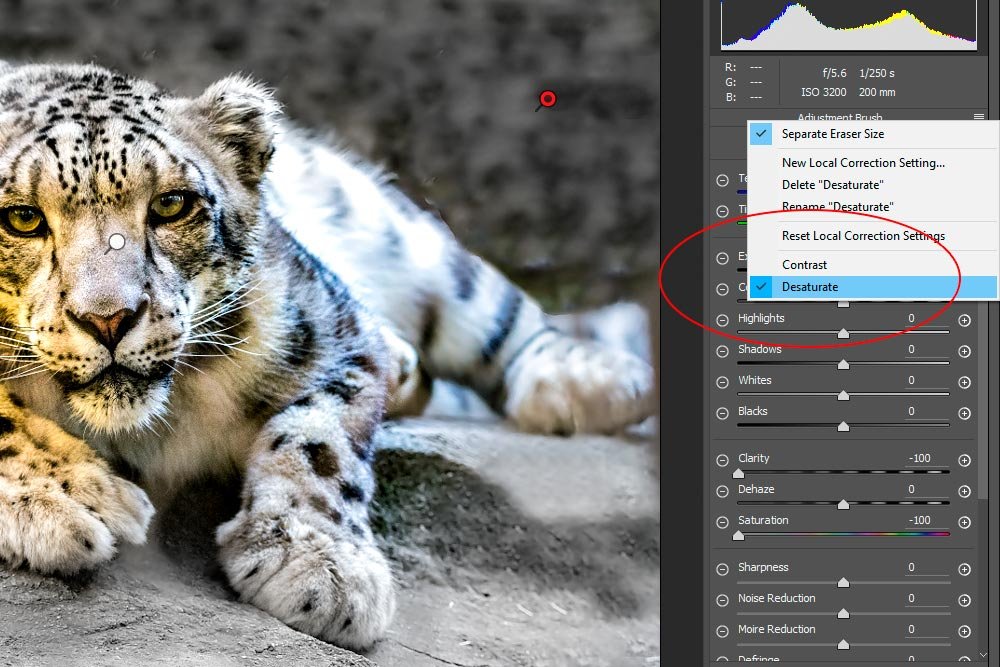
Before I close, I want to let you in on one final tip. The presets that you make with one tool apply to the other two as well. So if I decide to apply a Graduate or Radial Filter to this photo, I could do that and then choose one of the presets to apply the same slider settings as I used earlier. This is a very powerful feature that I encourage you to take advantage of if you use these tools often.
