JodyBuchanan
Member
- Joined
- May 10, 2021
- Messages
- 138
- Reaction Score
- 0
- Points
- 21
- #1
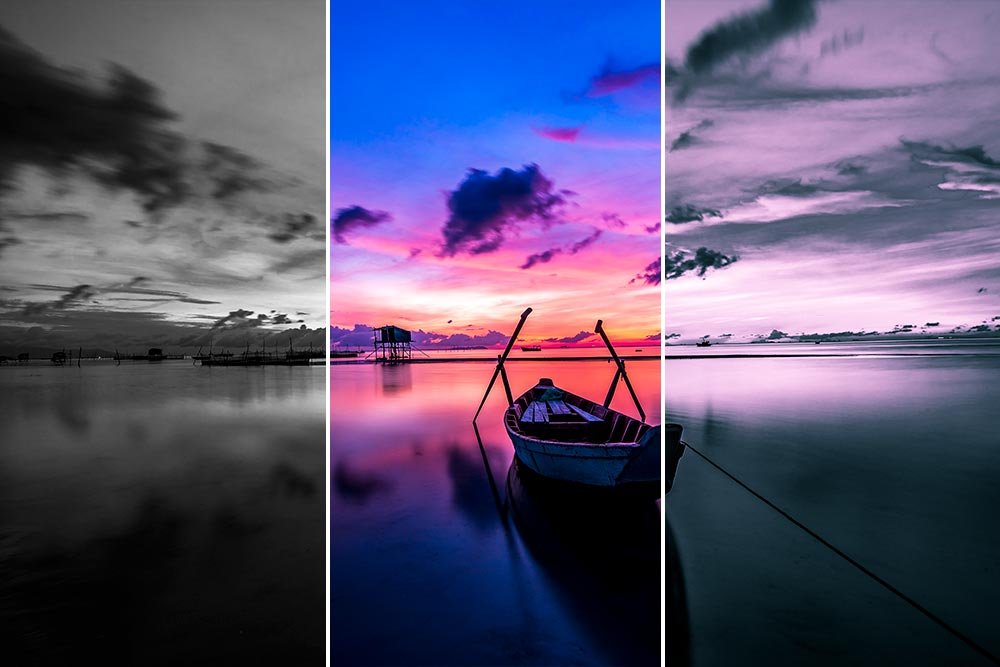
The Snapshots panel in Adobe Camera Raw controls one of those hidden features that you’ll use over and over again, once you discover it’s there. It’s tucked away, sort of as an afterthought, over at the right side of the right column. I’m not sure why it’s all the way over there because, plainly put, it’s awesome.
In today’s post, I’m going to explain what Snapshots are inside Camera Raw. I’ll also explain their benefits. Then, I’ll go through a demonstration of how snapshots can be used in your every day workflow. I’m telling ya, I’m excited because this is good stuff!
What are Snapshots?
If you’ve ever worked in Git, you know exactly what version control is. If you’re a designer or photographer, who has absolutely no idea what Git or version control is, you’ll definitely know what is means to open an image in a photo editor, make some changes, save those changes under one name, make some more changes, save the file again under another name and so on. To be more precise, version control is this:Version control is a system that records changes to a file or set of files over time so that you can recall specific versions later.
Think about it this way – and I’ll use the boat image at the top of this post as an example. Say I opened the boat image in Photoshop and adjusted the color. I wanted to output this file just like this for my website. Then, a friend of mine asks me for the same picture in black and white for his website. I’d have to open the file again, change it to black and white and save the original under a different name. After that, another friend asks me for the same picture, but this time, in two-tone. Hmmm…to do this, I’d have to open the original color file, change it to black and white and then two-tone and then save the original under another name. At the end of it all, I might end up with three files that are named like this:
boat.psd
boat-black-white.psd
boat-two-tone.psd
If I took these photos in RAW mode (which I always should) and they were 25MB each, I’d have just used up 75MB of my hard drive, just for a few changes to one file. I don’t know about you, but I think that’s a wildly inefficient use of hard drive space.
What about this? Let’s say there was a way to open the same file, make some changes to the color, save those changes as a snapshot, make the same photo black and white, save those changes as another snapshot and finally make the same photo two-tone and save those final changes as a snapshot and then close the file. One file, three versions, three outputs. Now we’re back to the single 25MB of space used. This is reality and it’s all in Camera Raw. It’s also in Lightroom, but I’ll talk about that another day.
Snapshots have different benefits for different people. Personally, I enjoy editing a file many different ways. I like to see how it looks with one set of changes and then I like to see how it looks with another set of changes. If I were to save all these changes as different files, I’d be stuck in some massive disorganization. Clients oftentimes like to see various versions of the same photo as well, so sometimes designers, editors and photographers are forced into different outputs of the same file. You never know which one the client is going to like the best, so you end up saving the source file many times over – each to cover the change that was made to the original.
Finally, Camera Raw has a small issue with having a horrible undo feature. I think it’s fairly non-existent. Sure, you can click Ctrl+Z a few times and go back a step or two (if you’re lucky) while using some select tools, but I wouldn’t rely on that. It’s hit or miss. Many folks prefer to edit and take snapshots as an alternative to the lack of the ability to undo.
To summarize, Snapshots in Camera Raw are a handy feature that allows you to save file space on your hard drive, let’s you experiment with different versions of the same file and gives you some flexibility to undo some changes if you don’t like where things are heading.
Creating Some Snapshots – A Demonstration
In this section, I’m going to go through the process of editing one photo a few times while taking Snapshots along the way. It’s super simple, so feel free to follow along with your own image as you read this.The first thing I’m going to do is open the photo I’m interested in working on in Adobe Camera Raw. If you need help doing this, you can check out one of my earlier posts:
How To Open Files & Photos Into Adobe Camera Raw
After the photo in question is open in Camera Raw, I’ll make some edits inside of the Basic panel.
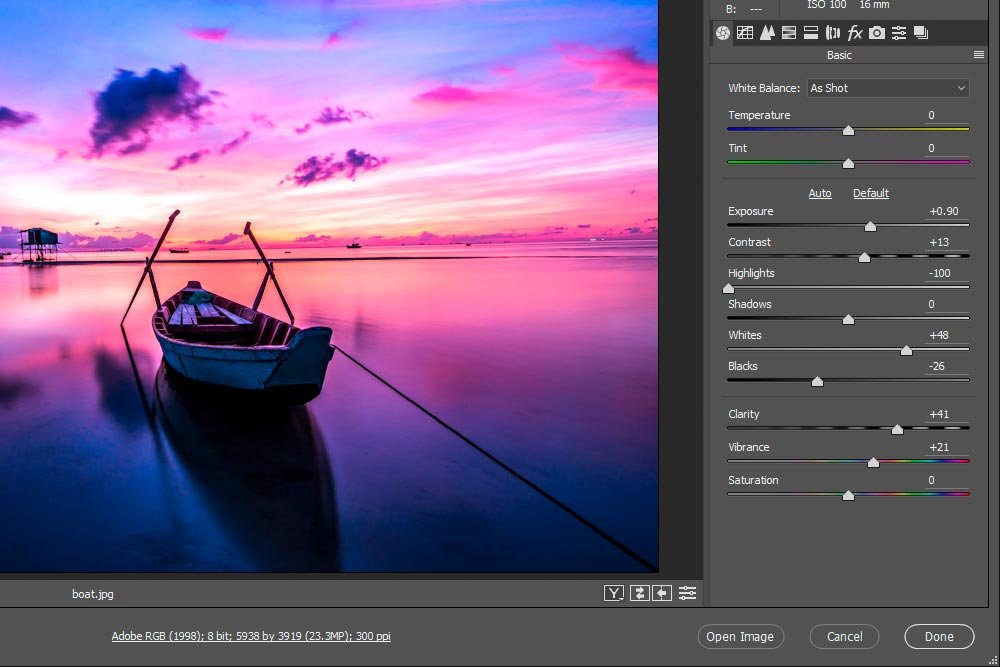
These aren’t any crazy edits or anything, they’re merely some standard changes I usually make to images.
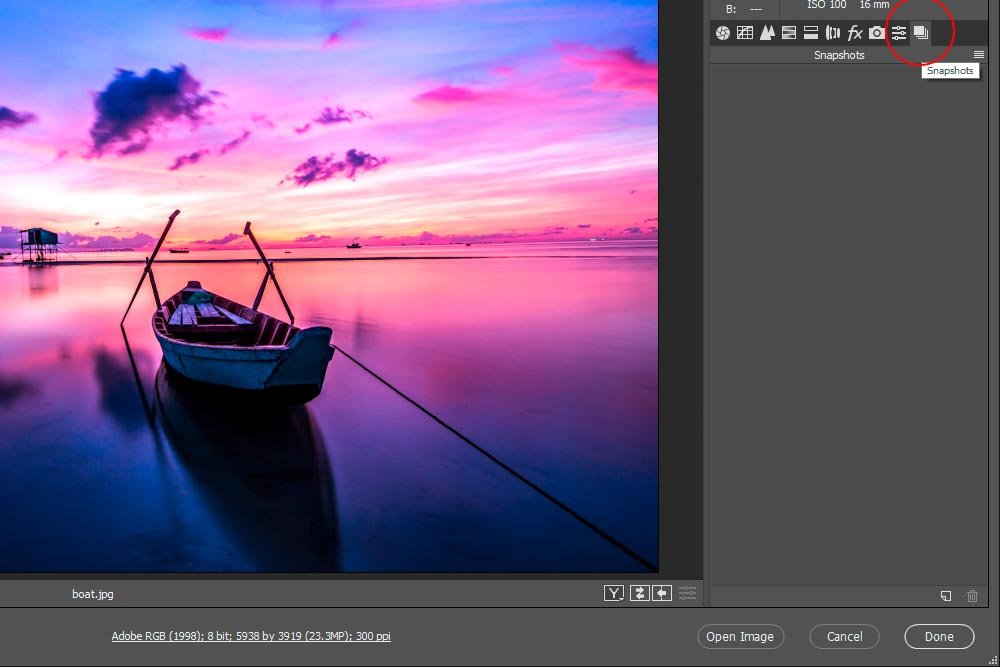
Now, I’m going to consider this the “color” version of this image. I’d like to save these changes. To do this in Camera Raw, I’ll click on the Snapshots panel button.
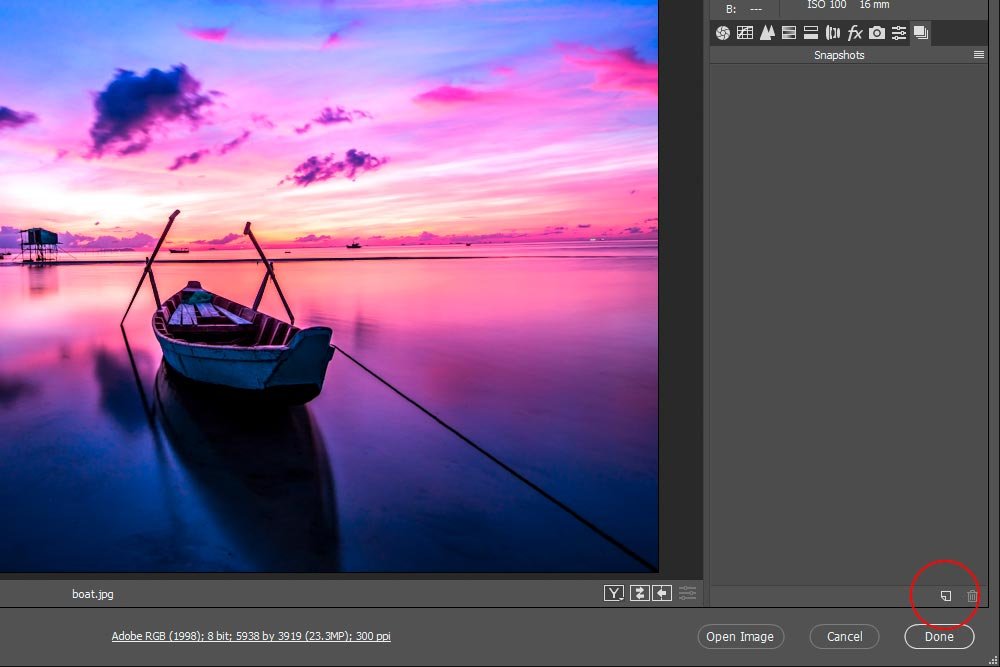
Once I’m in the Snapshots panel, I’ll create a new snapshot. To do so, I’ll click on the New Snapshot icon that’s at the bottom of the panel.
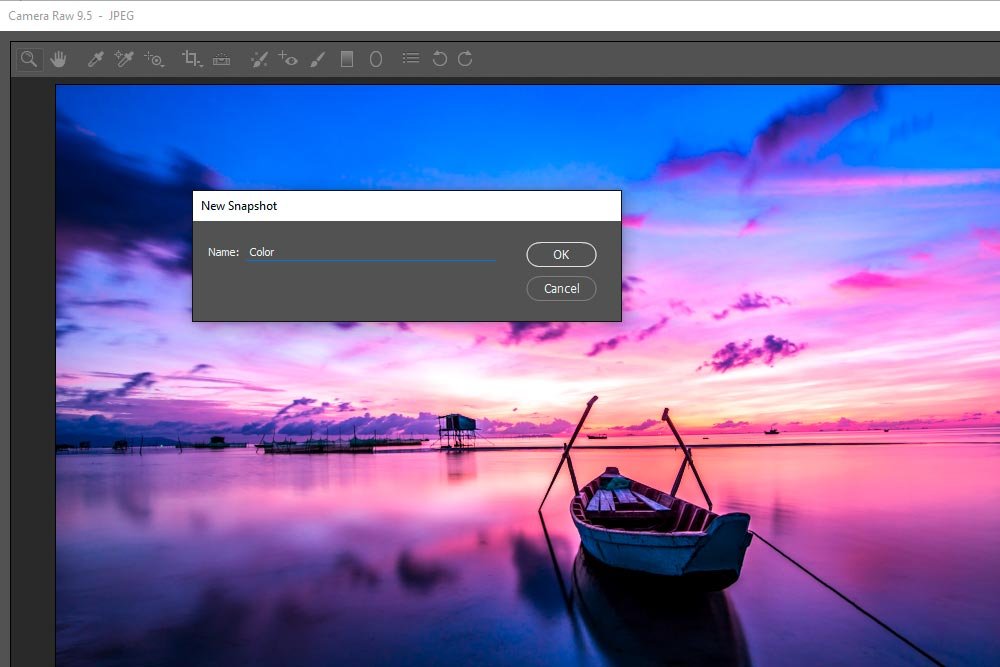
When I do that, the New Snapshot dialog box appears, where I can fill in the name of the snapshot. I’ll call this first one Color (after the changes I made). Then, I’ll click OK.
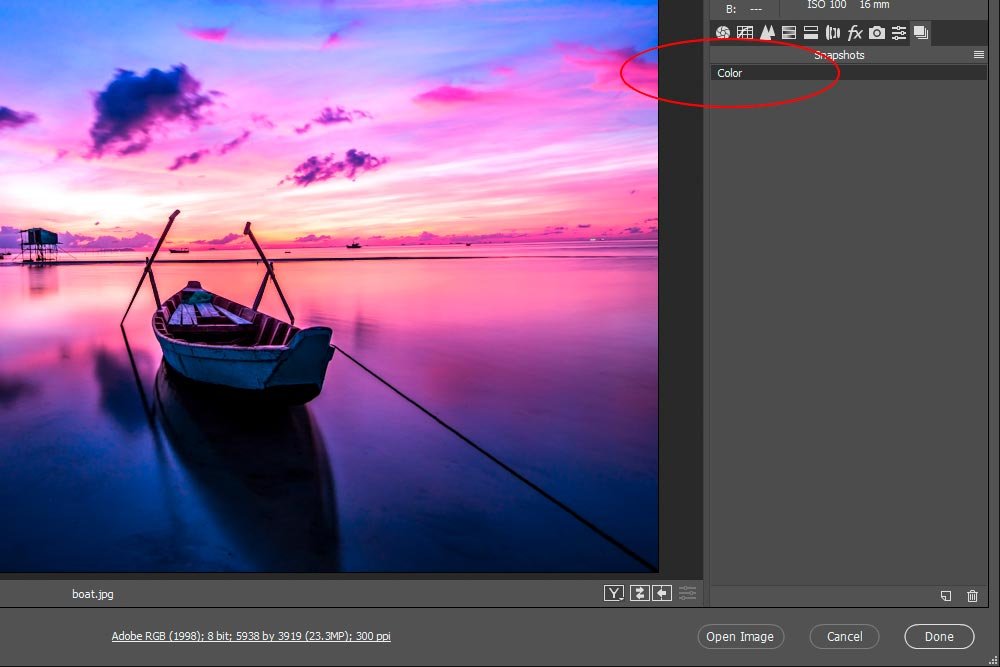
After that, I’ll notice that my snapshot has been saved as a line in the Snapshots panel.
Since I want to experiment with three different versions of this file, I’ll make some changes twice more and create two more snapshots. First, I’ll change this photo to black and white. I’ll head into the HSL/Grayscale panel and check off the Convert to Grayscale check box.
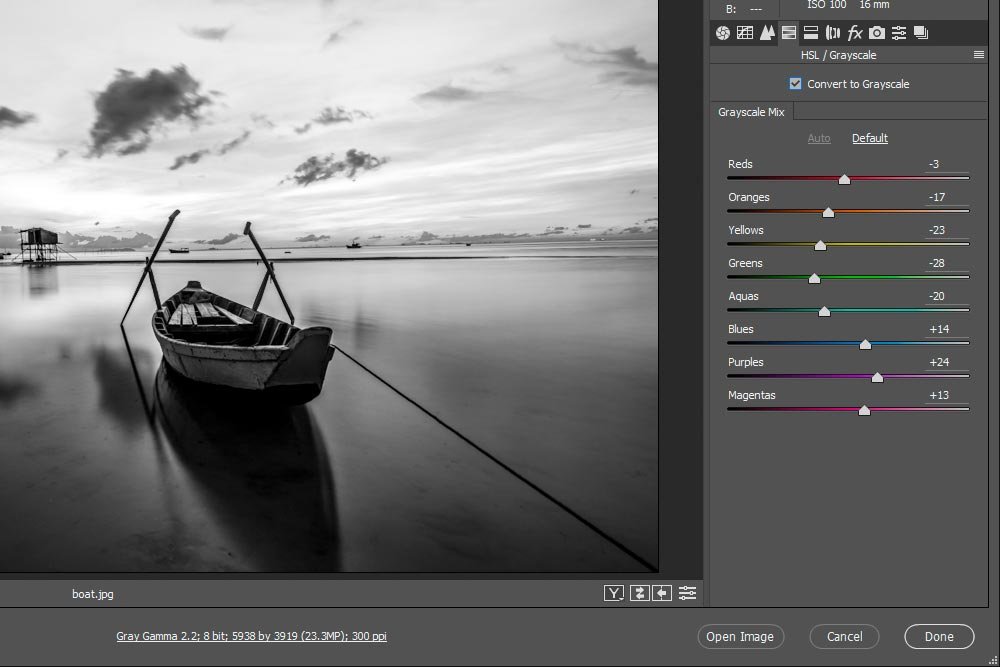
I’ll make some changes in this panel and then go back to the Snapshots panel and create a new snapshot. This time, I’ll call it Black White.
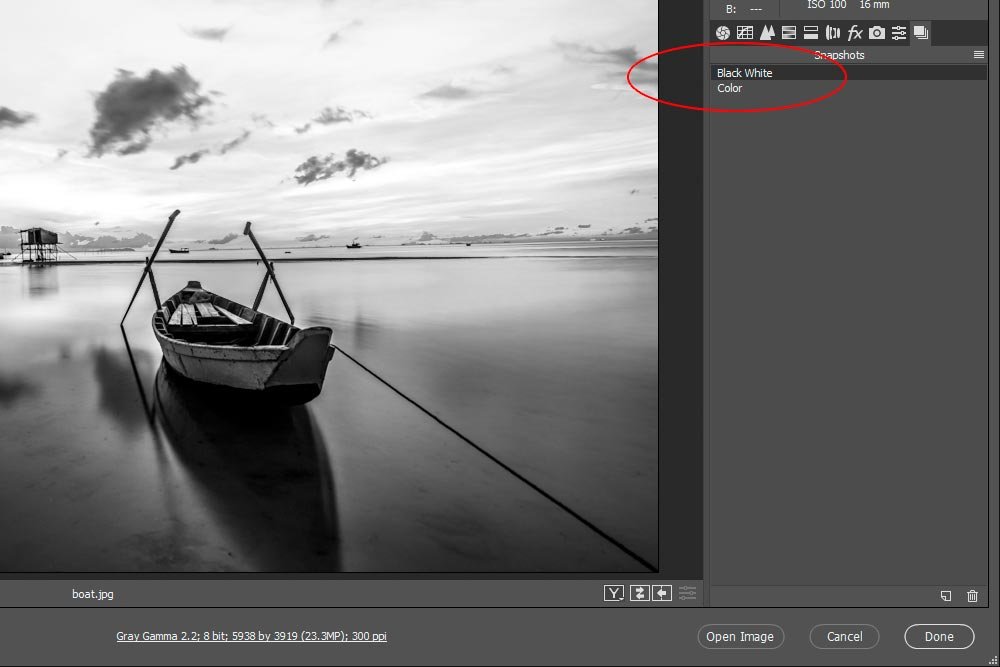
As you can see, there are now two snapshot lines in the Snapshots panel.
Finally, I’d like to create a duo-tone version of this image. To accomplish this, I’ll click on the Split Toning panel and make a few adjustments.
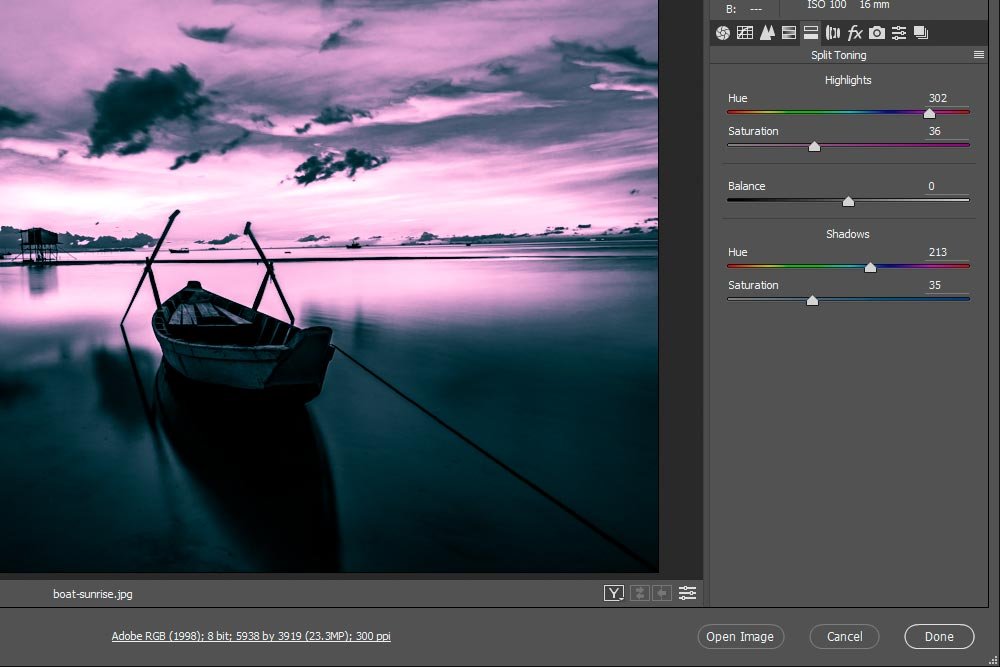
The last step with this one is to create yet another snapshot in the Snapshots panel. I’ll call this one Two Tone.
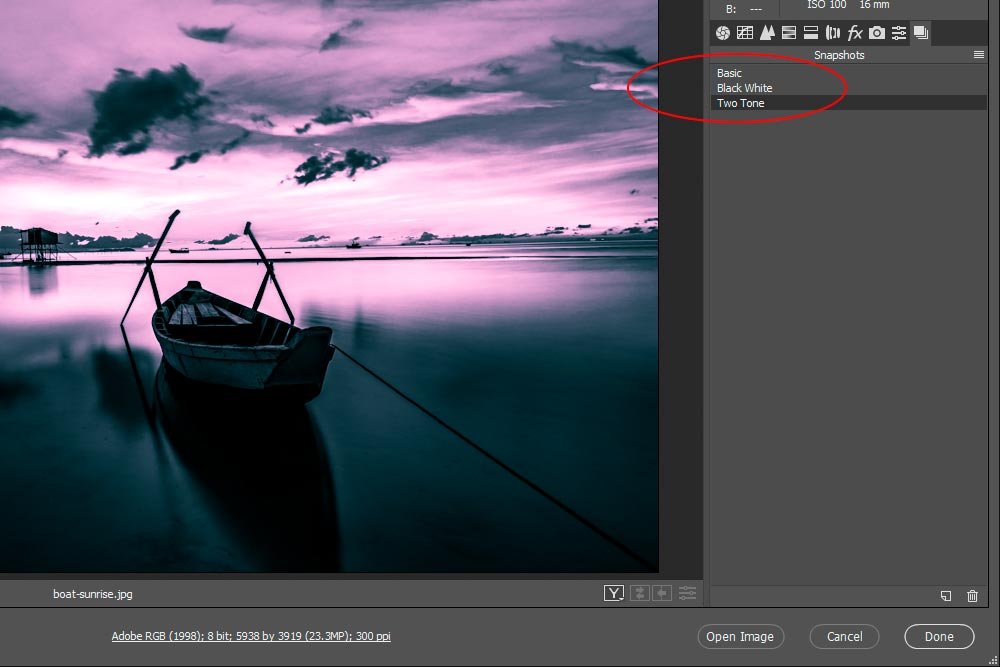
Now there are three snapshots in the Snapshots panel. If I click on any one of these, the image will immediately change to that version. And as you can see, all this data is being stored inside this one file. It’s in the metadata somewhere.
The best part of all this is that if I want to export any of these versions of the image to Photoshop for further editing (or save them outside of Camera Raw), all I need to do is click on whichever snapshot it is I want to export and click on the Open Image or Save Image buttons down at the bottom of the application. It’s that simple. I actually did this to create the leading image for this post. I opened each of the three versions of the file into Photoshop to put them all together.
If you have any questions, please don’t hesitate to ask. I absolutely love comments.
