15Katey
Member
- Joined
- May 10, 2021
- Messages
- 130
- Reaction Score
- 0
- Points
- 23
- #1

I’ve already talked a bit about keywords in both Adobe Lightroom and Adobe Bridge. Basically, the “keyword” feature allows users to identify their images by way of characters. If you apply a keyword to an image, you’ll ultimately have the ability to filter though all of your images to locate just the one with that specific keyword attached to it. If you apply the same keyword to multiple images and then filter once more, those multiple images will be returned. Think of how a search engine on the internet works. It’s almost the same idea.
If you’d like to review my previous posts on the topic, you can do so by following the links below.
Adding Keywords in Adobe Bridge
Develop Settings, Metadata & Keywords in Adobe Lightroom
In this post, I’m going to share how to go about applying keywords to images in Lightroom. I’ll warn you now – it’s extremely simple. After I’m finished covering how to apply keywords, I’ll quickly demonstrate how we can easily filter some images by using the keywords we added.
My Collection
As an example photo gallery in this post, I’ll be using my trusted “Washington Oaks State Park” images. I’ve used these before on this website and they’ve work out well. I’ll give you a screenshot of what they look like below.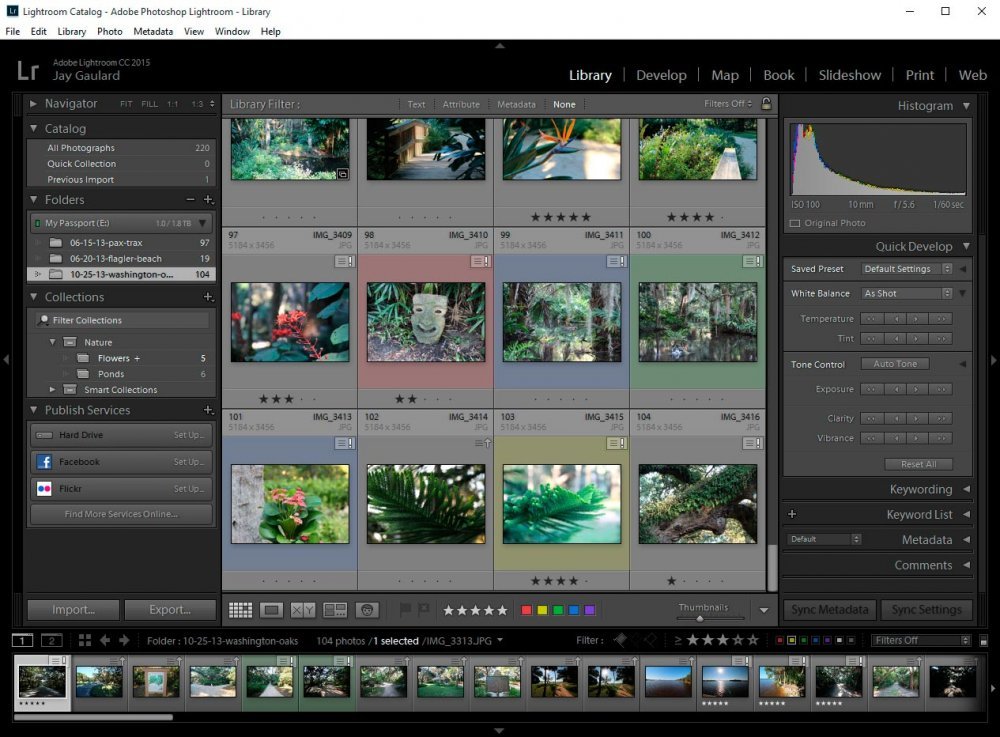
Displaying the Keyword Panel
In order to apply a keyword or keywords to a photo, we’ll need to first open up the “Keywording” panel over at the right side of the application. To open the panel, all we need to do is to click on the small white arrow that’s sitting at the side of the panel title.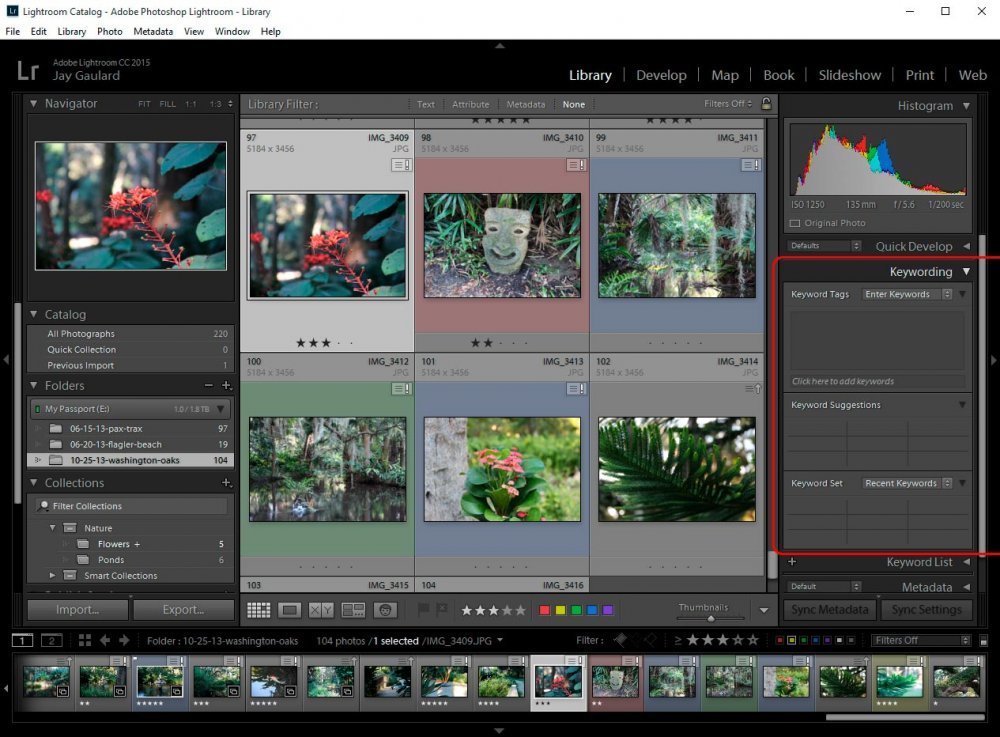
Applying Keywords
There are a few different methods of applying keywords to an image. Each method requires that you select at least one photo, so in our case, I’ll click on the thumbnail of the red flower in the upper left corner. Once an image is selected, I can head over to the Keywording panel and type in one word at a time in the small field that says “Click here to add keywords.” To apply the keyword to the photo, you can either hit enter or merely click away from that field.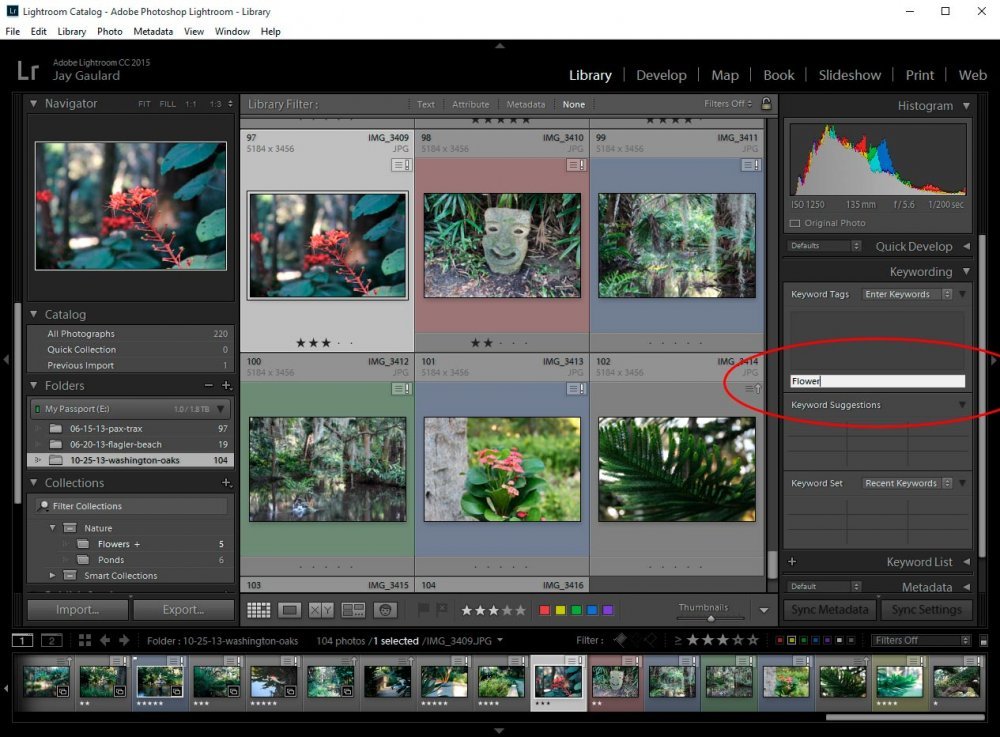
Editing a Keyword
There’s most likely going to come a time when you make a mistake filling in one or more of your keywords. It sure would be nice to have a way to correct the mistake, or to remove the keyword all together. Luckily, we have a method to accomplish this.If you look directly above the field I indicated earlier, you’ll see a larger field that holds all of the inputted keywords. If you click right inside that larger field, you should see that the words will become editable. From here, all that needs to be done is what you expect – edit or remove the words.
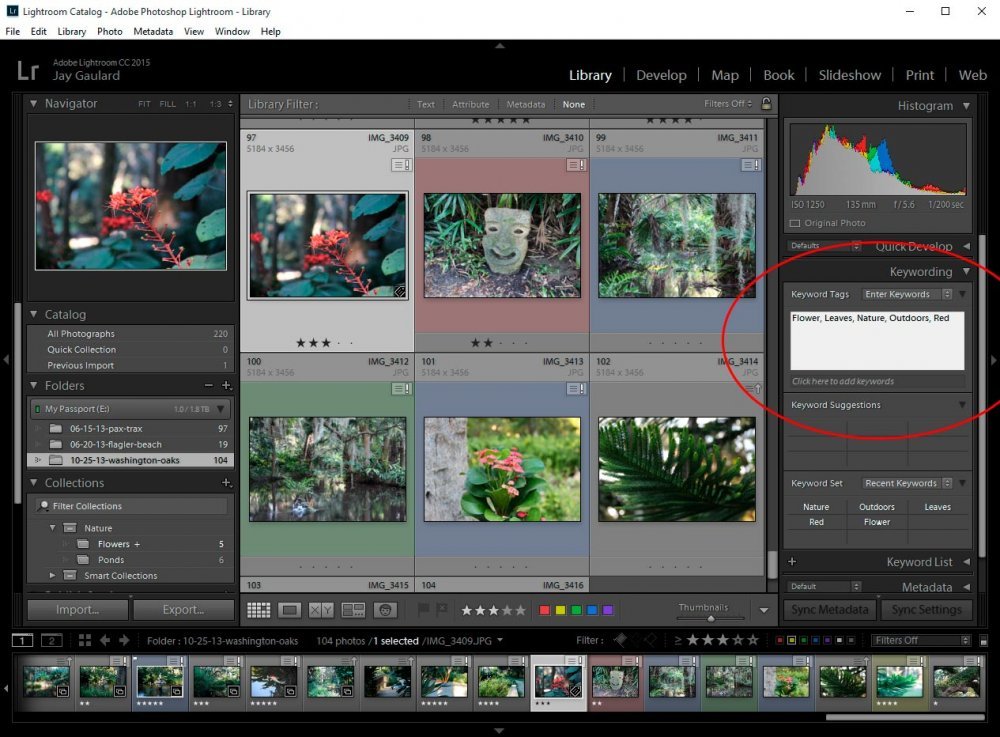
Adding Multiple Keywords
The really neat thing about Adobe Lightroom is that it’s quite flexible. If you’d like to add multiple keywords, you can do so in either field I’ve already shown (the small or the large). The only thing you need to be aware of is that the keywords need to be comma separated.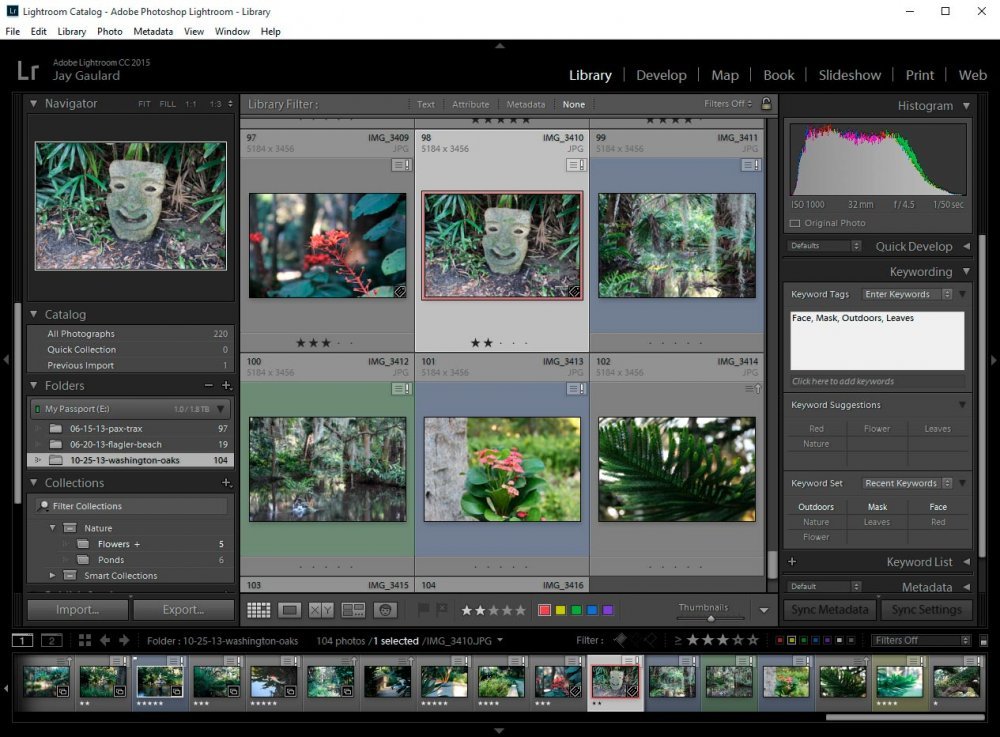
Choosing Keywords From a List
This is where all your hard work begins to pay off. After a while, you’ll notice that you’re adding the same keywords over and over again. For instance, I’ve already added the words “Leaves” and “Outdoors” for the two photos I’ve chosen as examples. It’s surely going to get tiresome typing all these repetitive keywords as time goes on.A quick and easy way to apply already existing keywords to photos is to expand the “Keyword List” panel.
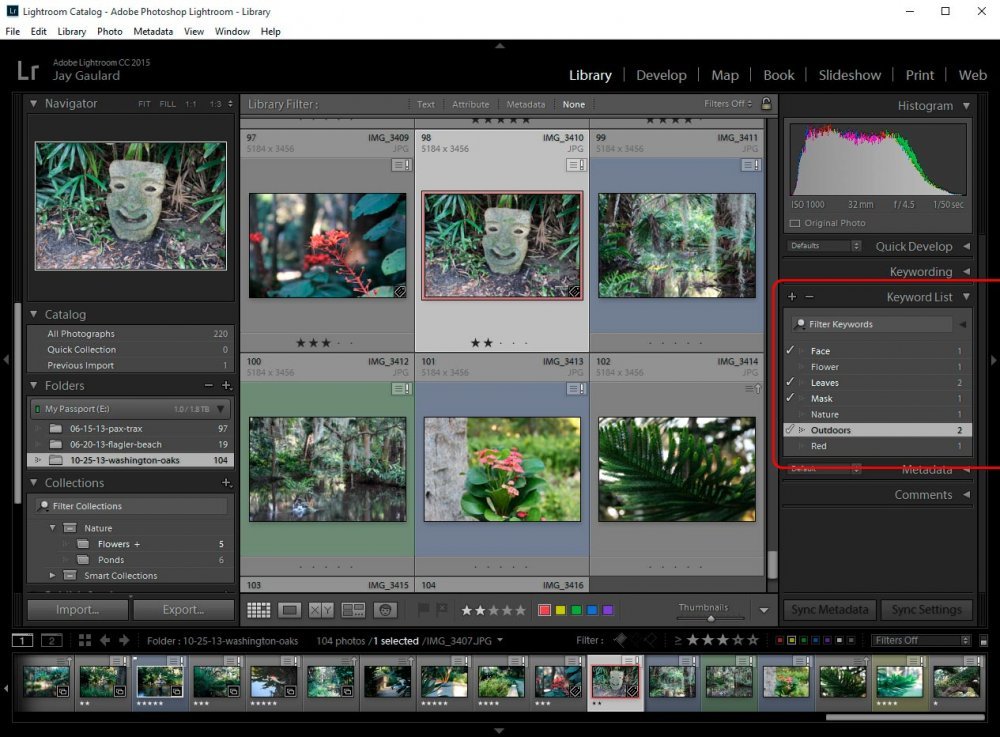
In this panel, you’ll see all existing keywords. To apply one of them to a photo, all you need to do is select the thumbnail and then click the little check box that’s to the right of the keyword itself.
Filtering Photos by Keyword
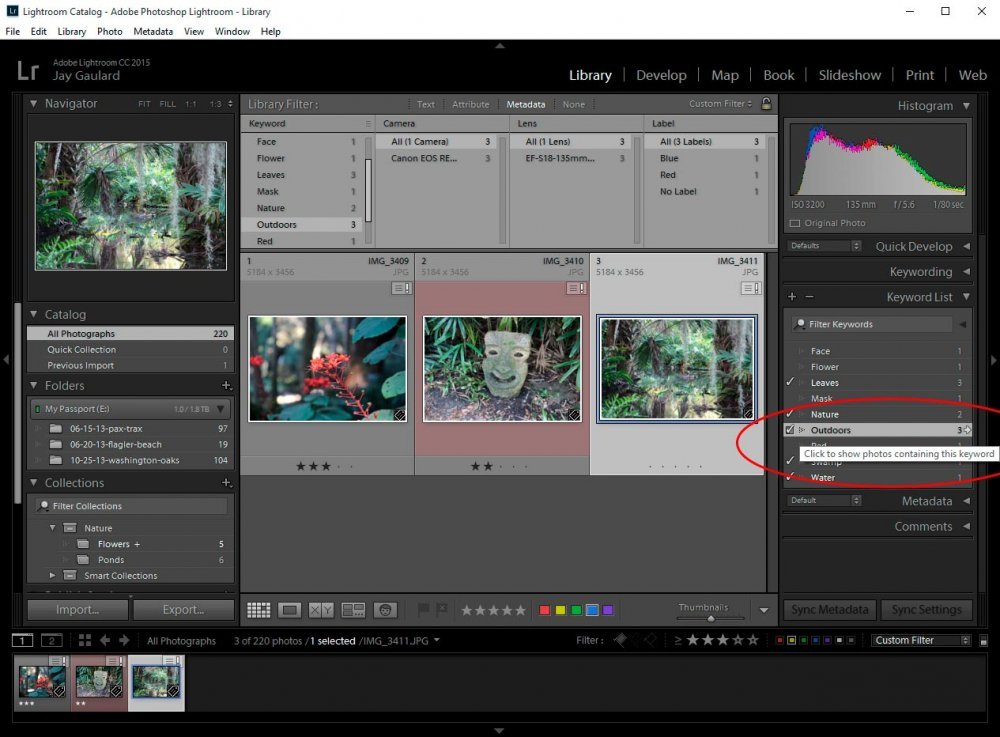
As if things couldn’t get any cooler, we’re going to get to that point. I now have three example photos in this post that I’ve applied various keywords to. I’ve applied two of those keywords to all three photos. Get this – with just one click of the mouse, I can filter those photos out from all the rest.In order to filter out keyworded photographs, I’ll need to click on the small white arrow that appears to the right of the keyword in the “Keyword List” panel when I roll over it (the word). Once I roll over the arrow, I’ll see a popup that states “Click to show photos containing this keyword.” If I click the arrow, I’ll find that all other thumbnails and images are removed from my view and only the appropriate thumbnails remain.
