CampFireJack
Member
- Joined
- May 9, 2021
- Messages
- 118
- Reaction Score
- 1
- Points
- 16
- #1
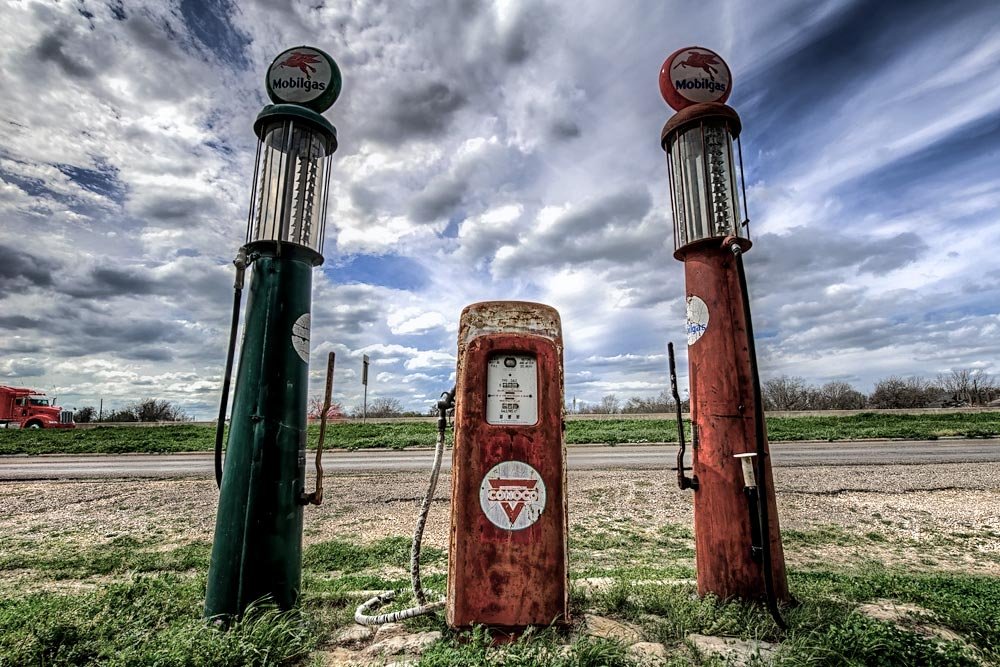
When it comes to manipulating the colors of a photograph, there’s no better place to go than Adobe Camera Raw’s HSL / Grayscale panel. There, you have everything you need, such as adjusting the Hue, Saturation and Luminance of eight colors. If you’d like to add saturation and vibrance, you can do that. If you’d like to change one color to another, you can do that too. And finally, if you’d like to adjust the lighting of any of the eight colors, you can do that as well. There’s tons of flexibility in this panel, so it’s definitely worth exploring.
In today’s post, I’m going to stay in the Saturation tab of the HSL / Grayscale panel. I’m going to walk you through a very simple set of steps that will fade out the photo of the old gas pumps above. Doing this has the potential of adding drama to the photo, which is what I’m after. Then, I’ll let you in on a neat trick that can help with accentuating specific colors and objects. Bring them to life, if you will.
Original Photo
Below is the original version of the image I’ll be working with. As you can see, it’s a great looking photo. It’s got tons of color and the subject is interesting and captivating. I really enjoy this shot, so it’s going to be a lot of fun working on it.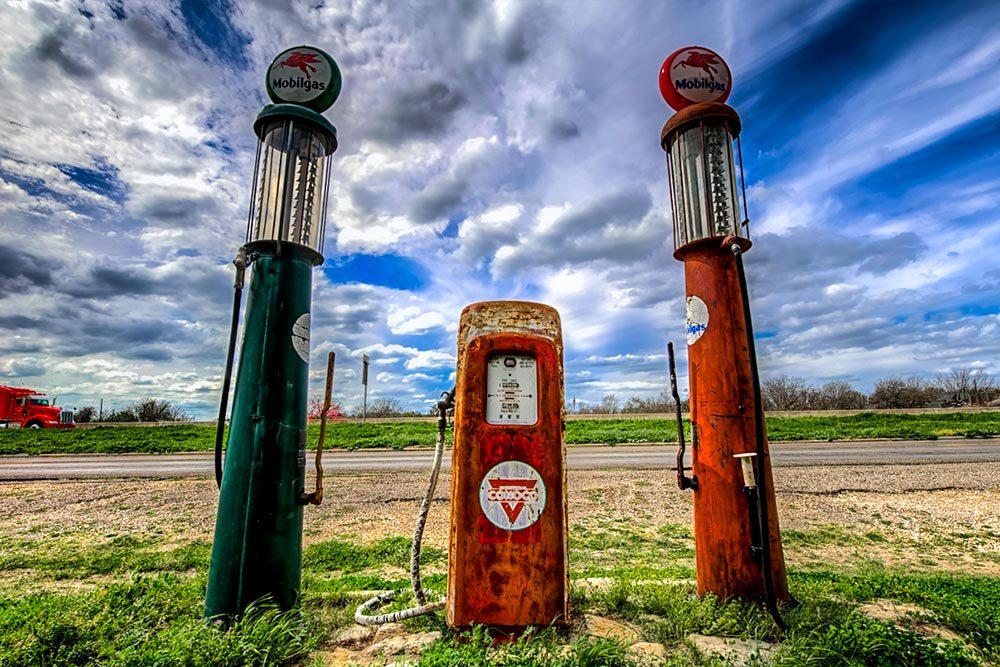
I already brought this picture into Camera Raw and made some edits using the Basic panel. The reason for this was to bring out any contrast and exposure that would help things ultimately look better. When adding and removing saturation, it’s best to have as much clarity as possible. If you’re editing your own files like this, I recommend beginning with the Basic panel.
If you’re interested in learning more about the Basic panel in Camera Raw and how it works, please check out my earlier post on the topic:
Editing a Photo Using the Basic Panel in Adobe Camera Raw
Saturating & Desaturating
The real goal here is to create drama. As things are, everything in the photo is at the forefront. The sky is really blue, which takes the focus away from the really green and red pumps, which takes the focus away from the really green grass, etc… I think you get the idea. Since everything is saturated, there’s no real focus. We need to fix that. So, the first thing I’ll do is to reduce the saturation of all the available colors to -65. This will create a similar type of photo, but instead of every object being at the forefront, every object will be in the background.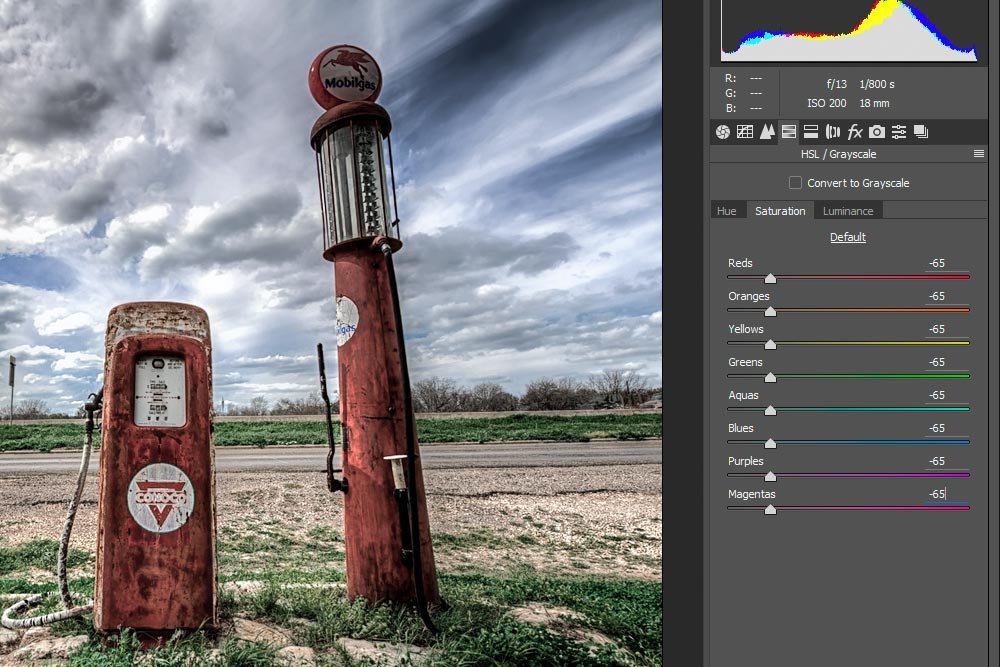
By removing saturation, no object is the focus of the photo. That’s what we want. Take a look at the picture now. It actually looks pretty cool.
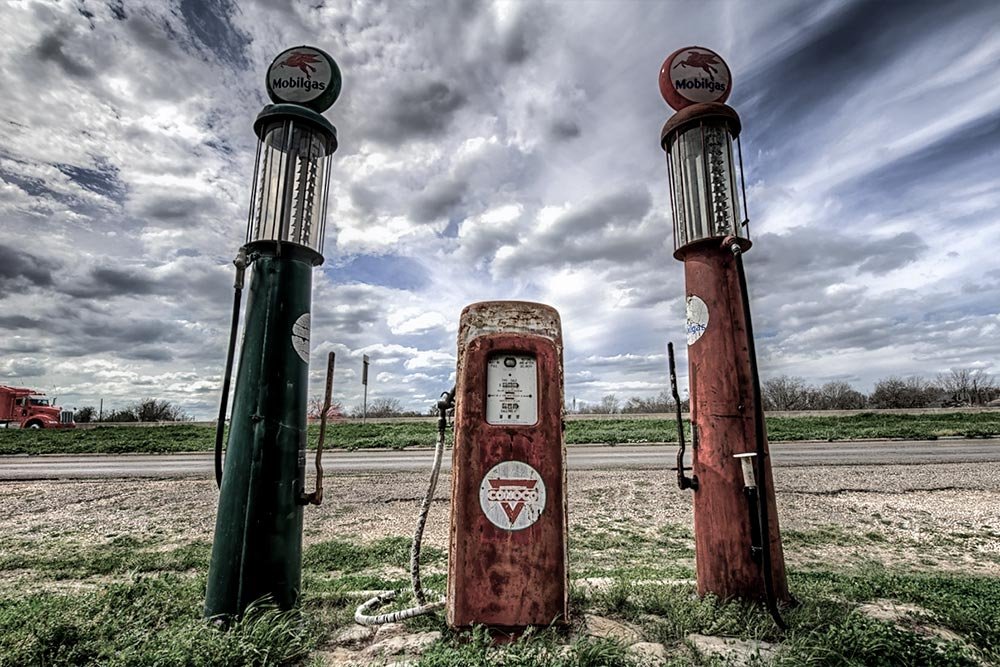
I guess you could consider this photo officially “faded out.” The thing is, like I mentioned earlier, we want drama. We get that by reducing the focus (focus, meaning the area we pay most attention to, not blur or lack thereof) of some items in the image and increasing the focus of other things. We need to make some decisions.
Since this is a tutorial, I’ll go ahead with three different scenarios. For the first one, I’ll assume someone wants the sky to be the star of the show. To bring the sky to the forefront, I’ll decrease the saturation of the remaining stand out objects even more, which I believe are the pumps and the grass. After that, I’ll increase the saturation of the blues in the sky.
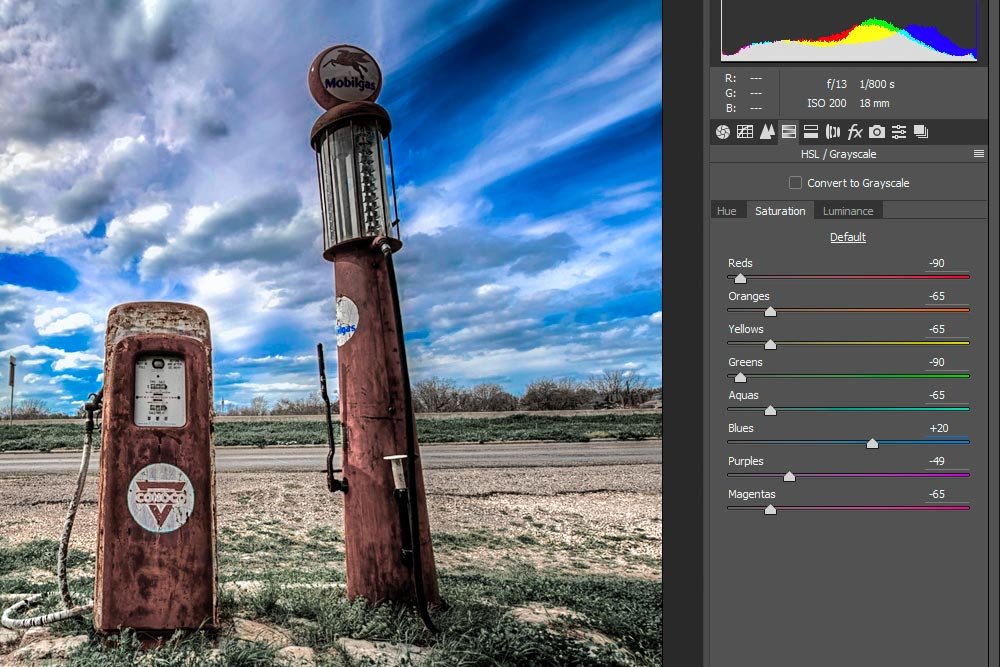
As you can see from the sliders, I’ve decreased the saturation of the red and greens. I also increased the saturation of the aquas, blues and purples. Mostly the blues. Here is the output of this version.
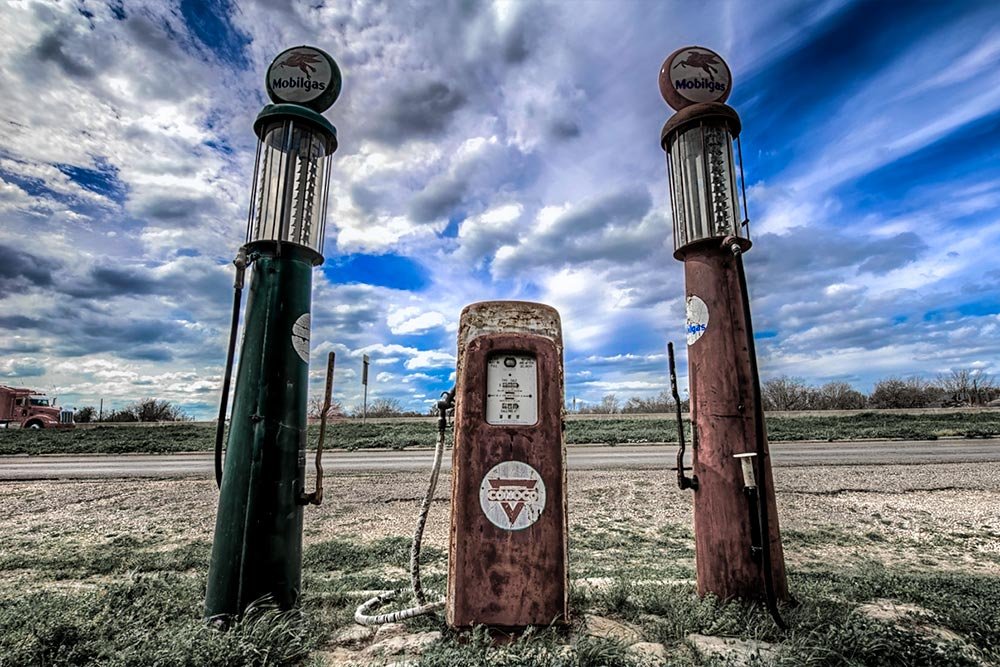
Can you see where I’m going with this? First, I moved each object in the photo to the background by reducing the saturation of everything. Then, I reduced the saturation of the primary objects that I wasn’t focused on even more, while I increased the saturation of the objects I was focused on. This technique makes for an interesting shot. The sky is really the focus now.
Now, the interesting thing is, I don’t have to guess at which colors or sliders I have to adjust to make these changes. For the above edit, I used the Targeted Adjustment Tool. This really is the most accurate way to go.
I used this tool in another post that I wrote a while ago. The post gives a good background on how it works, so if you’d like to read about it, please feel free to do so.
Creating Black & White Photos in Adobe Camera Raw
For the second scenario, I think the grass should be the primary focus of the photo. I’m tired of the sky and would like to see a bit of nature. To accomplish this, I’ll adjust the sliders once again. First, I’ll reset all of the sliders to -65 and then move the others using the Targeted Adjustment Tool.
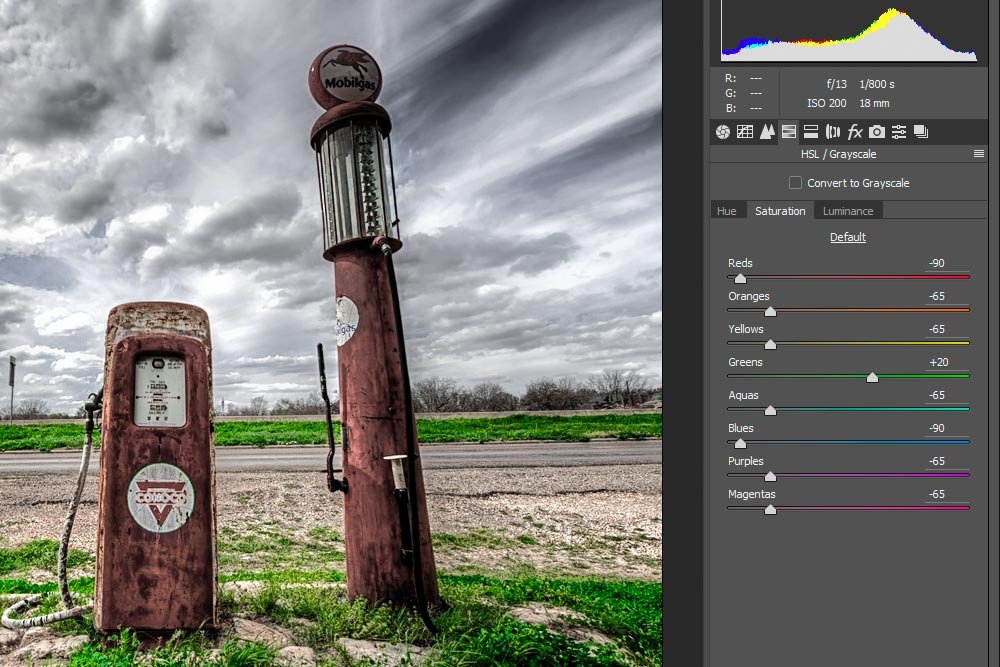
This is the outcome of this version.
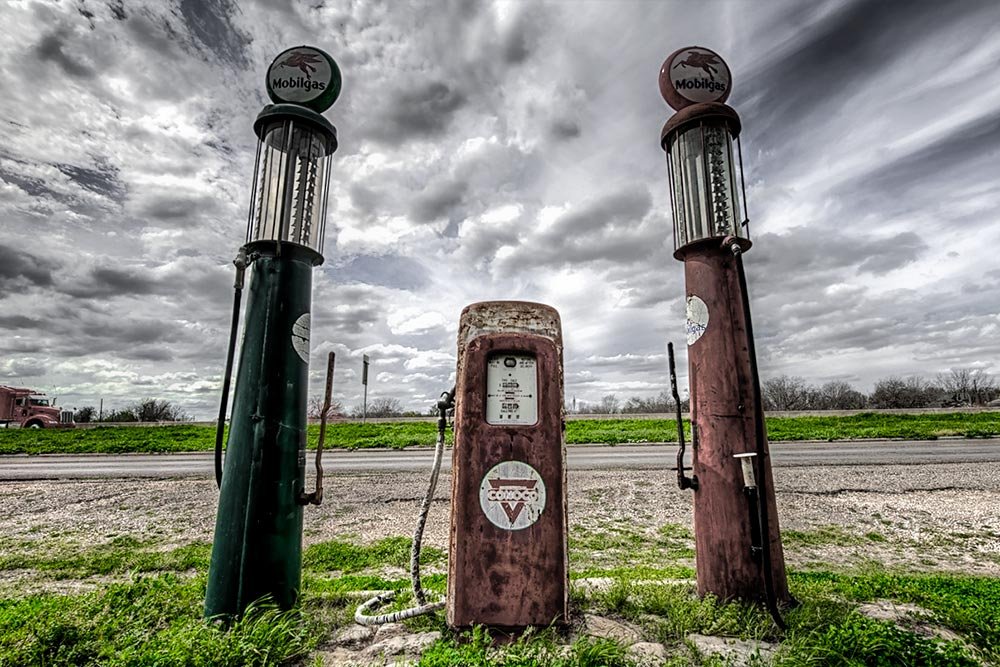
Since the sky and the pumps weren’t the primary objects I wanted to show in this version, I reduced their color’s saturation. I then increased the saturation of the grass, which is green. Pretty cool.
Finally, I think the pumps should be the objects that are front and center in this picture. Again, I’ll move the sliders around, beginning with resetting them to -65. After that, I’ll use the Targeted Adjustment Tool.
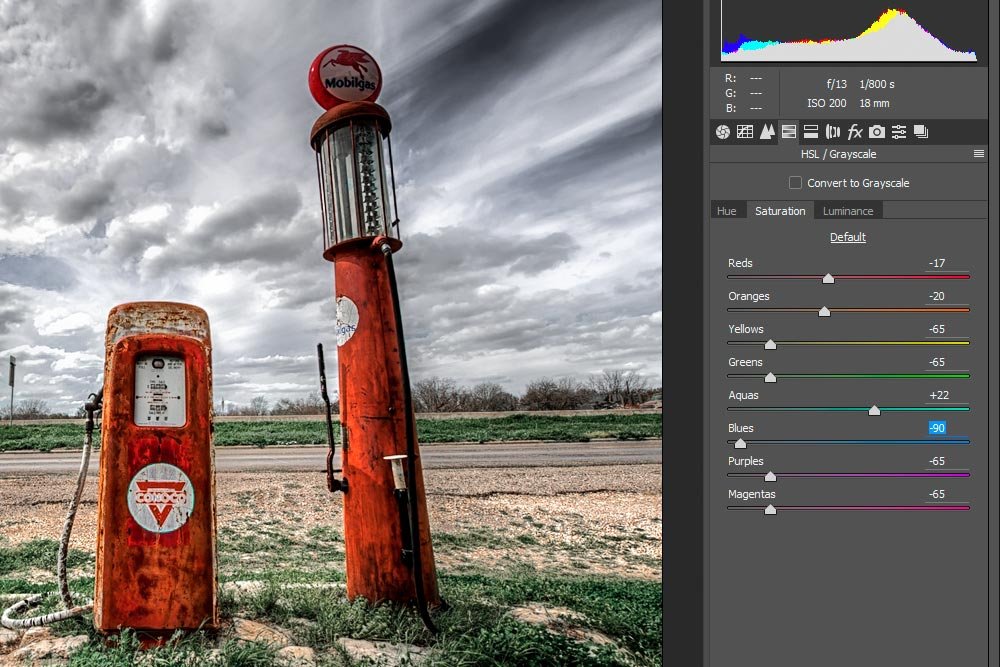
This is the final output of this version. I like this one the best.
