KodyWallice
Member
- Joined
- May 7, 2021
- Messages
- 123
- Reaction Score
- 1
- Points
- 23
- #1
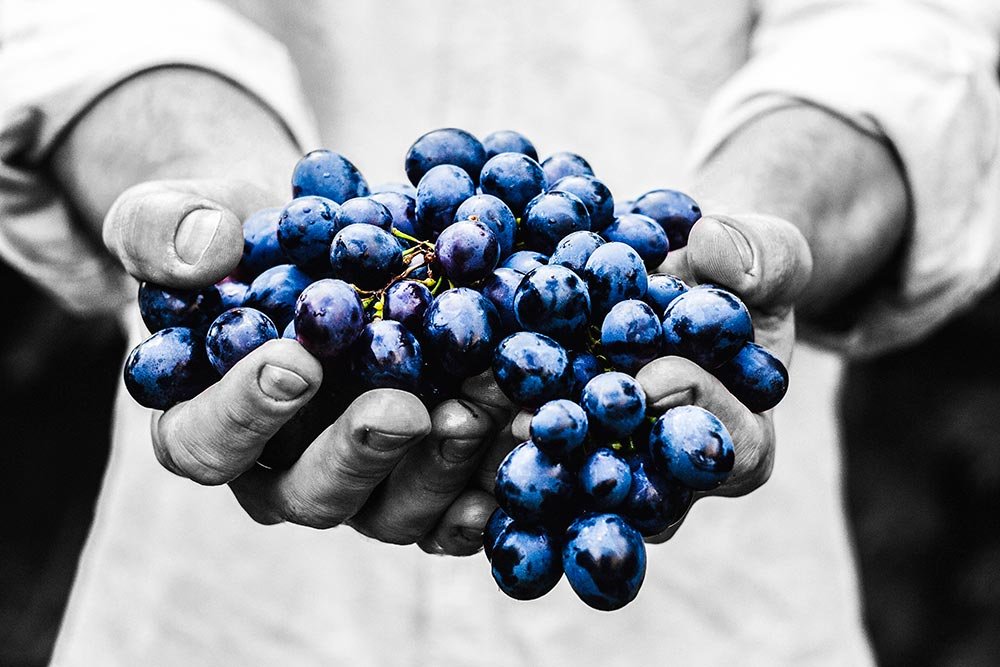
Recently, I wrote a post that covered how to colorize specific areas or objects inside of Adobe Photoshop. That was a fun one to write. I love the mixture between black and white and color, especially when it comes to vibrancy. In my previous post, the object I colored was an orange. If you’d like to view that post, you can do so here:
Using Masks to Colorize Only Part of a Photo in Adobe Photoshop
If you take a look at the previous post, I think you’ll agree that the orange really pops out. That was the intent. The thing is, while working like this in Photoshop is fine and all, many of us prefer to do as much as we can inside of Camera Raw, or Lightroom for that matter, because of the granular controls those applications offer. With that in mind, I decided to write a post that talks about how to accomplish a very similar task – but this time, inside of Adobe Camera Raw.
I want to mentioned a quick something about Camera Raw and Lightroom. The something is that these two applications are virtually twins when it comes to editing photographs. As a matter of fact, Lightroom has the Camera Raw processing engine built into the Develop module. So, when I write a post that talks about Camera Raw, please feel free to follow along in Lightroom. The controls are very similar. Of course, I’ll be writing posts that cover some of the very same aspects in Lightroom in the future, but for now, I wanted to let you know about the similarities of the two programs.
In today’s post, I’ll be taking a photo, desaturating it and then adding color back to one specific cluster of areas using the Adjustment Brush. This is a fairly simple tutorial, but it gives you a behind-the-scenes look at how easy it can be for a photographer or photo editor to alter a photograph in a drastic and remarkable way.
Original Photo
A few days back, I received a suggestion from a reader of this blog that made a lot of sense. Instead of my posting the “original” image after I cleaned it up in Camera Raw (contrast, whites, blacks, etc…), why not show the real original? You know, the straight up, untouched one. I thought that was a splendid idea, so I’m going to start doing that. While I won’t go through all of those simple clean-up edits in every post, I’ll point you to something I wrote a while back that covers those steps. This will help you with working through your own projects, from start to finish. Check out how to use the Basic panel in Camera Raw below:Editing a Photo Using the Basic Panel in Adobe Camera Raw
If you understand the material above, you’ll be ready to go for what follows.
Alright, let’s get going. Below, I’ll post the original shot that I’ll be using for this post.
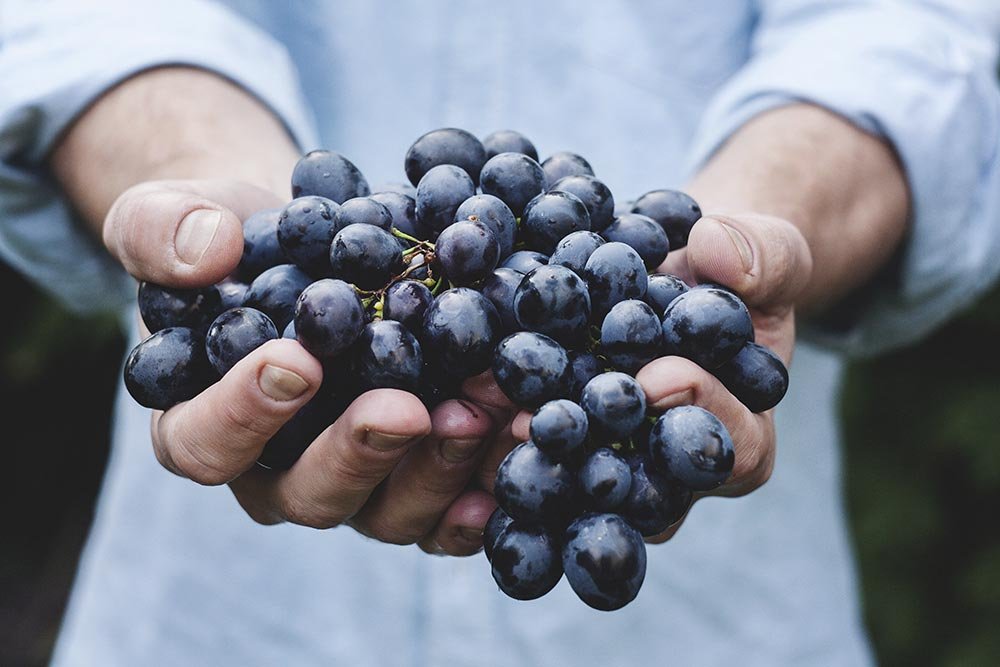
I’ll head into Camera Raw and follow the steps I just shared with you in the above two posts. Primarily, I’ll use the Basic panel to add some contrast and vibrancy. Then, I’ll push the blacks and whites around a bit until I feel that the photo has good definition. Here’s the outcome of that:
While editing the above photo, I mostly focused on the grapes. Those are the only objects in the photo that will be colorized. Everything else will be in black and white. But even though a good portion of the photo will be desaturated, I still want contrast and definition in those areas. Because of this, I pushed the Contrast slider all the way to the right, as far as it would go.
Desaturating the Image
To desaturate the above photo, I’ll head into the HSL / Grayscale panel in Camera Raw. From there, I’ll click on the Saturation tab and push every color slider to the left.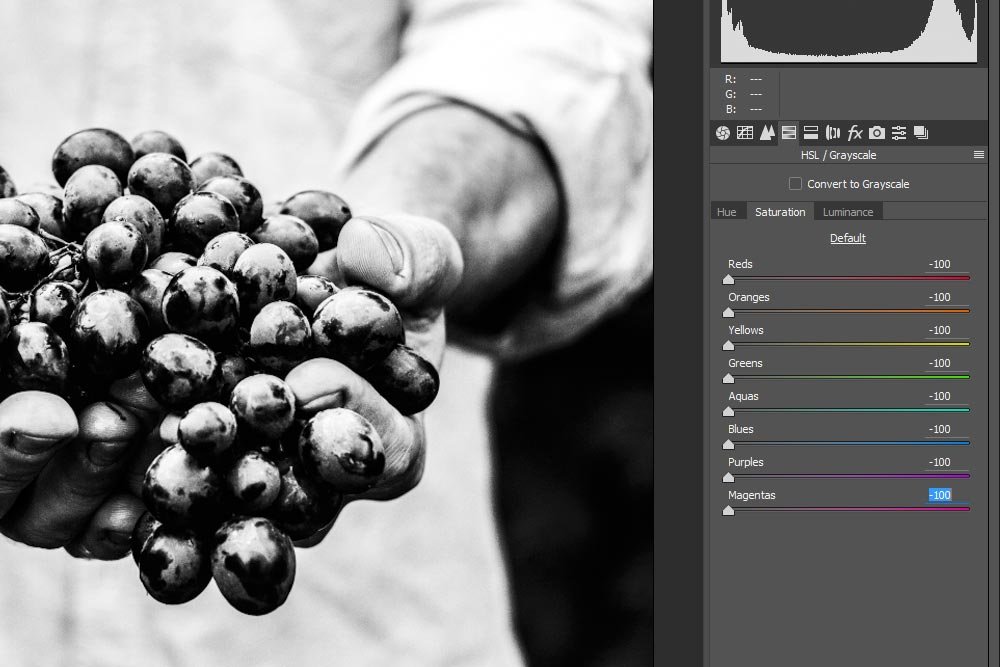
As you can see in the screenshot above, the color has been removed from this photo. You may be asking yourself why I didn’t just click on the Convert to Grayscale check box towards the top of this panel like I did in this post. The reason for this is simple. If I converted the image to grayscale, it would make no difference if I pushed the color sliders around when I tried to colorize an object. Basically, I would only affect the shade of the what once was a color. By desaturating the way I mentioned above, I can easily resaturate when I’m ready to.
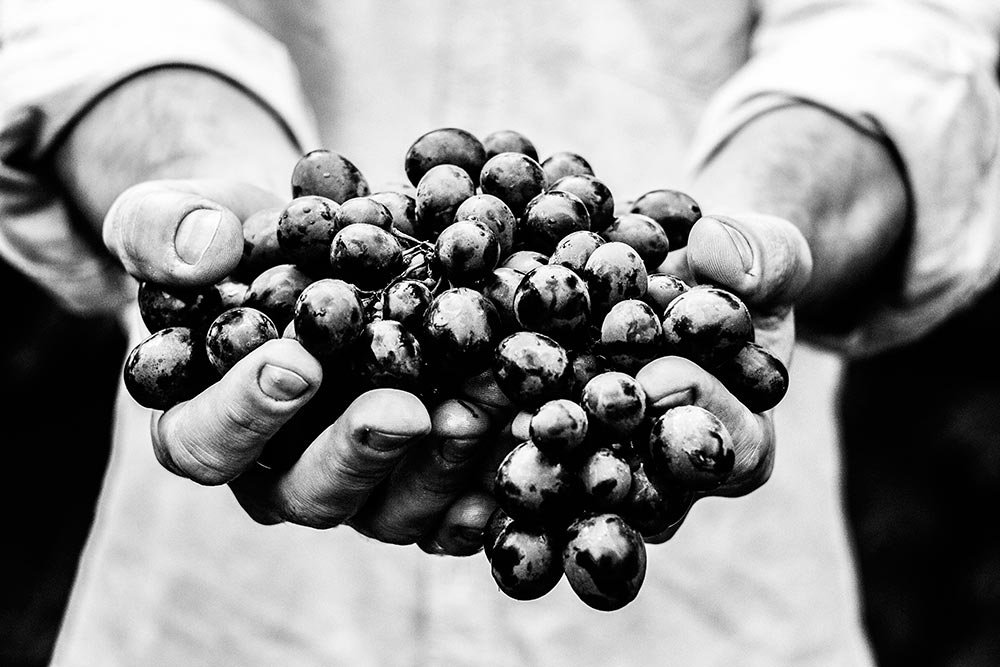
If I wanted to access controls that are similar to those used when the Convert to Grayscale check box is clicked, I can always click on the Luminance tab in the HSL / Grayscale panel. Inside that panel are sliders that affect the brightness and darkness of a particular color. By moving those sliders, you can affect contrast, blacks and whites – just in a different way.
Resaturating with the Adjustment Brush
My goal is to add color back to the grapes. To do this, I’ll click on the Adjustment Brush icon in the top toolbar.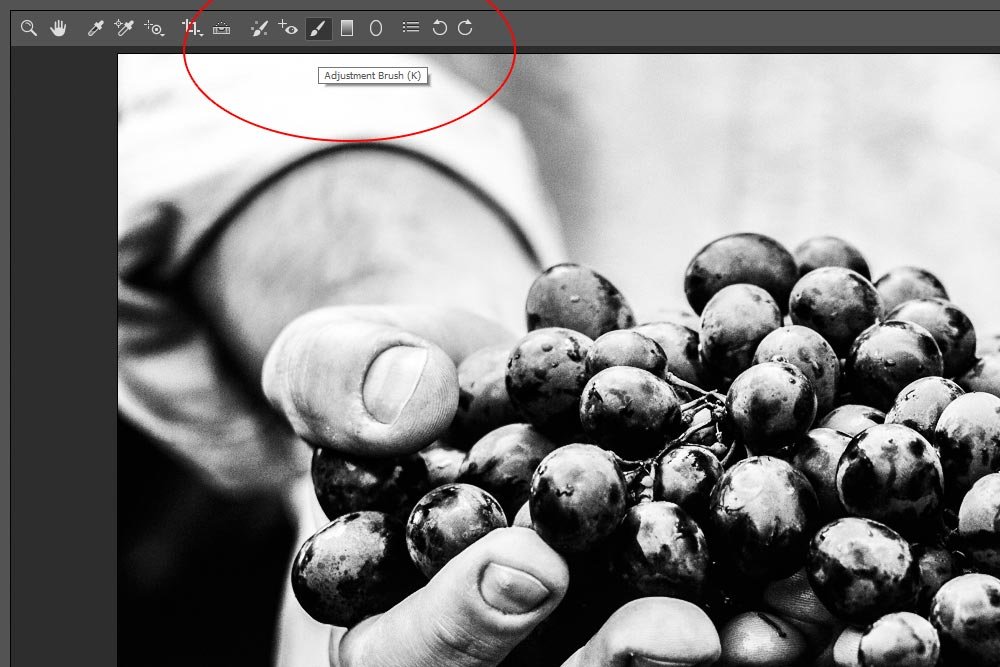
When I do that, my mouse pointer will turn into a circle. This is the brush. The way to control the size, feather, flow and density of this brush is to move the relevant sliders that are located at the bottom of the Adjustment Brush panel. This panel appears the moment this tool is selected.
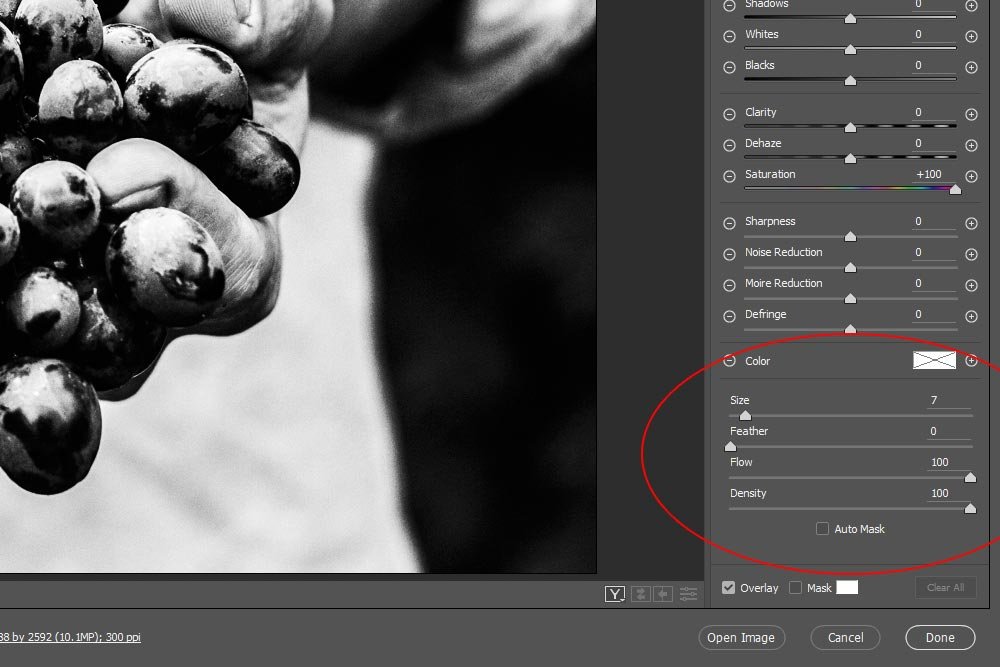
Since the size of the grapes are fairly obvious, I’ll move the Size slider so the brush corresponds to the size of the grapes. Since the edge of the grapes is sharp, I’ll push the Feather slider to the left, so there is as little feathering (softening) to the edge as possible. Since I want to add as much saturation as possible to the grapes so the color really pops out, I’ll push the Flow and Density sliders all the way to the right. If I wanted to create sort of a duotone color scheme here, I’d only push those two sliders to the right a bit. That would hold back some of the saturation. I could alternatively affect the color density with the Saturation slider directly above these controls. I’ll talk about that slider now.
Again, my goal is to add the color back to the grapes. To accomplish this, I’ll need to push the Saturation slider that resides inside the Adjustment Brush panel all the way to the right.
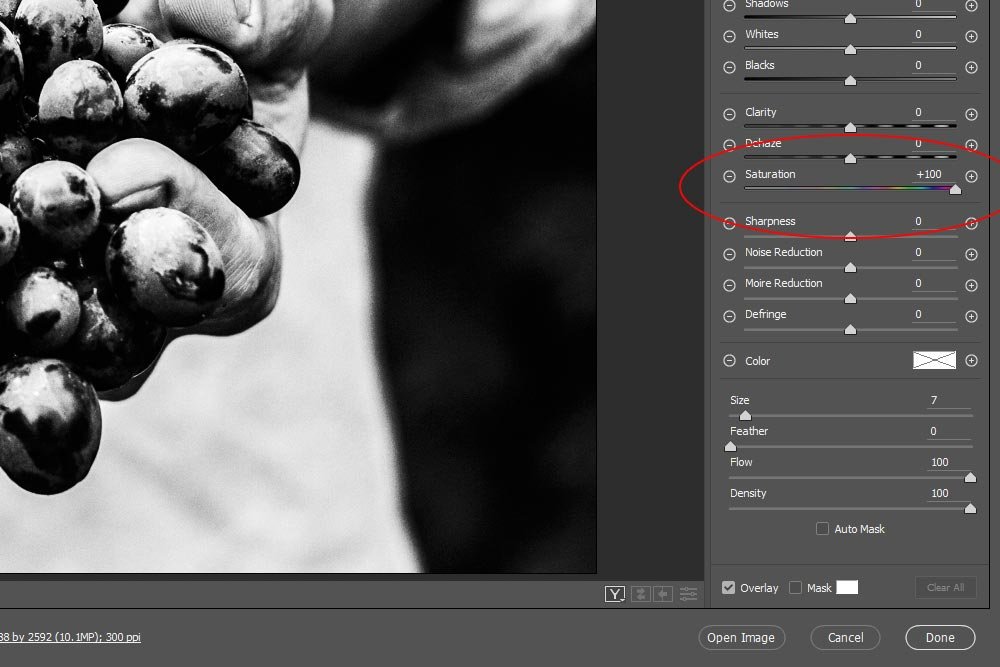
With these sliders the way I want them, I can begin painting the grapes. I’m going to do this just as if I had a crayon in my hand and I was coloring a coloring book. I’ll try to stay inside the edges of the grapes. Also, to adjust the size of the brush on the fly, I can use the [ and ] keys on my keyboard. In that order, those keys would shrink and grow the brush size.
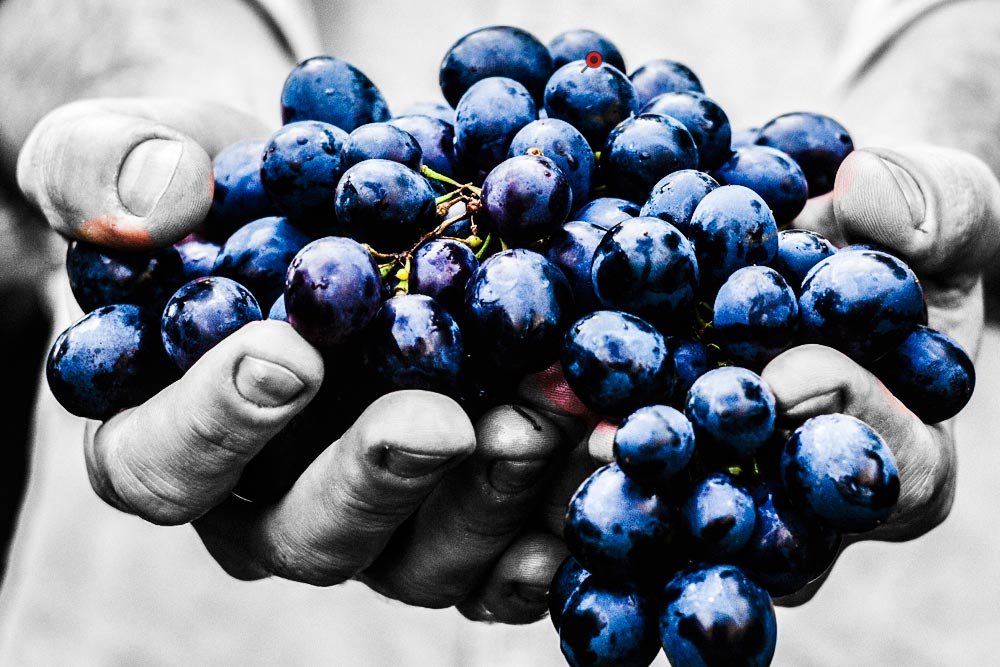
From the above screenshot, you can see the grapes are now blue again. The thing is, I accidentally saturated parts of the hands as well. And with as much saturation as I’m using, the areas of the hands I colored are really pink. I need to erase those areas. To do this, I’ll head up to the top area of the Adjustment Brush panel and click the Erase radio button. This simply turns my coloring brush into an erasure.
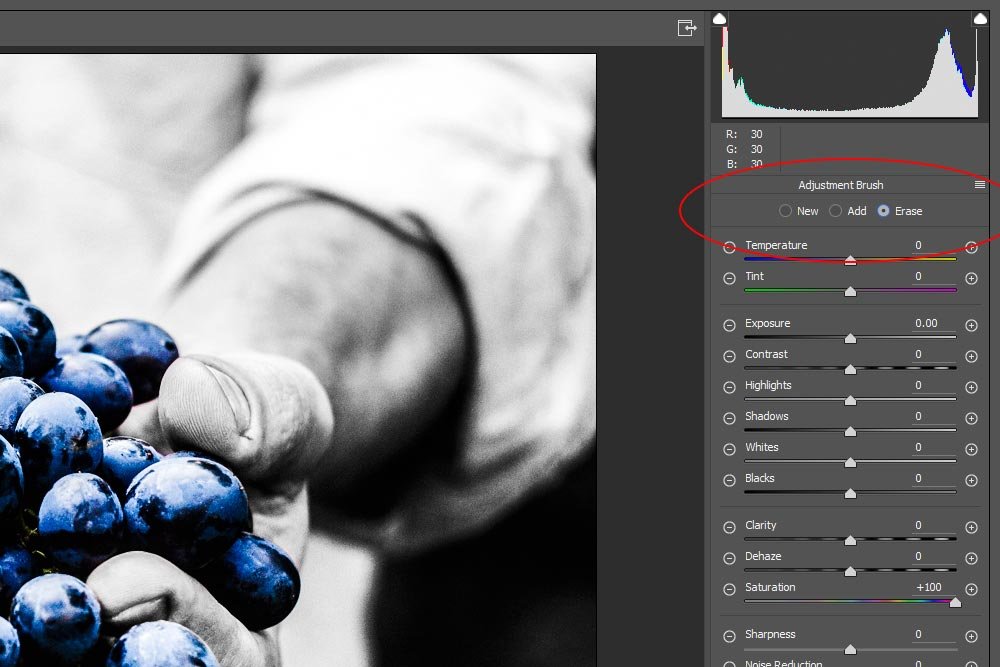
I’ll go ahead and fix up the image now. I’ll surely need to shrink the size of my brush to get into those nooks and crannies.
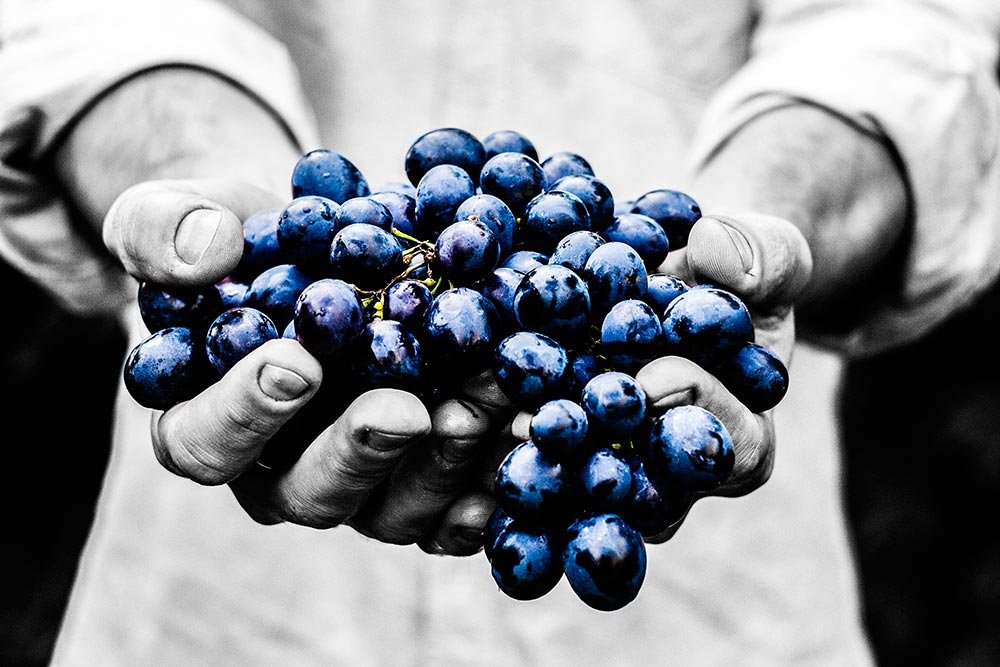
Ah, that’s better. I’d say this photo looks really good and the project is finished. Wasn’t that easy?
I want to mention one last thing before I go. I talked about how I could adjust the saturation of the grapes above by using a few different methods. The best way to do this after the specific object is resaturated is to push the Saturation slider that’s located inside the Adjustment Brush panel around. As a demonstration, I’ll reduce the saturation of the grapes to +50 from +100. Let’s see how that looks.
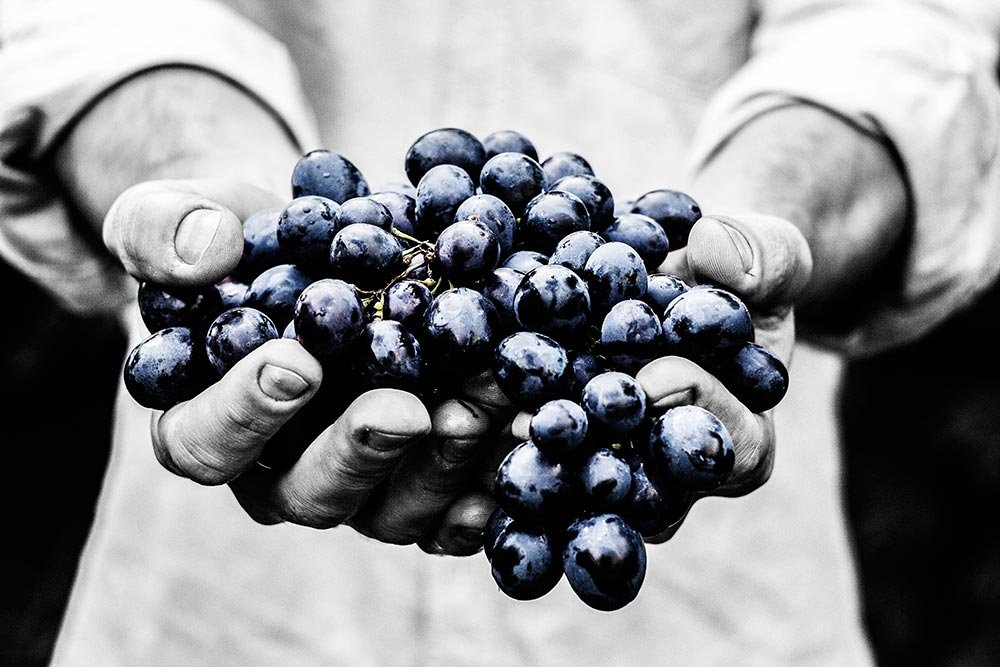
As you can see, the grapes are only slightly saturated. There’s more of an antique sort of look, so if that’s what you’re going for, by all means, do things this way. Personally, I like to fully saturate something to start with and then back off later on if need be.
Last edited:
