KodyWallice
Member
- Joined
- May 7, 2021
- Messages
- 123
- Reaction Score
- 1
- Points
- 23
- #1
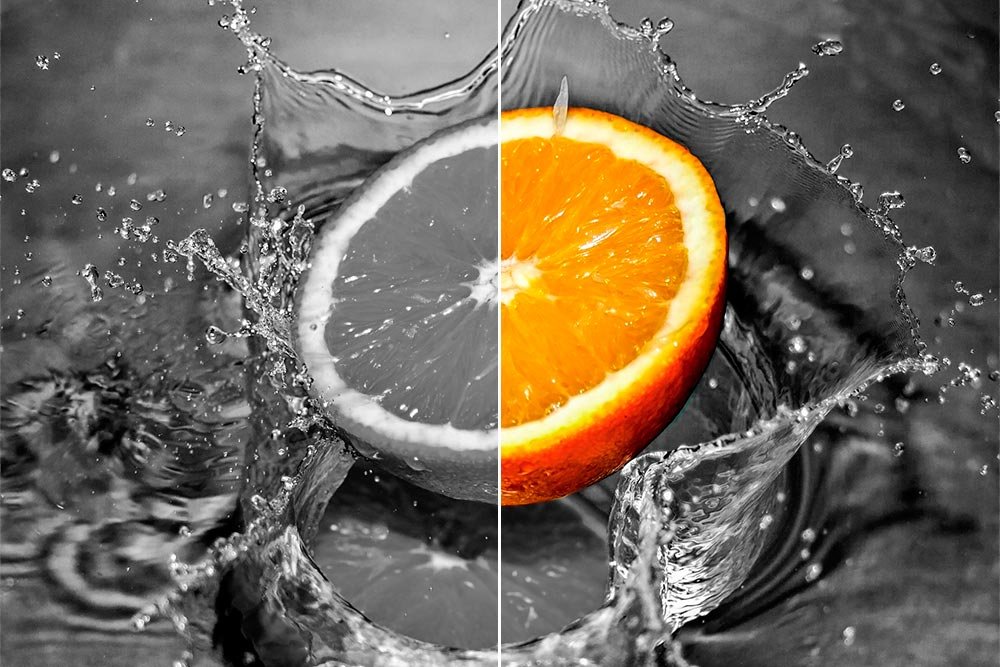
Have you ever seen a black and white photo that has only one object in it that’s color? I have. Actually, I’ve seen photos like this all over the place. They’re pretty cool, if you ask me. The color object is usually profound, such as a red rose that a child is carrying. Or perhaps a wedding photo where the bride is holding something special. Whatever the case, it’s important to properly accentuate the object so it appears as you intend it to.
A while ago, I wrote a post that touched on this topic. In the post, I selected the pupil of an eye and kept it color while I converted the rest of the photo to black and white. While this technique works well, it relies on selections. If you have any experience with selecting things in Photoshop, you know that it can take some time. Especially when the object has soft or strange edges. Sure, if it’s a perfect circle or square, there’s not much of an issue at all, but if it’s oddly shaped or has overlapping objects, things get complicated fast.
By now, you probably recognize the benefits of using masks in Adobe Photoshop. In previous posts, I talk about how you can go about using masks to manipulate parts of an image. The best part is, by using masks, you can make an edit, change your mind and quickly undo that edit. There’s so much flexibility to masks it makes my head spin.
In today’s post, I’m going to take a regular color photo, change it to black and white by taking advantage of an adjustment layer and then I’m going to use the built in adjustment layer mask to bring only one object in the photo back to color. I’ll experience the same outcome as I did in my earlier post, but this time, my task will be much more intuitive and dare I say, faster.
Original Photo
Below is the original image I chose to work with in this post. The reason I thought this photo would work well is that there’s an extremely distinct object at its center. There’s no mistaking what it is (an orange) and what it can look like after I’ve finished the project. It’s also large enough to work on so you can clearly see every step I work through.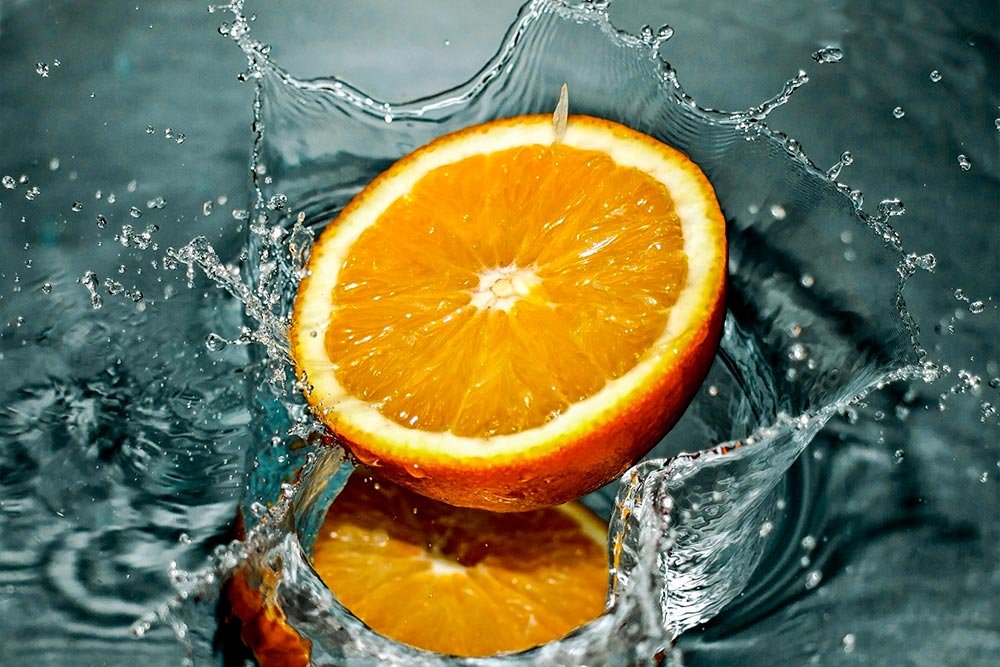
Creating a Black & White Adjustment Layer
One of the best methods of making a color photo black and white is to do it via an adjustment layer. As I’ve said many times before, adjustment layers are non-destructive, so you can play until your heart’s content and undo every single change you made along the way with the stroke of a finger. It’s that easy. With that in mind, I’ll head up to the Adjustments panel and click the Black & White icon. If you don’t have the Adjustments panel already open, simply go up to the Window > Adjustments menu item and select it. Then, follow my above instructions.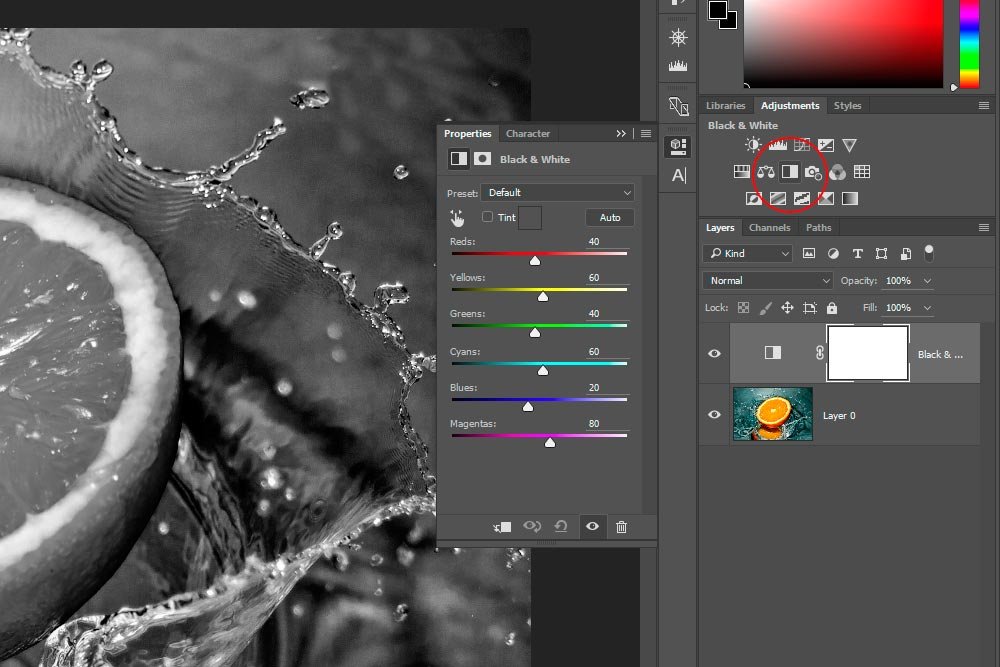
Once I click the Black & White adjustment layer icon, two things happen. First, the image changes to black and white and second, the Black & White Properties panel pops open. Now, because I used an adjustment layer, the image hasn’t actually lost any color data. It’s still there. It’s just behind a mask that’s making things appear colorless. And that’s what I’m going to discuss next.
Erasing Part of a Mask
Since the color photo now appears to be black and white due to a mask, in order to make a part of the photo color again, all I need to do is erase some of the mask. I can do this any number of ways. First though, I need to think about the rule I shared earlier on this site.I can’t see in the dark. I can see in the light. Black hides and white reveals.
What the above statement means is that if I apply black to a mask, I remove it. If I apply white, I add it back.
If I select the Brush Tool (my choice of tool for this project) and edit some size and edge settings up in the options bar, I should be good to go.
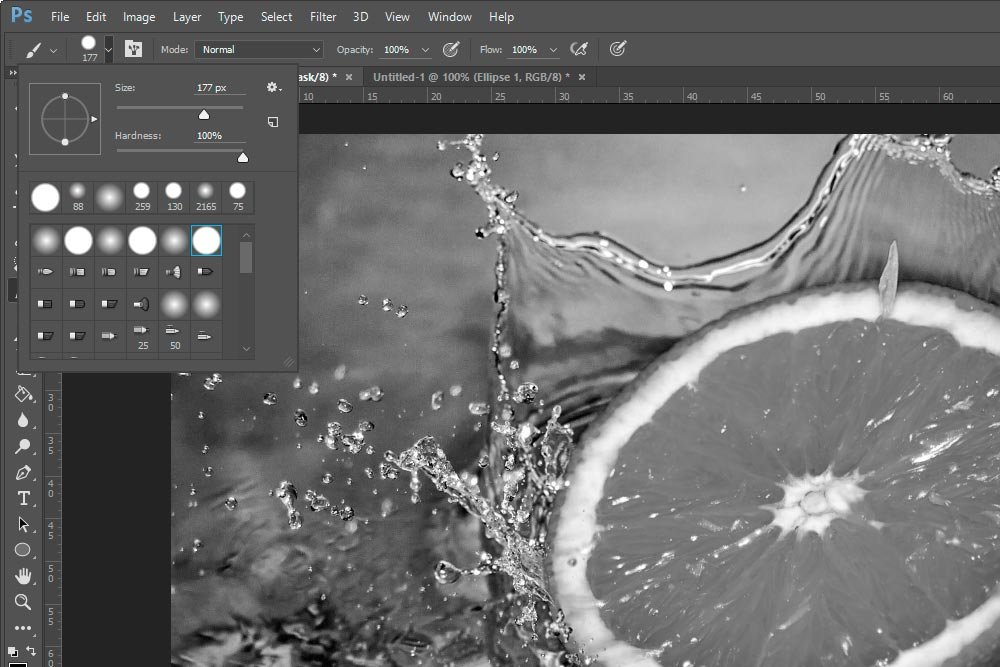
I set the brush so it’s 177 pixels wide and has the hardest edge. I did this because I wanted something large enough to quickly erase the part of the mask I’m not interested in keeping, while creating a sharp edge.
Next up, I’ll open the color picker and make sure black is selected (#000). Since I want to erase part of the mask, I need to work with black.
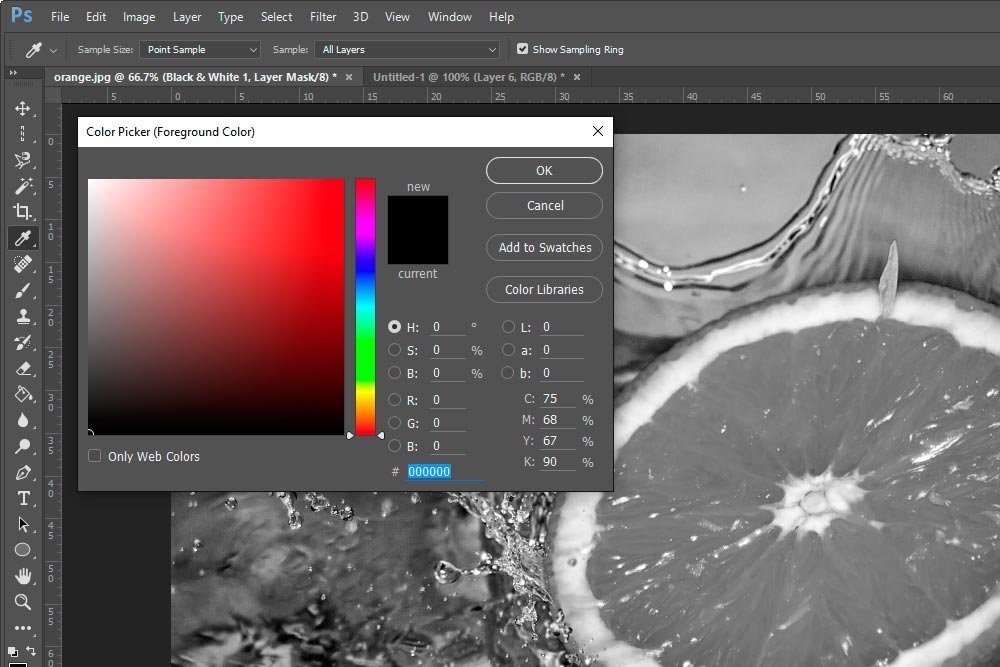
Now, all I need to do is “paint” the area of the photo I want to colorize. I’ll do half of it and then save a screenshot at that point.
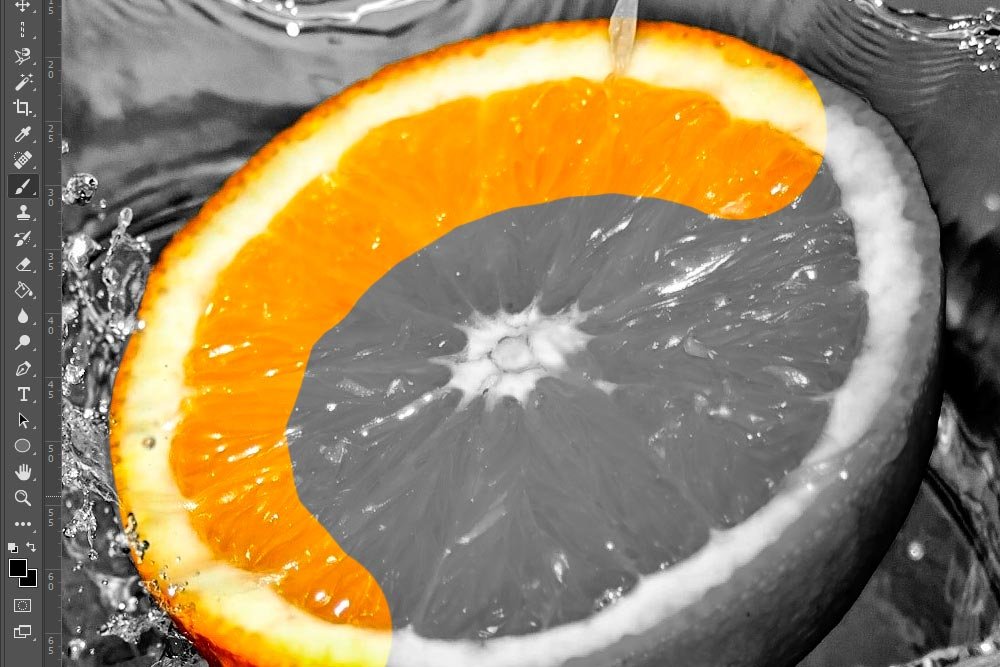
It might look like I’m actually painting and I suppose I am. I’m painting black over the mask, which removes it to reveal the color behind it. I’ll go ahead and finish now so you can see the entire thing. By the way, increasing and decreasing the photo view size helps with this (Ctrl++ and Ctrl+-). It gives you a nice large look at the object, so you can stay inside the edges.
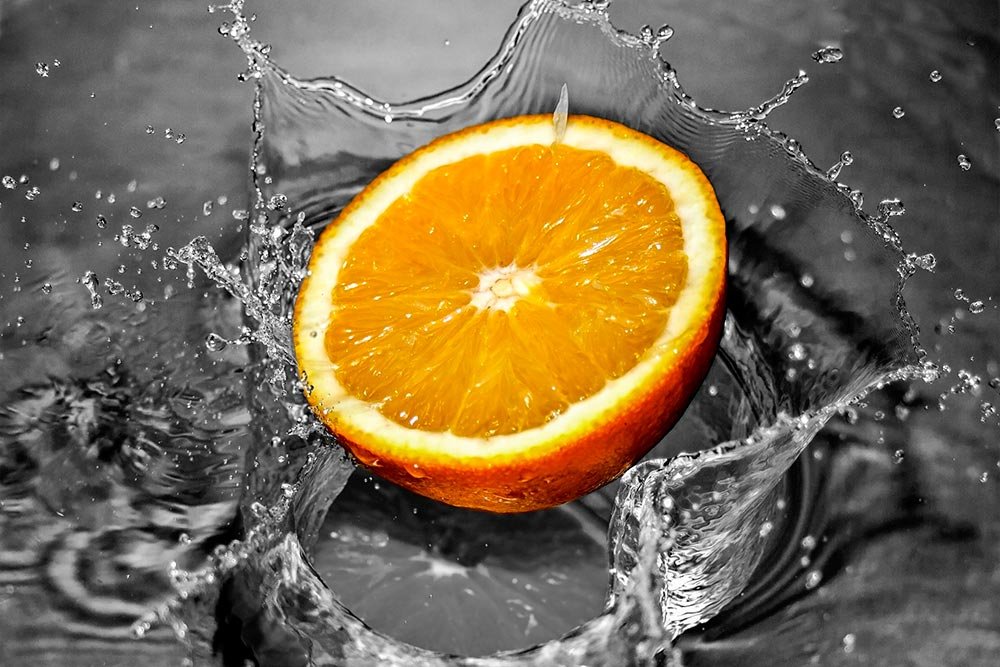
What’s important to remember is that I don’t need to go crazy trying to keep things perfect. If I make a mistake and paint outside of the lines, all I need to do is change the color picker color to white and paint over the mistakes. That will replace the mask, making those areas black and white again.
I’d say that looks pretty good.
