JodyBuchanan
Member
- Joined
- May 10, 2021
- Messages
- 138
- Reaction Score
- 0
- Points
- 21
- #1
Lately, I’ve been doing a lot of touch-ups to faces using Adobe Camera Raw. Remarkably, this is one of the areas many people have trouble with and just as remarkably, it’s really one of the easiest. With the correct tools and knowledge, facial editing can be completed in no time flat.
In today’s post, I’ll be working on the eyes of a young boy. I’d like to brighten them and then add a bit of color. The photo I’ll be using is really great – it’s clear and up-close. Basically, everything I would want to show off some of my editing skills.
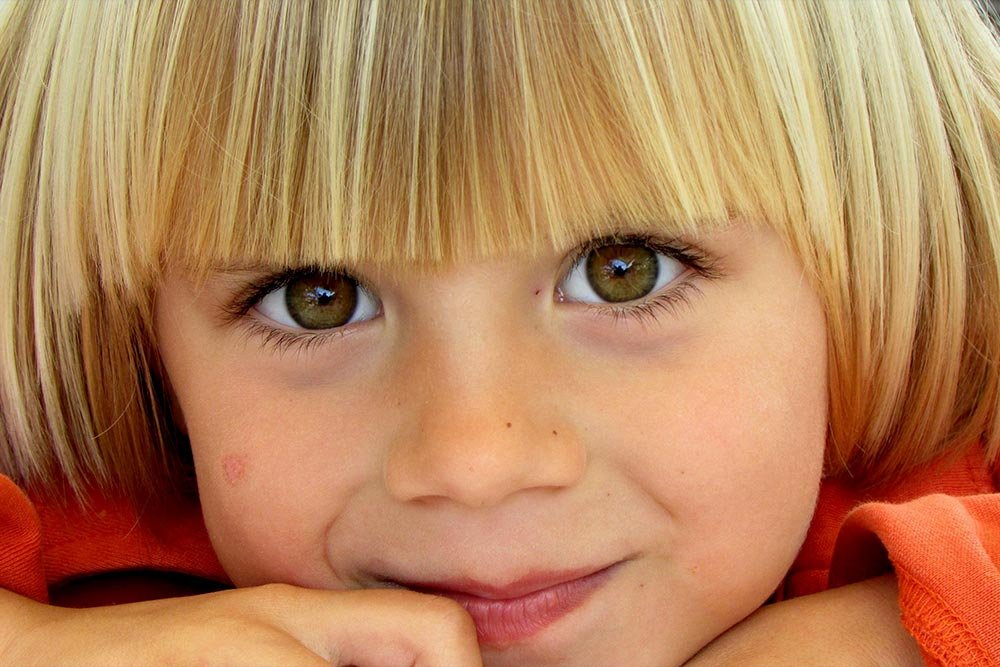
At first glance, you might think this is the perfect shot. I’d tend to agree – that is, if I hadn’t already done some work to it behind the scenes before I began writing this post. I’ve seen the potential and believe me, it can look a lot better. It is a good base though.
Editing a Photo Using the Basic Panel in Adobe Camera Raw
After I transform the photo and make it stand out by using the Basic panel, I’ll remove a few blemishes using the Spot Removal Tool in Camera Raw. To see how this tool works, take a look at this post:
How to Remove Face Blemishes in Adobe Camera Raw
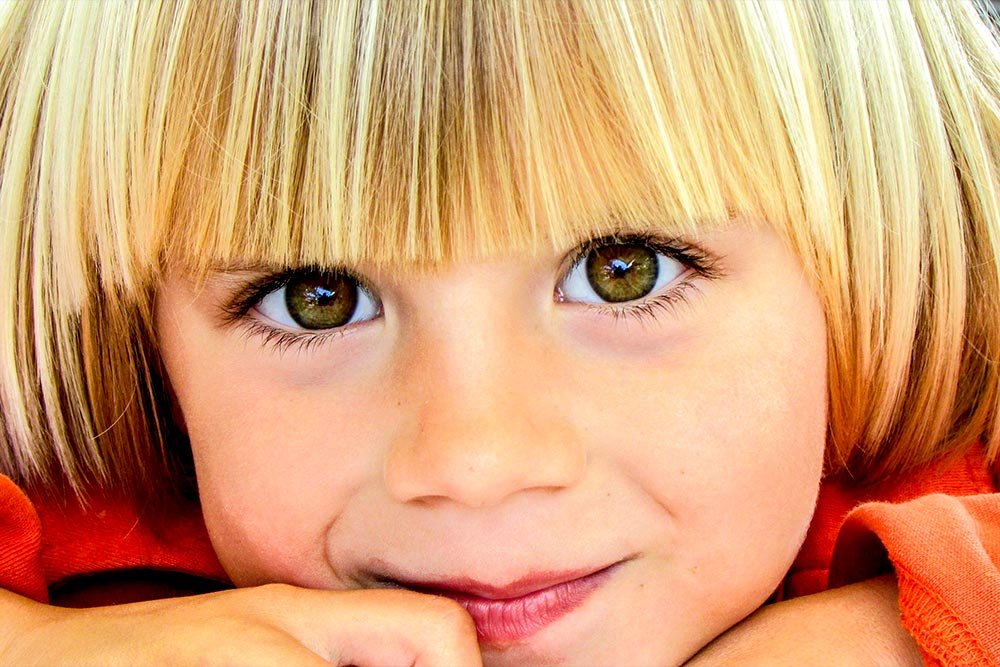
There really aren’t too many blemishes. Only four areas that I want to touch up. Here’s the photo after all that’s finished:
And here’s a before and after of the edits I made so far in Camera Raw.
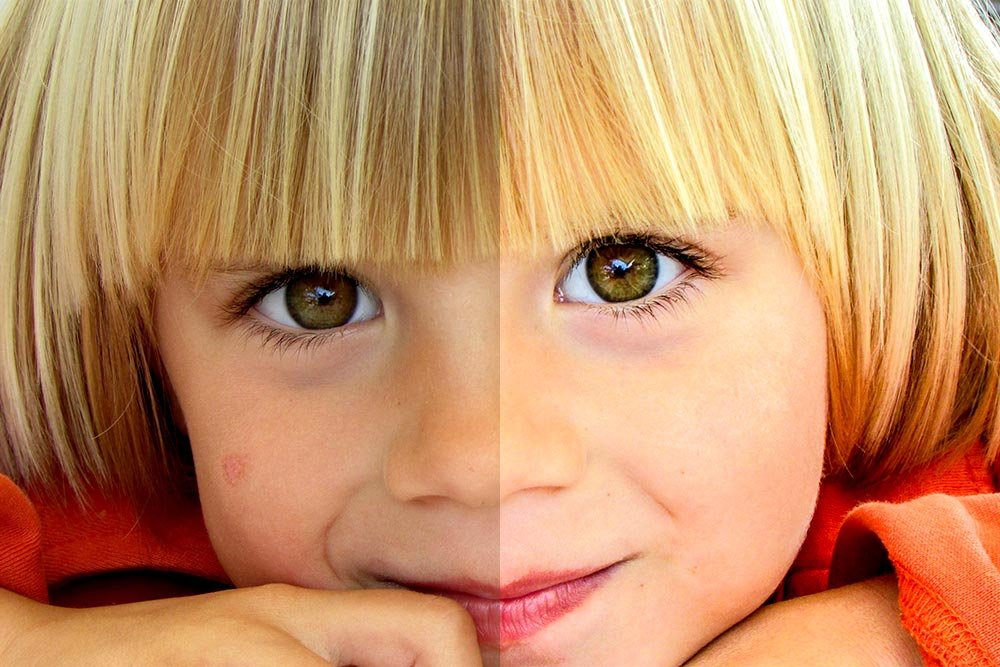
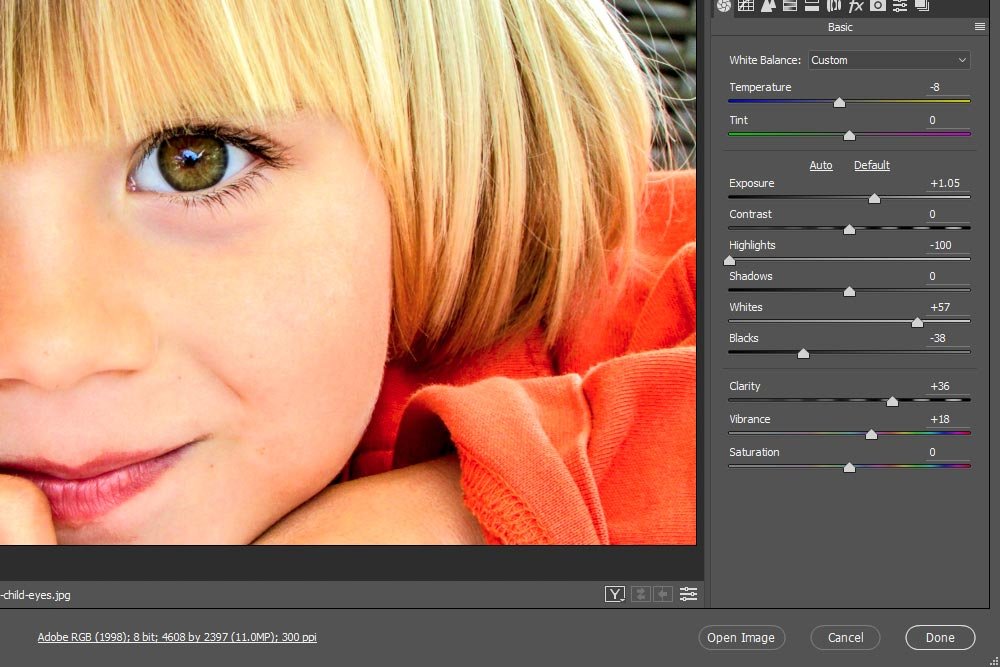
Pretty cool, huh? So far, this took me about 30 seconds. It’s really not very difficult. If you’re interested, I’ll give you a screenshot of the Basic panel below. These are my settings, minus what I did with the Spot Removal Tool.
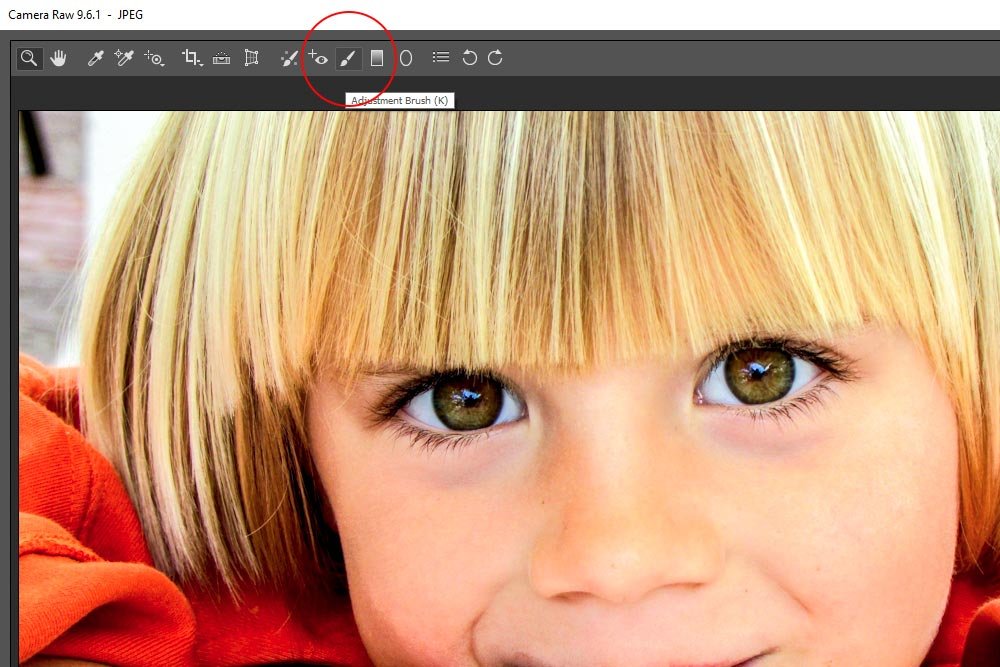
The first things I’m going to do to accomplish what I’m after in this section is to select the Adjustment Brush Tool from the top toolbar.
Then, I’ll click on the Reset Local Correction Settings from the small menu at the top of the Adjustment Brush panel.
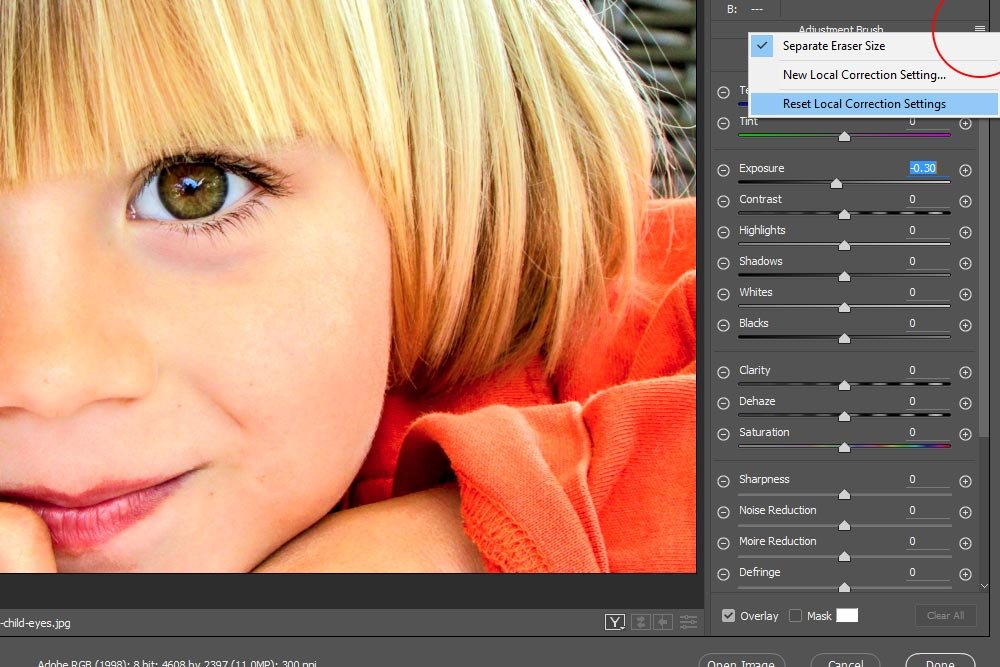
This will zero out any sliders that may have been set for previous edits. This is always a good thing to do.
After that, I’ll just give the Exposure slider a nudge to the right, to increase exposure. I’ll also resize my brush with the Size slider so it’s appropriate for this project (5) and I’ll add a soft edge by pushing the Feather slider to the right a bit (30). Right now, that’s all I want to do. Even though there are many other sliders that I’m going to push, right now, I just want to get something on the photo to see. I’ll bring the exposure up to +0.75.
By the way, the Exposure slider is at the top of the Adjustment Brush panel and the other two sliders are down at the bottom of the same panel. Below is a screenshot of the lower settings I’m using.
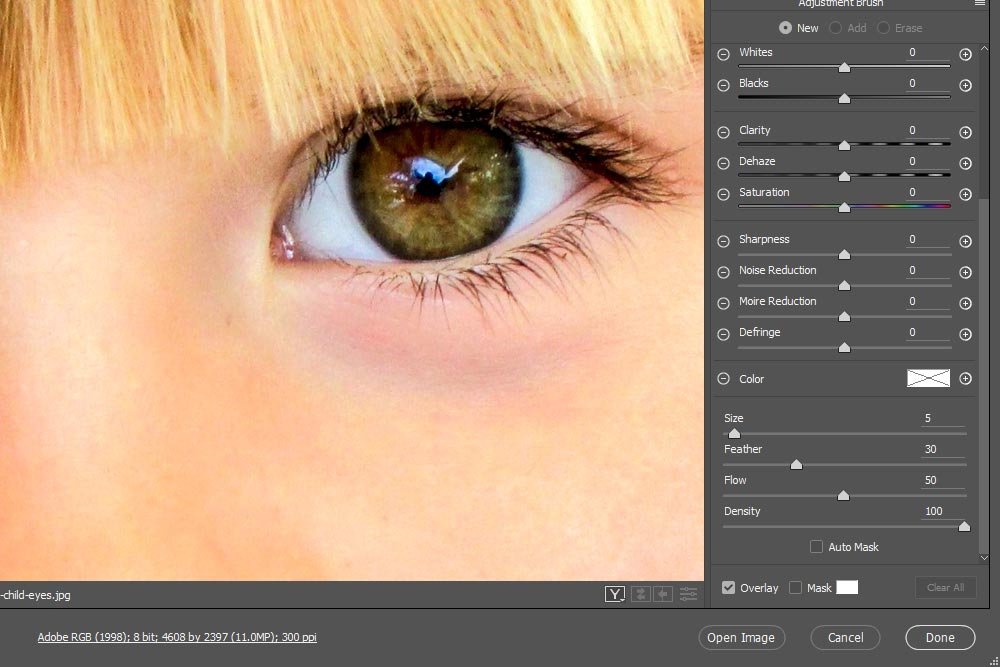
Finally, I’ll color in the iris of the eye with my brush. Here’s what it looks like now:
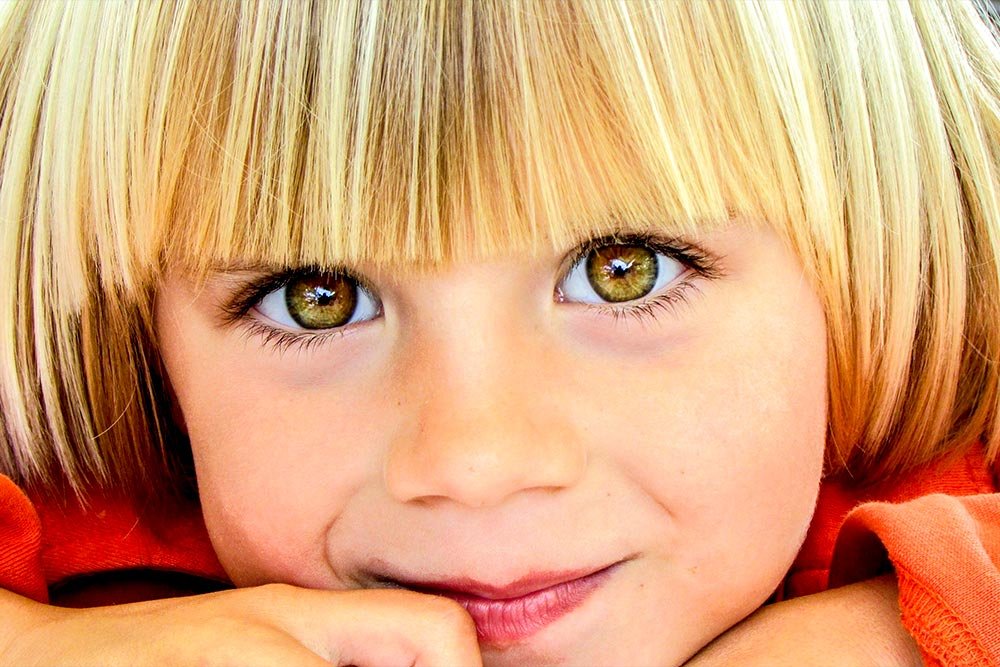
At this point, I have an active adjustment area. “Active” means that I can select it and then push more sliders around to adjust it. That’s why I wasn’t concerned about moving any other sliders right away. I could always push them around after that fact. With that in mind, I’ll go ahead and do that now. I’ll give you a list of what sliders I touched and their settings.
Temperature: -15
Contrast: +15
Clarity: +10
Saturation: +10
Sharpness: +15
Noise Reduction: +15
After all these edits, this is what the photo looks like:
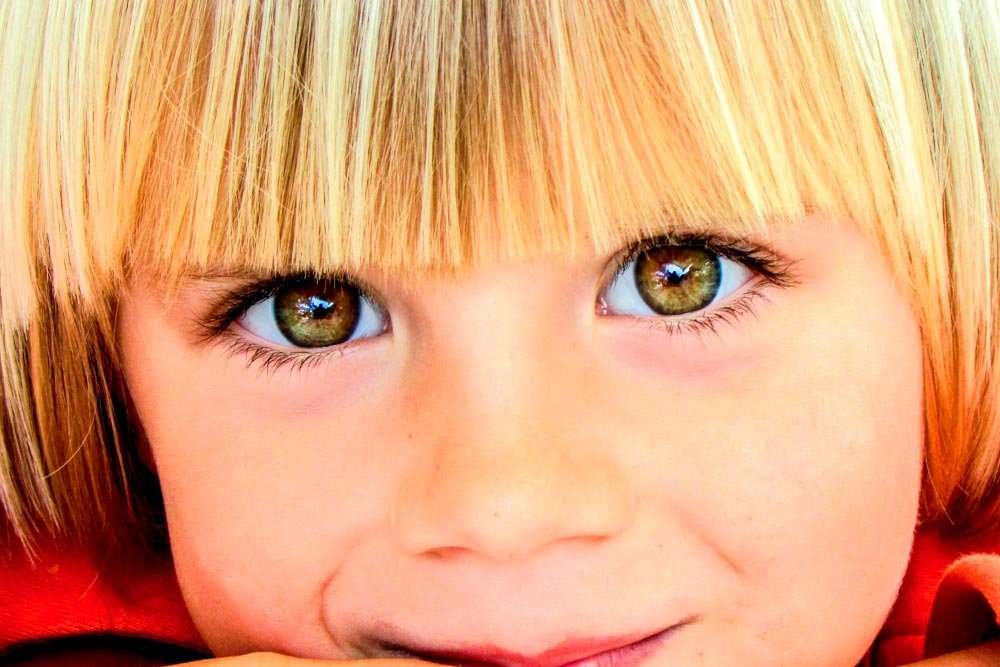
I’d say that’s looking pretty good.
Now that I’ve got my adjustment area active, I can click on the Color adjustment area that’s included in the Adjustment Brush panel.
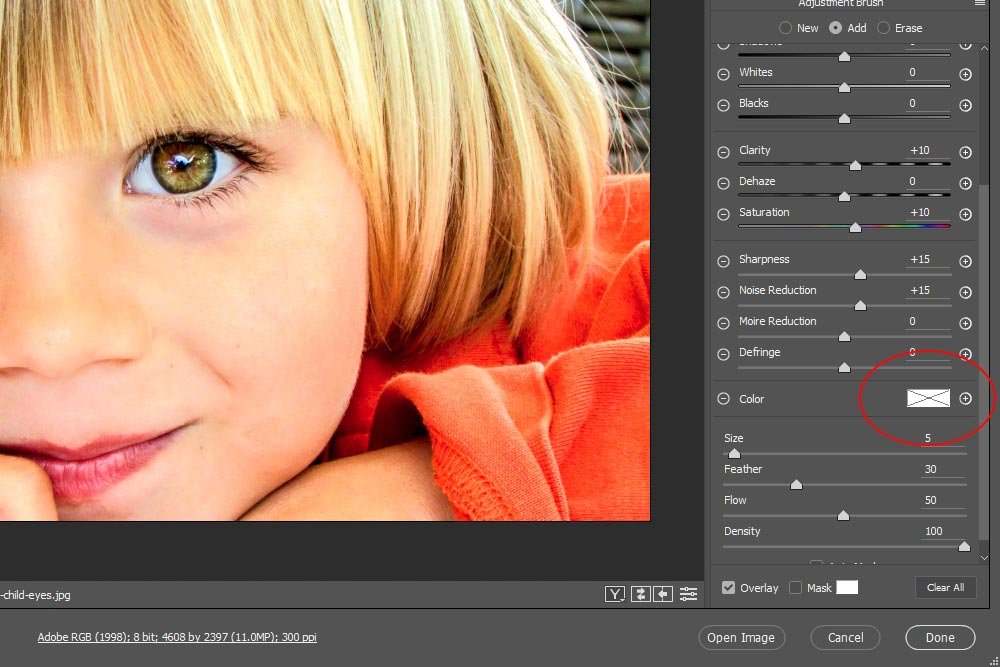
I’ll click right in the box. Once I do that, the Color Picker will appear.
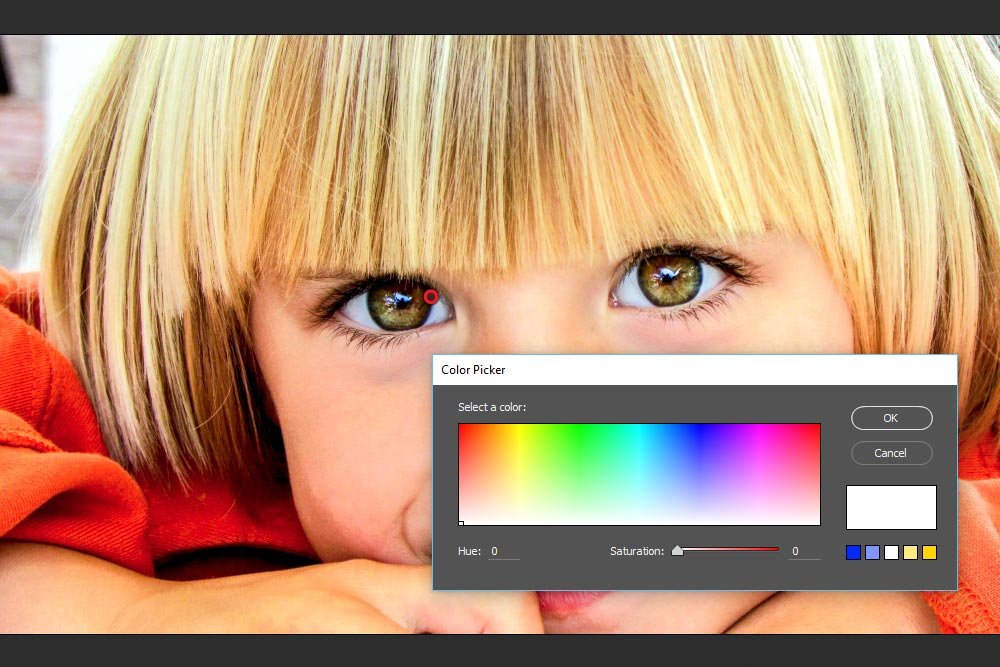
To add some color to any adjustment area, all you need to do is select a color with your mouse. The way I like to do this is to choose a fully saturated color by clicking the very top of the color and then using the Saturation slider inside the Color Picker to reduce the saturation. In the case of this photo, I’m choosing a Saturation of 50 and a Hue of 50, just to keep things simple. I’m also choosing a color that’s similar to what’s already in the eye, so nothing clashes. If the eye color was more neutral, I can change the color in the Color Picker to actually change the color of the eye. It’s really cool what you can do with this one tool.
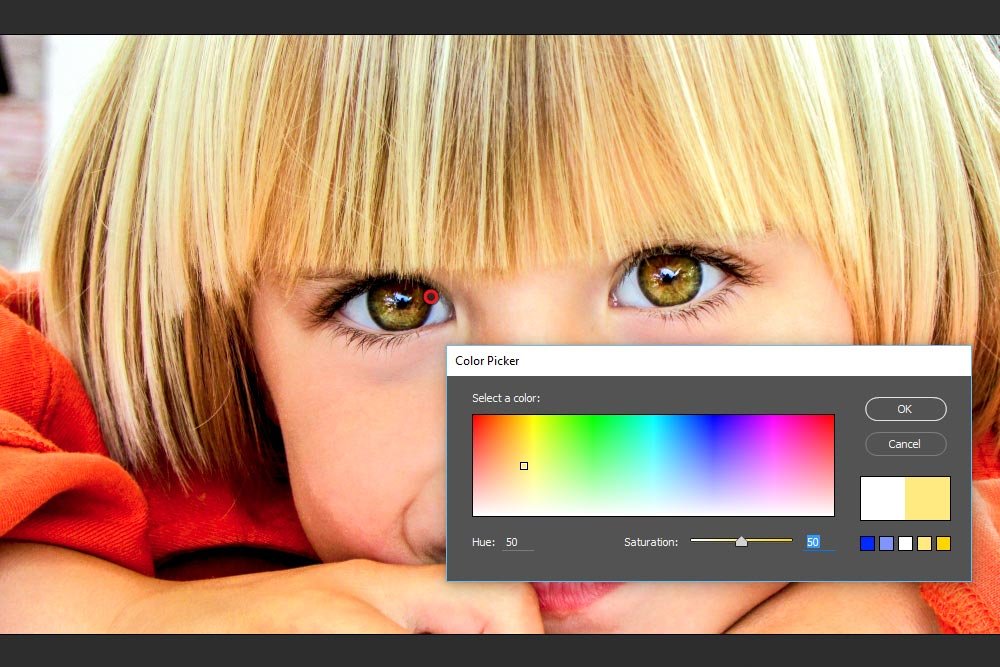
Here is the final photo:
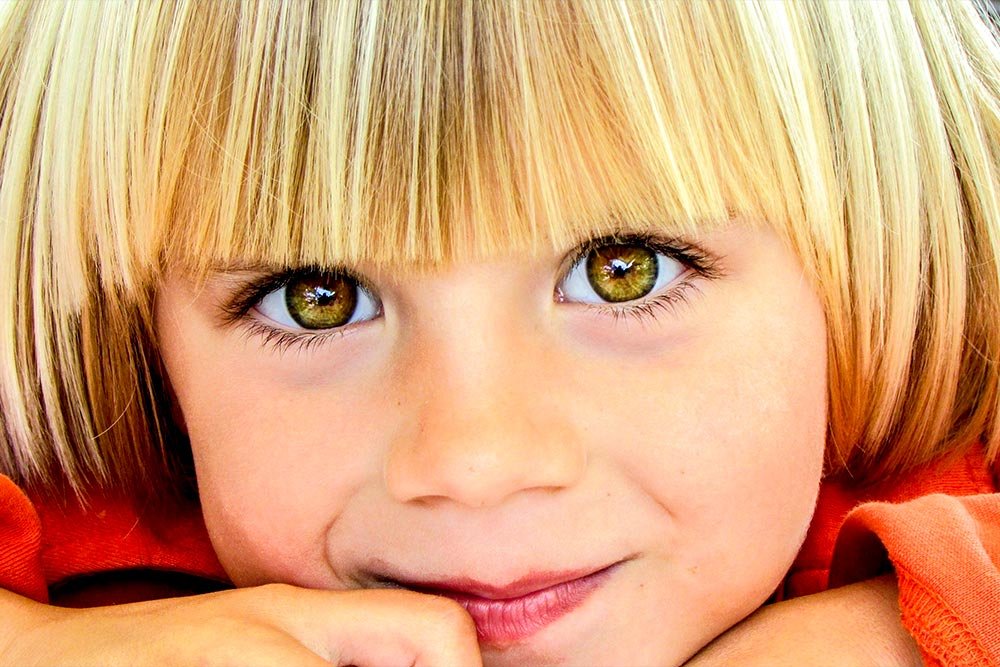
I want to offer a word of warning when you work on eyes. It’s very easy to go overboard. When editing anything that has to do with the face, especially the eyes, make a few changes and then walk away for a few minutes. That should be enough time to reset your vision. If you come back to your computer and say, “Whoa,” you may have gone too far. Reduce some of the previous changes and try again.
I hope I explained how to go about adding some color to someone’s eyes using Adobe Camera Raw. If you have any questions or comments, please leave them below. Thanks!
In today’s post, I’ll be working on the eyes of a young boy. I’d like to brighten them and then add a bit of color. The photo I’ll be using is really great – it’s clear and up-close. Basically, everything I would want to show off some of my editing skills.
Original Photo
To kick things off, I’ll post the original, untouched picture. Please look below.
At first glance, you might think this is the perfect shot. I’d tend to agree – that is, if I hadn’t already done some work to it behind the scenes before I began writing this post. I’ve seen the potential and believe me, it can look a lot better. It is a good base though.
Editing in Basic Panel & Removing Blemishes
Before I begin doing anything to the eyes in this photo, I’d like to perform my traditional edits in the Basic panel. I’ve included these types of edits in quite a few number of posts now. To see some of them, search the terms “basic panel camera raw” in the search bar above. If you want to see something more direct, check out this post:Editing a Photo Using the Basic Panel in Adobe Camera Raw
After I transform the photo and make it stand out by using the Basic panel, I’ll remove a few blemishes using the Spot Removal Tool in Camera Raw. To see how this tool works, take a look at this post:
How to Remove Face Blemishes in Adobe Camera Raw
There really aren’t too many blemishes. Only four areas that I want to touch up. Here’s the photo after all that’s finished:

And here’s a before and after of the edits I made so far in Camera Raw.

Pretty cool, huh? So far, this took me about 30 seconds. It’s really not very difficult. If you’re interested, I’ll give you a screenshot of the Basic panel below. These are my settings, minus what I did with the Spot Removal Tool.

Brightening & Sharpening the Eyes
For this next step, I’d like to brighten and sharpen the eyes. If you ask any photographer what the most important facial feature is when photographing, I’m confident they’ll tell you it’s the eyes. When your subject has strong eyes, it can really make a photo. That’s why so many editors focus the majority of their time in this area.The first things I’m going to do to accomplish what I’m after in this section is to select the Adjustment Brush Tool from the top toolbar.

Then, I’ll click on the Reset Local Correction Settings from the small menu at the top of the Adjustment Brush panel.

This will zero out any sliders that may have been set for previous edits. This is always a good thing to do.
After that, I’ll just give the Exposure slider a nudge to the right, to increase exposure. I’ll also resize my brush with the Size slider so it’s appropriate for this project (5) and I’ll add a soft edge by pushing the Feather slider to the right a bit (30). Right now, that’s all I want to do. Even though there are many other sliders that I’m going to push, right now, I just want to get something on the photo to see. I’ll bring the exposure up to +0.75.
By the way, the Exposure slider is at the top of the Adjustment Brush panel and the other two sliders are down at the bottom of the same panel. Below is a screenshot of the lower settings I’m using.

Finally, I’ll color in the iris of the eye with my brush. Here’s what it looks like now:

At this point, I have an active adjustment area. “Active” means that I can select it and then push more sliders around to adjust it. That’s why I wasn’t concerned about moving any other sliders right away. I could always push them around after that fact. With that in mind, I’ll go ahead and do that now. I’ll give you a list of what sliders I touched and their settings.
Temperature: -15
Contrast: +15
Clarity: +10
Saturation: +10
Sharpness: +15
Noise Reduction: +15
After all these edits, this is what the photo looks like:

I’d say that’s looking pretty good.
Adding Color to the Eyes
Now, I know the point of this post was to add color to the eyes, or to actually change the color of the eyes. I’ll show you how to do that next. It’s just that I had to go through a few steps before I got to this one. And remember, this next step is totally up to you. You can go about adding and changing color however you want. It’s a preference thing. I’ll merely guide you towards the tools necessary to accomplish something like this.Now that I’ve got my adjustment area active, I can click on the Color adjustment area that’s included in the Adjustment Brush panel.

I’ll click right in the box. Once I do that, the Color Picker will appear.

To add some color to any adjustment area, all you need to do is select a color with your mouse. The way I like to do this is to choose a fully saturated color by clicking the very top of the color and then using the Saturation slider inside the Color Picker to reduce the saturation. In the case of this photo, I’m choosing a Saturation of 50 and a Hue of 50, just to keep things simple. I’m also choosing a color that’s similar to what’s already in the eye, so nothing clashes. If the eye color was more neutral, I can change the color in the Color Picker to actually change the color of the eye. It’s really cool what you can do with this one tool.

Here is the final photo:

I want to offer a word of warning when you work on eyes. It’s very easy to go overboard. When editing anything that has to do with the face, especially the eyes, make a few changes and then walk away for a few minutes. That should be enough time to reset your vision. If you come back to your computer and say, “Whoa,” you may have gone too far. Reduce some of the previous changes and try again.
I hope I explained how to go about adding some color to someone’s eyes using Adobe Camera Raw. If you have any questions or comments, please leave them below. Thanks!
