CraigHardy
Member
- Joined
- May 11, 2021
- Messages
- 223
- Reaction Score
- 2
- Points
- 18
- #1
Quite honestly, things change as you become a better and better post-processing editor. At first, you’ll be enamoured at what Adobe products can do. You’ll open a photo in Camera Raw, Lightroom or Photoshop and play around for a while. This will be followed by all sorts of oohs and aahs. You’ll tell your friends all about your new-found skills and you’ll have a hunger for more.
Next, you’ll actually want to start getting things done. During this stage, you’ll search around the internet looking for answers. You’re not as impressed with the suite of products you use as you once were because you have tasks that need to be completed. Your thirst for knowledge is quite obvious.
Finally, you’ll have everything you need down pat. You understand how things work and have no issues with executing them wonderfully. It’s during this stage that you begin to wonder how you can get things done faster. You see yourself repeating steps over and over and over again. If you could only combine tasks or mass edit photos. It’s these sorts of solutions you’re on the hunt for now.
Luckily, Adobe is all about speed and efficiency. They have thought, and continue to think, about how you can get from point A to point B quicker than you ever have before.
I’ve written a few posts that touch on this last stage (having to do with Camera Raw). If you’d like to read them, you can here:
Independently Editing Multiple Images in Adobe Camera Raw
How to Copy & Paste Adobe Camera Raw Edit Settings
How to Save Tool Presets in Adobe Camera Raw
How To Edit More Than One Photo at a Time in Adobe Camera Raw
While this isn’t an exhaustive list, it’s certainly a place to start. And as I continue writing, I’ll continue sharing shortcuts and methods for combining tasks. I sincerely hope they help.
In today’s post, I’ll be discussing a new set of tips that will allow you to manage and edit multiple photos simultaneously inside of Adobe Camera Raw. While these tips are somewhat similar to ones I’ve shared previously, there are distinct differences, so it’s important to read the entire post carefully.
The key word today is synchronizing as opposed to processing or managing. Synchronizing means that certain actions are performed after the fact as opposed to simultaneously or “during.” Obviously, the images will be opened into Camera Raw simultaneously and many of the photos will be updated simultaneously, but in essence, there will be a lot of synchronizing with previous settings going on.
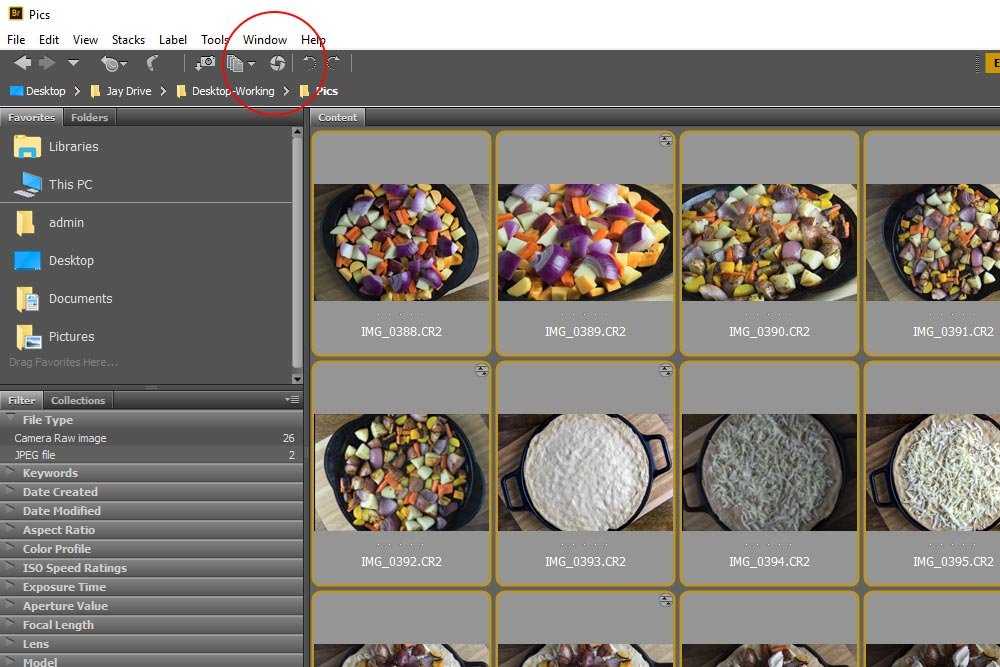
In this case, I’ll be using example photos I took just last night for my other blog – a cooking website.
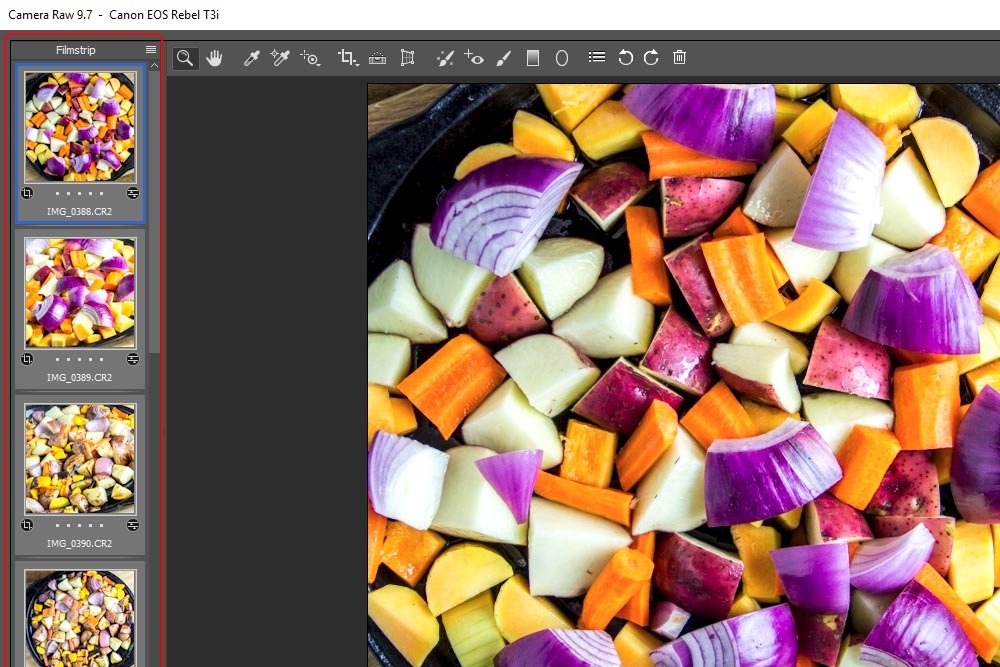
Once the photos open up inside of Camera Raw, they look like this:
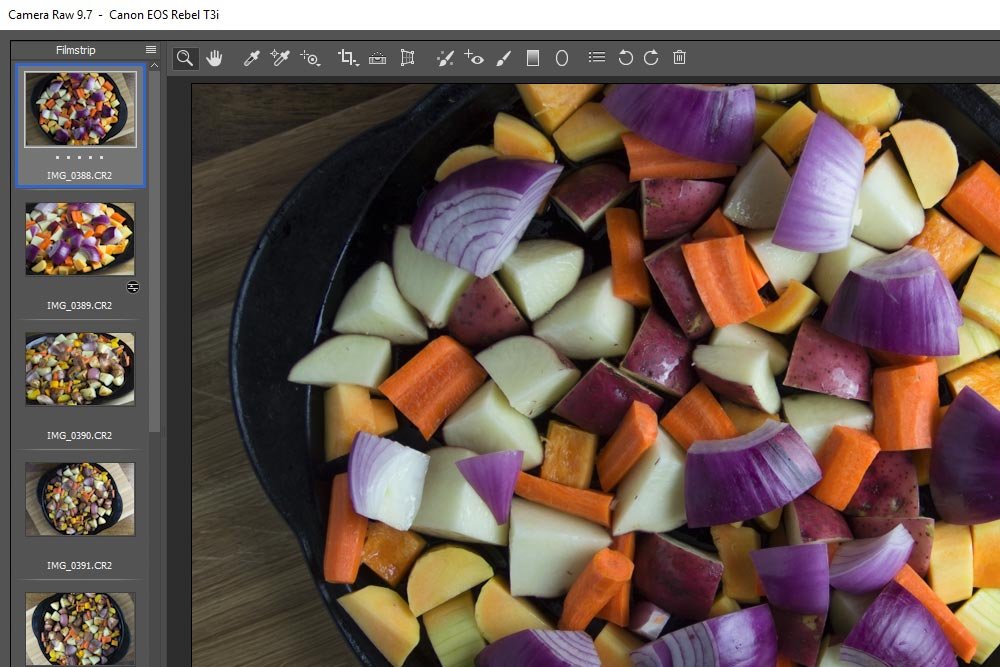
Notice the Filmstrip column of thumbnails in the left column. That’s where much of my focus will be today.
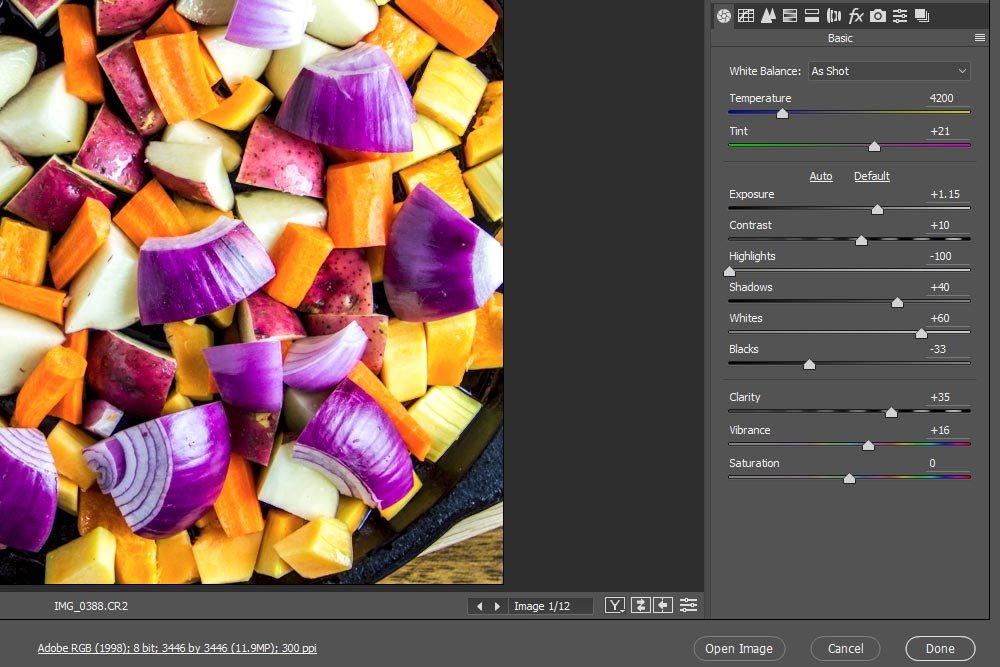
I’m going to choose my favorite photo and edit it inside of Camera Raw. I’ll crop it so it’s square and then push some sliders around in the Basic panel. Let’s take a look.
First, notice how I’ve only got the top thumbnail selected at this point. I don’t want all of the thumbnails selected, only one.
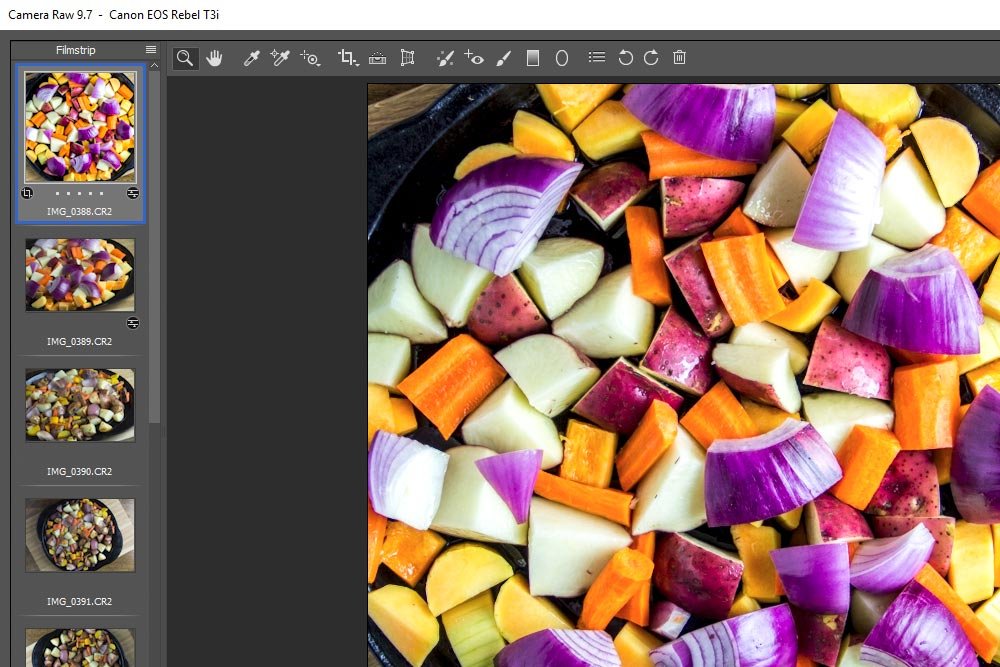
Now, check out the image itself. You can see that it’s been adjusted and cropped.
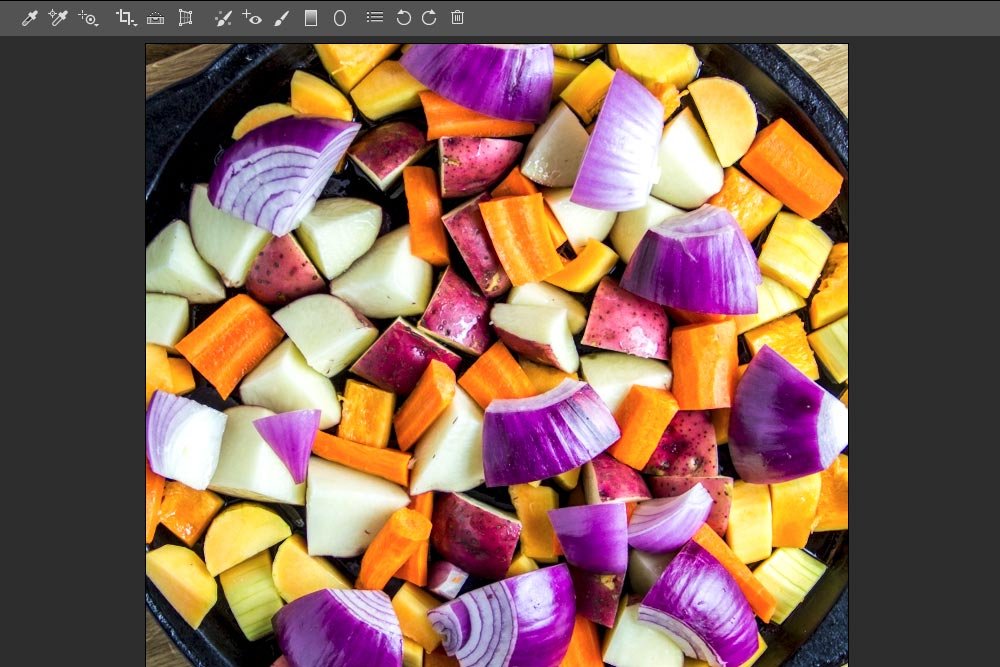
Finally, look at the Basic panel. You can tell that I moved some sliders.
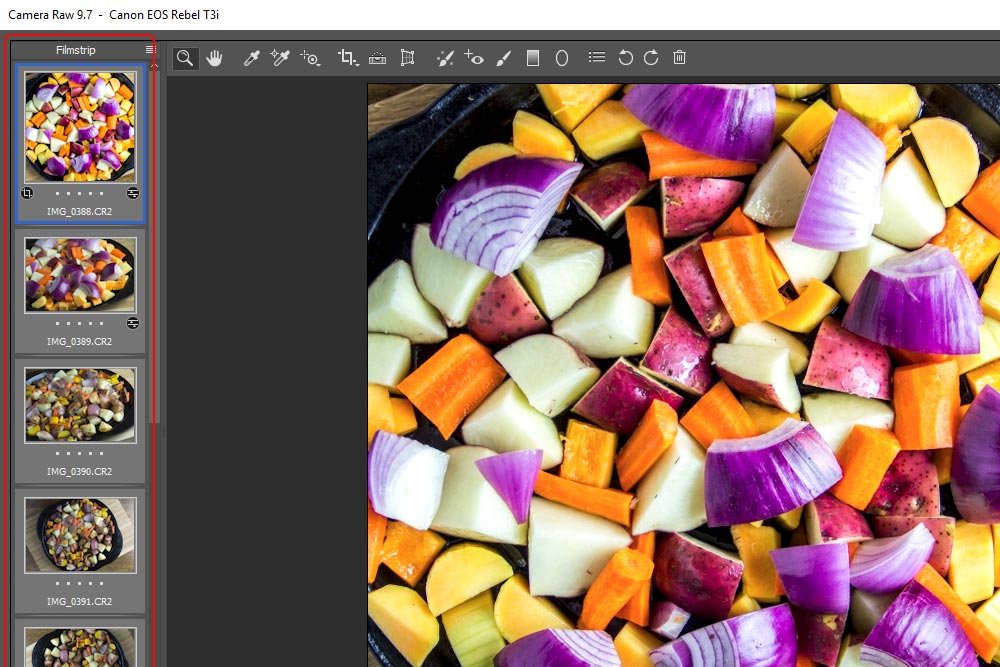
Well, if you only want to apply the settings to a few other images, you can use the Ctrl key on your keyboard to selectively highlight the appropriate thumbnails. If you want to apply the settings to all of the images, you can do two things. Use your Shift key to select everything or simply click into the Filmstrip panel and use the Ctrl+A keyboard shortcut to take care of the selection. If you do this, all the thumbnails will become highlighted.
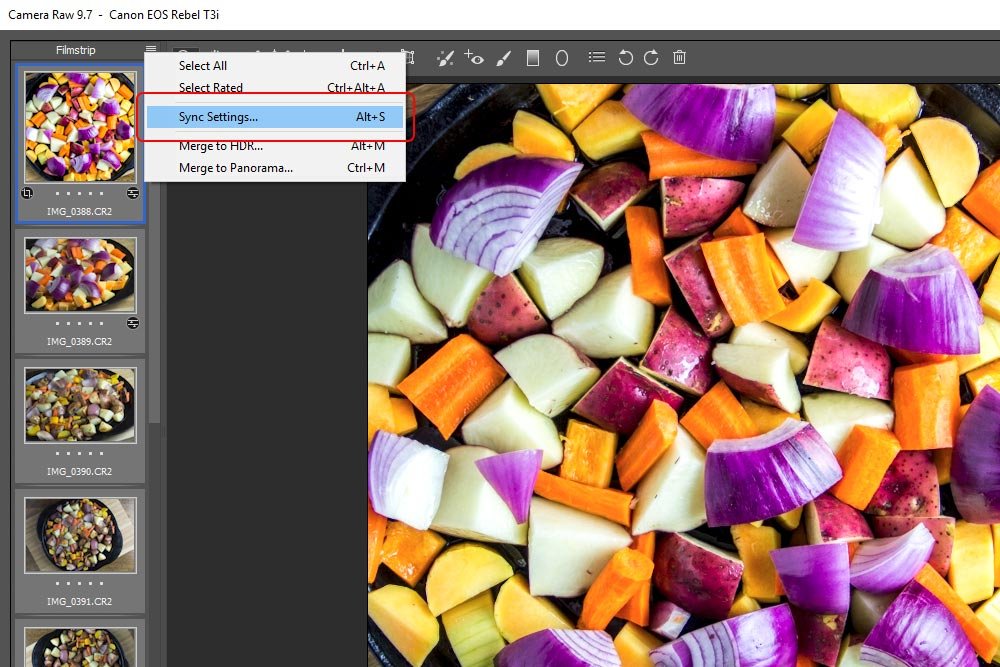
Now that I’ve got all the images selected, I can begin the process of syncing the settings among them. To do this, I’ll click on the menu that’s located at the top of the Filmstrip panel. Once open, I’ll click on the Sync Settings menu item.
Once I do that, the Synchronize dialog box will appear.
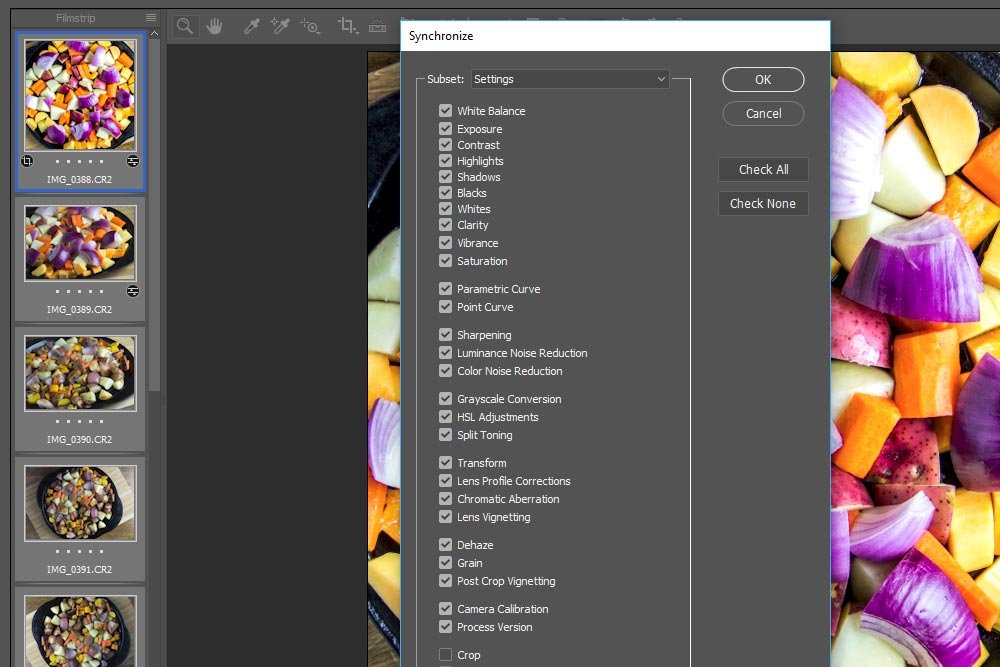
If you look inside this box, you’ll see all the options for the settings you can share with other images. Since I changed some slider positions in the Basic menu along with some cropping a bit, I’ll check off each of the boxes that aren’t currently checked off. When done, I’ll click the OK button and watch as the remaining photos are updated. Now, if you look at the thumbnails, you’ll see that they are brighter and have been cropped. And it only took a few seconds to complete. Much more efficient use of my time than having them update after each and every change I make.
I know this was a simple post, but I think these were very valuable tips to share. If you have any questions or concerns, please leave them in the comment section below. Thanks for reading!
Next, you’ll actually want to start getting things done. During this stage, you’ll search around the internet looking for answers. You’re not as impressed with the suite of products you use as you once were because you have tasks that need to be completed. Your thirst for knowledge is quite obvious.
Finally, you’ll have everything you need down pat. You understand how things work and have no issues with executing them wonderfully. It’s during this stage that you begin to wonder how you can get things done faster. You see yourself repeating steps over and over and over again. If you could only combine tasks or mass edit photos. It’s these sorts of solutions you’re on the hunt for now.
Luckily, Adobe is all about speed and efficiency. They have thought, and continue to think, about how you can get from point A to point B quicker than you ever have before.
I’ve written a few posts that touch on this last stage (having to do with Camera Raw). If you’d like to read them, you can here:
Independently Editing Multiple Images in Adobe Camera Raw
How to Copy & Paste Adobe Camera Raw Edit Settings
How to Save Tool Presets in Adobe Camera Raw
How To Edit More Than One Photo at a Time in Adobe Camera Raw
While this isn’t an exhaustive list, it’s certainly a place to start. And as I continue writing, I’ll continue sharing shortcuts and methods for combining tasks. I sincerely hope they help.
In today’s post, I’ll be discussing a new set of tips that will allow you to manage and edit multiple photos simultaneously inside of Adobe Camera Raw. While these tips are somewhat similar to ones I’ve shared previously, there are distinct differences, so it’s important to read the entire post carefully.
The key word today is synchronizing as opposed to processing or managing. Synchronizing means that certain actions are performed after the fact as opposed to simultaneously or “during.” Obviously, the images will be opened into Camera Raw simultaneously and many of the photos will be updated simultaneously, but in essence, there will be a lot of synchronizing with previous settings going on.
Opening the Photos into Camera Raw
I’ve shared this method many times on this blog, so you should be knowledgeable of it by now. From Adobe Bridge, I’ll select the images I’d like to open into Camera Raw and I’ll click on the Open in Camera Raw button that’s located in the top toolbar.
In this case, I’ll be using example photos I took just last night for my other blog – a cooking website.
Once the photos open up inside of Camera Raw, they look like this:

Notice the Filmstrip column of thumbnails in the left column. That’s where much of my focus will be today.
Editing One Photo
Here’s the thing – when there are many photos opened up and selected in Camera Raw, as they are edited, there’s a lag after each change you make. So if you’ve got 50 images opened up and need to make 50 small edits, each and every change will have to run the gamut through all the photos. Take it from me – after watching this type of thing for a while, it becomes tiresome. It would be great if each change didn’t have to get applied to each photo every single time. Say, perhaps, we could edit one photo in its entirety and then apply all the edits across the rest of the photos at once. Something like, umm, I don’t know – synchronizing them. I think you know where I’m going with this. Please allow me to explain.I’m going to choose my favorite photo and edit it inside of Camera Raw. I’ll crop it so it’s square and then push some sliders around in the Basic panel. Let’s take a look.
First, notice how I’ve only got the top thumbnail selected at this point. I don’t want all of the thumbnails selected, only one.

Now, check out the image itself. You can see that it’s been adjusted and cropped.

Finally, look at the Basic panel. You can tell that I moved some sliders.

Sync Settings Across Other Photos
Here comes the fun part. Let’s say that I’ve got a handful of photos in the group that I opened that I want to apply the same exact settings I just applied to the very first photo I edited to. Or, perhaps I’d like to apply these settings to every single photo that’s currently opened in Camera Raw. How can I do that?Well, if you only want to apply the settings to a few other images, you can use the Ctrl key on your keyboard to selectively highlight the appropriate thumbnails. If you want to apply the settings to all of the images, you can do two things. Use your Shift key to select everything or simply click into the Filmstrip panel and use the Ctrl+A keyboard shortcut to take care of the selection. If you do this, all the thumbnails will become highlighted.

Now that I’ve got all the images selected, I can begin the process of syncing the settings among them. To do this, I’ll click on the menu that’s located at the top of the Filmstrip panel. Once open, I’ll click on the Sync Settings menu item.

Once I do that, the Synchronize dialog box will appear.

If you look inside this box, you’ll see all the options for the settings you can share with other images. Since I changed some slider positions in the Basic menu along with some cropping a bit, I’ll check off each of the boxes that aren’t currently checked off. When done, I’ll click the OK button and watch as the remaining photos are updated. Now, if you look at the thumbnails, you’ll see that they are brighter and have been cropped. And it only took a few seconds to complete. Much more efficient use of my time than having them update after each and every change I make.

How to Update Individual Photos After the Fact
You may be wondering how you can update individual photos after you applied these changes across the board. Perhaps all the images weren’t as similar as you though or perhaps some changes need to be decreased in intensity or increased in intensity. Whatever the case, all that needs to be done is to have the specific thumbnail for the image you’d like to change clicked on and then edit as you would on any other occasion. The point is, just because you made some mass edits doesn’t mean you can’t make additional edits later on. Remember, the changes you make in Camera Raw are non-destructive, so they can be added to or reversed at any time.I know this was a simple post, but I think these were very valuable tips to share. If you have any questions or concerns, please leave them in the comment section below. Thanks for reading!
