CaptainDan
Member
- Joined
- May 9, 2021
- Messages
- 113
- Reaction Score
- 0
- Points
- 16
- #1
In several previous posts, I’ve discussed the benefits of using Smart Objects while working in Adobe Photoshop. If you aren’t aware of these benefits, I’ll list them below. And if you aren’t sure what Smart Objects are, I’ll link to my previous posts below that. For the uninitiated, Smart Objects are wonderful things because:
– They are wickedly easy to create
– They preserve raster image quality
– They save free transform settings
– You can link to a Smart Object and share the source with many instances
– You can duplicate Smart Objects without linking them
– You can replace the contents of a Smart Object
– You can turn text into Smart Objects to preserve quality
– There are things called Smart Filters and Smart Filter Masks – this equals wonderful
Now, I know you’re looking at some of these benefits that I just shared above and are scratching your head wondering what in the world they mean. I get that. With this in mind, I’m going to link to the previous posts I’ve written that talk about Smart Objects. Much of what I just listed above is covered in these posts and what I haven’t covered yet, I will soon.
What are Smart Objects in Adobe Photoshop?
Converting Multiple Layers into a Smart Object in Adobe Photoshop
Editing RAW Files as Smart Objects in Adobe Photoshop
That ought to do it. Really. There’s a lot of information in those posts, so if you’d like to learn about Smart Objects, start with them.
The reason I bring this topic up is because there’s a way to take advantage of Smart Objects while working in Adobe Lightroom. I know I’ve discussed opening files into Photoshop from Lightroom already, but in this case, we can do things slightly differently. This time, we can open either a JPEG or a RAW file right into Photoshop from Lightroom, as a Smart Object. Of course, there are benefits to doing this, such as all the ones I mentioned above.
In today’s post, I’ll be walking through the process that needs to be followed to accomplish something like this. As in my two previous posts on this topic, there really aren’t any tough areas or areas that need special concern. It’s just a simple step by step process.
Working Photo
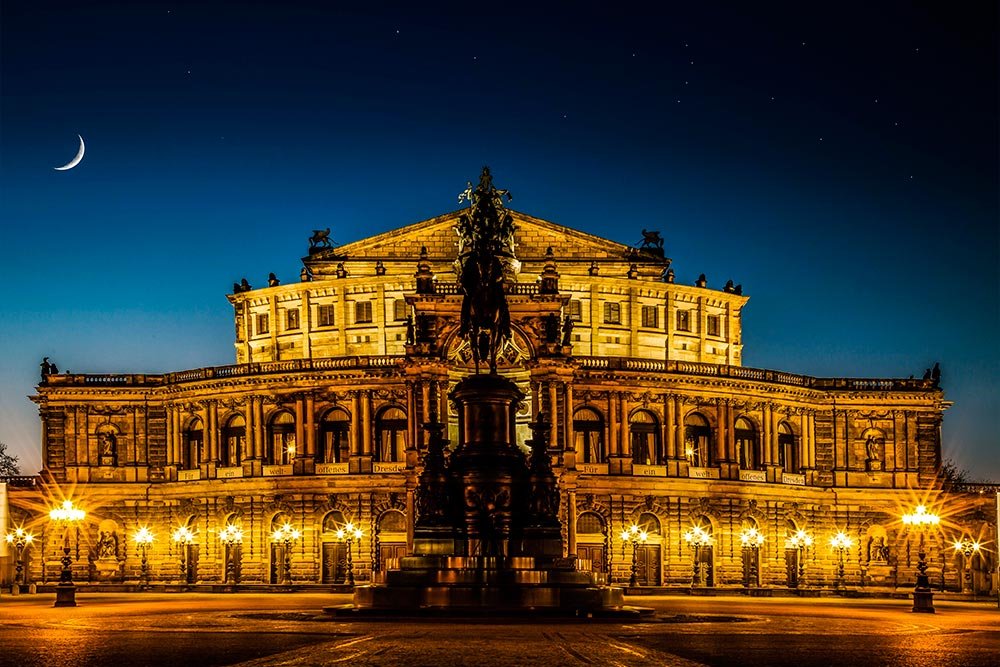
For this post, I’ll be working with a photo of a large building. It’s already been imported into Lightroom. It’s also a JPEG file. Again, for this process, it doesn’t matter if the file is JPEG or RAW.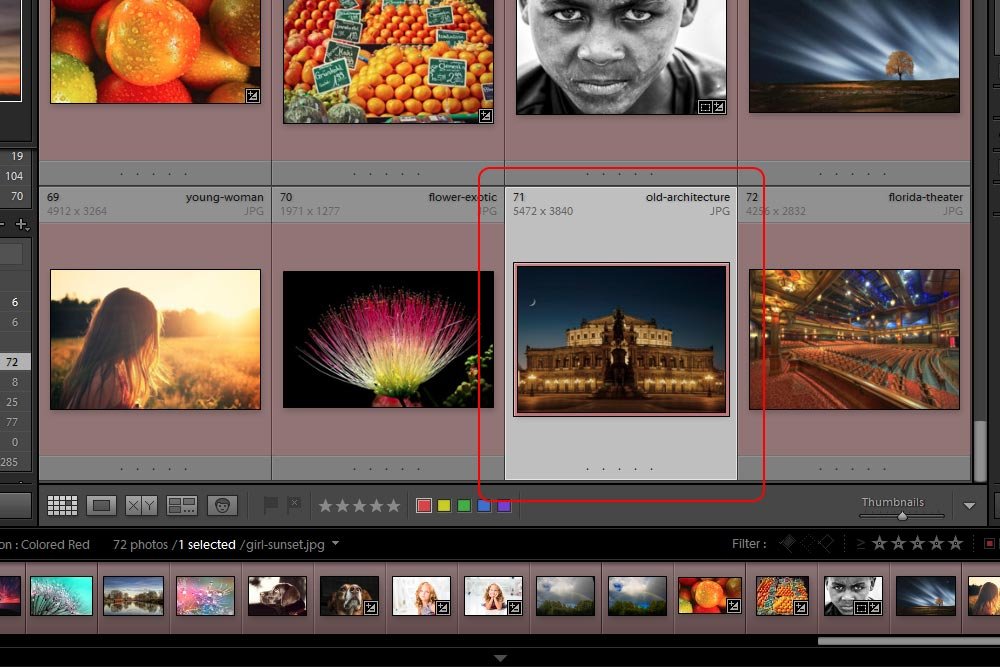
If you’re wondering why all the thumbnails have been shaded red, please see my post where I talk about how to filter photos by color.
Editing in Lightroom
For the sake of clarity, I’ll go ahead and make some quick edits to this photo inside the Quick Develop panel in Lightroom. I’ll click the Saved Preset drop-down and then roll over the Lightroom Color Presets selection and finally, I’ll click the Aged Photo preset.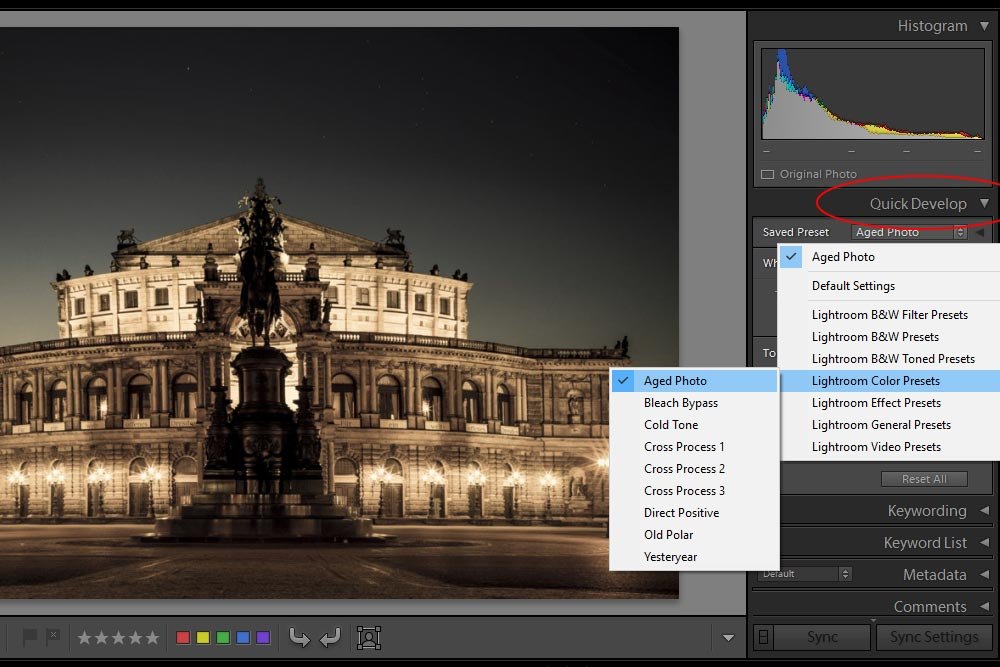
This simply applies a preset aged photo filter to the image. As you can see in the above screenshot, the photo now has a different look.
Opening Image as a Smart Object in Photoshop
At this point, things should start looking familiar. I’m going to head up to the Photo > Edit In > Open as Smart Object in Photoshop menu item and click.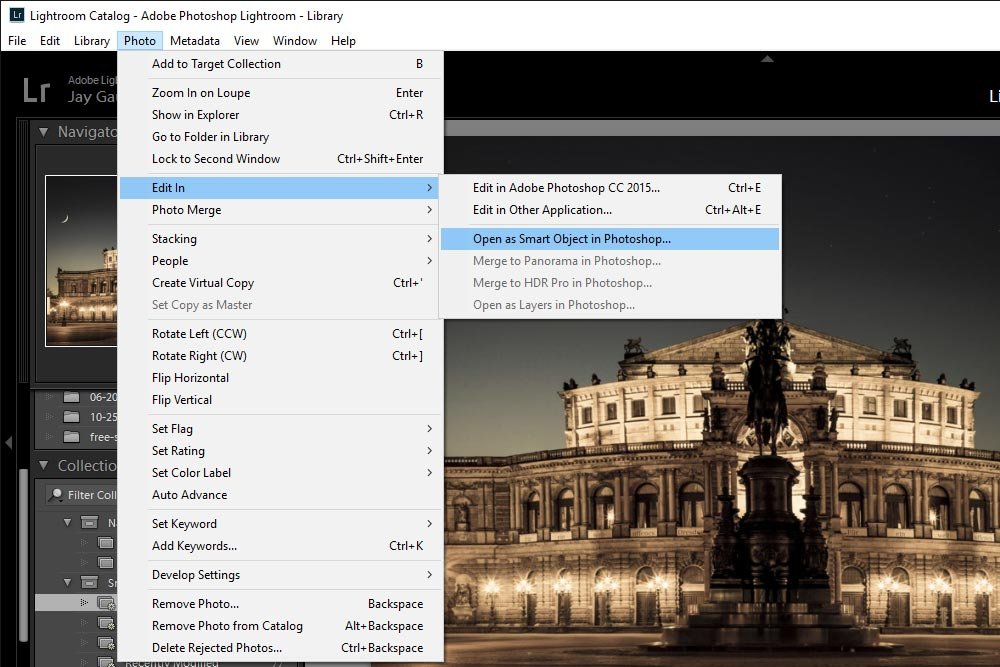
When I do this, the edited photo jumps directly into Photoshop in its own tab as a Smart Object.
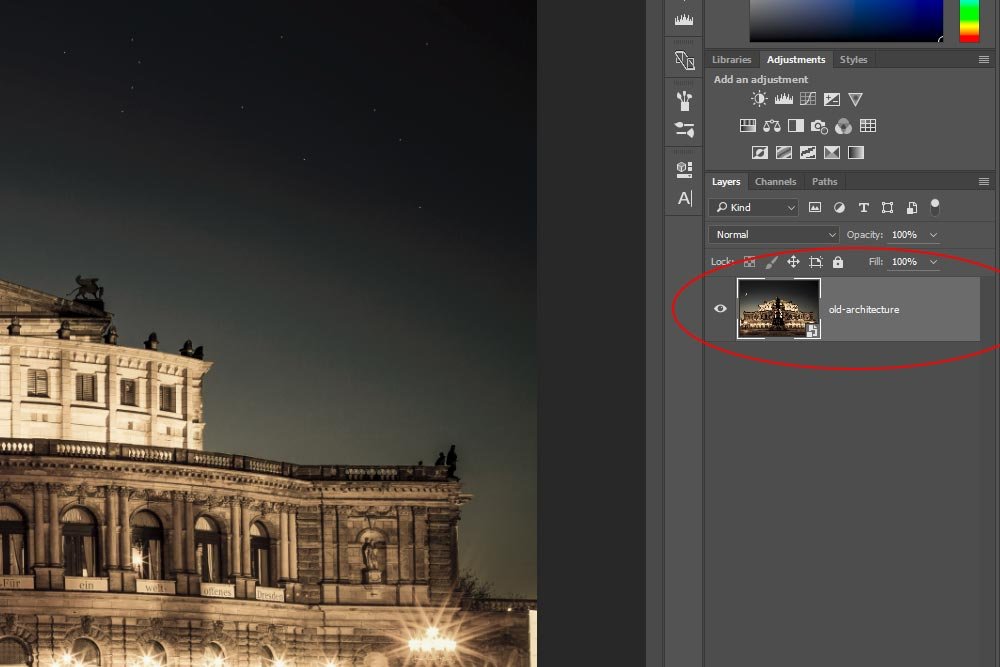
If you look at the layer in the above screenshot closely, you’ll notice that it contains the distinctive Smart Object icon inside the thumbnail. This is confirmation of what we already suspected we were dealing with.
Further Edits in Camera Raw
This is where I get really excited. I love jumping from one Adobe product to another. Let’s say that I wanted to edit this image further. Let’s say I’d like to do something to it that Camera Raw really excels at, such as adjusting the contrast, blacks, whites, vibrance, etc… How can I do that? Well, if I just double-click on the Smart Object layer thumbnail in Photoshop, Camera Raw will open with the Smart Object inside of it. Just like magic. And what’s super cool is that the modifications that were made in Lightroom are still intact in Camera Raw. Take a look at the Basic Panel. They were transferred over when I launched this file into Photoshop as a Smart Object.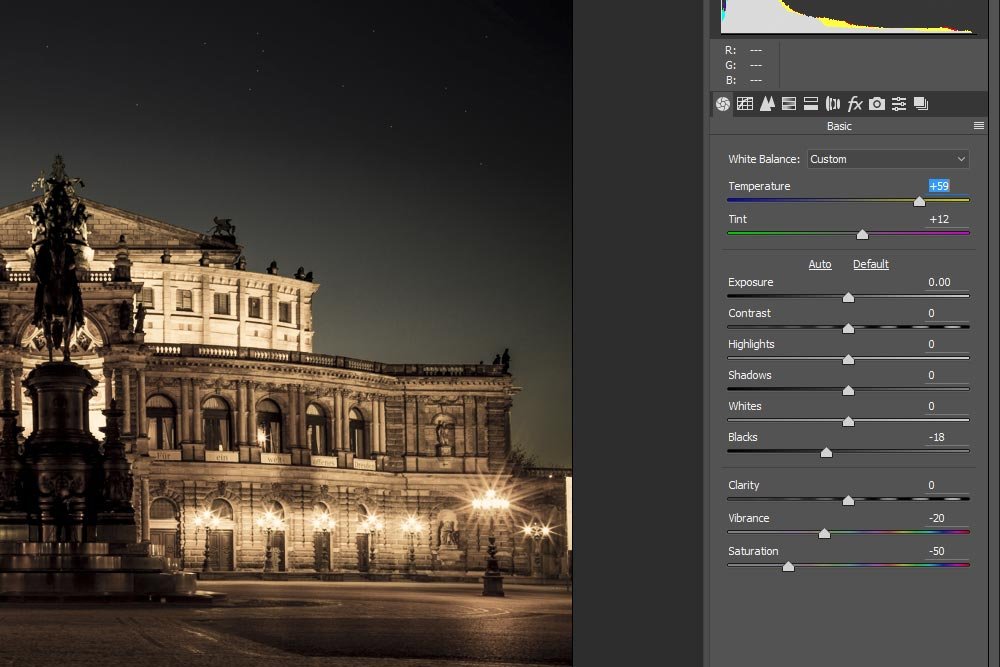
From here, I’ll make a few changes and when I’m done, I’ll click OK to close Camera Raw and head back into Photoshop.
Returning to Lightroom
The image looks pretty good. I made a few modifications inside Camera Raw that helped it with its clarity and contrast. I like this look better. Since I’m finished, all I need to do is return the image back to Lightroom.To return to Lightroom, all I need to do is head up to the File > Save menu item in Photoshop and click. What this does is saves the original image as a TIF file under a different name. It automatically adds -Edit to the name. So, in this case, an edited copy of old-architecture.jpeg was created and named old-architecture-Edit.tif. This new file was placed in the same folder as the original. I can see the two files in the filmstrip at the bottom of Lightroom.
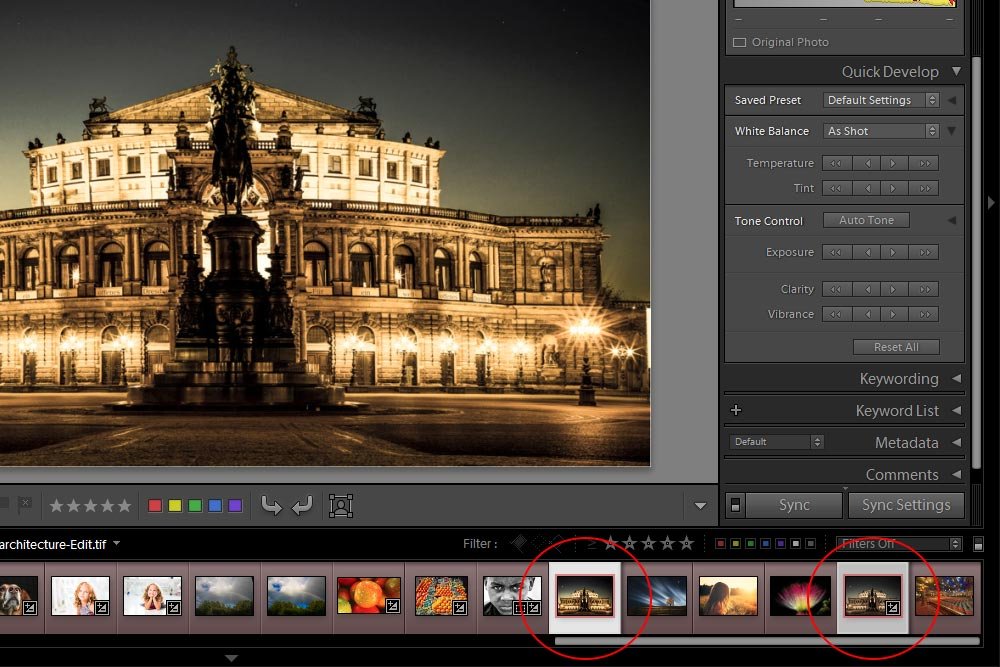
Viewing Before & After Files
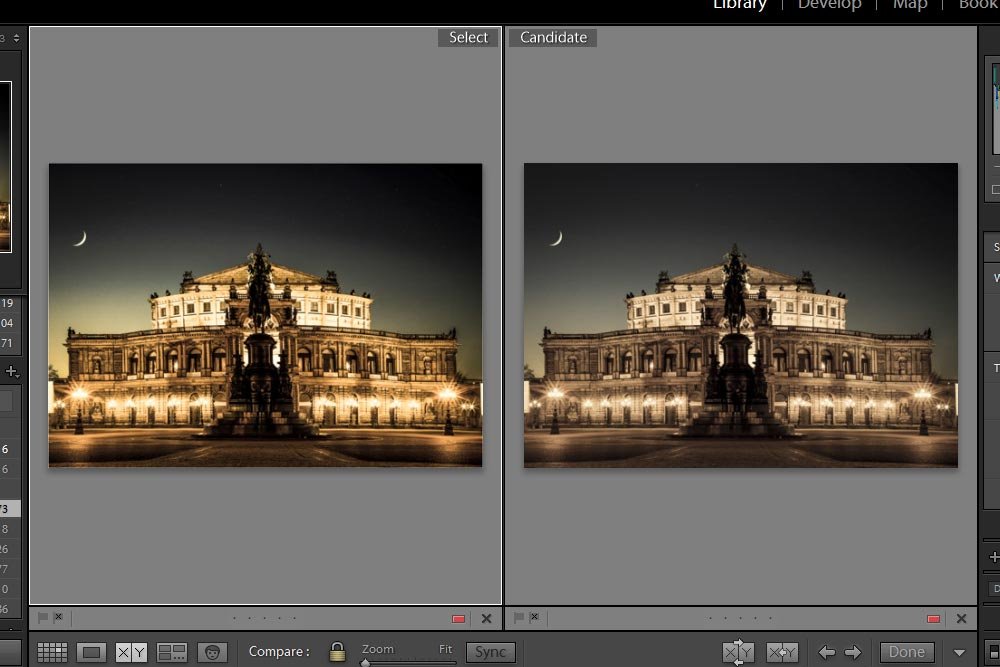
If I wanted to view the original image next to the image I saved after being edited in Photoshop and Camera Raw, I just have to select both thumbnails and click on the appropriate button under the thumbnails. I’ve already written about the many methods for viewing images inside of Lightroom, so please feel free to read that post.