KodyWallice
Member
- Joined
- May 7, 2021
- Messages
- 123
- Reaction Score
- 1
- Points
- 23
- #1
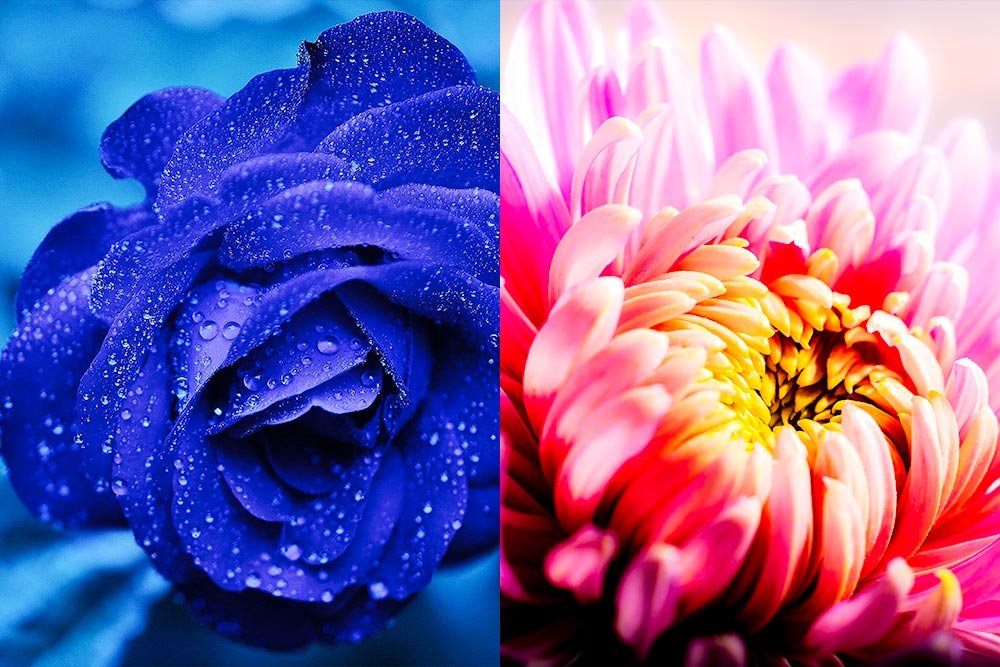
In previous posts, I wrote about how you can open multiple images into Photoshop and then drag some layers around to create a collection of photos in one file. I’ll give the links to those posts here:
How To Arrange the Tabs in Your Photoshop Workspace
Tips For Tabs & Guides in Adobe Photoshop
While the methods I outlined above are definitely workable and effective, any time there’s a shortcut to be had, it should be had. Especially when working with multiple applications, such as Camera Raw and Photoshop or Lightroom and Photoshop.
In today’s post, I’m going to demonstrate how easy it is to select multiple images in Adobe Lightroom and then open those images into Photoshop as layers in one document. As you might imagine, this type of operation can be very effective with many different types of photography. Portraits, family photos, engagement shoots and weddings, just to name a few. Basically, any time you’ve got similar styled photos that you’d like to see arranged next to each other in a sort of collage. Is that the right word – collage?
Selecting the Photos in Lightroom
For this project, I’m going to head back to my trusted collection of demo photos that are found in the Library module of Lightroom. What I’m going to do first is to find a few photos that are related, such as flowers (so this whole thing makes sense later on). Then, I’m going to take a look at each photo’s dimensions. While the photos don’t necessarily need to be exactly the same size, it’s nice if they are. As you follow me though this post, you’ll see why.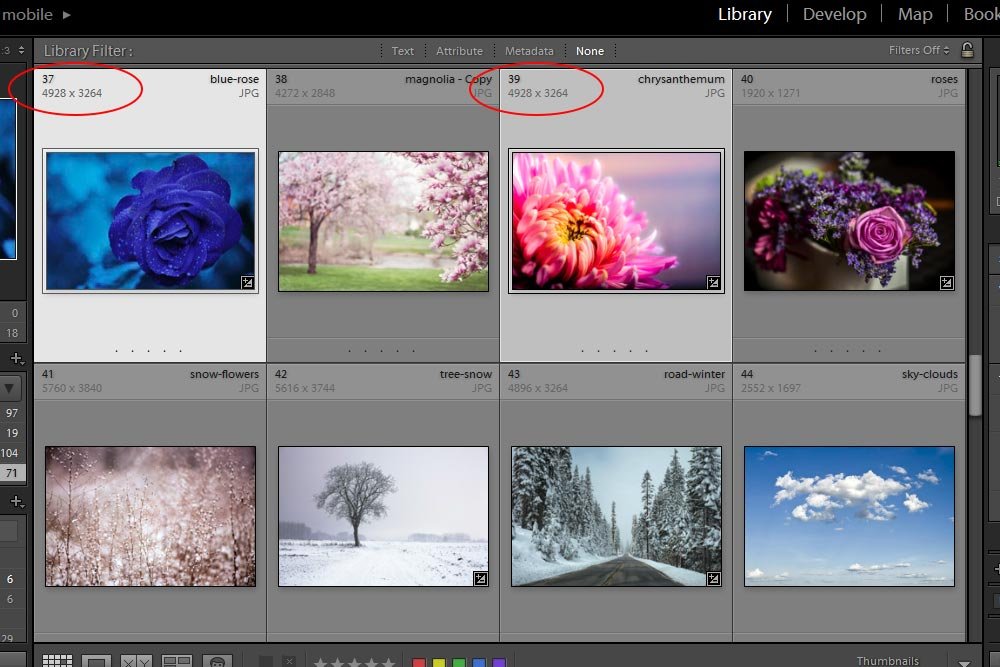
If you look at the screenshot above, you’ll see that I selected two thumbnail photos. To do this, I simply held down the Ctrl (Windows) or Command (Mac) key on my keyboard and clicked on each one with my mouse pointer.
I circled two areas in red. Inside those two areas are the pixel dimensions of the photos. In this case, the dimensions are 4928×3264. This is great because after I open both of these photos as layers in Photoshop, they’ll align nicely with one another.
Opening the Photos as Layers in Photoshop
This is a really easy step. To open multiple images as layers in Photoshop, I’m going to head up to the Photo > Edit In > Open as Layers in Photoshop menu item and click.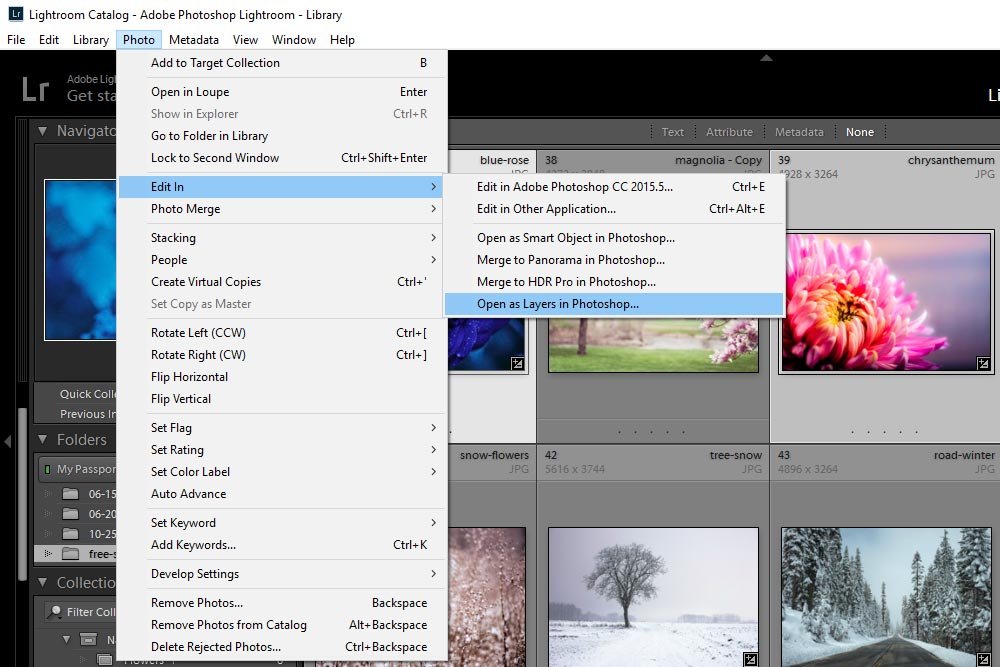
The minute I select this menu item, Photoshop will open and both of these images will appear in one file under one tab.
Note: The first time I tried this, Photoshop wasn’t launched yet and I got a weird error. This error disappeared after I launched Photoshop by itself and tried the process again. This may be due to the fact that I recently upgraded Lightroom but haven’t had the time to upgrade Photoshop yet.
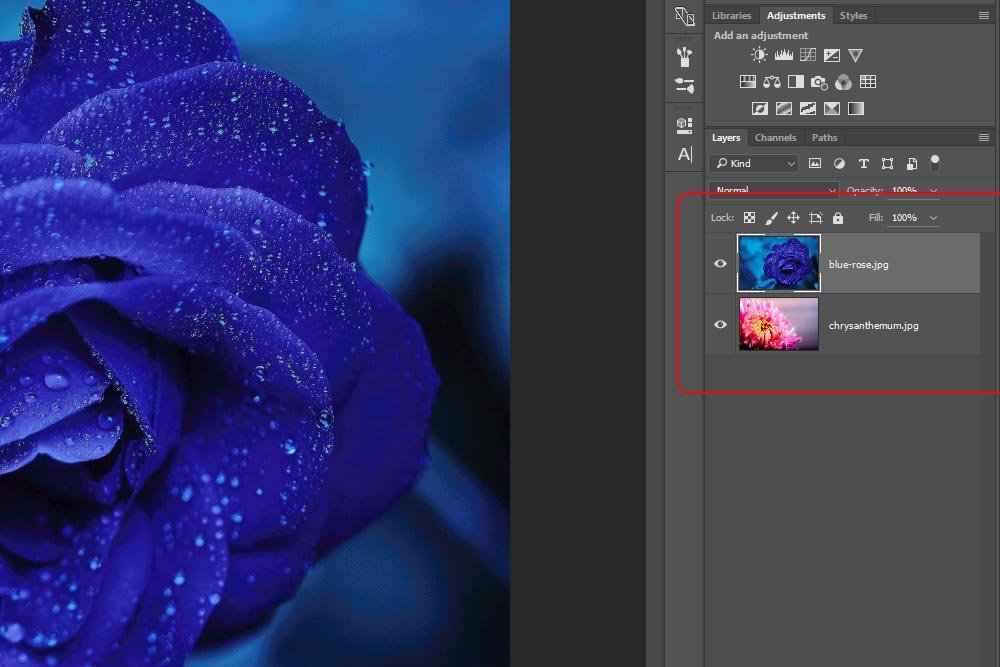
Arranging the Photos
Now that I’ve got both of the photos open in one document in Photoshop, I can go ahead and arrange them any way I wish. What I’d like to do here is to slide the top layer over to the left so its right edge is just touching the left edge of the lower layer. do do this, I’ll use the Move Tool and drag over. I want both layers horizontally aligned perfectly. To get a better view of what I’m doing, I’ll press the Ctrl and – keys on my keyboard to shrink things down.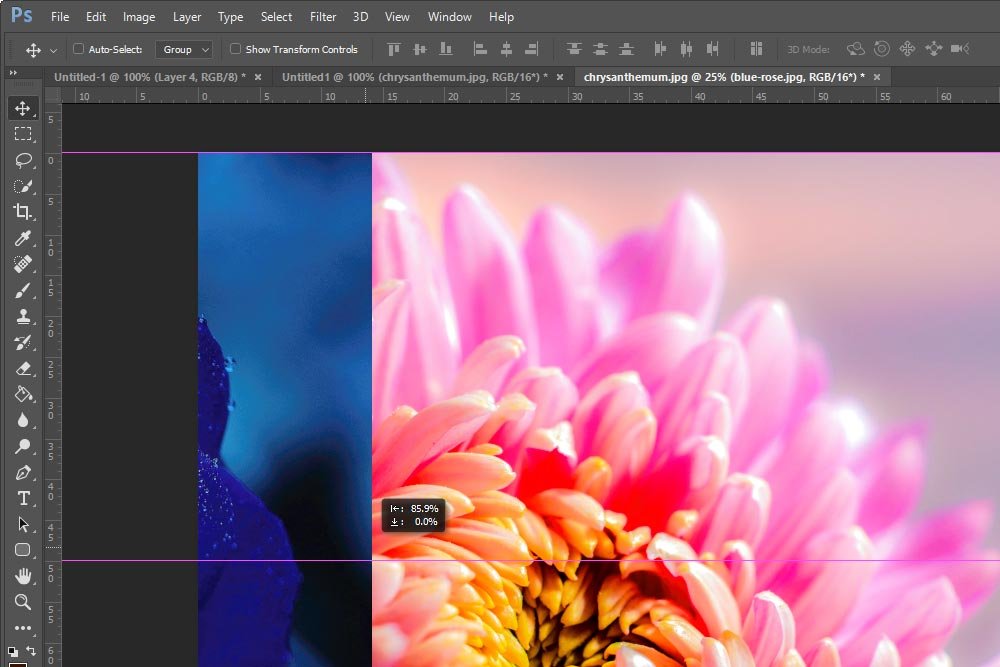
In the above screenshot, I was sliding the layer to the left, just as I described above. I kept a bit of it visible so you could see what I was doing. When I was finished, I couldn’t see the top (blue flower) layer at all. Also, please disregard both of the first two tabs. The file I’m actually working on is the third one. The first and second ones are for the screenshots for this post.
Now that both layers are set up properly, I can make both of them visible again. To accomplish this, I’ll head up to the Image > Reveal All menu item and click. What this does is reveal everything that’s currently not visible in the canvas area of a file. It essentially expands the canvas area. To confirm this, I can select the Image > Canvas Size menu item and look at the pixel dimensions.
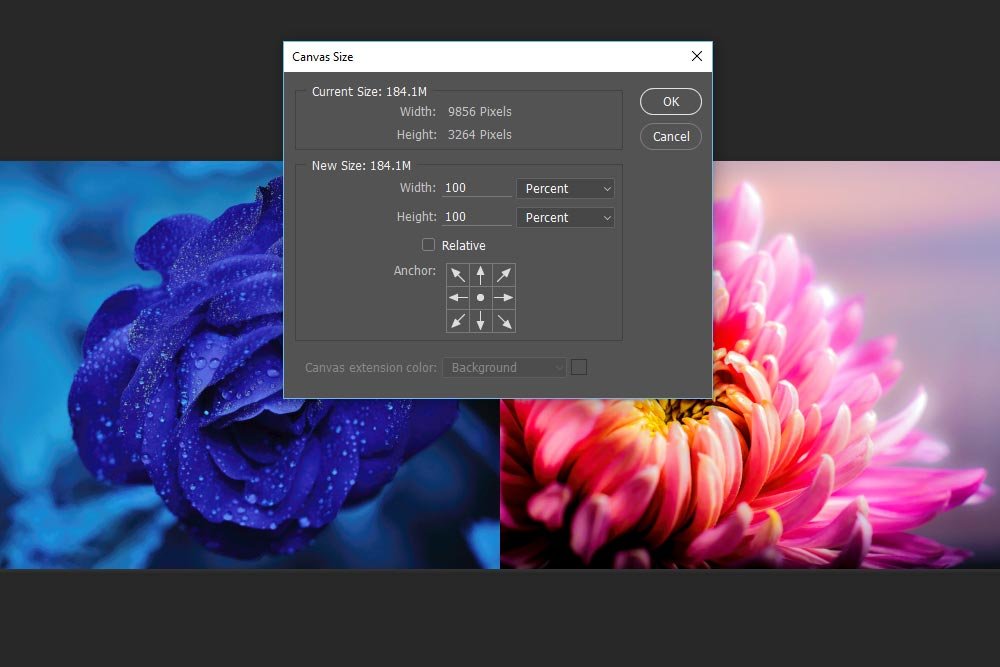
What started out as 4928×3264 has grown to 9856×3264. That’s pretty cool.
What I have now is a rather wide image. If you look up at the very first photo in this post, you’ll see that the image isn’t nearly this wide. Actually, it’s only the width of one of these images. That’s because I cropped it. So, I’ll do that right now. I’ll select the Crop Tool, adjust my settings and hit Enter on my keyboard to apply the crop. That’s it.
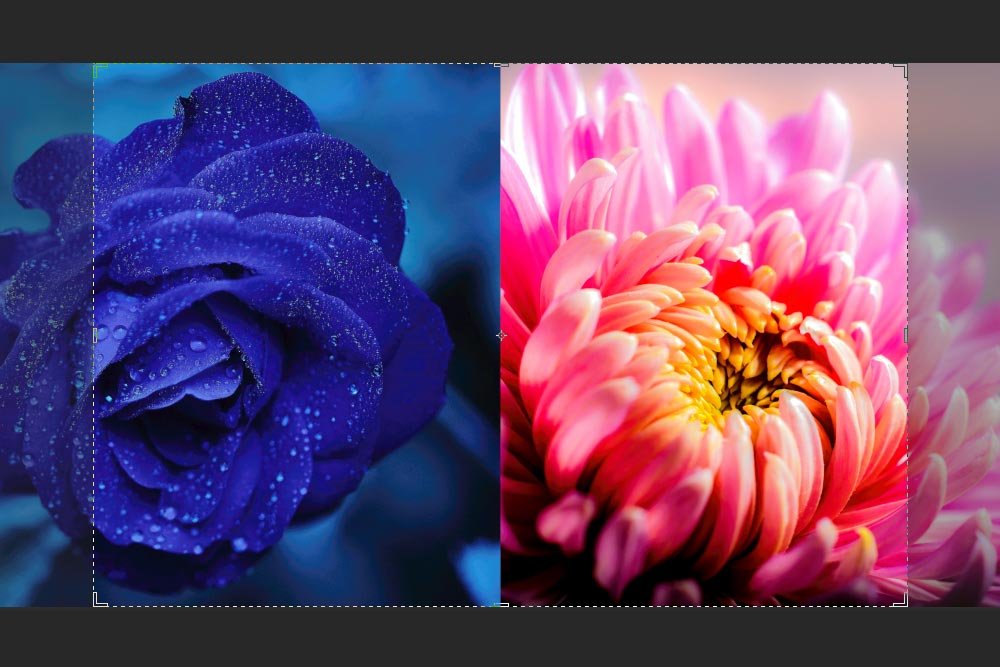
If you aren’t too familiar with how the Crop Tool works in Adobe Photoshop, you should check out my previous posts on the topic.
How to Crop a Photo to an Exact Size & Resolution in Adobe Photoshop
Using the Crop Tool in Adobe Photoshop
Examples of Using the Perspective Crop Tool in Adobe Photoshop
Saving the File
To finish up, I’ll need to save the file. To do this, I’ll merely head up to the File > Save menu item and click.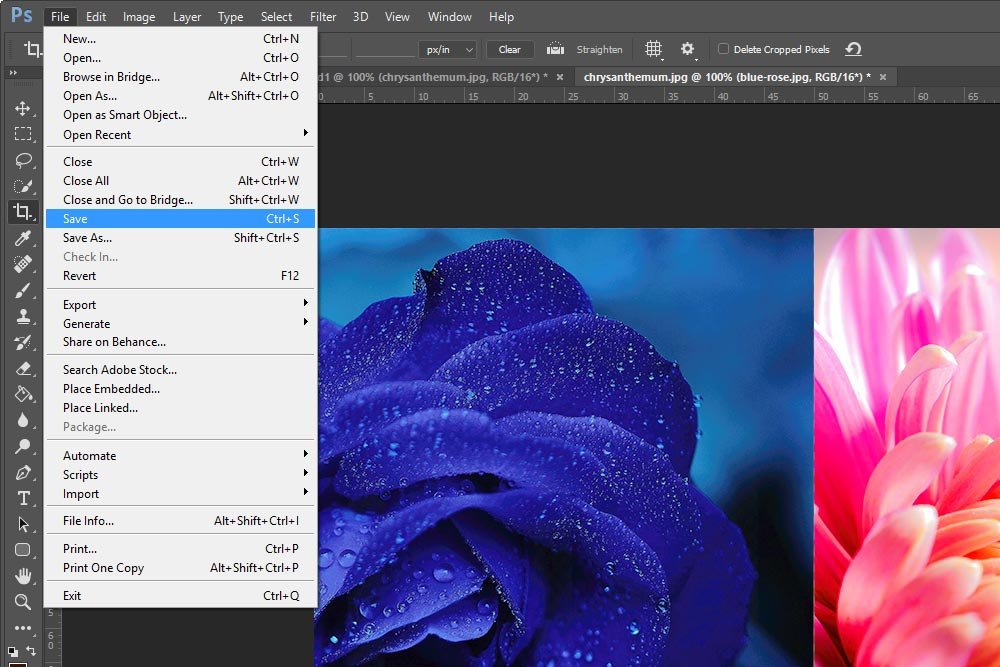
If you’re wondering where that file saved to, let me show you. I’ll head back to Lightroom.
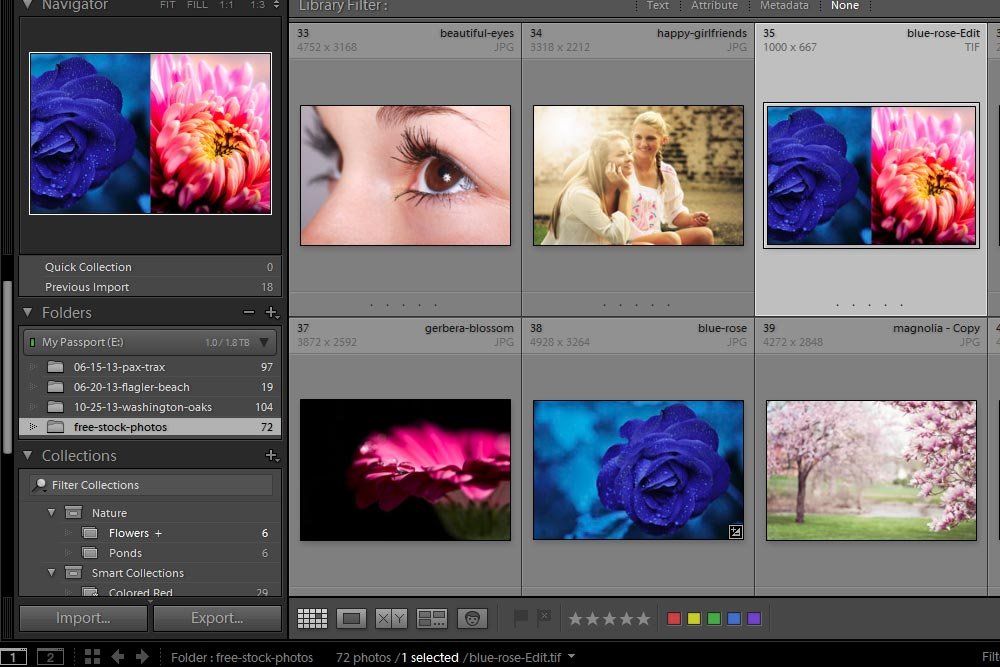
When I clicked the Save menu item in Photoshop, the file I was working on saved into the Library folder in Lightroom as a TIF file. This is very handy because I can now open it from there and continue working on it.
Well, there you have it – how to open multiple photos from Adobe Lightroom as layers in Adobe Photoshop. I hope this post was clear and easy to understand. If you have any questions at all, please ask them in the comment section below. Thanks!
