Cameron
Member
- Joined
- May 10, 2021
- Messages
- 108
- Reaction Score
- 3
- Points
- 23
- #1
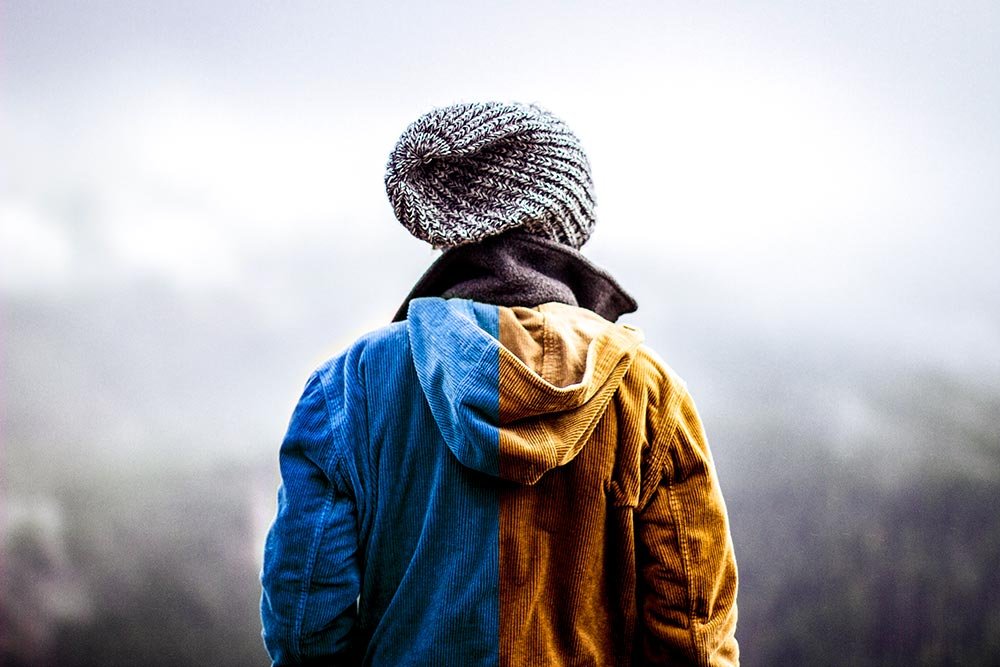
Using the Color Range selection tool in Adobe Photoshop is an awesome (and quite handy, I might add) method for selecting areas of a photo that are unique in color. Oftentimes, you can make quick work of grabbing hold of particular items that would have otherwise taken far too long with more traditional selection tools.
In today’s post, I’ll be progressing through a demonstration that explains how to alter the color of someone’s jacket. You can take the same principles and apply them to other objects in a variety of circumstances. This is definitely one you don’t want to miss.
Before I begin though, I’d like to share the official Adobe Color Range information page. If you’d like to learn more about this tool, you can read through it.
Photoshop Help / Select a Color Range in an Image
Original Photo
I had a good number of photos to choose from for this project, but I settled on this one because of the uniqueness of the colors in the jacket when compared to its surroundings. Things get much tougher if you’re attempting to use the Color Range tool to select a red shirt on someone who is wearing red pants in a red car. The tan of the jacket stands out in this photograph, which is perfect for my uses.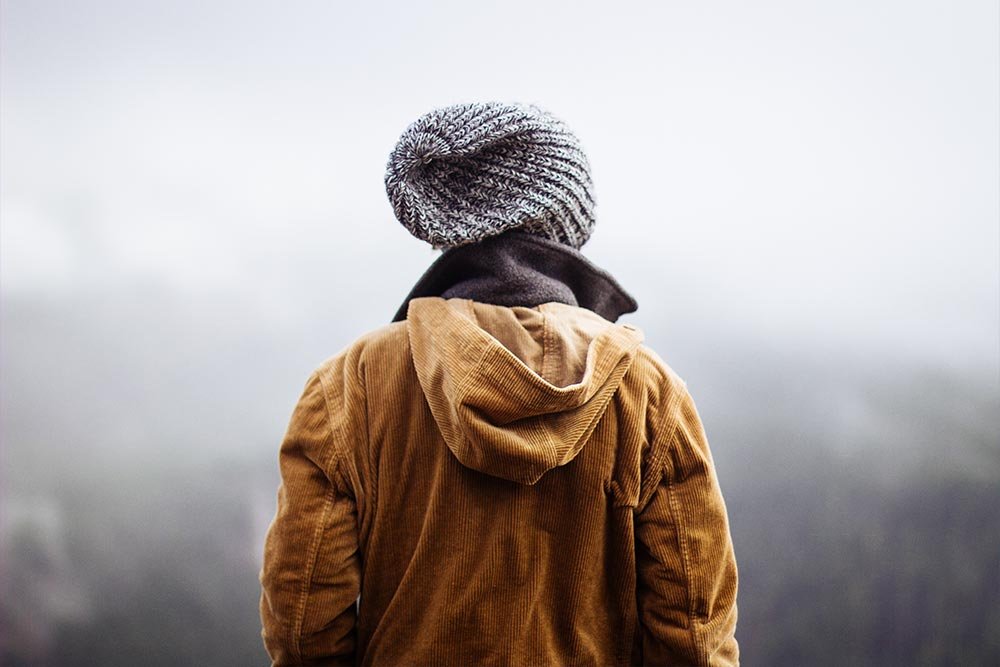
The Color Range Selection Tool
The Color Range selection tool can be accessed by heading up to the Select > Color Range menu item and clicking.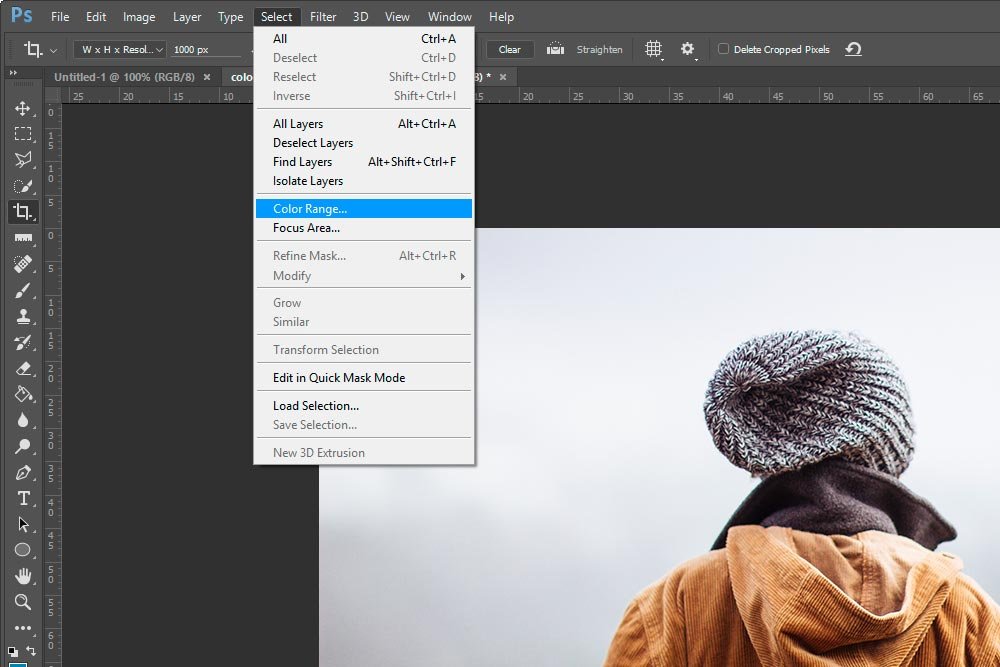
Once that’s done, you’ll see a Color Range dialog box open up.
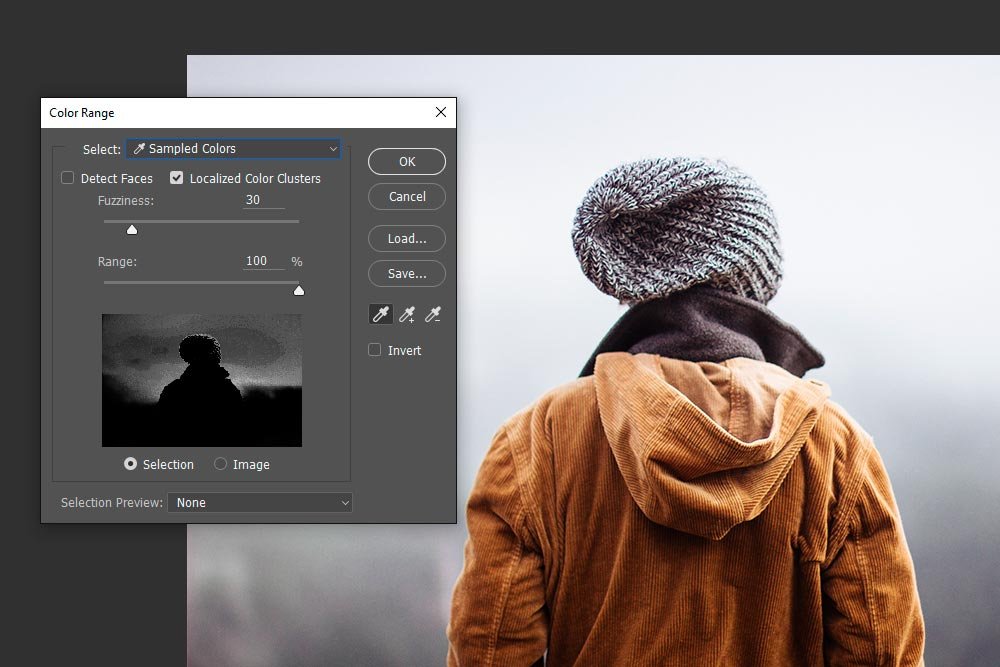
In today’s demo, I’ll be selecting tightly situated colors, meaning colors that are located only in the area of the jacket. Because of this, I’ll check the Localized Color Clusters box. By doing this, Photoshop is instructed to keep all the selected areas within a specific range (distance) from one another.
Selecting Colors
I’m going to select the first color. To do this, all I need done is to move my mouse pointer (dropper) over to an area of the jacket and click.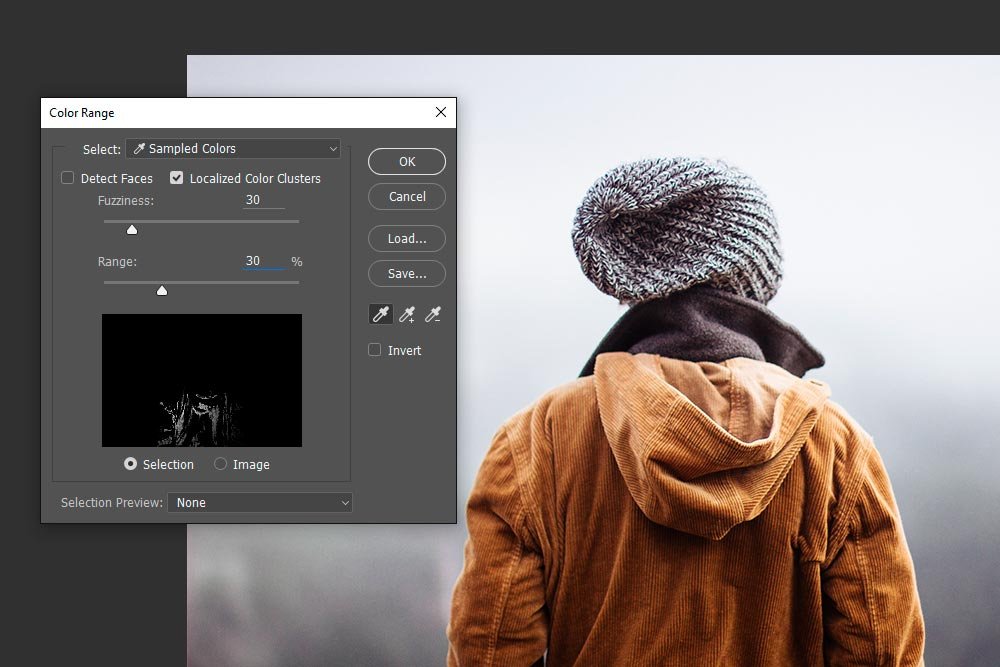
Now, there are two sliders in the dialog box. The first one is called Fuzziness and the second is called Range. The Fuzziness slider controls how soft the selected areas are. If I chose to push that slider all the way to the right, my selection would look more like a gradient. Also, if I pushed the Range slider all the way to the right, the range of my selected areas would grow. Let me show you. I’ll push both sliders to the right now. In the next screenshot, look at the white area in the black box. Then, compare it to the previous screenshot. The white area is what’s actually selected.
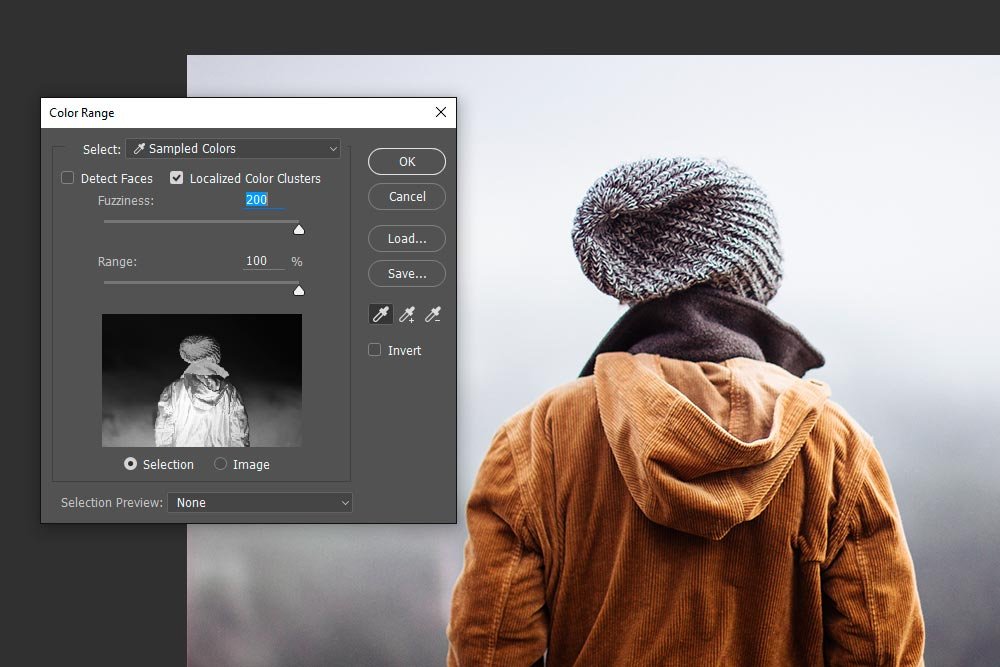
Obviously, these sliders were pushed too far. Not only did the selected area grow past the jacket, half of the photo background is selected. It shouldn’t be. I’ll move the sliders back. I think 50 and 35% are good.
Adding to or Subtracting From a Selection
I already selected one color from a fairly dynamic tan jacket. I’m going to need to click a few more times to get the range I’d like. To do this, I’m going to push the little button in the dialog box with the icon of the dropper and a + in the lower right corner of the icon.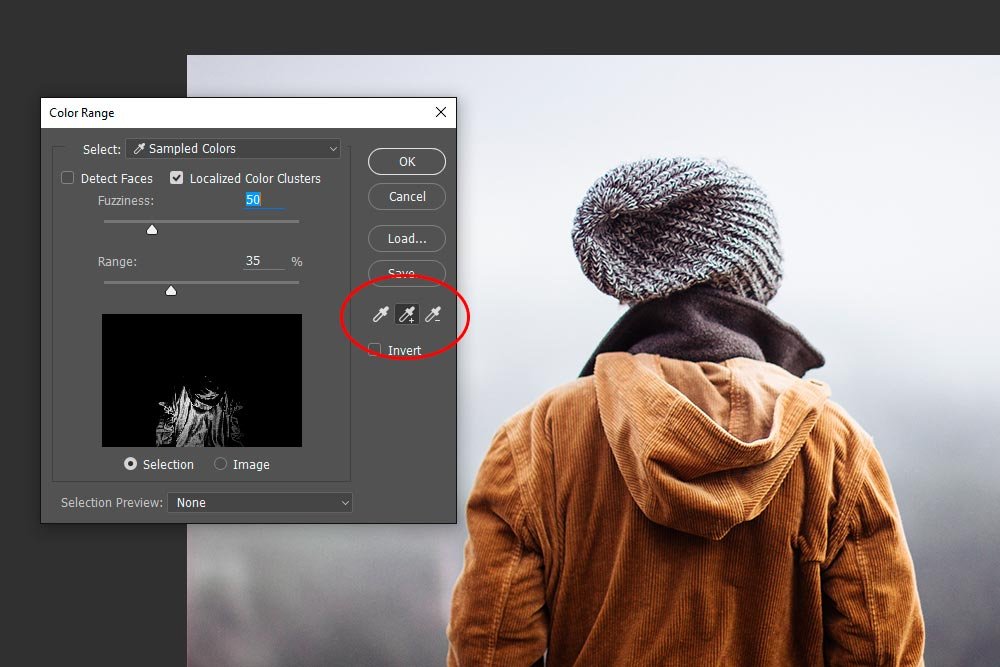
I’ll continue clicking in the area of the jacket to add to the selection. If I see the selected area jump out of the jacket, I’ll click the other button with the – inside of it to subtract from the selection. I’ll also adjust the sliders again. Let’s see what I’ve got.
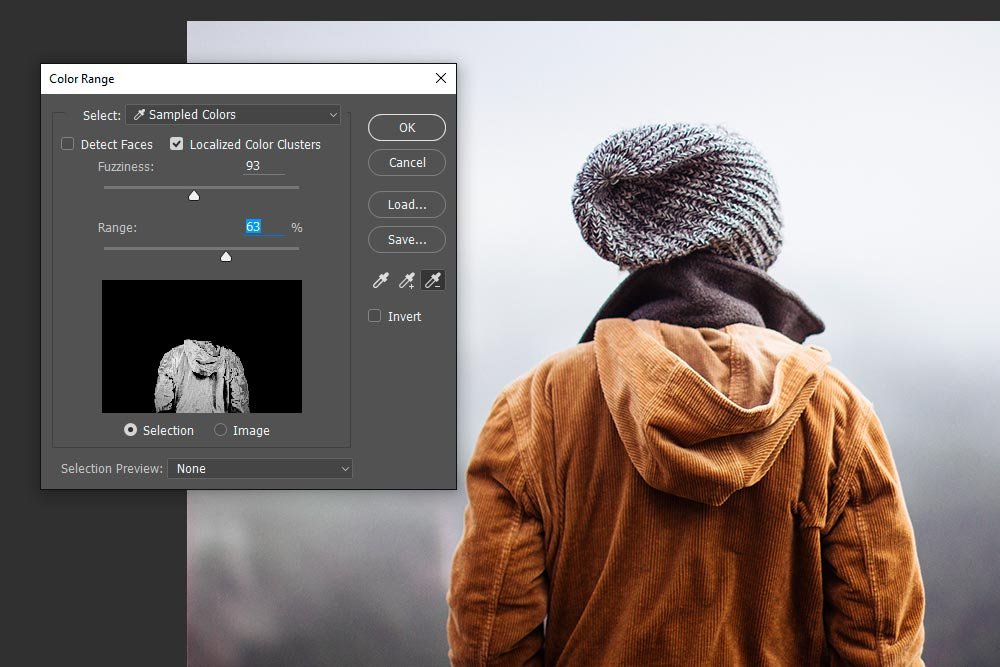
Once I’m happy with things, I can click the OK button in the dialog box. Inside the photo, I should see the marching ants of my selected area.
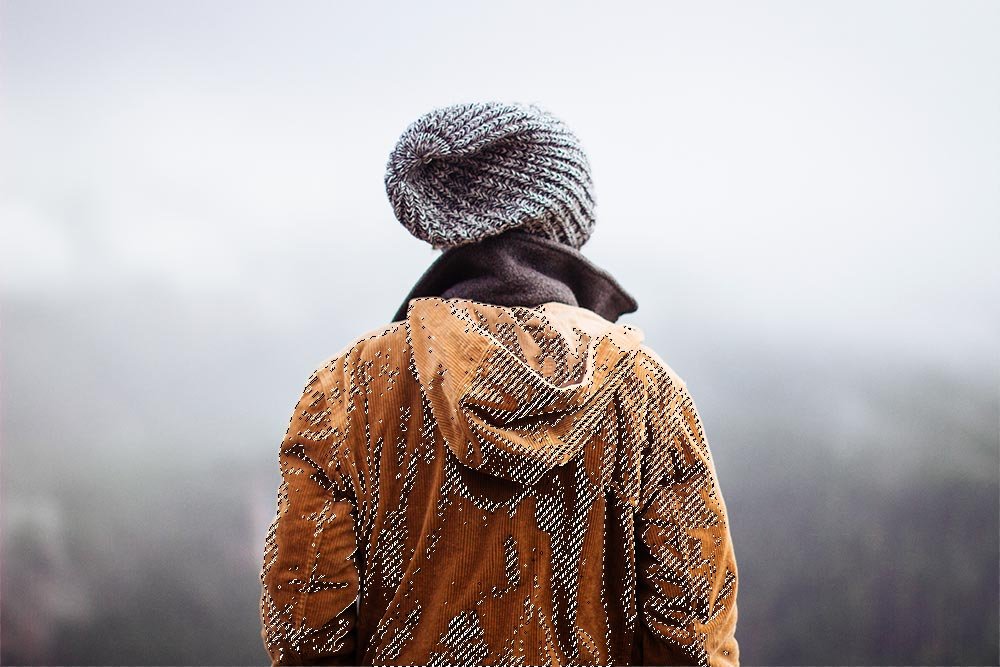
Because the jacket is corduroy, the marching ants are very detailed. To broaden the scope of the selected area and smooth it out, I’m going to refine the edges.
Refine Edge
Since I already covered the Refine Edge tool in a previous post, I won’t go into the specifics here. I will direct you to the other post though.Selecting Objects & Refining Edges in Adobe Photoshop
I’ll also tell you that to refine an edge at this point in the project, you’ll need to head up to the Select > Refine Edge menu item and work from there. I’ll make some adjustments and exit the Refine Edge tool.
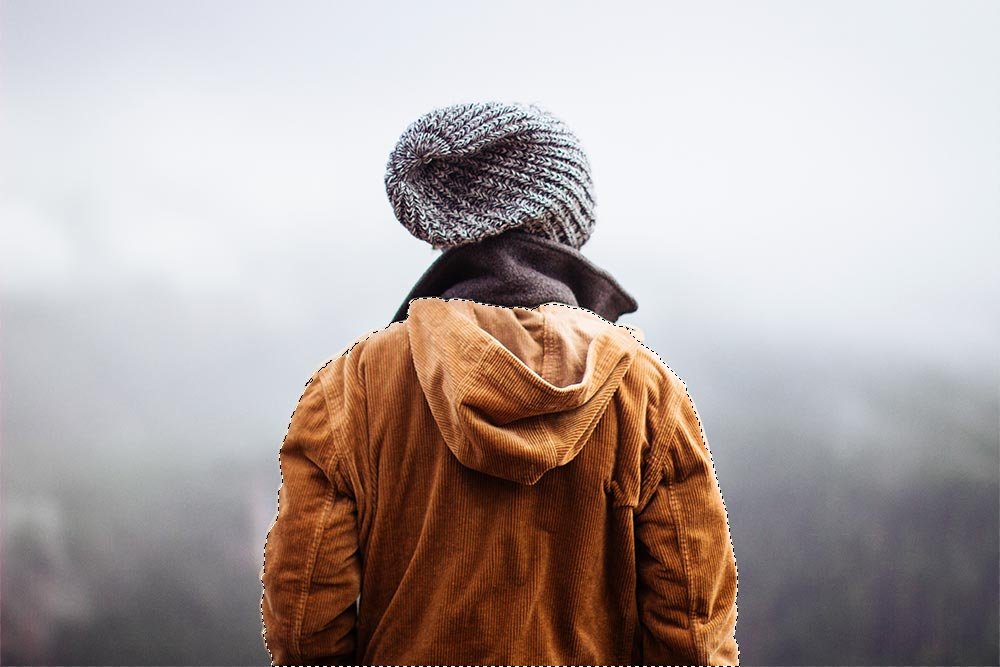
That’s looking a lot better. Now, the entire jacket is selected, as indicated by the outline of marching ants.
Changing Color
As I mentioned earlier, the goal for this project is to change the color of the jacket. Obviously, now that I have a selection made, I could do a lot with it. But, in this case, I’ve got to keep calm.To change the color of the selected area, I’m going to click on the Hue/Saturation button in the Adjustments panel to create an adjustment layer. In the screenshot below, you’ll see the new layer above the photo layer. The adjustment layer will only affect the selection area (the jacket).
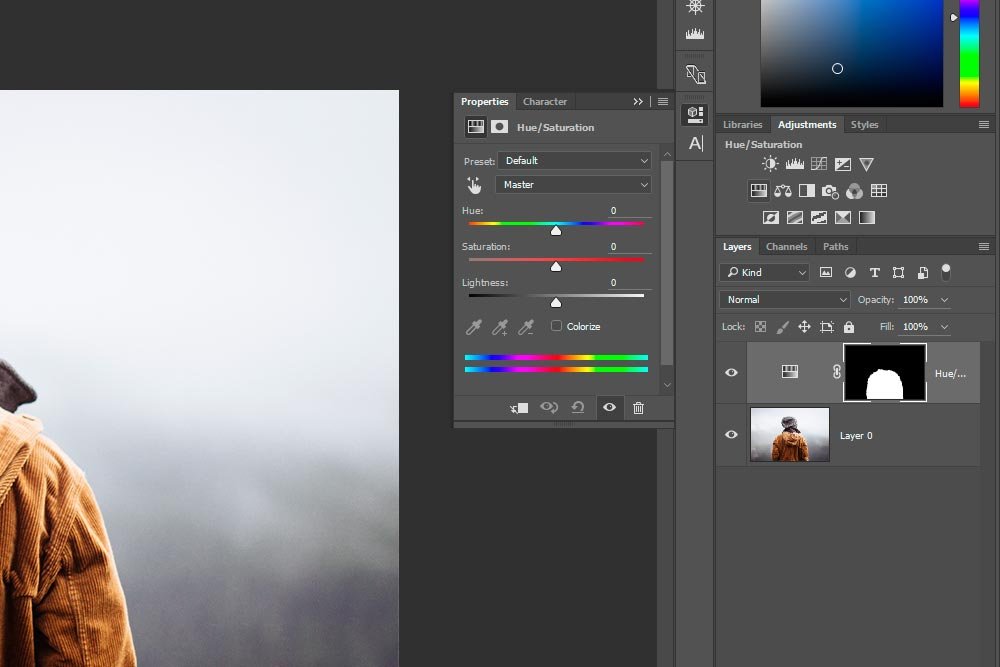
I’ll push the Hue slider all the way to the left and take a look at the result.
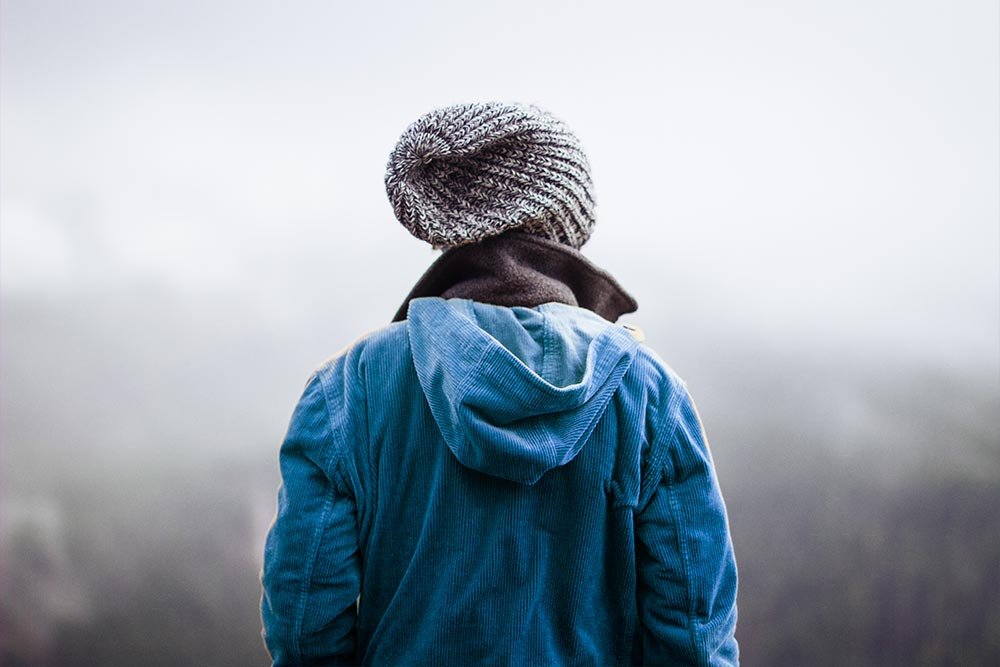
I’d say that looks pretty good. Now you know how those retail stores show the entire variety of shirt and pants colors with the same exact photo. Also, vehicle websites do the same thing with car and truck color variety. It’s incredible what you can accomplish with Adobe Photoshop.
