KodyWallice
Member
- Joined
- May 7, 2021
- Messages
- 123
- Reaction Score
- 1
- Points
- 23
- #1

If there was ever a talked about feature of Adobe Photoshop, this is the one. It’s called “Content-Aware Fill” and it’s nothing short of remarkable.
Imagine this: you’re visiting the most beautiful place on earth to take some photos. When you get there, you realize there are people walking around or power wires that weren’t there before or a road that’s just downright ugly. You can’t avoid having these objects in your photos, so you go ahead with the shots, wondering how you can get rid of them later on in Photoshop. Well, I’m here to tell you that you should fear not. There are quite a few tools to accomplish these types of tasks, but one stands out from the crowd.
In this post, I’m going to talk about two things. First, I’ll introduce the Lasso Tool to you and second, I’ll explain the power of the Fill command, while focusing specifically on the Content-Aware feature.
The Lasso Tool
The Lasso Tool is another one of the selection tools that Photoshop offers to make your life easier. Like the others, there are occasions when you might want to use it and there are occasions when you might not. For example, let’s say that you have a perfectly square or round object that you’d like to select. The Lasso Tool would probably not be a good choice for this task. But, if you have an oddly shaped shrub you’d like to select, the Lasso Tool would probably be a good fit. The question is, though, why is this the case?Some of the more rigid selection tools (Elliptical Marquee and Rectangular Marquee) are locked into specific parameters. They either have straight or curved edges. Those attributes are their strengths. Other, more flexible, selection tools (Quick Selection and Magnetic Lasso Tool) look for edges to cling to. Those attributes are their strengths. If you’ve got a photo or graphic with extremely well defined edges, you’re in luck.
Oftentimes though, edges are oddly shaped and blurry with very little definition. It’s during these times an even more flexible and free-hand tool may become necessary. And this is when we take advantage of the Lasso Tool.
To get a feel for what this tool is like, pretend that you’ve got a pencil in your hand. When you draw a closed loop on something with that pencil, pretend that the loop turns into a selected area. There you have it – the Lasso Tool. It’s a completely free-hand drawing selection tool that leaves all the traced curves, straight and blurry edges up to you. Selection tools can either be your best friends or worst enemies, so be sure to choose wisely.
Using the Lasso Tool
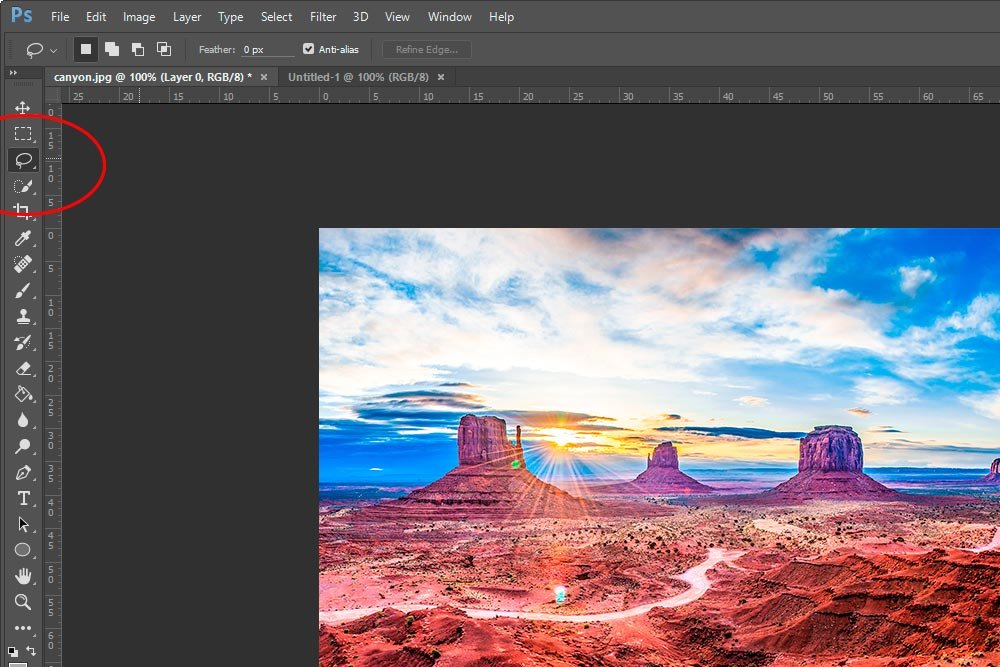
In this section, I’m going to show you where to find the Lasso Tool and then I’ll select something in my demo photo, just to show off how easy it is to grab hold of pretty much any object – fast.To activate the Lasso Tool, head on over to the left toolbar and click and drag out the 3rd icon down from the top. There are three tools available; the Lasso Tool, the Polygonal Lasso Tool and the Magnetic Lasso Tool. It’s the top one we’re interested in.

Now that I’ve got the tool activated, I can pretend that I’ve got that pencil I referred to above in my hand. I’m going to draw loops around both pieces of the road that travels through the example photo. I’ll draw one loop and then hold down the Shift key on my keyboard and continue drawing the next loop. The Shift key allows a continuation of any selection. Let’s see what these loops look like.

If you can’t see them clearly, I’ll enlarge an area for you.

There we go. As you can see, these selections aren’t pretty. For our uses today, they don’t need to be. What I’d like to do is to fill these areas using the Fill > Content-Aware feature Photoshop offers. This will delete the area inside the selection and fill it with what Photoshop deems in necessary to blend the area with what’s around it. Let’s test it out.
Content-Aware Fill
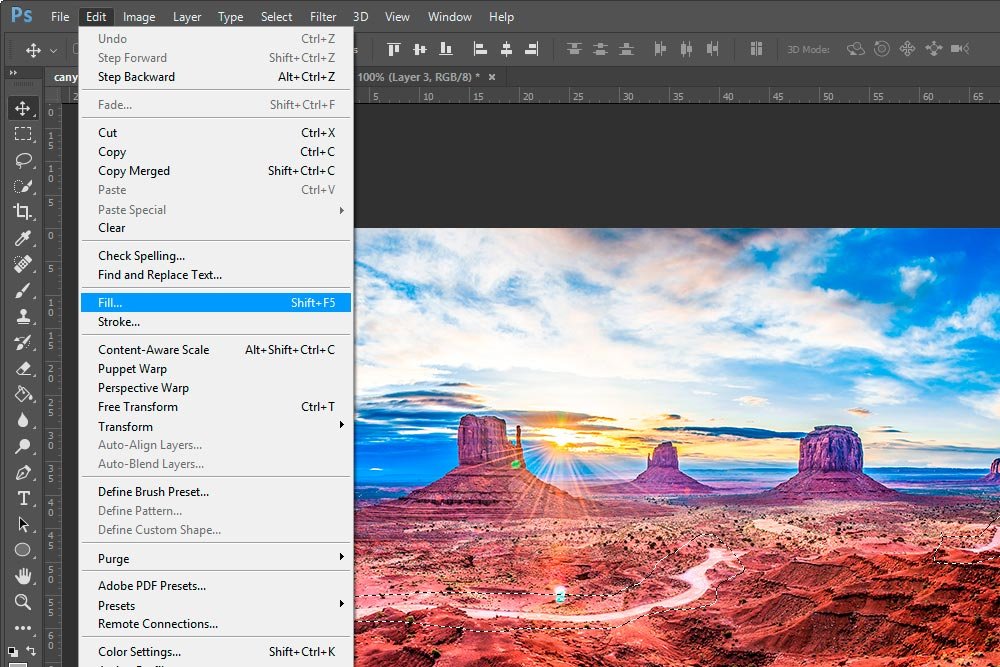
To fill in these roads so they blend with their environment, I can choose from a few methods. First, I can head up to the Edit > Fill menu and click on that.
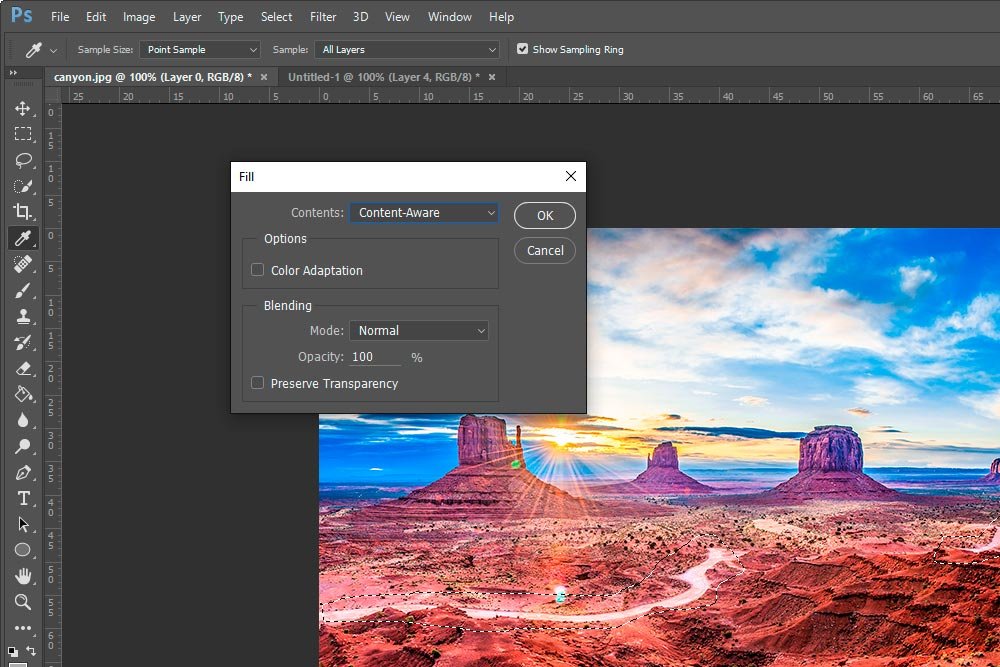
When I do this, a small dialog box appears.

From the drop-down box, I can choose Content-Aware. Don’t worry about the other choices right now. I’ll cover them in later posts.
If I wanted to use a keyboard shortcut, I could simply press the Shift+F5 keys on my keyboard. Doing this will open the dialog box just the same as before.
Okay, let’s see what happens to the roads when I click the OK button in the Fill dialog box.

I kept the areas selected so you could see what actually changed. I’ll go ahead and deselect them now by clicking on the Select > Deselect menu item up top.

Compare the above After shot with the Before shot below. I think you’ll admit, this is a pretty awesome tool.

Feathering the Edges
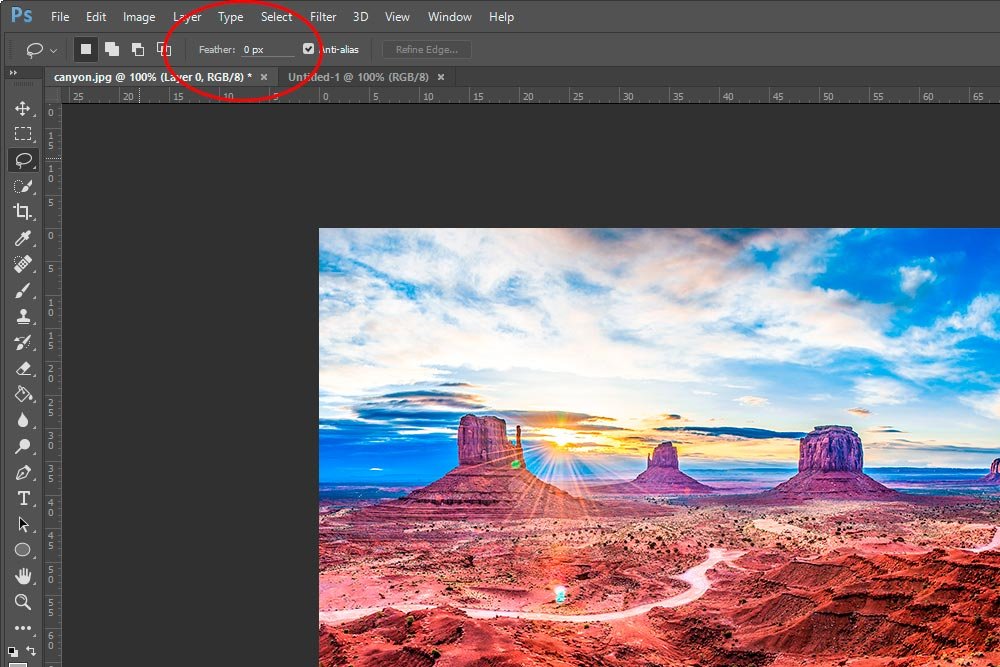
I want to mention one last thing before I end this post. There may be times when you fill an area and you can see the edges of what you selected. When this happens, feathering the edge may help. To feather (soften) an edge, you can add a pixel value to the Feather area when the Lasso Tool is selected.
You’ll need to test out which values work best for your particular photo, but this certainly can help.
